- La batería debe ser reemplazada cuando su duración sea inferior a la autonomía asignada/Batteries should be replaced once theri duration gets inferior to the assigned.
- Las emergencias deben ser revisadas por lo menos una vez al año por personal cualicado/The luminaries should be checked at least once a year by qualied
technicians.
- Las baterías y PCB sustituidos deben ser reciclados de forma adecuada/Batteries and PCB should be re-cycled in adequate way.
- Asegurar que la red está desconectada/Make sure the main supply is switched o.
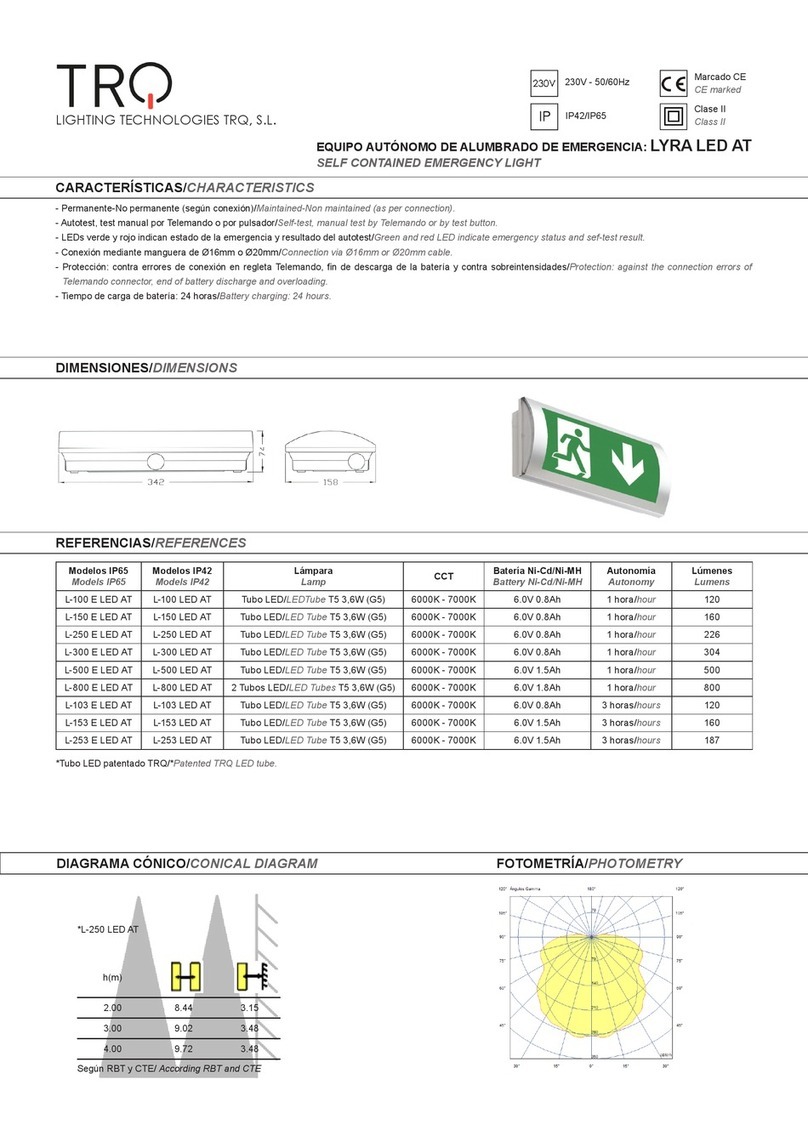
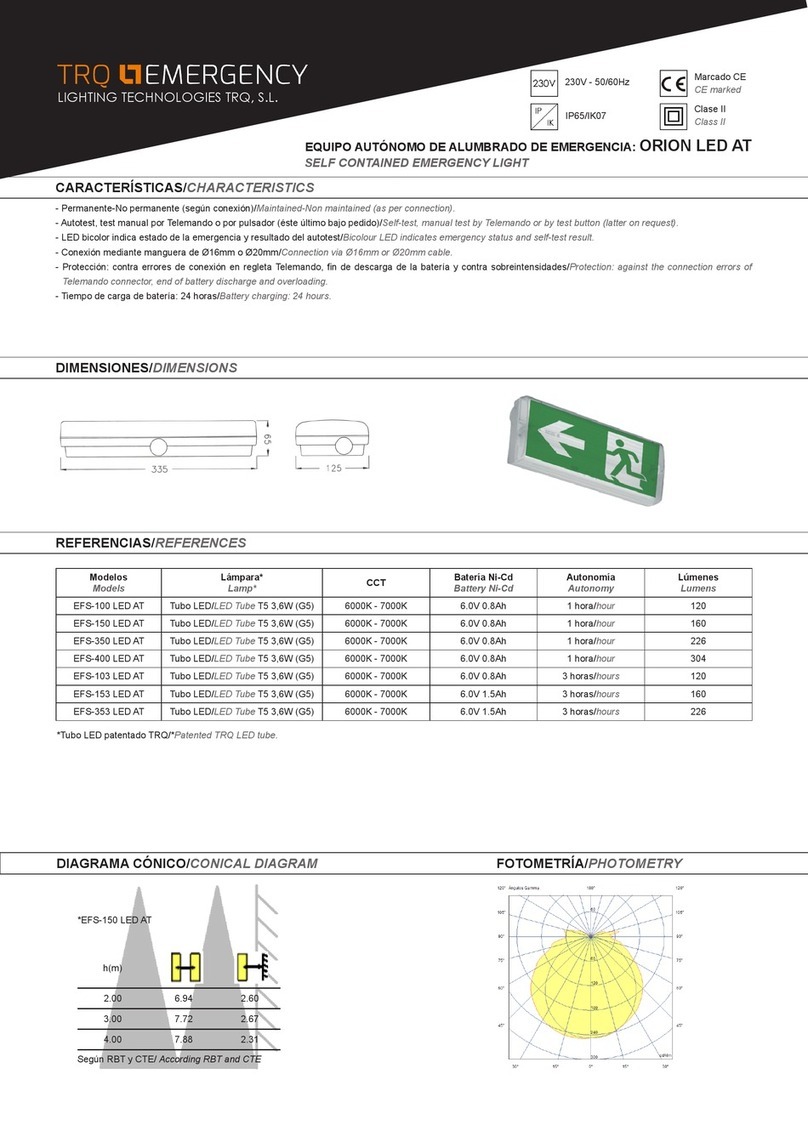
- IMPORTANTE: en caso de sustituir el tubo de LED, tiene que hacerse con la red y la batería desconectada, en caso contrario se puede dañar la electrónica del circuito.
Hay que montar el tubo con la polaridad adecuada/IMPORTANT: when replacing LED tube, it has to be done with the mains and the battery disconnected, otherwise it
can cause damage to the electronic component. The tube must be mounted with the correct polarity.
MANTENIMIENTO/MAINTENANCE
FUNCIONAMIENTO/FUNCTIONING
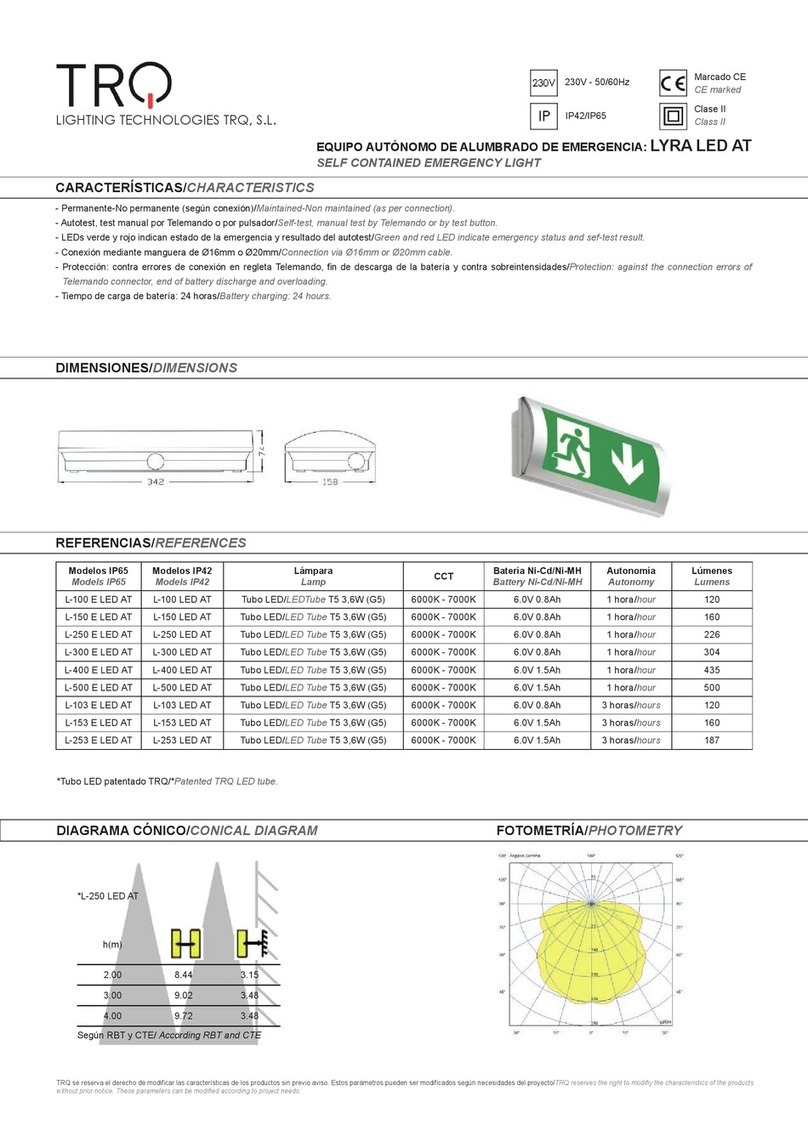
INSTALACIÓN/INSTALLATION
Retirar el cristal difusor desmontando los 4 tornillos (modelo IP65) o haciendo
palanca hacia arriba con el destornillador (modelo IP42)/Remove the cover by
unscrewing the 4 screws (IP65 model) or introduce the screwdriver into the
small space on each side of the cover and lift up the screwdriver to remove the
cover (IP42 model).
Romper la zona redonda de la caja e
introducir la goma-cono pasacables/
Break the circular zone of the base
and introduce the conical rubber.
Anclar el bloque en la pared
mediante 2 tornillos/Install the
luminary on the wall using 2
screws.
Conectar el cableado de la línea de
alimentación de emergencia y de la
luminaria en las regletas de 230V, montar
el cristal difusor y dar tensión de red a la
instalación/Make cable connections to the
emergency and mains light by connecting
the power linte to the 230V connectors,
mount the cover and switch on the mains
power suplly.
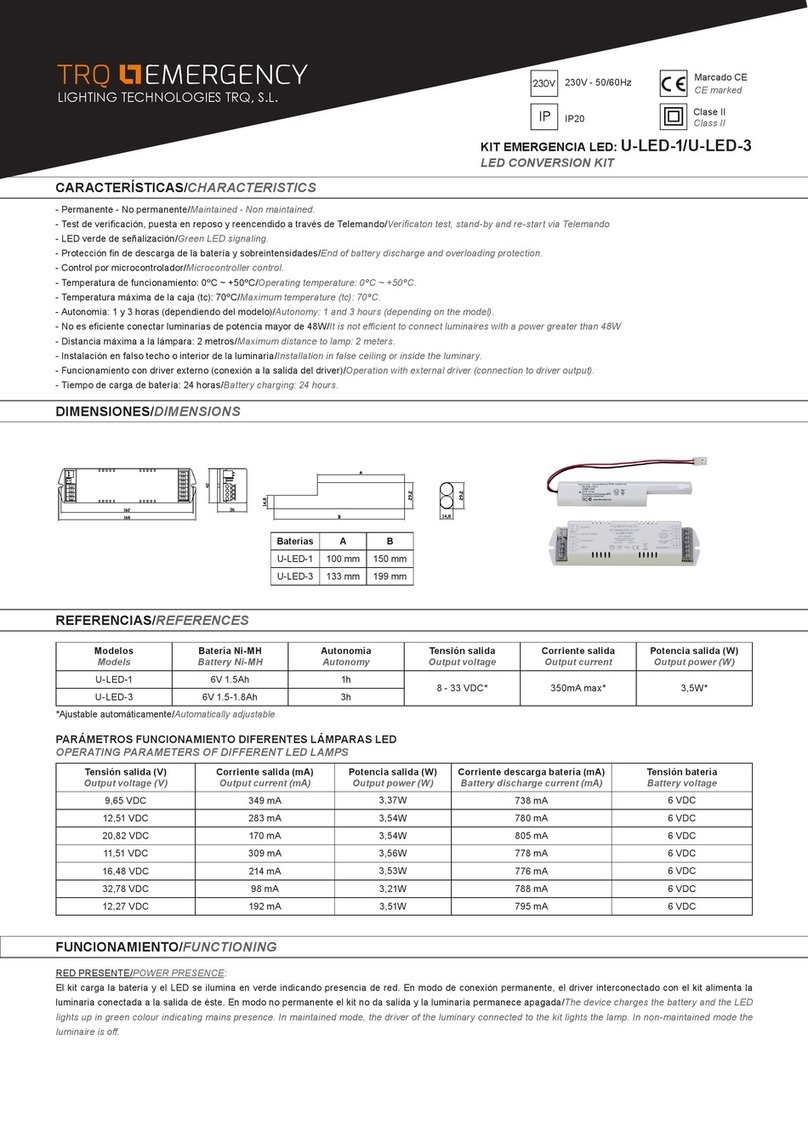
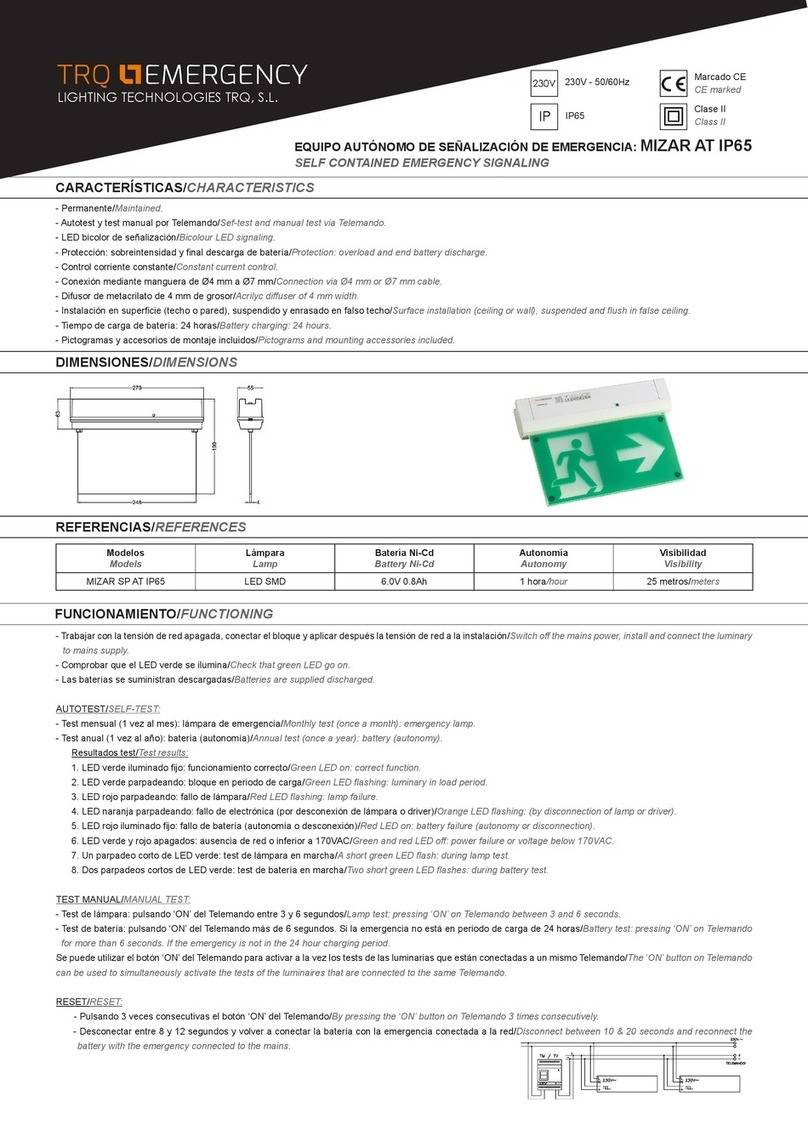
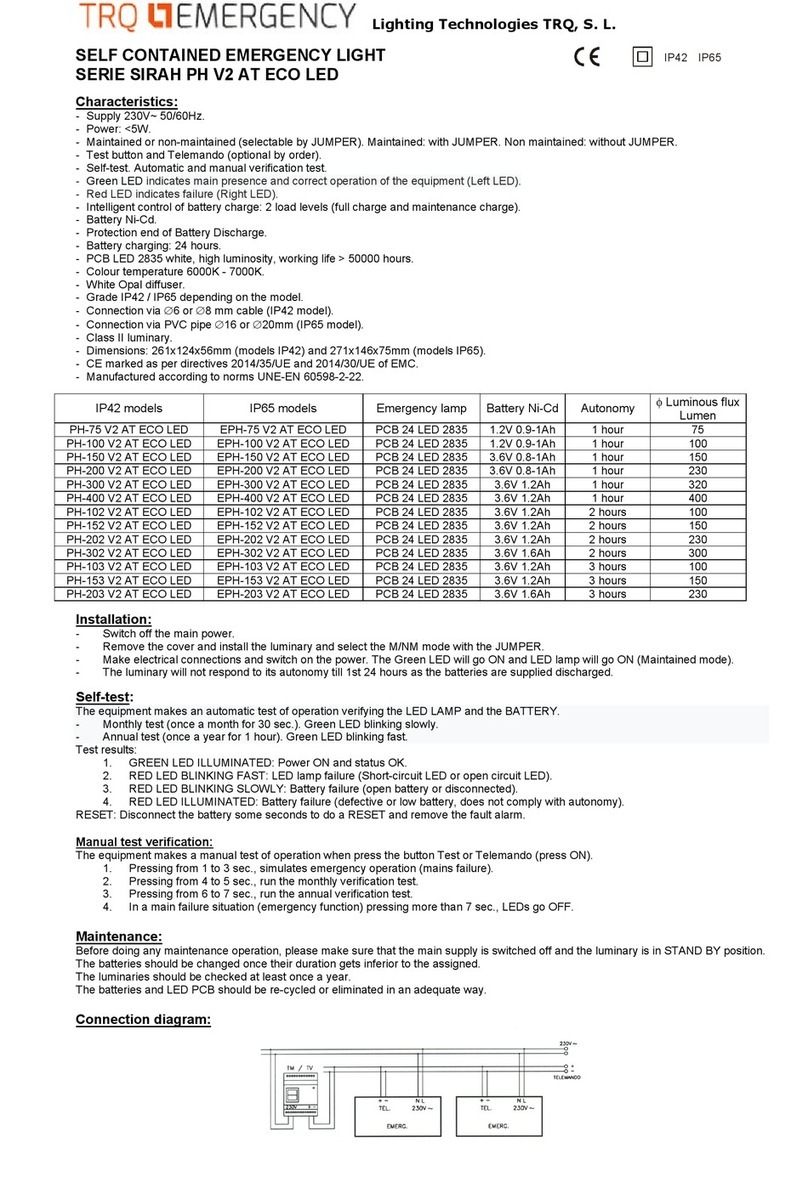
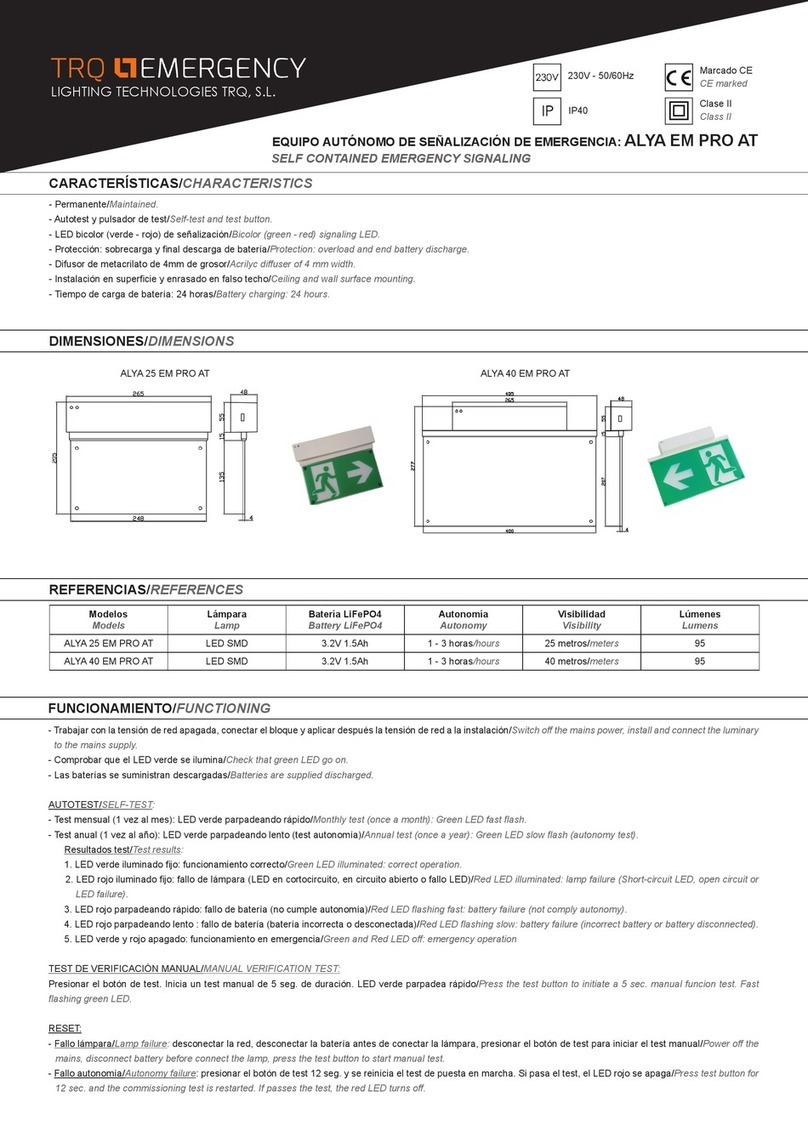
- Trabajar con la tensión de red apagada, conectar el bloque y aplicar después la tensión de red a la instalación/Switch o the mains power, install and connect the luminary
to mains supply.
- Comprobar que el LED verde se ilumina/Check that green Led go on.
- Las baterías se suministran descargadas/Batteries are supplied discharged.
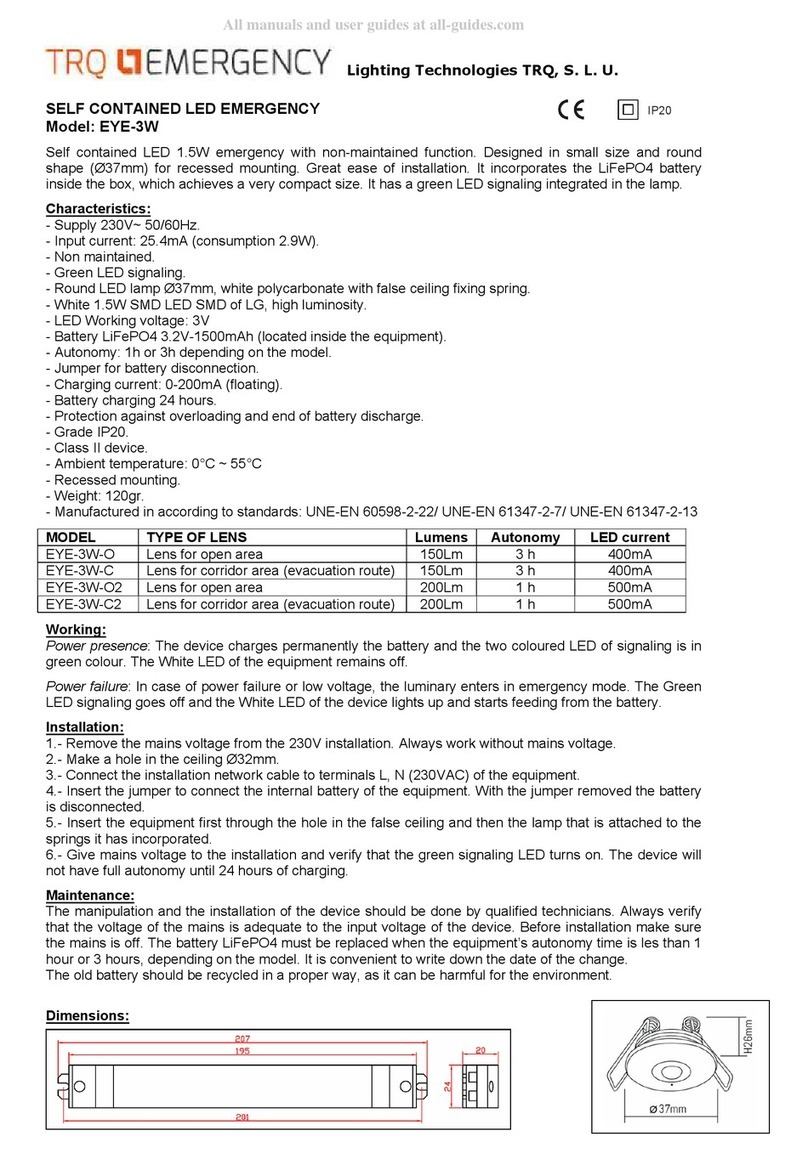
AUTOTEST/SELF-TEST:
- Test mensual (1 vez al mes): lámpara de emergencia/Monthly test (once a month): emergency lamp.
- Test anual (1 vez al año): batería (autonomía)/Annual test (once a year): battery (autonomy).
Resultados test/Test results:
1. LED verde iluminado jo: funcionamiento correcto/Green LED on: correct function.
2. LED verde parpadeando: bloque en periodo de carga/Green LED ashing: luminary in load period.
3. LED rojo parpadeando: fallo de lámpara/Red LED ashing: lamp failure.
4. LED naranja parpadeando: fallo de electrónica (por desconexión de lámpara o driver)/Orange LED ashing: (by disconnection of lamp or driver).
5. LED rojo iluminado jo: fallo de batería (autonomía o desconexión)/Red LED on: battery failure (autonomy or disconnection).
6. LED verde y rojo apagados: ausencia de red o inferior a 170VAC/Green and red LED o: power failure or voltage below 170VAC.
7. Un parpadeo corto de LED verde: test de lámpara en marcha/A short green LED ash: during lamp test.
8. Dos parpadeos cortos de LED verde: test de batería en marcha/Two short green LED ashes: during battery test.
TEST MANUAL/MANUAL TEST:
- Test de lámpara: pulsando ‘ON’ del Telemando o pulsador de test entre 3 y 6 segundos/Lamp test: pressing ‘ON’ on Telemando or test button between 3 and 6 seconds.
- Test de batería: pulsando ‘ON’ del Telemando o pulsador de test más de 6 segundos. Si la emergencia no está en periodo de carga de 24 horas/Battery test: pressing
‘ON’ on Telemando or test button for more than 6 seconds. If the emergency is not in the 24 hour charging period.
Se puede utilizar el botón ‘ON’ del Telemando para activar a la vez los tests de las luminarias que están conectadas a un mismo Telemando/The ‘ON’ button on Telemando
can be used to simultaneously activate the tests of the luminaires that are connected to the same Telemando.
RESET/RESET:
- Pulsando 3 veces consecutivas el botón ‘ON’ del Telemando/By pressing the ‘ON’ button on Telemando 3 times consecutively.
- Desconectar entre 10 y 20 segundos y volver a conectar la batería con la emergencia conectada a la red/Disconnect between 10 & 20 seconds and reconnect the battery
with the emergency connected to the mains.
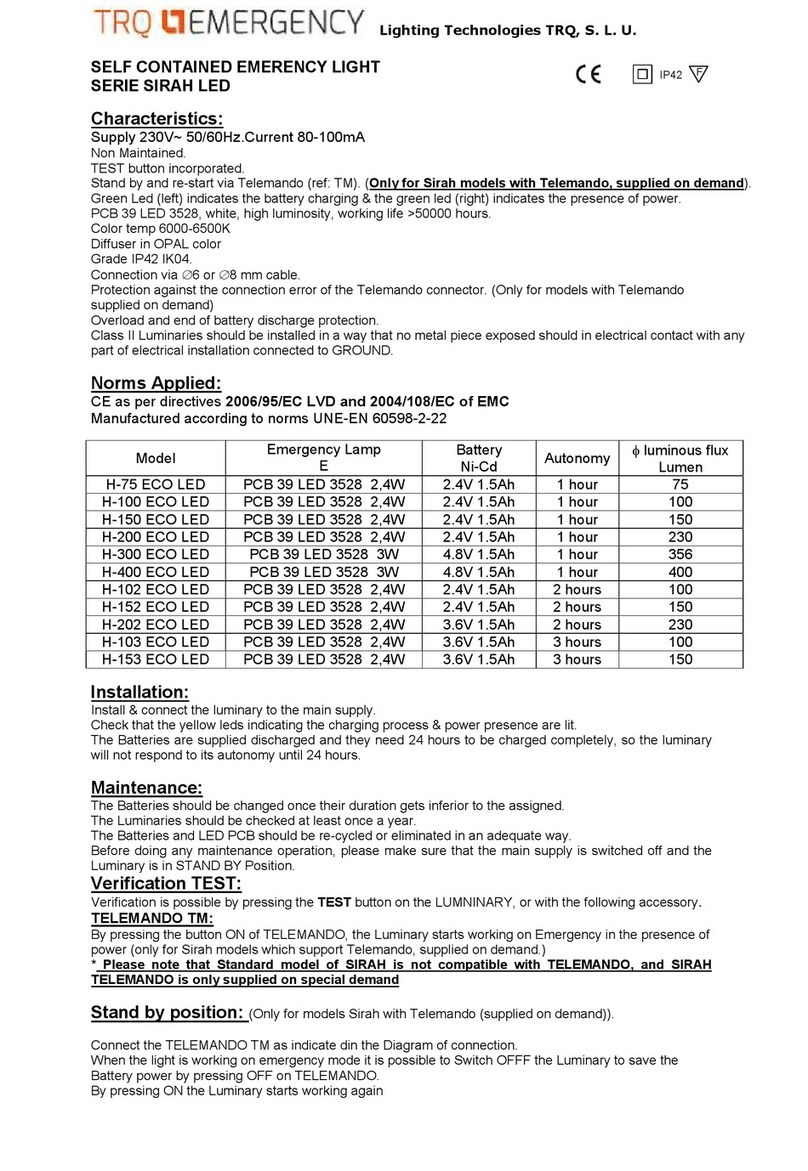
A) Permanente (tubo LED siempre encendido)/
Maintained (LED tube always on).
B) Permanente ON/OFF mediante interruptor en
presencia de red/ Maintained with possibility to
switch ON/OFF the LED tube by switch in power
presence.
TRQ se reserva el derecho de modicar las características de los productos sin previo aviso/TRQ reserves the right to modify the characteristics of the products without prior notice.
