Trumeter 7922 User manual

019510-01 Issue 1.1 03/2007
7922
6 digit programmable bi-directional counter relay, with
dual preset or batch mode operation, prescaling and
EEPROM data storage
6-Stelliger Bi-Direktionaler Zähler mit Supertwist-LCD
mit Einzel/Doppel- und Chargen Vorwahl, Skalierung
durch Vorteiler und EEPROM-Datenspeicherung
Compteur bidirectionnel à 6 chiffres, programmable,
avec 2 présélections ou 1 présélection et comptage de
lots, facteurs d'échelles et mémoire EEPROM
Relé contador bidireccional programable de 6 dígitos,
con modos de operación de doble preselección o de
lotes, pre-escala y almacenado de datos en EEPROM.
Contatore a relè a 6 cifre bidirezionale programmabile,
con funzionamento in doppia modalità preimpostata o
batch, prescala e memorizzazione dati nella EEPROM
Diagrams, Abbildungen, Diagrammes,
Diagramas, Diagrammi
English
Page 2
Deutsch
Seite 8
Français
Page 14
Español
Página 20
Italiano
Pagina 26
Page 35
Seite 35
Pagina 35
WARNING: Read page 32 first.
ACHTUNG: Lesen Sie zuerst Seite 32!
RECOMMANDATION IMPORTANTE:
Reportez-vous tout d'abord à la page 33
ATENCIÓN: Primero lea la página 33
ATTENZIONE: Leggere prima la pagina 34.
www.GlobalTestSupply.com
Find Quality Products Online at: sales@GlobalTestSupply.com

Specification
Display
Black on green STN LCD, with yellow/green LED
backlight.
Program Storage
Erase/write cycles:1,000,000
Life: 40 years min
Count Range
-99999 to 999999
Count Pre-scaler
Multiplier 0.00250 to 9.99999
Divider 1 to 99999
External Reset response time
Max 2ms
Count Inputs
High Speed: 10kHz max (electronic)
(Dividing prescaler: 7kHz max)
Duty cycle: 60:40 max
Low Speed: 30Hz max (contact closure)
Relay Contacts
5A resistive load 100,000 operations
2A resistive load 1,000,000 operations
Reaction time: <20ms.
P1 Relay: UL Ratings
AC 250V max, DC 125V max
250VAC 1/6 HP
30VDC 5A
P1 Relay: General ratings
AC 1250VA max 300V AC
250Vac (cosø =1): 5A
250Vac (cosø =0.4): 3A
DC 150W max 220V DC
30Vdc: 5A
P2 Relay: UL Ratings
AC 250V max, DC 125V max
250VAC 1/6 HP
30VDC 5A
P2 Relay: General ratings
AC 2000VA max 300V AC
250Vac (cosø =1): 8A
250Vac (cosø =0.4): 5A
DC 150W max 220V DC
30Vdc: 5A
Supply (see Connections)
94 to 240V AC ± 10% 50/60Hz
VA Rating 4VA
or 12 to 24VDC ± 10%
typical current 100mA DC (max)
Installation Category (IEC 664)
Overvoltage category II
(Pollution degree 2)
Operating temperature
-10°C to +60°C
Storage temperature
-20°C to +70°C
Environmental protection
IP65 (panel mounting) using the sealing gasket
supplied (without Screw-fixed bezel). If the seal is
removed, it must be replaced with a new one.
See page 39 for cut-out dimensions
Altitude
Up to 2000m
Relative Humidity
80% max up to 31°C, decreasing to 50% max at
40°C
The front panel buttons are used to program the counter and to display and set the P1
and P2 presets. All the buttons can be disabled by the Keyboard Inhibit input. (see
Programming, page 6).
Auto Reset (see and on page 35)
When Auto Reset is on, the counter will be automatically reset as follows:
In Reset to Zero mode, the counter will reset to zero when P1 is reached.
In Reset to P1 mode, the counter will reset to P1 when zero is reached.
Front Panel Reset and External Reset (RST / Ext. Reset)
A Reset can be caused by pressing the RST button or by applying a signal to the
External Reset input. Any active relay will be returned to its normal condition.
If the operation of the External Reset is safety critical, it is recommended that the External
Reset signal is derived from an independent power supply which will remain stable if the
7922’s supply is interrupted.
P1 and P2 Presets
The minimum value possible for P1 and P2 is 000001,except in Dual Preset
mode, when P2 can be set to zero. P1 and P2 must be greater than any
31
2
The Front Panel Count
P1 or P2 or
Batch Total
Digit 1
Multiplying Prescaler
Dividing Prescaler
Select
Program
Reset
P1 Relay state
P2 Relay operated
P1 Relay operated
Digit 6
www.GlobalTestSupply.com
Find Quality Products Online at: sales@GlobalTestSupply.com

multiplying prescaler value, or the unit may not operate correctly.
The P1 preset can be set at any time.
In Reset to Zero mode, the change will be accepted immediately.
In Reset to P1 mode, the change will not be accepted until after a Reset.
The P2 preset can be set as shown below.
The change will be accepted immediately.
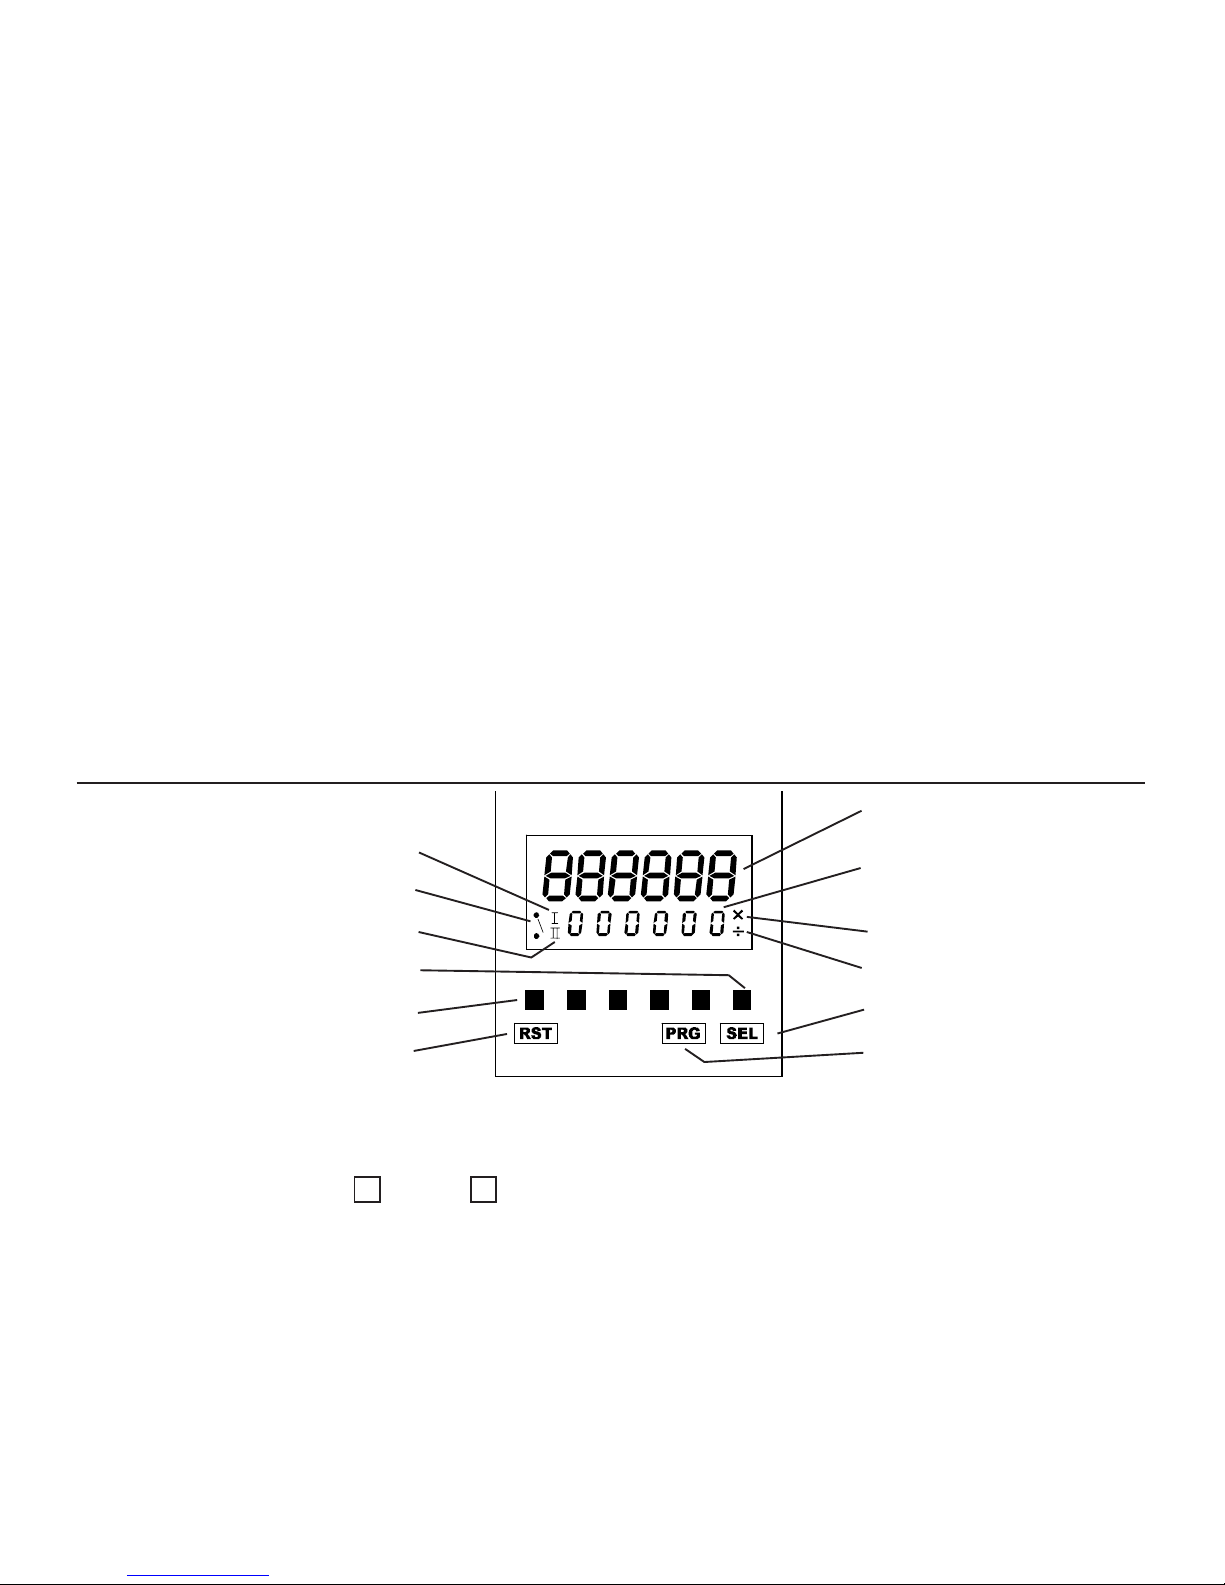
Count Modes (see page 35)
The diagrams show how the P1 and P2 Relays are controlled by the Count, by Batch
Total and by Reset.
The diagrams show how the Count is reset to zero or P1 by Auto Reset. In all modes, the
Count can be reset at any time by a RST/Ext. Reset.
The counter can count up to 999999, and or down to -99999. Beyond these limits, the
counter will continue to count internally, but the display will flash 999999 or -99999 until
either the count returns to below the limit, or the counter is reset by RST/Ext. Reset.
Dual Preset Mode
In Dual Preset mode, P1 and P2 are used independently to control the operation of the
counter and the relays.
Press SEL, then use the Digit buttons to change P1. The display will flash. Press SEL
again to accept the new P1 value, then use the Digit buttons to change P2. Press SEL
again to accept the new P2 value. If SEL is not pressed within 30 seconds of the last
change to either P1 and P2, they will revert to their original values.
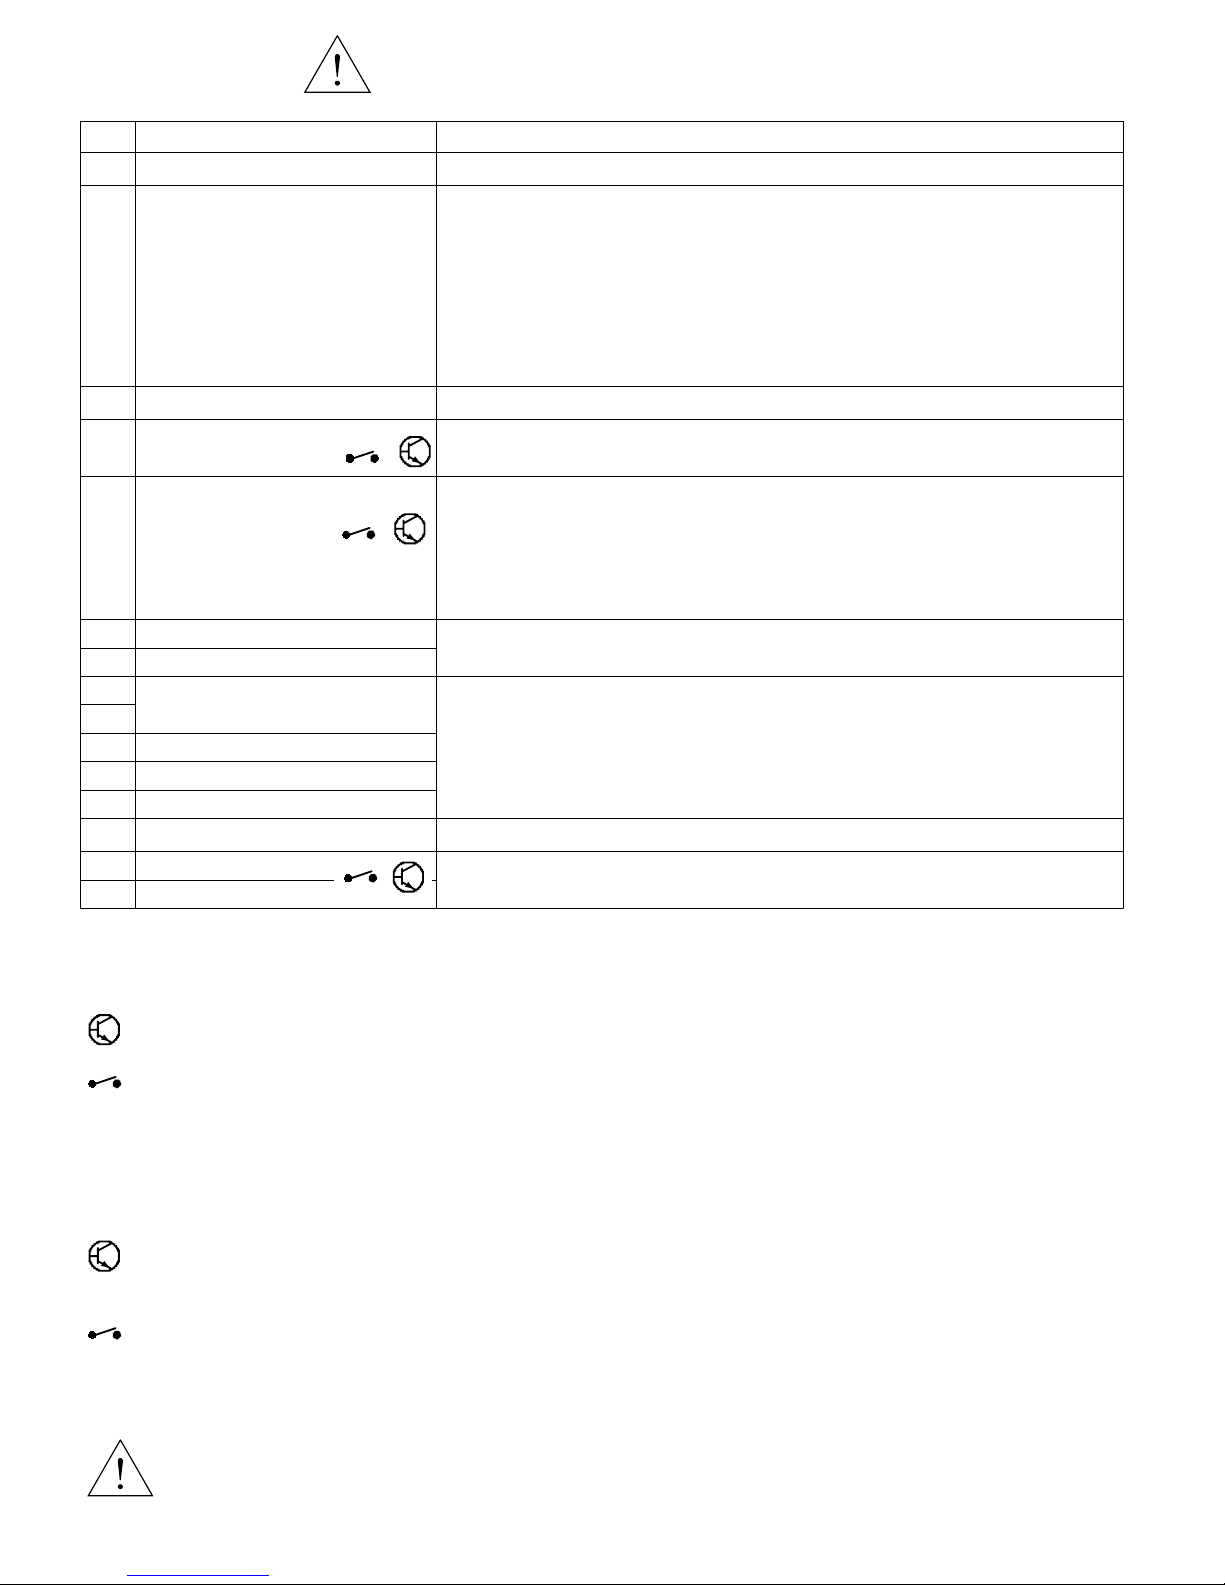
Dual Preset with Auto Reset on
Note: P1 Relay cannot be set to Latched.
Note: If P2 Relay is set to Latched, it will return to normal at the same time as P1 Relay.
Dual Preset with Auto Reset off
Note: If P1 or P2 Relays are set to Latched, they will return to normal at RST/Ext. Reset.
Batch Mode
In Batch mode, P1 and P2 are used in combination to control the operation of the counter
and the relays.
Set P1 and P2, as shown above for Dual Preset mode.
When the Batch Total is displayed, the RST button can be used to reset it to zero.
Note: P2 relay cannot be set to Pulsed.
Note: The P2 Relay operates when the Batch Total reaches P2. It will return to normal
when the Batch Total is reset to zero.
Batch Mode with Auto Reset on
Note: P1 relay cannot be set to Latched.
Note: The Batch Total increments at Auto Reset.
Batch Mode with Auto Reset off
Note: If P1 is set to Latched, it will return to normal at RST/Ext. Reset.
Note: The Batch Total increments at the first RST/Ext. Reset after P1 has been reached.
4
3
2
1
3
P1 P2
P1
Count
P2
P1 P1
Batch
Total
www.GlobalTestSupply.com
Find Quality Products Online at: sales@GlobalTestSupply.com

Connections WARNING: This counter must not be wired the same as
the 7921.
Inputs A and B in Unidirectional mode
In the two Unidirectional modes, the count is incremented or decremented by input A,
whilst the direction is dependent on input B.
In Unidirectional High mode, both inputs are high speed inputs, suitable only for
electronic signal sources, eg. transistors, proximity switches, encoders.
In Unidirectional Low mode, both inputs are low speed inputs (30Hz max), suitable
for contact closure sources, eg. microswitches, relays, pushbuttons. Any contact
noise is removed by filtering. They can also be used for electronic signal sources.
Inputs A and B in Quadrature mode
In Quadrature mode, the count is incremented or decremented depending on the phase
difference between input A and input B.
In this mode, both inputs are high speed inputs, suitable only for electronic signal
sources, eg. transistors, proximity switches, encoders.
Input K (Keyboard Inhibit) and Input R (Reset)
Both inputs are low speed inputs as described above.
Cables
Maximum wire size the connector can accept is:
2.5mm2cross sectional area; 1.8mm diameter. (equivalent 13 AWG solid wire)
Any signal cables connected to this device must not exceed 30 metres in length.
If signal cables are installed that are routed outside the building, it will be
necessary to install additional surge protection devices.
Pin Description Range
1 Auxilliary DC Supply -ve 0V - See pin 2, below
2 Auxilliary DC Supply +ve
Power Supply (see pages 37 & 38)
The counter can be powered by AC mains, in which case pins 1
and 2 provide an Auxilliary supply (+12V DC +20% -10%, 75mA
max recommended) which can be used to power sensors if
required. Alternatively, the counter can be powered by an external
DC source (12-24V DC ±10%, 100mA), connected to pins 1 and 2.
3 4/5 Common See Input Polarity, page 5
4
External Reset Input
(Input R)
Opto-isolated, 12-240 V ±10% DC or 50/60Hz AC
See Specification, page 2
5
Keyboard Disable Input
(Input K)
Opto-isolated, 12-240 V ±10% DC or 50/60Hz AC
See Specification, page 2
This input can be used to disable the front panel buttons, but only if
configured by the Inhibit option. See Programming, page 6
6 Neutral
7Live
8
9
10 P1A contact
11 P1 Common contact
12 P1B contact
13 14/15 Common See Input Polarity, page 5
14 Input B
15 Input A
5-30 VDC See Specification, page 2
P2 Relay contacts
94 to 240VAC ±10% 50/60 Hz
Isolated relay contacts
50/60Hz 300V AC max, 220V DC max
See Specification, page 2
See Relays, page 5
4
www.GlobalTestSupply.com
Find Quality Products Online at: sales@GlobalTestSupply.com

Relays (see page 38)
The P2 relay can be programmed to be normally-open or normally-closed. In the case of
the P1 relay, contact P1A can be programmed to be normally-open or normally-closed.
P1B will always be the opposite of P1A.
The relays can be programmed independently to operate in pulsed or latched mode. In
pulsed mode (P1 relay: Auto Reset Off only) the relay will operate for a length of time set
by the program. In latched mode the relay will operate, and stay in that condition until
reset.
The relays can be programmed to revert to a known safe state in the event of a power
failure or on entering program mode. The three alternatives are:
Current - the contacts will remain in the same state as before the event;
Reset - the contacts will revert to their normal, unoperated state;
Set - the contacts will revert to their operated state.
15 A
R
B
K
AK
R
B
11
14
54
3
45
14 15
13
13 3
–V –V–V –V
Count Direction (see page 36)
In all modes, count direction is dependent on Reset mode (see Programming) and
Sink/Source wiring, as shown in the diagrams. The count direction and the edges that
trigger the count are shown by the arrows.
For unidirectional mode, the count directions obtained with input B open-circuit are
marked *.
Note:
The count direction must not change in less than 25 µs, or the unit may not operate
correctly.
Sink Inputs (NPN) Source Inputs (PNP)
Input Polarity (see page 37)
Inputs A and B (pins 15 and 14) can be sink or source dc inputs, depending on the way
they are wired, with respect to their Common input (pin 13), as shown in the examples
below, and on pages 37 and 38. Pin 1 must always be connected as shown.
The opto-isolated inputs K and R (pins 5 and 4) can be sink or source ac or dc inputs,
depending on the way they are wired, with respect to their Common input (pin 3), as
shown in the examples below and on pages 37 and 38.
Only K and R are isolated from the supply pins.
Note: Common Pins 3 and 13
These pins must always be correctly connected for their inputs to work.
For dc signals, to +V or -V, as shown in the examples above and on page 37.
For ac signals (5/4/3 only), as shown in example 4on page 37.
5
www.GlobalTestSupply.com
Find Quality Products Online at: sales@GlobalTestSupply.com

6
If the Prescaler or the Reset Mode or the Batch Mode are changed, the new
configuration will not be fully effective until after exit from Program mode, AND THEN
AFTER a Reset.
Decimal Point
The decimal point can be in one of three positions, or off.
Prescaling
A multiplying or dividing factor can be used. If a multiplying prescaler of n is used, the
counter will count: 0, n, 2n, 3n etc. If a dividing prescaler of n is used, the counter will
increment or decrement on every nth input pulse.
Input Mode
See Input Modes.
Batch Mode
See Count Modes.
Reset Mode
See Auto Reset and Count Modes
Inhibit
See Front Panel.
Auto Reset
See Auto Reset and Count Modes
P1 and P2 Relays
See Relays
* Auto Reset On and P1 Relay Latched cannot be set together.
** In Batch mode, P2 Relay cannot be set to Pulsed.
LCD Backlight:
can be on, off, or turn on for 30 seconds when a button is pressed.
Programming
• Press and hold PGM for 3 seconds to enter Programming mode.
• Press Digit 1 to cycle through the
menus, or PGM to exit
Programming mode.
• Press SEL to select a menu, then
Digit 1 to cycle through the
options.
• Press SEL to select an option, or
PGM to exit the menu without
change.
• Press the Digit buttons to adjust a
numerical setting, eg. pulse time.
• Press SEL to accept the setting,
or PGM to exit the setting without
change.
• Press PGM once or twice to exit
Programming mode.
Main menu
Decimal Point menu
Prescaling menu
Input Mode menu
Batch Mode menu
Reset Mode menu
Inhibit menu
Auto Reset menu
P1 Relay Condition menu
P1 Relay Type menu
P1 Relay Safe State menu
P2 Relay Condition menu
P2 Relay Type menu
P2 Relay Safe State menu
LCD Backlight menu
Exit Programming mode
www.GlobalTestSupply.com
Find Quality Products Online at: sales@GlobalTestSupply.com

7
Decimal Point
No Decimal point
1 Decimal place
2 Decimal places
3 Decimal places
Main menu
Prescaling
No prescaling
Multiply --------
Divide ----------
Main menu
P1 Relay Condition
P1A Normally open
P1A Normally closed
Main menu
P2 Relay Condition
Normally open
Normally closed
Main menu
P1 Relay Type
Pulsed ----------
Latched*
Main menu
P2 Relay Type
Pulsed ** ----------
Latched
Main menu
P1 Relay Safe State
Current state
Normal state
Operated state
Main menu
P2 Relay Safe State
Current state
Normal state
Operated state
Main menu
LCD Backlight
On
Off
Delay
Main menu
Input Mode
Unidirectional high speed
Quadrature high speed
Unidirectional low speed
Main menu
Batch Mode
Batch Mode off
Batch Mode on **
Main menu
Reset Mode
Reset to Zero
Reset to P1
Main menu
Inhibit
Programming
Programming and Presets
All buttons
Main menu
Auto Reset
Auto Reset on *
Auto Reset off
Main menu
Multiply
Divide
Pulsed
Pulsed
www.GlobalTestSupply.com
Find Quality Products Online at: sales@GlobalTestSupply.com
Table of contents
Other Trumeter Cash Counter manuals

Trumeter
Trumeter Durant E4148793 User manual

Trumeter
Trumeter 898 Series User manual

Trumeter
Trumeter EMP-9100 User manual

Trumeter
Trumeter MULTICOUNT User manual

Trumeter
Trumeter 7931 User manual

Trumeter
Trumeter 898X User manual

Trumeter
Trumeter 7911 User manual

Trumeter
Trumeter 34 Series User manual

Trumeter
Trumeter 9100 User manual

Trumeter
Trumeter FALCON HED251-R User manual