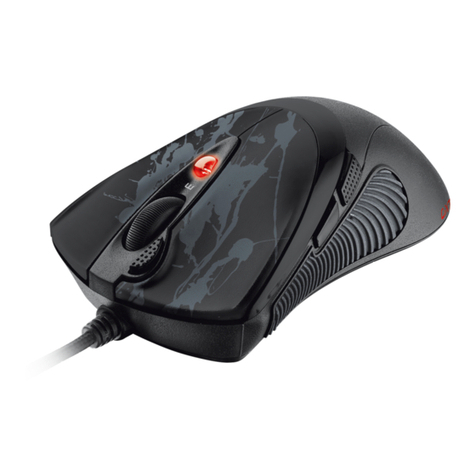
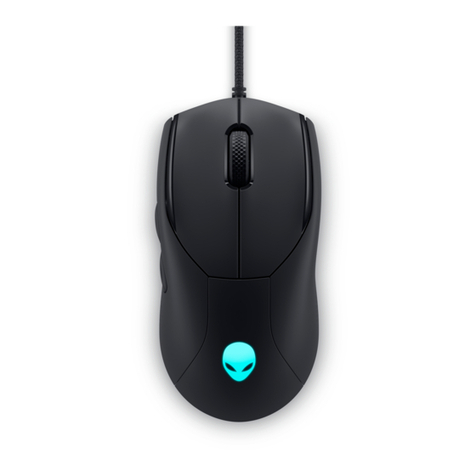
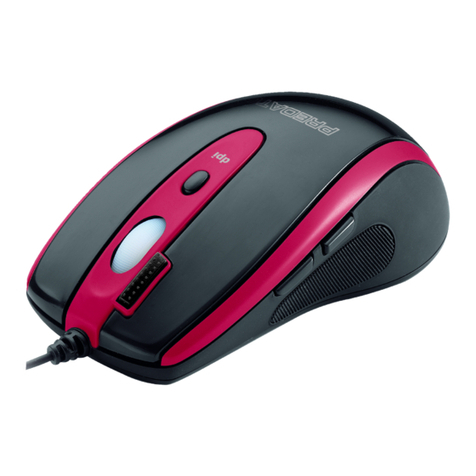
Trust GXT31 User manual

www.trust.com/18471/faq
Mouse Layout
a
i
c
j
d
f
b
g
h
k
L
em n
o
p
q

Installation Configuration
4
2x
8
5
1
2
3
Install Driver
Online support
www.trust.com
69 10
Configuration
bc
a b c
a
b
c
a
b c
b c
a b c
7
a
b c
d
a
a
b

GXT 31 Gaming Mouse - USER’S MANUAL
1
Index
Language
page
English 2
Deutsch 6
Français 10
Italiano 14
Español 18
Português 22
Nederlands 26
Dansk 30
Suomi 34
Norsk 38
Svenska 42
Polski 46
Česky 50
Slovenčina 54
Magyar 58
Română62
Български 66
Русский 70
Ελληνικά 74
T
ürkçe 78
Hrvatski 82
Slovenski 86
Cрпски 90

GXT 31 Gaming Mouse - USER’S MANUAL
2
Mouse layout
a
b
c
d
e
f
g
h
i
j
k
l
m
n
o
p
q
- Button 1 (left mouse button)
- Scroll wheel
Button 3 default function = middle click
Button 8 default function = tilt left
Button 9 default function = tilt right
Button 10 default function = scroll up
Button 11 default function = scroll down
- Button 2 (default function = right mouse click)
- Multipurpose LED indicator - battery status
-DPIsetting
- scroll acceleration
- DPI LED indicator
- Button 4 (default function = page forward)
- Button 5 (default function = page backward)
- DPI switch
- Button 6 (default function = none)
- Button 7 (default function = none)
- Function button (see ‘advanced configuration’ for explanation)
- Mode button (click to switch between ‘Profile-1,2,3,4 and 5’)
- Cable release button
- USB connection
- Link button
- on/off switch
- Battery compartment
Installation
a. - Insert the Trust CD-ROM into your CD drive.
b. - Click “Run Setup.exe – Published by Trust International BV”.
- Click “Install driver”.
c. - Click ‘close’ when the installation is completed.
a. - Connect the USB cable to the mouse and power on the mouse.
b. - Connect the USB dongle to the USB port of the PC.
- Connect the mouse to the USB port of the PC.
c. - Wait until the message ‘Your device is ready to use’ appears.
- Start the mouse configuration software (located in the taskbar).
- You can now start to configure the mouse.
- After configuring the mouse, keep the USB cable connected to fully charge the battery.
The mouse needs to be charged for 4 hours before you can use it wirelessly.

GXT 31 Gaming Mouse - USER’S MANUAL
3
Main
a
Button fuction
In this section of the software you can configure the mouse profiles and buttons.
b
Macro management
In this section of the software you can make and modify macro functions.
c DPI & tool
In this section of the software you can change the DPI settings, report rate, scroll acceleration and
backup or restore your setup.
Button function
a
Different profiles
- Select the profile/mode that you want to change by clicking on ‘mode-1/2/3/4/5’ or press the ‘Mode’
button on the mouse (L).
b
Function list
- In this list you will find all the standard- and the created macro functions.
c
Buttons
- All the programmable buttons.
Assign a button
- Drag the function that you want to assign for the Function list ‘b’.
- Drop the function on the button that you want to re-assign in list ‘c’.
The left mouse button can only be re-assigned when the function ‘left click’ is assigned to a different button.
The mouse function can only be configured when the mouse is connected using the USB cable.

GXT 31 Gaming Mouse - USER’S MANUAL
4
Macro Management
(Store a sequence of keys in the software)
- Go to the macro manager section (step 4b).
- The macro management is divided in 3 sections:
a. Macro (Mouse Memory) list
b. Function buttons
c. Macro editor
Create a macro
There are 2 ways to create a macro function.
a- Drag the function that you want to assign from the function buttons ‘7b’.
- Drop the function in the Macro editor ‘7c’.
b - Press the ‘play’ button to start recording your sequence.
- Press the ‘stop’ button when you have finished your record.
Save a macro
- Drag the created macro to the Macro (Mouse Memory) list ‘7a’.
- Drop the created macro on an empty field.
- Give your macro a name (13 characters maximum).
- You can now assign the macro to a mouse button (see step 6).
Edit a macro
- Drag a macro from the list (7a).
- Drop the macro in the editor (7c).
- You can now edit the macro.
- When you’re done editing the macro save the macro as explained above.
To clear the macro editor press the clear button in the function list (7b).
DPI & Tools
a
DPI settings
- Select the DPI setting that you which to change.
- You can change the DPI setting for both X and Y axis seperatly (100 – 5600).
b
Change the report rate
- Select the desired report rate (125Hz, 142Hz, 166Hz, 200Hz, 250Hz, 333Hz, 500Hz, 1000Hz).
c
Change the scroll acceleration
- You can change the number of lines that will be scrolled by one click (1-9).
d
Backup, Restore or Reset
- You can Backup the settings that you just created by pressing ‘Backup’.
- You can Restore previous saved settings by pressing ‘Restore’.
- You can load the default mouse configuration by pressing ‘Reset’.

GXT 31 Gaming Mouse - USER’S MANUAL
5
Advanced Configuration
a Press the function button to toggle between the current Battery status, dpi & scroll settings.
b
Adjust the DPI (both X and Y axis separately) and scroll settings on the mouse
- Press and hold the function button for 4sec. (the X in the status indicator LED starts blinking).
- Rotate the scroll wheel up to increase the DPI or down to decrease the DPI setting.
- Press the function button to switch to the Y axis or scroll setting.
- Press and hold the function button for 4sec. when you have finished the settings.
Trouble shooting
Problem Solution
Error in the software
“
Can not detect mouse”
- To configure the mouse, the mouse has to be connected by using
the USB cable.
Mouse is not working wirelessly - Charge the battery.
How do I reset the default settings - See step 10d.
The mouse arrow shakes, moves
strangely or does not move at all
- Charge the battery.
- Press the link button ‘o’ on the bottom of the mouse.
- Try using the mouse on a different surface or use a mouse pad.
- Clean the sensor on the bottom of the mouse with a dry cloth.
- Connect the Trust wireless receiver to another USB port, closer to
your Trust wireless device.
- Remove any other wireless receivers which are connected to USB
ports close to your Trust wireless receiver.

GXT 31 Gaming Mouse - USER’S MANUAL
6
Tastenbelegung der Maus
a
b
c
d
e
f
g
h
i
j
k
l
m
n
o
p
q
– Taste 1 (Linke Maustaste)
– Scrollrad
Taste 3 Standardfunktion = mittlerer Mausklick
Taste 8 Standardfunktion = nach links neigen
Taste 9 Standardfunktion = nach rechts neigen
Taste 10 Standardfunktion = Bildlauf nach oben
Taste 11 Standardfunktion = Bildlauf nach unten
– Taste 2 (Standardfunktion = rechter Mausklick)
– LED-Mehrfachanzeige – Akkustand
– DPI-Einstellung
– Scroll-Beschleunigung
– LED-Anzeige DPI
– Taste 4 (Standardfunktion = nächste Seite)
– Taste 5 (Standardfunktion = vorherige Seite)
– DPI-Taste
– Taste 6 (Standardfunktion = keine)
– Taste 7 (Standardfunktion = keine)
– Funktionstaste (zur Erläuterung siehe „Erweiterte Konfiguration“)
– Mode-Taste (hiermit wird zwischen den „Profilen 1, 2, 3, 4 und 5“ umgeschaltet)
– Kabel-Auslösetaste
– USB-Anschluss
– Verbindungstaste
– Ein/Aus-Schalter
– Akkufach
Installation
a. – Legen Sie die Trust-CD in das CD-ROM-Laufwerk ein.
b. – Klicken Sie auf „Run Setup.exe – Published by Trust International BV“ [Setup.exe ausführen –
Veröffentlicht von Trust International BV].
– Klicken Sie auf „Install driver“ [Treiber installieren].
c. – Klicken Sie auf „Close“ [Schließen], wenn die Installation abgeschlossen ist.
a. – Schließen Sie das USB-Kabel zur Stromversorgung der Maus an.
b. – Schließen Sie den USB-Dongle an den USB-Anschluss des PCs an.
– Schließen Sie die Maus an den USB-Anschluss des PCs an.
c. – Warten Sie, bis die Meldung „Your device is ready to use“ [Das Gerät kann jetzt verwendet werden]
angezeigt wird.
– Starten Sie die Konfigurationssoftware für die Maus (in der Taskleiste).
– Sie können nun mit der Konfiguration der Maus beginnen.
– Lassen Sie nach der Konfiguration der Maus das USB-Kabel eingesteckt, um den Akku vollständig
aufzuladen.

GXT 31 Gaming Mouse - USER’S MANUAL
7
Die Maus muss 4 Stunden geladen werden, bevor sie im WLAN verwendet werden kann.
Hauptmenü
a
Button fuction
[Tastenfunktion] In diesem Abschnitt der Software können Sie die Mausprofile und Tasten
konfigurieren.
b
Macro management
[Makro-Management] In diesem Abschnitt der Software können Sie Makrofunktionen erstellen und
konfigurieren.
c DPI & tool
[DPI & Extras] In diesem Abschnitt der Software ändern Sie die DPI-Einstellungen, die Abtastrate und
die Scroll-Beschleunigung, und führen eine Sicherung und Wiederherstellung des Systems durch.
Button function [Tastenfunktion]
a
Verschiedene Profile
– Wählen Sie das gewünschte Profil bzw. den Modus, indem Sie auf „mode-1/2/3/4/5“ [Modus
1/2/3/4/5] oder die „Mode“-Taste [Modus] auf der Maus (l) klicken.
b
Funktionsliste
– In dieser Liste finden Sie alle Standard- und benutzerdefinierten Makrofunktionen.
c
Tasten
– Alle programmierbare Tasten.
Taste zuweisen
– Ziehen Sie die Funktion, die Sie für die Funktionsliste „b“ zuweisen möchten.
– Legen Sie in Liste „c“ die Funktion auf der Taste ab, die Sie neu zuweisen möchten.
Die linke Maustaste kann nur neu zugewiesen werden, wenn eine andere Taste mit der Funktion „Linker
Mausklick“ belegt ist.
Die Mausfunktion kann nur konfiguriert werden, wenn die Maus über das USB-Kabel angeschlossen ist.

GXT 31 Gaming Mouse - USER’S MANUAL
8
Macro Management
(Speichern einer Tastenfolge in der Software)
– Gehen Sie zum Abschnitt Macro Manager (Schritt 4b).
– Die Makro-Verwaltung ist in drei Abschnitte unterteilt:
a. Makro-Liste (Mausspeicher)
b. Funktionstasten
c. Makro-Editor
Makro erstellen
Es gibt 2 Möglichkeiten zum Erstellen einer Makrofunktion:
a– Ziehen Sie die Funktion, die Sie von den Funktionstasten „7b“ zuweisen möchten.
– Legen Sie die Funktion im Makro-Editor „7c“ ab.
b – Drücken Sie die „Play“-Taste, um die Aufnahme zu beginnen.
– Drücken Sie nach Abschluss der Aufnahme die „Stop“-Taste..
Makro speichern
– Ziehen Sie das erstellte Makro zur Makro-Liste (Mausspeicher) „7a“.
– Legen Sie das erstellte Makro auf einem leeren Feld ab.
– Geben Sie Ihrem Makro einen Namen (mindestens 13 Zeichen).
– Sie können das Makro nun einer Maustaste zuweisen (siehe Schritt 6).
Makro bearbeiten
– Ziehen Sie ein Makro von der Liste (7a).
– Legen Sie das Makro im Editor (7c) ab.
– Sie können das Makro nun bearbeiten.
– Nach der Bearbeitung des Makros können Sie dieses wie oben beschrieben speichern.
Um die Einträge im Makro-Editor zu löschen, drücken Sie die entsprechende Taste in der Funktionsliste (7b).
DPI &Tools [DPI & Extras]
a
DPI-Einstellungen
– Wählen Sie die DPI-Einstellung aus, die Sie ändern möchten.
– Die DPI-Einstellung kann für die X-Achse und die Y-Achse getrennt eingestellt werden (100 – 5600).
b
Abtastrate ändern
– Wählen Sie die gewünschte Abtastrate aus (125Hz, 142Hz, 166Hz, 200Hz, 250Hz, 333Hz, 500Hz,
1000Hz).
c
Scroll-Beschleunigung ändern
– Sie können bestimmen, wie viele Zeilen mit jedem Klick durchlaufen werden (1-9).
d
Backup, Restore oder Reset
– Drücken Sie auf „Backup“ [Speichern], um die Einstellungen zu speichern, die Sie gerade
vorgenommen haben.
– Mit „Restore“ [Wiederherstellen] können Sie die zuvor gespeicherten Einstellungen wiederherstellen.
– Die Standardkonfiguration der Maus können Sie laden, indem Sie „Reset“ drücken.
GXT 31 Gaming Mouse - USER’S MANUAL
9
Erweiterte Konfiguration
a Drücken Sie die Funktionstaste, um zwischen dem aktuellen Akkuladestand, den dpi- und den Scroll-
Einstellungen zu wechseln.
b
DPI (X- und Y-Achse getrennt) und den Scroll-Einstellungen für die Maus bestimmen
– Halten Sie die Funktionstaste 4 Sekunden lang gedrückt. (das X in der Status-LED beginnt zu blinken).
– Drehen Sie das Scrollrad, um die DPI-Einstellungen zu erhöhen oder zu senken.
– Drücken Sie die Funktionstaste, um zur Y-Achsen- oder Scroll-Einstellung zu wechseln.
– Halten Sie die Funktionstaste 4 Sekunden gedrückt, nachdem Sie alle Einstellungen vorgenommen
haben.
Fehlerbehebung
Problem Lösung
Software-Fehler
„Can not detect mouse“
– Die Maus muss zur Konfiguration über ein USB-Kabel angeschlossen
sein.
Keine Mausfunktion über Funk – Laden Sie den Akku auf.
Wie setze ich alles auf die
Standardeinstellungen zurück? – Siehe Schritt 10d.
Der Mauszeiger bewegt sich hin
und her, bewegt sich komisch oder
gar nicht.
– Laden Sie den Akku auf.
– Drücken Sie die Verbindungstaste „o“ an der Unterseite der Maus.
– Versuchen Sie es mit der Maus auf einer anderen Oberfläche oder
einem anderen Mauspad.
– Reinigen Sie den Sensor an der Unterseite der Maus mit einem
trockenen Tuch.
– Schließen Sie den Trust WLAN-Empfänger an einen anderen USB-
Anschluss an, der sich näher zu Ihrem Trust WLAN-Gerät befindet.
- Entfernen Sie alle WLAN-Empfänger, die sich an USB-Anschlüssen in

GXT 31 Gaming Mouse - USER’S MANUAL
10
der Nähe Ihres Trust WLAN-Empfängers befinden.
Fonctions de la souris
a
b
c
d
e
f
g
h
i
j
k
l
m
n
o
p
q
- Bouton 1 (bouton gauche de la souris)
- Molette de défilement
Bouton 3 fonction par défaut = clic milieu
Bouton 8 fonction par défaut = incliné gauche
Bouton 9 fonction par défaut = incliné droit
Bouton 10 fonction par défaut = défilement vers le haut
Bouton 11 fonction par défaut = défilement vers le bas
- Bouton 2 (fonction par défaut = clic souris droit)
- Témoin LED multifonctions - état de la batterie
-RéglageDPI
- Accélération du défilement
- Témoin LED DPI
- Bouton 4 (fonction par défaut = page suivante)
- Bouton 5 (fonction par défaut = page précédente)
- Bouton DPI
- Bouton 6 (fonction par défaut = aucune)
- Bouton 7 (fonction par défaut = aucune)
- Bouton de fonction (pour plus d'informations, voir « configuration avancée »)
- Bouton Mode (appuyez sur le bouton ‘Profile-1,2,3,4 and 5’) pour sélectionner le profil souhaité.
- Bouton de déblocage du câble
- Connexion USB
- Bouton de lien
- Bouton d'alimentation
- Compartiment de la pile
Installation
a. - Insérez le CD-ROM Trust dans votre lecteur CD.
b. - Cliquez sur «
Run Setup.exe – Published by Trust International BV. » [lancer Setup.exe]
- Cliquez sur « Install driver » [installez le pilote].
c. - Cliquez sur « Fermer » lorsque l'installation est terminée.
a. - Branchez le câble USB sur la souris et allumez-la.
b. - Raccordez le dongle USB au port USB de votre ordinateur.
- Raccordez la souris au port USB de votre ordinateur.
c. - Attendez qu'apparaisse le message « Your device is ready to use » [Votre appareil est prêt à
l'utilisation].
- Lancez le logiciel de configuration de la souris (situé dans la barre des tâches).
- Vous pouvez maintenant configurer la souris.
- Après configuration de la souris, laissez le câble USB branché jusqu'au chargement complet de la

GXT 31 Gaming Mouse - USER’S MANUAL
11
batterie.
La souris doit être chargée pendant 4 heures avant l'utilisation sans fil.
Fonctions principales
a
Bouton de fonction
Cette partie du logiciel vous permet de configurer les profils et boutons de la souris.
b
Gestion des macros
Cette partie vous permet d'exécuter et de modifier des fonctions macro.
c DPI et outil
Cette partie vous permet de modifier les réglages DPI, le taux de rapport, l'accélération du défilement,
la sauvegarde et la restauration de votre installation.
Bouton de fonction
a
Différent profils
- Sélectionnez le profil/mode que vous souhaitez modifier en cliquant sur « Mode-1/2/3/4/5 » ou
appuyez sur le bouton « Mode » de la souris (L).
b
Liste de fonctions
- Vous trouverez dans cette liste toutes les fonctions standard et les fonctions macro créées.
c
Boutons
- Tous les boutons programmables.
Attribuer un bouton
- Faites glisser la fonction que vous souhaitez attribuer à la liste de fonctions 'b'.
- Déposez la fonction sur le bouton que vous souhaitez réattribuer dans la liste 'c'.
Le bouton gauche de la souris peut seulement être attribué si la fonction « clic gauche » est attribuée à un
bouton différent.
La fonction souris peut seulement être configurée si la souris est branchée à l'aide du câble USB.

GXT 31 Gaming Mouse - USER’S MANUAL
12
Gestion des macros
(stockage d'une série de touches dans le logiciel)
- Allez dans la partie gestionnaire des macros (étape 4b).
- La gestion des macros est répartie en 3 sections :
a. Liste des macros (mémoire de la souris)
b. Boutons de fonction
c. Éditeur de macros
Création d'un macro
Il existe 2 façons de créer une fonction macro.
a- Faites glisser la fonction que vous souhaitez attribuer depuis les boutons de fonctions '7b'.
- Déposez la fonction dans l'éditeur de macros '7c'.
b - Appuyez sur le bouton « Lecture » pour démarrer l'enregistrement de votre série.
- Appuyez sur le bouton « Stop » lorsque vous avez fini votre enregistrement.
Enregistrement d'une macro
- Faites glisser la macro créée dans la liste des macros (mémoire de la souris) '7a'.
- Déposez la macro créée dans un champ vide.
- Donnez un nom à votre nom (13 caractères maximum).
- Vous pouvez attribuer maintenant une macro à un bouton de souris (voir étape 6).
Édition d'une macro
- Faites glisser une macro dans la liste (7a).
- Déposez la macro dans l'éditeur (7c).
- Vous pouvez maintenant éditer la macro.
- Lorsque vous avez fini d'éditer la macro comme expliqué ci-dessus.
Pour effacer l'éditeur de macros, appuyez sur le bouton effacer dans la liste de fonctions (7b).
DPI et outils
a
Réglages DPI
- Sélectionnez le réglage DPI que vous souhaitez modifier.
- Vous pouvez modifier individuellement les axes X et Y des réglages DPI (100 - 5600).
b
Changer le taux de rapport
- Sélectionnez le taux de rapport souhaité (125 Hz, 142 Hz, 166 Hz, 200 Hz, 250 Hz, 333 Hz, 500 Hz, 1
000 Hz).
c
Changer l'accélération
- Vous pouvez modifier le nombre de lignes qui seront défilées en un clic (1-9).
d
Sauvegarde, restauration ou réinitialisation
- Vous pouvez sauvegarder les réglages que vous venez de créer en appuyant sur « Backup ».
- Vous pouvez restaurer les réglages configurés précédemment en appuyant sur « Restaurer ».
- Vous pouvez charger la configuration de la souris par défaut en appuyant sur « Réinitialisation ».

GXT 31 Gaming Mouse - USER’S MANUAL
13
Configuration avancée
A Appuyez sur le bouton de fonction pour basculer entre le statut actuel de la batterie, les réglages DPI et
les réglages de défilement.
B
Ajustez les réglages DPI (axes X et Y individuellement) et faites défiler les réglages de la souris.
- Appuyez sur le bouton de fonction pendant 4 s. (le X dans le témoin LED de l'état commence à
clignoter).
- Pivotez la molette de défilement vers le haut pour augmenter le DPI ou baisser le réglage DPI.
- Appuyez sur le bouton de fonction pour passer à l'axe Y ou au réglage de défilement.
- Appuyez sur le bouton de fonction pendant 4 s lorsque vous avez fini les réglages.
Dépannage
Problème Solution
Erreur de logiciel
“
Can not detect mouse” (« Ne peut
pas détecter la souris »)
- Pour configurer la souris, celle-ci doit être branchée à l'aide du
câble USB.
La souris ne fonctionne pas sans fil - Charger la batterie.
Comment je dois réinitialiser les
réglages par défaut - Voir étape 10d.
La flèche de la souris tremble,
bouge curieusement ou ne bouge
pas du tout
- Charger la batterie.
- Appuyez sur le bouton de lien 'o' e, bas de la souris.
- Essayez d'utiliser la souris sur une surface différente ou utilisez un
tapis de souris.
- Nettoyez le détecteur en bas de la souris à l'aide d'un chiffon sec.
- Branchez le récepteur Trust sans fil sur un autre port USB, le plus
proche du périphérique Trust sans fil.
- Supprimez tous les autres récepteurs sans fil qui sont branchés aux

GXT 31 Gaming Mouse - USER’S MANUAL
14
ports USB proche du récepteur Trust sans fil.
Struttura del mouse
a
b
c
d
e
f
g
h
i
j
k
l
m
n
o
p
q
- Pulsante 1 (pulsante sinistro del mouse)
- Rotella di scorrimento
Pulsante 3 funzione predefinita = clic intermedio
Pulsante 8 funzione predefinita = inclinazione a sinistra
Pulsante 9 funzione predefinita = inclinazione a destra
Pulsante 10 funzione predefinita = scorrere verso l'alto
Pulsante 11 funzione predefinita = scorrere verso il basso
- Pulsante 2 (funzione predefinita = clic destro del mouse)
- Indicatore LED multifunzione - stato della batteria
- impostazione DPI
- accelerazione di scorrimento
- Indicatore LED DPI
- Pulsante 4 (funzione predefinita = avanzamento pagina)
- Pulsante 5 (funzione predefinita = pagina precedente)
- Interruttore DPI
- Pulsante 6 (funzione predefinita = nessuna)
- Pulsante 7 (funzione predefinita = nessuna)
- Pulsante Function [Funzione] (vedere ‘Configurazione avanzata’ per la spiegazione)
- Pulsante Mode [Modalità] (fare clic per passare tra i profili 1, 2, 3, 4 e 5)
- Pulsante di rilascio cavo
- Connessione USB
- Pulsante di collegamento
- Interruttore on/off
- Vano batterie
Installazione
a. - Inserire il CD-ROM di installazione fornito da Trust nell'unità CD-ROM.
b. - Fare clic su “Run Setup.exe – Published by Trust International BV” [Esegui Setup.exe - Autore Trust
International BV].
- Fare clic su “Install driver” [Installa driver].
c. - Fare clic su ‘close’ [Chiudi] al termine dell'installazione.
a. - Collegare il cavo USB al mouse e accendere il mouse.
b. - Collegare il dongle USB alla porta USB del PC.
- Collegare il mouse alla porta USB del PC.
c. - Attendere finché non appare il messaggio ‘Your device is ready to use' [Dispositivo pronto per
l'utilizzo].
- Avviare il software di configurazione del mouse (situato nella barra delle applicazioni).
- Ora è possibile iniziare a configurare il mouse.
- Dopo aver configurato il mouse, mantenere collegato il cavo USB al fine di caricare completamente

GXT 31 Gaming Mouse - USER’S MANUAL
15
le batterie.
Il mouse va caricato per 4 ore prima di poterlo utilizzare in modalità wireless.
Sezione principale
a
Button fuction
[Funzione pulsanti] In questa sezione del software è possibile configurare i profili e i pulsanti del
mouse.
b
Macro management [Gestione macro]
In questa sezione del software è possibile creare e modificare le funzioni macro.
c DPI & tool [DPI e strumenti]
In questa sezione del software è possibile cambiare le impostazioni DPI, la velocità di report,
l'accelerazione di scorrimento, nonché eseguire backup o ripristinare le impostazioni.
Button function [Funzione pulsanti]
a
Profili diversi
- Selezionare il profilo/la modalità che si desidera cambiare facendo clic su ‘mode-1/2/3/4/5’ [Modalità-
1/2/3/4/5] oppure premere il pulsante ‘Mode’ [Modalità] sul mouse (L).
b
Elenco delle funzioni
- Questo elenco comprende tutte le funzioni standard e le funzioni macro create.
c
Pulsanti
- Tutti i pulsanti programmabili.
Assegnazione di un pulsante
- Selezionare e trascinare la funzione che si desidera assegnare per l'elenco delle funzioni ‘b’.
- Rilasciare la funzione sul pulsante a cui si desidera eseguire la riassegnazione nell'elenco ‘c’.
È possibile eseguire la riassegnazione al pulsante sinistro del mouse quando la funzione ‘left click’ [Clic sinistro]
è assegnata a un pulsante diverso.
La funzione mouse può essere configurata solamente quando il mouse è collegato tramite il cavo USB.

GXT 31 Gaming Mouse - USER’S MANUAL
16
Macro Management [Gestione macro]
(memorizzazione di una sequenza di tasti nel software)
- Andare alla sezione dedicata alla gestione macro (punto 4b).
- La gestione macro è divisa in 3 sezioni:
a. elenco macro (memoria mouse)
b. pulsanti funzione
c. macro editor
Creazione di una macro
Esistono 2 modi per creare una funzione macro.
a- Selezionare e trascinare la funzione che si desidera assegnare dai pulsanti funzione ‘7b’.
- Rilasciare la funzione nel macro editor ‘7c’.
b - Premere il pulsante ‘play’ [Registra] per avviare la registrazione della sequenza.
- Premere il pulsante ‘stop’ [Interrompi] al termine della registrazione.
Salvataggio di una macro
- Selezionare e trascinare la macro creata nell'elenco delle macro (memoria mouse) ‘7a’.
- Rilasciare la macro creata in un campo vuoto.
- Dare un nome alla macro (massimo 13 caratteri).
- Ora è possibile assegnare la macro ad un pulsante mouse (vedere punto 6).
Modifica di una macro
- Selezionare e trascinare una macro dall'elenco (7a).
- Rilasciare la macro nell'editor (7c).
- Ora è possibile modificare la macro.
- Al termine della modifica della macro, salvare la macro come precedentemente indicato.
Per cancellare il macro editor, premere il pulsante di cancellazione nell'elenco delle funzioni (7b).
DPI & Tools [DPI e strumenti]
a
Impostazioni DPI
- Selezionare l'impostazione DPI che si desidera modificare.
- È possibile modificare l'impostazione DPI sia per l'asse X che per l'asse Y separatamente (100 – 5600).
b
Modifica della velocità di report
- Selezionare la velocità di report desiderata (125 Hz, 142 Hz, 166 Hz, 200 Hz, 250 Hz, 333 Hz, 500 Hz,
1000 Hz).
c
Modifica dell'accelerazione di scorrimento
- È possibile modificare il numero di righe scorse con un clic (1-9).
d
Backup, ripristino o reset
- Premendo ‘Backup’ [Backup] è possibile effettuare il backup delle impostazioni appena create.
- Premendo ‘Restore’ [Ripristino] è possibile ripristinare le impostazioni precedentemente salvate.
- Premendo ‘Reset’ [Reset] è possibile caricare la configurazione mouse predefinita.

GXT 31 Gaming Mouse - USER’S MANUAL
17
Configurazione avanzata
a Premere il pulsante funzione per passare tra lo stato batteria corrente, le impostazioni DPI e le
impostazioni di scorrimento.
b
Regolazione delle impostazioni DPI (sia dell'asse X che dell'asse Y separatamente) e di scorrimento sul
mouse
- Tenere premuto il pulsante funzione per 4 secondi. (La X nel LED di stato inizia a lampeggiare.)
- Ruotare la rotella di scorrimento verso l'alto per aumentare l'impostazione DPI o verso il basso per
diminuirla.
- Premere il pulsante funzione per passare all'asse Y o all'impostazione di scorrimento.
- Al termine delle impostazioni, tenere premuto il pulsante funzione per 4 secondi.
Risoluzione dei problemi
Problema Soluzione
Errore del software
“
Can not detect mouse”
- Per configurare il mouse, questo deve essere collegato tramite il cavo
USB.
Il mouse non funziona in modalità
wireless. - Caricare le batterie.
Come si ripristinano le
impostazioni predefinite? - Vedere il punto 10d.
Il cursore del mouse vibra, si
sposta in modo strano o non si
muove affatto.
- Caricare le batterie.
- Premere il pulsante di collegamento ‘o’ nella parte inferiore del mouse.
- Provare a utilizzare il mouse su una superficie diversa oppure utilizzare
un tappetino per mouse.
- Pulire il sensore nella parte inferiore del mouse con un panno asciutto.
- Collegare il ricevitore wireless Trust a un'altra porta USB, più vicina al
dispositivo wireless Trust.
- Rimuovere tutti gli altri ricevitori wireless collegati alle porte USB e

GXT 31 Gaming Mouse - USER’S MANUAL
18
vicini al ricevitore wireless Trust.
Distribución del ratón
a
b
c
d
e
f
g
h
i
j
k
l
m
n
o
p
q
- Botón 1 (botón izquierdo del ratón)
- Rueda de desplazamiento
Botón 3 función predeterminada = clic central
Botón 8 función predeterminada = inclinación a la izquierda
Botón 9 función predeterminada = inclinación a la derecha
Botón 10 función predeterminada = desplazamiento hacia arriba
Botón 11 función predeterminada = desplazamiento hacia abajo
- Botón 2 (función predeterminada = clic derecho del ratón)
- Indicador LED multifunción: - estado de la batería
- Ajuste de PPP
- Aceleración del desplazamiento
- Indicador LED de PPP
- Botón 4 (función predeterminada = avance de página)
- Botón 5 (función predeterminada = avance de página)
- Interruptor de PPP
- Botón 6 (función predeterminada = ninguna)
- Botón 7 (función predeterminada = ninguna)
- Botón de función (consulte "configuración avanzada" para acceder a la explicación)
- Botón Mode (Modo, haga clic para cambiar entre "Profile-1,2,3,4 and 5" [Perfil-1,2,3,4,5])
- Botón de liberación del cable
- Conexión USB
- Botón de enlace
- Interruptor de encendido/apagado
- Compartimiento de las pilas
Instalación
a. - Inserte el CD-ROM de Trust en la unidad de CD.
b. - Haga clic en “Run Setup.exe – Published by Trust International BV”.
- Haga clic en "Install driver" [Instalar controlador].
c. - Haga clic en "Close" [Cerrar] cuando concluya el proceso de instalación.
a. - Conecte el cable USB al ratón y encienda el ratón.
b. - Conecte la mochila USB a uno de los puertos USB del ordenador.
- Conecte el ratón a uno de los puertos USB del ordenador.
c. - Espere hasta que aparezca el mensaje "Your device is ready to use" [El dispositivo está listo para
usarse].
- Inicie el software de configuración del ratón (situado en la barra de tareas).
- Ahora podrá comenzar a configurar el ratón.
- Tras configurar el ratón, mantenga el cable USB conectado para cargar las pilas al completo.
Deberá cargar el ratón durante 4 horas antes de poder usarlo de forma inalámbrica.
Other manuals for GXT31
2
Table of contents
Languages:
Other Trust Mouse manuals

Trust
Trust Comfortline wireless Mini Mouse Guide

Trust
Trust MI-6950R User manual

Trust
Trust Pebble Wireless User manual

Trust
Trust Kusan User manual

Trust
Trust MI-6600Rp User manual

Trust
Trust GXT 180 User manual

Trust
Trust AMI HAND TRACK PRO User manual

Trust
Trust MI-7900Z User manual

Trust
Trust MI-4950R User manual

Trust
Trust AMI 300 User manual

Trust
Trust 350FL User manual

Trust
Trust GRAPHIN GXT 960 User manual

Trust
Trust AMI 250S User manual

Trust
Trust AMI 250SX User manual

Trust
Trust MI-2510T User manual

Trust
Trust GXT 155 User manual

Trust
Trust Sight Fighter Digital Plus User manual

Trust
Trust GXT 144 REXX User manual

Trust
Trust 950 User manual

Trust
Trust 450LR User manual