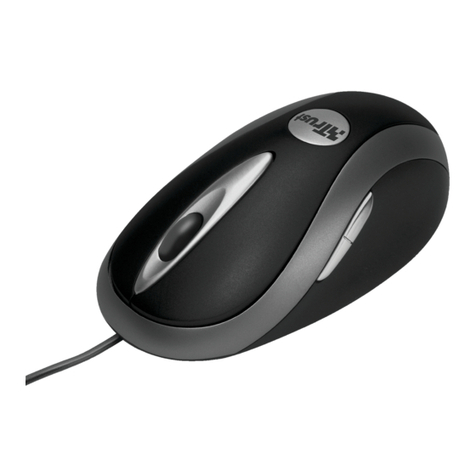
Trust 350WL User manual

350WL MOUSE WIRELESS OPTICAL
1
UK
Method when using for the first time Chapter
1. Uninstalling old drivers and devices (3.1)
2. Connecting (3.2)
3. Installing in Windows (3.3)
4. Checking after the installation (4.0)
1 Introduction
This instruction manual is for users of the TRUST 350WL MOUSE WIRELESS
OPTICAL. The TRUST 350WL MOUSE WIRELESS OPTICAL is a five button mouse
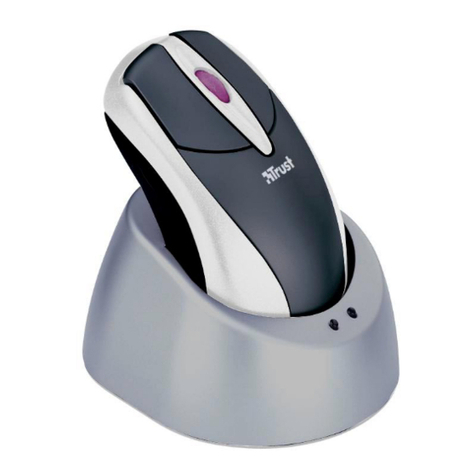
with scroll wheel and convenient cradle for storing the mouse when it is not in use.
The mouse is suitable for right and left handed users. Three buttons can be
programmed with the included software for easy access to frequently used functions.
Since this mouse is produced using the precise ball-less optical technology there is
no mouse ball that you have to clean. The set is wireless and works at a frequency
of 27 MHz. It has two channels with each 256 different ID codes.
This set can be used for a distance of up to 1meter. A battery charger is integrated
into the cradle so you always have full batteries to work with. Rechargeable batteries
are included so no need to change the batteries ever again.
2 Safety
Carefully read the following instructions before use:
-The TRUST 350WL MOUSE WIRELESS OPTICAL does not require any
special maintenance. Use a slightly damp, soft cloth to clean the set.
-Do not use aggressive substances, such as petrol or white spirit, to clean the
device. These may harm the material.
-Do not submerge the device in liquid. This may be dangerous and will
damage the device. Do not use this device near water.
-Make sure nothing is placed on the cable. Do not use this device in an area
where the cable can become worn or damaged as a result of people walking
over it.
-Do not repair this device yourself.
0470
-This device operates at a frequency of 27.045 ~ 27.555 MHz. It has been
approved according to the European R&TTE guidelines and meets the
essential requirements and other relevant conditions of Directive 1999/5/EC.
This device may be used in all EU countries, NO, CH, PL. The Declaration of
Conformity (DoC) is available at www.trust.com/13091/ce
-There may be limitations for the use of this device outside of the EU. If this
device is used outside of the EU, check whether this device meets local
regulations. Frequency: 27.045 ~ 27.555 MHz, Bandwidth:
-+/- 4,5 KHz, Capacity: 0.12mW.
-Nowadays, there are an increasing number of wireless products (video,
audio, convenience, computer, etc.) which work in the same frequency range
as this device. It may, therefore, be possible that the functionality of this
product can be limited by or be limiting for other wireless products. This can
only be avoided by paying attention to the distance between products and,
where possible, by changing channels.
-Be careful when using wireless devices if you have a pacemaker or are
dependent on other life-saving, sensitive electronic equipment. This product
transmits radio signals!
!
350WL MOUSE WIRELESS OPTICAL
2
3 Installation
3.1 Connecting
1. Make sure the computer is turned off.
2. Connect the power adapter for the cradle to the wall outlet.
3. Connect the power adapter to the cradle at the backside.
4. Connect the green plug of the mouse to the PS/2 mouse connection on your
computer. Read the manual of the pc/mainboard how to do this.
5. Insert the rechargeable batteries, notice the drawing inside the compartment
for how they should be placed.
6. Turn the computer on.
7. The PC will automatically detected and install a standard PS/2 Wheel mouse.
Note: Inserting the batteries incorrectly will cause damage. Only use
rechargeable NiMH batteries.
Note: The NiMH batteries provided are rechargeable. The batteries will be
recharged when the mouse is placed into cradle. The batteries will
only be recharged if the RF receiver has been connected to the power
supply, which has been provided together with this product. For the
best results, insert the mouse into the cradle when not in use. Make
sure that the contact points on the bottom of the mouse touch the
contact pins on the cradle or the batteries will not charge. The green
led on the cradle will be lit while charging.
3.2 Making a wireless connection
1. Make sure your computer is turned on.
2. Make sure that all products are not more than 1meter apart and that there are
no objects (or a total metal surface) in between since this will reduce the
functionality of the connection.
3. Make sure that the batteries are placed and that they have enough power.
4. The receiver has a green indicator to show the connection status. This
indicator is located inside the purple button of the receiver.
5. Press the purple button (‘E’ in fig.1) on the front of the receiver. The
indicators will start to flash.
6. Press the round ID button on the bottom of the mouse (see ‘A’ in figure 8).
The green indicator will also stop flashing. The indicator will remain
constantly lit. The mouse has now made a connection with the receiver. The
mouse will now work as a standard mouse. When the receiver receives data
(from the mouse) it will flash rapidly.
7. When there is interference or someone is on the same channel switch to
another channel by moving the switch inside the mouse (‘B’ in fig. 7)
8. Continue with the installation of the software if you wish to use the extra
functions.

350WL MOUSE WIRELESS OPTICAL
3
UK
3.3 Uninstalling old drivers and devices
The most common cause of faults during installation is the presence of a driver for a
similar, old product. The best solution is to first remove all drivers related to old
devices before installing the new driver.
1. Enter the Windows ‘Safe Mode’ (press F8 when starting Windows and then
select ‘Safe Mode’ from the menu which is displayed).
2. Go to ‘Start – Settings – Control Panel’ and double-click on the ‘Add/Remove
Programs’ icon.
3. Find all the programs for similar, old devices and remove these by clicking on
the ‘Add/Remove’ button. When in the ‘Safe Mode’, it is possible for some
programs to appear twice. In that case, remove all the programs which
appear twice.
4. Restart the computer.
3.4 Installation in Windows 98 / ME / 2000 / XP
Note: The latest software (driver) can be downloaded from
www.trust.com/13091. Check whether a new driver is available and use
this for the installation.
Note: Make sure all other programs are closed during the installation.
Note: During installation in Windows XP, you may receive a message saying
that the driver has not been signed. This does not cause a problem for
the functionality. Click ok to continue.
Note: In the example, ‘D:\’ is used to indicate the CD-ROM drive. This may be
different for your computer.
Note: Software is for programming the three buttons. Mouse will work without
installing it.
1. Insert the CD-ROM into your computer’s CD-ROM drive. The installation
program will start automatically. If it does not start automatically, carry out
the following:
a) Select 'Run' from the Start menu.
b) Type [D:\SETUP.EXE] and click on 'OK' to start the Trust Software
Installer.
2. Figure 2 will appear.
3. Click on the language you wish to use for the installation.
4. Click on ‘Trust Mouse Utility‘ to start the installation of the mouse.
5. Follow the on-screen instructions.
6. Restart the computer.
The installation of the software for the mouse has now been completed.
4 Checking after the installation
After installing the device and the driver, the following are installed on your computer
and can be checked:
Taskbar
– The icons as shown in figure 3 should be visible in the taskbar.
‘Start – Settings – Control Panel’. Double-click on the ‘System’ icon and select the
‘Device Manager’ tab.
- Mouse – WHEEL MOUSE PS/2
‘Start – Settings – Control Panel’ and then double-click on the ‘Add/Remove
Programs’ icon.
- Trust Mouse Utility
Start – Programs – Trust Mouse Utility

350WL MOUSE WIRELESS OPTICAL
4
- Trust Mouse Utility
- Uninstall Trust Mouse Utility
Note: The information given in this chapter will vary when the installation has
been altered by the user (for example, not everything has been installed
or locations other than the default locations have been selected).
Note: Deviations may also occur as a result of using new drivers available on
the Internet.
Note: The location or name in the ‘Control Panel’ may vary for different
Operating Systems.
5 Use
5.1.1 About optical technology
The 350WL MOUSE WIRELESS OPTICAL uses a technology in which a built in
sensor takes numerous photos per second and compares them with the ones
previously made.
Since this is made using light, it is good to understand that the surface you use the
mouse on is an important item. Transparent surfaces like glass and mirrors will not
reflect the light of the mouse that much but let it go through. Also black or red
surfaces might give a bit of a problem since it absorbs a part of the light the mouse
emits. The best surface to use the mouse on will be a flat white surface, however
this does not mean that on other surfaces it will not work completely, the mouse
could react a bit slower than on a white flat surface.
5.1.2 Explanation of the buttons
The mouse has five different buttons and a scroll wheel. The functions of these
components are given in table 2. Use this table together with figure 1.
Item Name Function
AButton 1 Right mouse button function.
BButton 2 Programmable third mouse button + scroll wheel.
CButton 3 Left mouse button function.
DButtons 4 + 5 Programmable fourth and fifth mouse buttons on the
left and right side of the mouse.
Table 1: Explanation of the mouse
5.1.3 Battery indicator
The mouse also has a battery low indicator built inside the mouse wheel. When it will
continuously light up red you need to recharge the batteries. Correctly place it into
the cradle for charging.
5.1.4 Software
1. Double-click on the Trust icon (figure 3) in the taskbar.
2. The mouse properties window will appear (figure 4).
3. The scroll wheel mode can be selected in the ‘Scroll wheel’ tab.
4. There are two options:
•Increased scroll mode; has all the advantages of the MS-Intellimouse
and scrolls in Windows 98, Windows ME, Windows 2000 and Windows
XP.
•Intellimouse mode; works as an MS-Intellimouse.
5. Select the scroll wheel speed.
6. The buttons 3, 4 and 5 can be programmed in the ‘Buttons’ tab (see figure 5).

350WL MOUSE WIRELESS OPTICAL
5
UK
7. Select a button and click on the arrow on the right-hand side. A drop-down
menu will appear (see figure 6).
8. Select the function you wish to use.
9. Click on ‘Apply’.
The mouse has now been programmed.
Right clicking on the Trust icon and then selecting active mouse property will let you
set windows mouse properties like left and right hand use amongst others functions.
De-installation can be done by starting the uninstall function which is located in the
same folder where you installed the mouse utility function.
Right clicking on the Trust icon and then selecting exit shuts down the utility so you
could use the functions for the buttons specified in other programs, or games.
6 Troubleshooting
Method
1. Read the solutions given below.
2. Check for up-to-date FAQ’s, drivers and instruction
manuals on the Internet (www.trust.com/13091).
Problem Cause Possible solution
The software for your
previous mouse is still
active.
Remove the software for
your previous mouse
before installing the Trust
software (see chapter
3.1).
PS/2 mouse port is not
activated.
Activate the PS/2 port.
Read the manual of the
pc/mainboard how to do
this.
The mouse does not
react or Windows
displays an error
message concerning
the mouse when the
computer is started.
Mouse is not connected
well.
Connect the mouse
properly in the (green)
mouse port, do not use a
converter to connect it to
a serial port.
The software has not
been installed.
Install the mouse
software.
The scroll function
does not work.
The software has not
been configured correctly.
Configure the software
correctly.
The mouse arrow
moves erratically on
the monitor.
The used surface is not
optimal to use with an
optical mouse
Use other than
transparent and red/black
surfaces for the mouse.
The green indicator on
the receiver behind the
purple button does not
light up.
The cradle has not been
connected correctly.
Connect the green plug to
the (green) PS/2 mouse
port on your computer.
Check whether the port
works correctly.
!

350WL MOUSE WIRELESS OPTICAL
6
Problem Cause Possible solution
The green indicator for
charging on the
receiver does not light
up.
The power supply is not
connected to the cradle.
Connect the power supply
to the cradle.
No batteries have been
inserted.
Insert the batteries.
The batteries for the
mouse are (almost)
empty, the led in the
mouse will light up red.
Charge the batteries by
putting the mouse in the
cradle.
There is no wireless
connection between the
mouse and receiver.
Make a wireless
connection between the
mouse and the receiver
(see chapter 3.2).
The distance between the
receiver and the mouse is
too great.
Place the mouse to the
wireless receiver. The
maximum distance is 1
metre. Avoid placing it on
a metal surface since it
will decrease the
reception.
Another device close by
uses the same frequency
as the mouse.
Change the channel or
place the wireless
receiver closer to the
mouse.
The mouse does not
react.
The mouse is connected
with a serial converter
Do not use a converter
with this mouse.
The software has not
been (correctly) installed.
Remove all the drivers
and reinstall them (see
chapters 3.1-3.4).
The configured mouse
buttons do not react.
The software for your old
mouse is still active.
Remove the old software
(see chapter 3.1).
The software has not
been installed.
Install the mouse
software.
The scroll function
does not work.
The software has not
been configured correctly.
Configure the software
correctly.
If you still have problems after trying these solutions, please contact one of the Trust
Customer Care Centers. You can find more information at the back of this instruction
manual. Please have the following information available:
•The article number, this is : 13091;
•A good description of what does not work;
•A good description of when the problem occurs.

350WL MOUSE WIRELESS OPTICAL
7
UK
Warranty conditions
-Our products have a two-year manufacturer's warranty which is effective from
the date of purchase.
-If there is a fault, return the product to your dealer and include an explanation
of the fault, the proof of purchase and all the accessories.
-During the warranty period, you will receive a similar model, if one is
available. If no similar product is available, your product will be repaired.
-Please contact our help desk for missing components, such as the instruction
manual, software or other components.
-The warranty becomes invalid if the product is opened, if there is mechanical
damage, if the product has been misused, if alterations have been made to
the product, if the product has been repaired by a third party, in the case of
negligence or if the product has been used for a purpose other than that
originally intended.
-Excluded from the warranty:
•Damage caused by accidents or disasters, such as fire, flood, earthquakes,
war, vandalism or theft.
•Incompatibility with other hardware/software which is not stated in the
minimum system requirements.
•Accessories, such as batteries, fuses (if applicable).
- Under no circumstances will the manufacturer be held responsible for any
incidental or consequential damage, including the loss of income or other
commercial losses resulting from the use of this product.
Table of contents
Other Trust Mouse manuals

Trust
Trust GXT 162 User manual

Trust
Trust Ami Track Dual Scroll User manual

Trust
Trust AMI 240T User manual

Trust
Trust MI-3200 User manual

Trust
Trust MI-2500X User manual

Trust
Trust MI-1550X User manual

Trust
Trust Siano User manual

Trust
Trust Xidon GXT 940 User manual

Trust
Trust MI-4500X User manual

Trust
Trust 350FL User manual

Trust
Trust MI-4150K User manual

Trust
Trust MI-7900Z User manual

Trust
Trust GXT 922 YBAR User manual

Trust
Trust MI-6950R User manual

Trust
Trust 950 User manual

Trust
Trust Sight Fighter Digital Plus User manual

Trust
Trust CELOX GXT 165 User manual

Trust
Trust MI-2950R User manual

Trust
Trust 460LR User manual

Trust
Trust MI-3500X User manual