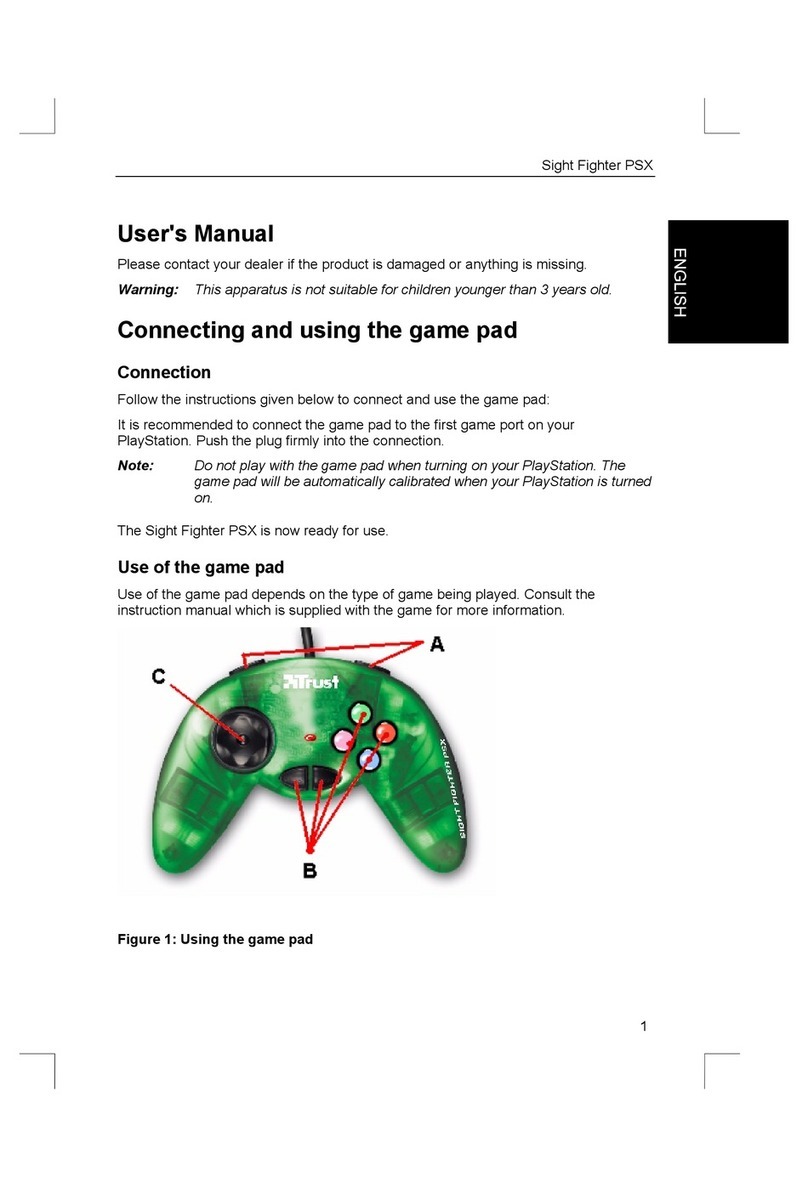
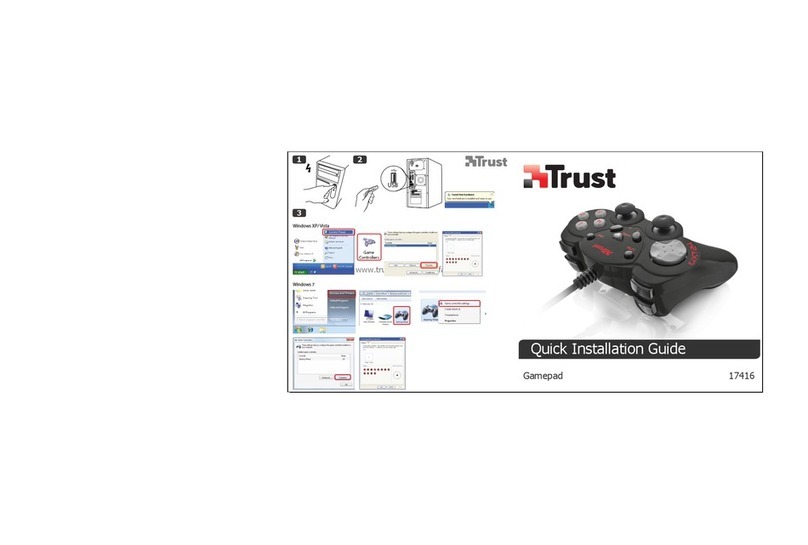
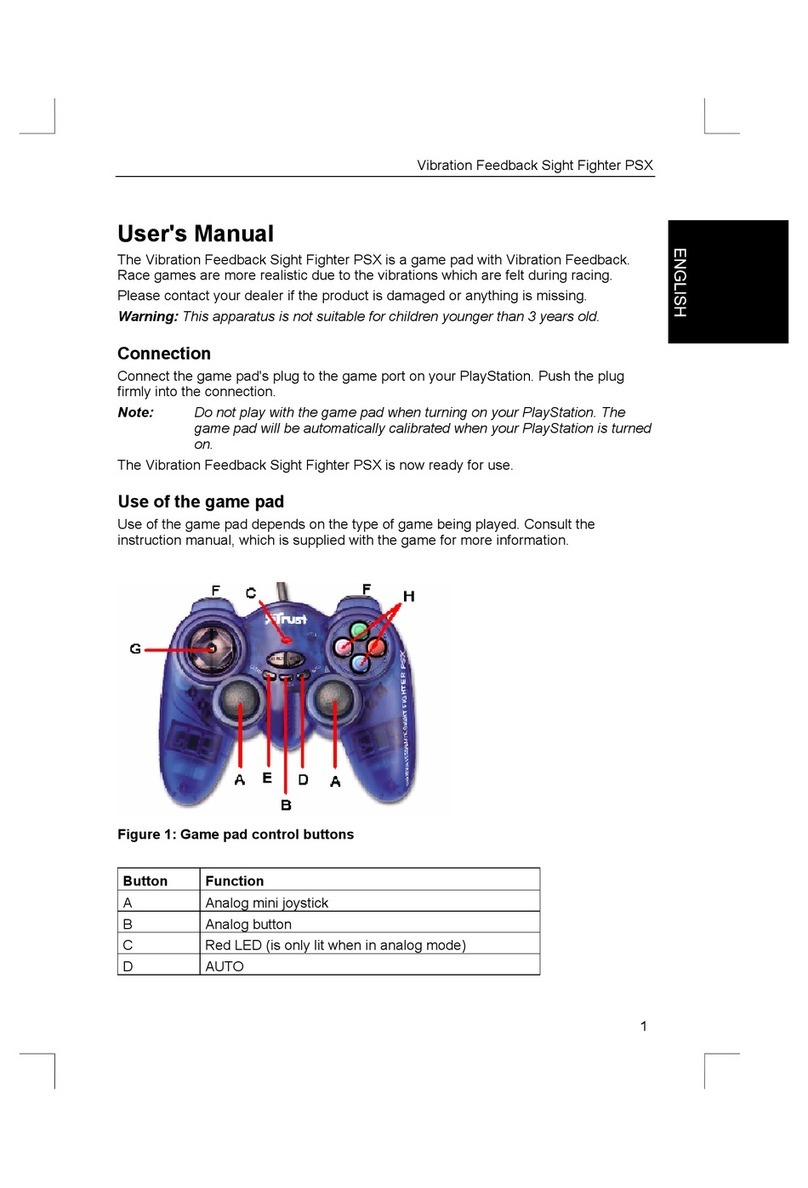
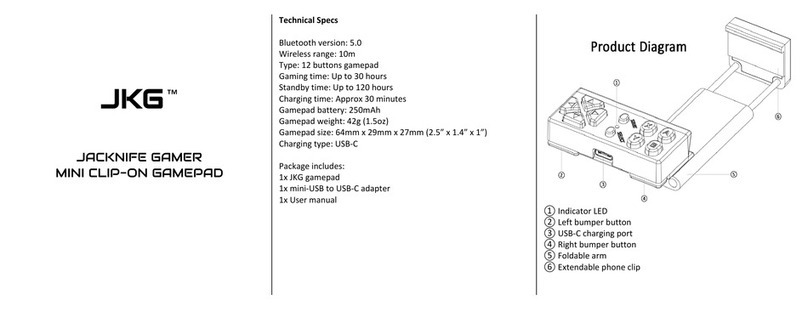
Trust 16064 User manual

Quick Installation Guide
16064Steeringwheel
www.trust.com/16064/faq
A B C D E

6/L2
7/L1
D-PAD
11/L3
9/SELECT
MODE
5/R2
8/R1
1/
2/ O
3/ X
4/
12/R3
10/START
2/L2 1/R2
1 2
3
USB
Windows XP/ Vista
Windows 7
Devices and Printers
Control Panel

Steering Wheel - USER’S MANUAL
1
Index
Language page
Englisch 2
Deutsch 4
Français 6
Italiano 8
Español 10
Português 12
Nederlands 14
Dansk 16
Suomi 18
Norsk 20
Svenska 22
Polski 24
Česky 26
Slovenčina 28
Magyar 30
Română32
Български 34
Русский 36
Ελληνικά 38
Türkçe 40

Steering Wheel – USER’S MANUAL
2
Product information
A: Race wheel
B: Feet pedals
C: USB connector (PC/Playstation3)
D: Playstation2 connector
E: Table clamp
Installation PC
Turn on the PC. Connect USB to PC.
USB wheel ready to use.
Open Game Controllers in Windows Control Panel. Test all functions and calibrate.
Make sure your game supports this kind of game controller. Read the instruction manual of the game to
approach the best settings.For the best reception, place the TV-stick near a window and away from metal
objects.
The following options will only work if supported by the game:
Force Vibration. (only on ps2 & 3)
Analogue and Digital function. Use the ‘Mode’ button to switch between them.
Buttons 1 – 4 / Δ, O, X, , and hand levers are pressure sensitive. (only on ps2 & 3)
Pressing ‘Mode’ button for 3 seconds will reset all programmed button to their default setting. (Red LED will
flash for confirmation)
Feet pedals are hot swappable. Hand levers functions:
Pedals connected: Hand levers “F” and “G” have same functions as Δand O
Pedals not connected: Hand levers “F” and “G” function as throttle and brake.
You can customize your controller settings 4. Settings:
(Δ, O, X, , L1, R1, L2, R2, L3, R3)
3
2
1

Steering Wheel – USER’S MANUAL
3
Settings for PC and Playstation2/3
Switch vibration feedback on/off
Press “Select”+D-pad (up) for 1 second to switch on/off the vibration feedback:
All 3 LEDS will flash 3 seconds for confirmation
Sensitivity settings:
Press “Select”+D-pad (right) to cycle through sensitivity settings:
Level 1: blue LED least sensitive
Level 2: green LED
Level 3: red LED
Level 4: blue and green LED
Level 5: red and green LED
Level 6: blue and red LED most sensitive
Swapping buttons: (Δ, O, X, , L1, R1, L2, R2, L3, R3)
Step 1 Press “Select” for 3 seconds.
Step 2 Press button you want to change
Step 3 Press button of the function you want to assign.
(All 3 LEDS will flash for confirmation)
Step 4 Press “Select” to Exit programming mode.
Step 5 Repeat step 1,2,3 and 4;
begin with button from step3.
Pressing ‘Mode’ button for 3 seconds will reset all programmed button to their default setting. (Red LED will
flash for confirmation)
6
5
4

GEBRAUCHSANLEITUNG
4
Produktinformationen
A: Lenkrad
B: Pedale
C: USB-Anschluss (Computer/PlayStation 3)
D: Anschluss für PlayStation 2
E: Tischklemme
Installation auf dem Computer
Schalten Sie den Computer ein. Schließen Sie das USB-Kabel an den Computer an.
Damit ist das USB-Lenkrad betriebsbereit.
Wählen Sie in der Windows-Systemsteuerung die Option „Gamecontroller“ aus. Testen Sie alle
Funktionen, und führen Sie eine Kalibrierung durch.
Hinweise
Überprüfen Sie, ob diese Art von Gamecontroller im aktuellen Spiel unterstützt wird. In der Bedienungsanleitung
des Spiels finden Sie Informationen zu den am besten geeigneten Einstellungen.
Die folgenden Funktionen sind nur verfügbar, wenn sie im aktuellen Spiel unterstützt werden:
Force Vibration. (Nur PS 2 & 3)
Funktionen „Analogue“ (Analog) und „Digital“. Über die Taste „Mode“ (Modus) können Sie zwischen diesen
beiden Funktionen wechseln.
Druckempfindlichkeit der Tasten 1–4 /, O, X und der Schalthebel (Nur PS2 & 3)
Wenn Sie die Taste „Mode“ (Modus) 3 Sekunden lang drücken, werden alle programmierten Tasten auf die
jeweilige Standardeinstellung zurückgesetzt. (Zur Bestätigung blinkt die rote LED-Anzeige.)
Die Pedale sind im laufenden Betrieb austauschbar. Funktionen der Schalthebel:
Pedale angeschlossen: Die Schalthebel „F“ und „G“ haben die gleiche Funktion wie Δbzw. O.
Pedale nicht angeschlossen: Die Schalthebel „F“ und „G“ dienen zur Beschleunigungs- bzw. Bremssteuerung.
Sie können die Einstellungen des Gamecontrollers anpassen 4. Settings (Einstellungen):
(Δ, O, X, , L1, R1, L2, R2, L3, R3)
1
3
2

GEBRAUCHSANLEITUNG
5
Einstellungen für Computer und PlayStation 2/3
Vibration-Feedback ein- oder ausschalten
Drücken Sie „Select“ (Auswahl) + das Steuerkreuz (oben) 1 Sekunde lang, um das Vibration-Feedback
ein- oder auszuschalten.
Zur Bestätigung blinken alle 3 LED-Anzeigen 3 Sekunden lang.
Empfindlichkeitseinstellungen:
Drücken Sie „Select“ (Auswahl) + das Steuerkreuz (rechts), um die einzelnen
Empfindlichkeitseinstellungen anzuzeigen.
Stufe 1: Blau LED Geringste Empfindlichkeit
Stufe 2: Grüne LED
Stufe 3: Rote LED
Stufe 4: Blau und Grüne LED
Stufe 5: Grüne und Rote LED
Stufe 6: Blau und Rote LED Höchste Empfindlichkeit
Ändern der Tastenbelegung: (Ä, O, X, , L1, R1, L2, R2, L3, R3)
Schritt 1 Drücken Sie „Select“ (Auswahl) 3 Sekunden lang.
Schritt 2 Drücken Sie die Taste, deren Belegung Sie ändern möchten.
Schritt 3 Drücken Sie die Taste, die mit der Funktion belegt ist, die Sie zuweisen möchten.
(Zur Bestätigung blinken alle 3 LED-Anzeigen.)
Schritt 4 Drücken Sie „Select“ (Auswahl), um den Programmierungsmodus zu beenden.
Schritt 5 Wiederholen Sie die Schritte 1, 2, 3 und 4.
Beginnen Sie dabei mit der Taste aus Schritt 3.
Wenn Sie die Taste „Mode“ (Modus) 3 Sekunden lang drücken, werden alle programmierten Tasten auf die
jeweilige Standardeinstellung zurückgesetzt. (Zur Bestätigung blinkt die rote LED-Anzeige.)
6
5
4

Manuel d'utilisateur
6
Description du produit
A : Volant de course
B : Pédales
C : Connecteur USB (PC/Playstation3)
D : Connecteur Playstation2
E : Ventouse de fixation
Installation sur PC
Allumez le PC. Raccordez le connecteur USB au PC.
Le volant USB est prêt à l'emploi.
Ouvrez Contrôleurs de jeu dans le Panneau de configuration de Windows. Testez toutes les fonctions et
procédez à un étalonnage.
Note
Assurez-vous que votre jeu prend en charge ce type de contrôleur de jeu. Lisez le manuel d'instructions du jeu
pour profiter des meilleurs parameters.
Les options suivantes ne fonctionnent que dans la mesure où elles sont prises en charge par le jeu \:
Retour de force . (seulement ps2 & 3)
Fonctionnement analogique et numérique. Utilisez le bouton "Mode" pour basculer de l'un à l'autre.
Les boutons 1 – 4 / Δ, O, X, , et les leviers sont sensibles à la pression. (seulement ps2 & 3)
Appuyez sur le bouton Mode pendant 3 secondes pour réinitialiser tous les boutons programmés à leur valeur
par défaut. (La diode rouge clignote pour confirmer l'opération.)
Les pédales peuvent être branchées et débranchées à chaud. Fonctions des leviers:
Pédales branchées : Les leviers “F” et “G” ont les mêmes fonctions que Δet O.
Pédales débranchées : Les leviers “F” et “G” servent respectivement à l'accélération et au freinage.
Vous pouvez personnaliser les paramètres de votre contrôleur 4. Paramètres:
(Δ, O, X, , L1, R1, L2, R2, L3, R3)
1
3
2

Manuel d'utilisateur
7
Paramètres pour PC et Playstation2/3
Commutation du retour de force
Appuyez simultanément sur “Select” et sur le pavé directionnel (côté haut) pendant 1 seconde pour
activer/désactiver le retour de force.
Les 3 diodes clignotent pendant 3 secondes pour confirmer l'opération.
Paramétrage de la sensibilité :
Appuyez simultanément sur “Select” et sur le pavé directionnel (côté droit) pour varier le paramétrage de
la sensibilité :
Niveau 1 : Diode bleu sensibilité minimale
Niveau 2 : Diode verte
Niveau 3 : Diode rouge
Niveau 4 : Diodes bleu et verte
Niveau 5 : Diodes verte et rouge
Niveau 6 : Diodes bleu et rouge sensibilité maximale
Permutation de boutons : (Δ, O, X, , L1, R1, L2, R2, L3, R3)
Etape 1 Appuyez sur “Select” pendant 3 secondes.
Etape 2 Appuyez sur le bouton que vous voulez changer.
Etape 3 Appuyez sur le bouton de la fonction que vous voulez affecter.
(Les trois diodes clignotent pour confirmer l'opération.)
Etape 4 Appuyez sur “Select” pour quitter le mode de programmation.
Etape 5 Répétez les étapes 1, 2, 3 et 4 ;
commencez avec le bouton à partir de l'étape 3.
Appuyez sur le bouton Mode pendant 3 secondes pour réinitialiser tous les boutons programmés à leur valeur
par défaut. (La diode rouge clignote pour confirmer l'opération.)
6
4
5

Manuale utente
8
Informazioni sul prodotto
A: Volante per videogiochi
B: Pedali
C: Connettore USB (PC/Playstation3)
D: Connettore Playstation2
E: Morsetto da tavolo
Installazione su PC
Accendere il PC. Collegare l'USB al PC.
Volante USB pronto per l'uso.
Aprire i Game Controller nel pannello di controllo di Windows. Testare tutte le funzioni e calibrare.
N.B.
Assicurarsi che il gioco supporti questo tipo di game controller. Leggere il manuale di istruzioni del gioco per
trovare le impostazioni migliori.
Le opzioni che seguono funzionano solo se supportate dal gioco:
Force Vibration. (soltanto ps2 & 3)
Funzione digitale e analogica. Usare il pulsante ‘Mode’ per passare dall'una all'altra.
Ipulsanti 1 – 4 / Δ, O, X e le leve manuali sono sensibili alla pressione. (soltanto ps2 & 3)
La pressione del pulsante Mode per 3 secondi riporta tutti i pulsanti programmati alla loro impostazione
predefinita. (Il LED rosso lampeggia per conferma)
I pedali consentono lo scambio a caldo. Funzioni delle leve manuali:
Pedali collegati: Le leve manuali “F” e “G” hanno le stesse funzioni di Δe O
Pedali non collegati: Le leve manuali “F” e “G” funzionano da acceleratore e freno.
Si possono personalizzare le impostazioni del controller 4. Impostazioni:
(Δ, O, X, , L1, R1, L2, R2, L3, R3)
3
2
1

Manuale utente
9
Impostazioni per PC e Playstation2/3
Attivazione/disattivazione feedback con vibrazione
Premere “Select”+D-pad (su) per 1 secondo per attivare/disattivare il feedback con vibrazione:
Tutti e 3 i LED lampeggiano per 3 secondi per conferma
Impostazioni di sensibilità:
Premere “Select”+D-pad (destra) per passare attraverso le impostazioni di sensibilità:
Livello 1: Spia LED blu il meno sensibile
Livello 2: Spia LED verde
Livello 3: Spia LED rossa
Livello 4: LED blu e verde
Livello 5: LED verde e rosso
Livello 6: LED blu e rosso il più sensibile
Pulsanti scambiabili: (Δ, O, X, , L1, R1, L2, R2, L3, R3)
Fase 1 Premere “Select” per 3 secondi.
Fase 2 Premere il pulsante che si desidera cambiare
Fase 3 Premere il pulsante della funzione che si desidera assegnare.
(Tutti e 3 i LED lampeggiano per conferma)
Fase 4 Premere “Select” per uscire dalla modalità programmazione.
Fase 5 Ripetere le fasi 1,2,3 e 4;
iniziare con il pulsante dalla fase 3.
La pressione del pulsante Mode per 3 secondi riporta tutti i pulsanti programmati alla loro impostazione
predefinita. (Il LED rosso lampeggia per conferma.)
4
6
5

Manual del usuario
10
Información sobre el producto
AVolante
B: Pedales
C: Conector USB (PC/Playstation3)
D: Conectores Playstation2
E: Abrazadera de sujeción a la mesa
Instalación al PC
Encienda el ordenador. Conecte el conector USB al ordenador.
El volante USB está listo para usar.
Abra la opción Controladores de juego [Game Controllers] en el panel de control de Windows.
Compruebe y calibre todas las funciones.
Nota
Asegúrese de que su juego sea compatible con esta clase de controlador de juegos. Consulte en el manual de
instrucciones del juego las configuraciones más adecuadas.
Las siguientes opciones solo funcionan si son soportadas por el juego:
Efecto de vibración. (solamente ps2 & 3)
Funcionamiento análogo y digital. Use el botón ‘Modo’ [Mode] para conmutar entre ambas opciones.
Los Botones 1 – 4 / Δ, O, X, , y las palancas de mano son sensibles a la presión. (solamente ps2 & 3)
Pulse el botón Modo durante 3 segundos para asignar nuevamente a todos los botones programados sus
funciones estándar. (El testigo luminoso (LED) de color rojo se encenderá en señal de confirmación)
Los pedals son de insralación en caliente (hot swappable). Funciones de las palancas de mano:
Pedales conectados: Las palancas de mano “F” y “G” tienen las misma funciones de los botones Δy O
Pedales no conectados: Las palancas de mano “F” y “G” tienen la función de acelerador y freno.
Si lo desea, puede personalizar las funciones de su controlador 4. Configuraciones:
(Δ, O, X, , L1, R1, L2, R2, L3, R3)
3
2
1

Manual del usuario
11
Configuraciones para el PC y el Playstation2/3
Encienda o apague el efecto de vibración
Pulse el botón de selección [Select]+el control D-pad (hacia arriba) durante 1segundo para
activar/desactivar el efecto de vibración:
Los 3 testigos luminosos (LEDS) se encenderán durante 3 segundos en señal de confirmación
Configuración de la sensibilidad:
Pulse el botón de selección [Select]+el control D-pad (hacia la derecha) para navegar por los parámetros
de sensibilidad:
Nivel 1: LED amarillo menor grado de sensibilidad
Nivel 2: LED verde
Nivel 3: LED rojo
Nivel 4: LED amarillo y verde
Nivel 5: LED verde y rojo
Nivel 6: LED amarillo y rojo mayor grado de sensibilidad
Asignación de funciones a los botones: (Δ, O, X, , L1, R1, L2, R2, L3, R3)
Paso 1 Pulse el botón de selección [Select] durante 3 segundos.
Paso 2 Pulse el botón cuya función desea modificar
Paso 3 Pulse el botón de la función que desea asignar.
(Los 3 testigos luminosos (LEDS) se encenderán en señal de
confirmación)
Paso 4 Pulse el botón de selección [Select] para salir del modo de
programación.
Paso 5 Repita los pasos 1,2,3 y 4;
empiece con el botón a partir del paso 3.
Pulse el botón Modo durante 3 segundos para asignar nuevamente a todos los botones programados sus
funciones estándar. (El testigo luminoso (LED) de color rojo se encenderá en señal de confirmación)
6
5
4

Volante – MANUAL DO UTILIZADOR
12
Informação sobre o produto
A: Volante de competição
B: Pedais
C: Ficha USB (PC/Playstation3)
D: Ficha para a Playstation2
E: Fixador para mesa
Instalação no PC
Ligue o PC. Ligue a ficha USB ao PC.
Volante USB pronto a ser utilizado.
Teste todas as funções e calibre.
Certifique-se de que o seu jogo é compatível com este tipo de controlador. Leia o manual de instruções do jogo
para definir as melhores opções de configuração.
As opções que se seguem só funcionam se forem compatíveis com o jogo:
Força de vibração. (só nas ps2 & 3)
Função Analógica e Digital. Use o botão ‘Mode’ para alternar entre os dois modos.
Botões 1 – 4 / Δ, O, X, e manípulos são sensíveis à pressão de toque. (só nas ps2 & 3)
Se premir o botão ‘Mode’ durante 3 segundos, repõe as predefinições em todos os botões programados. (LED
vermelho pisca para confirmar)
Os pedais são substituíveis automaticamente. Funções dos manípulos:
Pedais ligados: Manípulos “F” e “G” têm as mesmas funções que Δe O
Pedais desligados: Manípulos “F” e “G” funcionam como acelerador e travão.
Pode personalizar as definições do controlador 4. Definições:
(Δ, O, X, , L1, R1, L2, R2, L3, R3)
3
2
1

Volante – MANUAL DO UTILIZADOR
13
Definições para PC e Playstation2/3
Ligar/desligar a sensação de vibração
Prima “Select”+D-pad (para cima) durante 1 segundo para ligar/desligar a sensação de vibração:
Os 3 LEDs piscam durante 3 segundos para confirmar
Definições da sensibilidade:
Prima “Select”+D-pad (direita) para percorrer as definições da sensibilidade:
Nível 1: LED azul menos sensível
Nível 2: LED verde
Nível 3: LED vermelho
Nível 4: LED azul e verde
Nível 5: LED vermelho e verde
Nível 6: LED azul e vermelho mais sensível
Trocar de botões: (Δ, O, X, , L1, R1, L2, R2, L3, R3)
Passo 1 Prima “Select” durante 3 segundos.
Passo 2 Prima o botão que pretende mudar
Passo 3 Prima o botão da função que pretende atribuir.
(os 3 LEDs piscam para confirmar)
Passo 4 Prima “Select” para Sair do modo de programação.
Passo 5 Repita os passos 1, 2, 3 e 4;
comece com o botão do passo 3.
Se premir o botão ‘Mode’ durante 3 segundos, repõe as predefinições em todos os botões programados. (LED
vermelho pisca para confirmar)
6
5
4
GEBRUIKERSHANDLEIDING
14
Product informatie
A: Racestuur
B: Pedalen
C: USB-stekker (PC/Playstation3)
D: Playstation2 connector
E: Tafelklem
Installation PC
Schakel de pc in. Sluit de USB-kabel aan op de pc.
Het USB-stuur is nu gereed voor gebruik.
Open de spelbesturing in het Configuratiescherm van Windows. Test alle functie en kalibreer het stuur.
Note
Controleer of het spel deze soort controllers ondersteund. Lees de handleiding van het spel voor de beste
instellingen.
De volgende opties werken alleen als ze door het spel ondersteund worden:
Force Vibration. (Alleen PS 2 & 3)
Analoge en Digitale functie. Gebruik de ‘Mode’ knop om hier tussen te wisselen.
Knoppen 1 – 4 / Δ, O, X, , en de handflippers zijn druk gevoelig. (Alleen PS2 & 3)
Door de ‘Mode’ knop gedurende 3 seconden ingedrukt te houden, worden alle geprogrammeerde knoppen
terug gezet naar de fabrieksinstellingen. (Rode LED knippert ter bevestiging)
De pedalen kunnen tijdens het spelen worden aangesloten of losgekoppeld. Functies van de hendels:
Pedalen aangesloten: Hendels “F” en “G” hebben dezelfde functie als Δand O.
Pedalen niet aangesloten: Hendels “F” en “G” hebben de functies van gas geven en remmen.
U kunt de instellingen van de knoppen zelf aanpassen 4. Settings:
(Δ, O, X, , L1, R1, L2, R2, L3, R3)
3
2
1

GEBRUIKERSHANDLEIDING
15
Instellingen voor de pc en Playstation2/3
Trillingsfeedback in/uit schakelen
Druk 1 seconde op “Select”+D-blok (boven) om de trillingsfeedback in- of uit te schakelen.
De LED’s knipperen alledrie gedurende 3 seconden ter bevestiging.
Stuurgevoeligheid instellen:
Druk gelijktijdig op “Select”+D-blok (rechts) om de gevoeligheid van het stuur in te stellen.
Niveau 1: Blauwe LED Laagste gevoeligheid
Niveau 2: groene LED
Niveau 3: rode LED
Niveau 4: blauwe en groene LED
Niveau 5: groene en rode LED
Niveau 6: blauwe en rode LED Hoogste gevoeligheid
Knoppen programmeren: (Δ, O, X, , L1, R1, L2, R2, L3, R3)
Stap 1 Druk gedurende 3 seconde op “Select”.
Stap 2 Druk op de knop die u wilt wijzigen
Stap 3 Druk op de knop van de functie die u wilt toewijzen.
(Alle LED’s knipperen ter bevestiging)
Stap 4 Druk op “Select” om de programmeermodus te sluiten.
Stap 5 Herhaal stap 1t/m4 begin nu met de knop van stap 3
begin with button from Stap3.
Door de ‘Mode’ knop gedurende 3 seconden ingedrukt te houden, worden alle geprogrammeerde knoppen
terug gezet naar de fabrieksinstellingen. (Rode LED knippert ter bevestiging.)
4
6
5

Rat – BRUGSVEJLEDNING
16
Produktinformation
A: Racerrat
B: Fodpedaler
C: USB tilslutning (PC/Playstation3)
D: Playstation2 tilslutning
E: Bordklemme
Installation PC
Tænd computeren. Tilslut USB på PC'en.
USB-rat klart til brug.
Åbn Game Controller i Windows betjeningspanel. Test alle funktioner og indstil.
Kontroller at dit spil understøtter denne type game controller. Læs instruktionerne til spillet for at få de bedste
indstillinger.
Følgende muligheder vil kun fungere, hvis de er understøttet af spillet:
Kraftvibration. (kun på ps2 & 3)
Analog og digital funktion. Brug ‘Mode’-knappen til at skifte mellem dem.
Knap 1 – 4 / Δ, O, X, , og håndtag er trykfølsomme. (kun på ps2 & 3)
Når der trykkes på ‘Mode’-knappen i 3 sekunder, vil alle programmerede knapper gå tilbage til
standardindstillingerne. (Rød LED vil blinke, som bekræftelse)
Fodpedalerne kan ikke byttes om. Håndtagenes funktioner:
Pedaler tilsluttet: Håndtag “F” og “G” har samme funktioner som Δog O
Pedaler ikke tilsluttet: Håndtag “F” og “G” fungerer som gaspedal og bremse.
Du kan indstille dine controller-indstillinger 4. Indstillinger:
(Δ, O, X, , L1, R1, L2, R2, L3, R3)
3
2
1

Rat – BRUGSVEJLEDNING
17
Indstillinger til PC og Playstation2/3
Tænd/sluk vibrationsfeedback
Tryk på “Vælg”+D-tast (op) i 1 sekund for at tænde/slukke vibrationsfeedback:
Alle 3 LED vil blinke i 3 sekunder som bekræftelse
eFølsomhedsindstillinger:
Tryk på “Vælg”+D-tast (højre) for at køre gennem følsomhedsindstillingerne:
Niveau 1: Blå LED mindst følsom
Niveau 2: Grøn LED
Niveau 3: Rød LED
Niveau 4: Blå og grøn LED
Niveau: Rød og grøn LED
Niveau: Blå og rød LED mest følsom
Skifte knapfunktion: (Δ, O, X, , L1, R1, L2, R2, L3, R3)
Trin 1 Tryk på “Vælg” i 3 sekunder.
Trin 2 Tryk på den knap du vil ændre.
Trin 3 Tryk på knappen til den funktion, du vil bruge.
(Alle 3 LED vil blinke som bekræftelse)
Trin 4 Tryk på “Vælg” for at forlade programmingsfunktionen.
Trin 5 Gentag trin 1,2,3 og 4;
begynd med knappen fra trin 3.
Når det trykkes på ‘Mode’-knappen i 3 sekunder, vil alle programmerede knapper gå tilbage til
standardindstillingerne. (Rød LED vil blinke som bekræftelse)
6
5
4

Ohjauspyörä – KÄYTTÖOPAS
18
Tuotetiedot
A: Kilparatti
B: Polkimet
C: USB-liitin (PC/Playstation3)
D: Playstation2 -liitin
E: Pöytäpuristin
Asennus PC:lle
Kytke PC päälle. Liitä USB-liitin PC:hen.
USB-ratti on valmis käytettäväksi.
Avaa Peliohjaimet Windowsin Ohjauspaneelista. Testaa kaikki toiminnot ja kalibroi ohjain.
Varmista, että peli tukee tämäntyyppistä ohjainta. Katso pelin käyttöohjeesta parhaat asetukset.
Seuraavat asetukset toimivat vain, jos peli tukee niitä:
Force-tärinä. (Vain PS2 & 3)
Analoginen ja digitaalinen tila. Käytä Mode-painiketta tilojen välillä vaihtamiseen.
Painikkeet 1 – 4 / Δ, O, X, ja vaihdevivut ovat paineherkkiä. (Vain PS2 & 3)
Painamalla Mode-painiketta 3 sekunnin ajan voit palauttaa kaikki ohjelmoidut painikkeet oletusasetuksiinsa.
(Punainen merkkivalo vilkkuu vahvistukseksi)
Polkimet tukevat hotswap-toimintoa. Vaihdevipujen toiminnot:
Polkimet liitetty: Vaihdevivuilla “F” ja “G” on samat toiminnot kuin painikkeilla Δja O
Polkimia ei liitetty: Vaihdevivut “F” ja “G” toimivat kaasuna ja jarruna.
Voit mukauttaa ohjaimen asetuksia4. Asetukset:
(Δ, O, X, , L1, R1, L2, R2, L3, R3)
3
2
1
This manual suits for next models
1
Table of contents
Languages:
Other Trust Video Game Controllers manuals

Trust
Trust Predator Extreme User manual

Trust
Trust COMPACT VIBRATION FEEDBACK STEERING WHEEL User manual

Trust
Trust VIBRATION FEEDBACK RALLYMASTER USB User manual

Trust
Trust GM-1500 User manual

Trust
Trust 17735 User manual

Trust
Trust Sight Fighter PSX User manual

Trust
Trust Thunder Wheel 3D User manual

Trust
Trust GXT 28 User manual

Trust
Trust GXT 580 User manual

Trust
Trust GM-1200 User manual