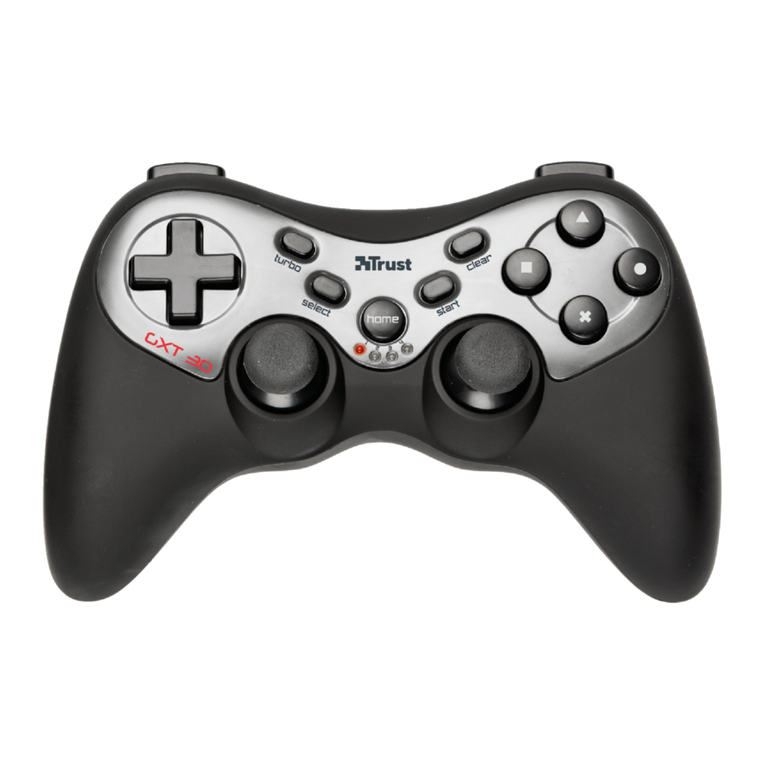
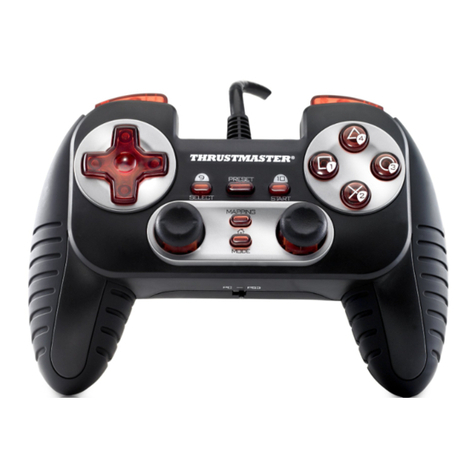
Trust GM-1500 User manual

UK
DE
FR
IT
ES
PL
NL
PT
GR
DK
SE
HU
CZ
FI
NO
TR
RU
User’s manual
GM-1500 COMPACT DUAL STICK GAMEPAD
SK
UK
DE
FR
IT
ES
PL
NL
PT
GR
DK
SE
HU
CZ
FI
NO
TR
RU
SK
RO
BU
CN
Version 1.0

USER’S MANUAL
I
L
M
N
K
G
A
D
C
E
J F
OP
H
B
Installation PC
1
2
Windows XP
Windows
98SE/ME/2000
ON
2
1

USER’S MANUAL
3
44
2
1
2
1
5
Windows XP Windows 98SE / ME / 2000
2
3
1

USER’S MANUAL
1
UK
Product information
PC PlayStation2
A Buttons 1 - 4 Buttons ∆, O, X,
B Button 5 L2
C Button 6 R2
D Button 7 L1
E Button 8 R1
F Button 9 Select
G Button 10 Start
H X/Y-axis + button 11 (press)
function only in analog mode Left direction + L3 (press)
function in both analog and digital mode
I Z-axis + button 12 (press)
function only in analog mode Right direction + R3 (press)
function in both analog and digital mode
J Digital mode: X/Y-axis
Analog mode : Hat Switch (Point of View) Direction pad
K Analog / Digital mode switch Analog / Digital mode switch
L Turbo: Continuous (shoot) action Turbo: Continuous (shoot) action
M Macro: Program a sequence of button
actions under one button Macro: Program a sequence of button actions
under one button
N Macro indicator Macro indicator
O - Gamepad connection
P USB connection -
Installation PC
1 (1)Turn on the PC. (2) Connect USB to PC.
2 Open gaming control in Windows Control Panel.
3 Select this product (Status must be OK) then click properties.
4
(1) Click Test:
Digital mode
Press 8-D pad to each direction and see if the cross on screen responds accordingly.
If all work properly, then click OK. Product is ready to use.
Otherwise repeat step 5-6.
Analog mode

USER’S MANUAL
2
Press Analog button to activate analog mode.
Press the 12 buttons and see if they respond to 1-12 on screen.
Press 8-D pad to each direction and see if the Point of View Hat responds accordingly.
Move left side mini stick to see if the cross on screen responds accordingly.
Move right side mini stick to see if Z-axis bars respond accordingly.
(2) Click OK. The controller is ready for use.
Note
Force Vibration only works with PlayStation2 games supporting vibration.
Buttons will be pressure sensitive, only with PlayStation2 games supporting this function.
Turbo mode
• (1) Press and hold Turbo button, press a fire button (1 – 8 / ∆, O, X, , L1, L2, R1, R2) = turbo fire on.
• (2) Press and hold Turbo button, press the same button again = automatic turbo fire.
• (3) Press and hold Turbo button, press the same button again = turbo fire off.
Macro mode: Assign button(s) to fire button
• Program: (1) press and hold Macro <
indicator lit
>, (2) choose a button which will become the macro button
(5, 6, 11, 12 / L2, L3, R2, R3) <
indicator blinking
>, (3) select the button sequence by pressing one or more
buttons from D-pad or 1 – 8 / ∆, O, X, , L1, L2, R1, R2, (4) press Macro <
indicator off
>.
• Use: press defined button to activate te programmed button sequence <
indicator blinks for each button
>.
A maximum of 15 actions can be programmed.
• Disable: (1) press Macro <
indicator lit
>, (2) press the defined button <
indicator blinking
>, (3) press Macro
<
indicator off
>.
• Speed setting for Macro (0.03 or 0.1 seconds):
- Quick: (1) Push and hold Macro, (2) press ↑on D-pad <
indicator blinks quickly during 2 seconds
>.
- Slow: (1) Push and hold Macro, (2) press ↓on D-pad <
indicator blinks slower during 2 seconds
>.
Use on PlayStation2
• Please follow PlayStation2 instruction manual.
Use on PC
• Make sure the controller is set as preferred device (Windows XP), or ID is 1 (Windows 98SE/ME/2000), see
image 5.
• Make sure your game supports this kind of game controller. Read the instruction manual of the game to
approach the best settings.
• Do not extend USB cables over 5 meters.
See www.trust.com/14863 for up-to-date FAQs and instruction manuals. For extensive service, register at
www.trust.com/register.
BEDIENUNGSANLEITUNG
1
DE
Produktinformationen
PC Playstation2
ATasten 1–4 Tasten ∆, O, X,
BTaste 5 L2
CTaste 6 R2
DTaste 7 L1
ETaste 8 R1
FTaste 9 Wahl
GTaste 10 Anfangen
HX/Y-Achse + Taste 11 (drücken)
Funktioniert nur im analogen Modus.
Nach links + L3 (drücken)
Funktioniert im analogen und im digitalen
Modus.
IZ-Achse + Taste 12 (drücken)
Funktioniert nur im analogen Modus.
Nach rechts + R3 (drücken)
Funktioniert im analogen und im digitalen
Modus.
JDigitaler Modus: X/Y-Achse
Analoger Modus: Coolie-Hat (Rundumsicht) Steuerkreuz
KUmschalter für analog/digital Umschalter für analog/digital
LTurbo: Dauerfeuerfunktion Turbo: Dauerfeuerfunktion
MMakro: Belegen einer Taste mit einer Folge
von Tastenaktionen. Makro: Belegen einer Taste mit einer Folge
von Tastenaktionen.
NMakroanzeige Makroanzeige
O- Gamepad-Anschluss
PUSB-Anschluss -
Installation: PC
1 (1) Schalten Sie den PC ein. (2) Schließen Sie den USB-Anschluss an den PC an.
2 Öffnen Sie die Gamecontroller in der Systemsteuerung von Windows.
3 Markieren Sie dieses Produkt (der Status muss „OK“ sein) und klicken Sie auf „Eigenschaften“.
4
(1) Klicken Sie auf „Test“:
Digitaler Modus:
Betätigen Sie das 8-Wege-Steuerkreuz in allen Richtungen und beobachten Sie, ob das Kreuz auf dem
Bildschirm sich entsprechend bewegt.
Wenn alles richtig funktioniert, klicken Sie auf „OK“. Das Produkt ist einsatzbereit.
Wiederholen Sie andernfalls Punkt 5–6.
Analoger Modus:

BEDIENUNGSANLEITUNG
2
Stellen Sie den analogen Modus mit dem Umschalter ein.
Drücken Sie auf alle 12 Tasten und beobachten Sie, ob sie mit 1–12 auf dem Bildschirm
übereinstimmen.
Betätigen Sie das 8-Wege-Steuerkreuz in allen Richtungen und beobachten Sie, ob der Coolie-Hat
entsprechend reagiert.
Bewegen Sie den linken Mini-Joystick, um zu überprüfen, ob das Kreuz auf dem Bildschirm
entsprechend reagiert.
Bewegen Sie den rechten Mini-Joystick, um zu überprüfen, ob die Balken für die Z-Achse entsprechend
reagieren.
(2) Klicken Sie auf „OK“. Der Controller ist einsatzbereit.
Hinweis
Die Force Vibration funktioniert nur mit PS2-Spielen, die Vibration unterstützen.
Turbofunktion
• (1) Drücken Sie auf die Turbotaste, halten Sie sie eingedrückt und drücken Sie auf eine Feuertaste (1–8 / ∆,
O, X, , L1, L2, R1, R2) = Dauerfeuer aktiviert.
• (2) Drücken Sie auf die Turbotaste, halten Sie sie eingedrückt und drücken Sie erneut auf dieselbe Taste =
automatisches Dauerfeuer.
• (3) Drücken Sie auf die Turbotaste, halten Sie sie eingedrückt und drücken Sie erneut auf dieselbe Taste =
Dauerfeuer deaktiviert.
Makrofunktion: Taste(n) der Feuertaste zuweisen
• Programmieren: (1) Drücken Sie af die Makrotaste und halten Sie sie eingedrückt <
Anzeige leuchtet
>, (2)
wählen Sie eine Taste zum Programmieren aus (5, 6, 11, 12 / L2, L3, R2, R3) <
Anzeige blinkt
>, (3)
bestimmen Sie eine Tastenfolge, indem Sie eine oder mehrere Tasten des Steuerkreuzes oder 1–8 / ∆, O, X,
, L1, L2, R1, R2 eindrücken, (4) drücken Sie auf die Makrotaste <
Anzeige erlischt
>.
• Verwendung: Durch Betätigung der definierten Taste wird die programmierte Tastenfolge aktiviert <
Anzeige
leuchtet für jede Taste
>.
Es können bis zu 15 Aktionen programmiert werden.
• Deaktivierung: (1) Drücken Sie auf die Makrotaste <
Anzeige leuchtet
>, (2) danach auf die definierte Taste
<
Anzeige blinkt
>, (3) und wieder auf die Makrotaste <
Anzeige erlischt
>.
• Einstellen der Makrogeschwindigkeit (0,03 oder 0,1 s):
- Schnell: (1) Drücken Sie auf die Makrotaste und halten Sie sie eingedrückt, (2) drücken Sie auf die Taste ↑
auf dem Steuerkreuz <
Anzeige blinkt 2 Sekunden lang schnell
>.
- Langsam: (1) Drücken Sie auf die Makrotaste und halten Sie sie eingedrückt, (2) drücken Sie auf die Taste
↓auf dem Steuerkreuz <
Anzeige blinkt 2 Sekunden lang langsam
>.
Gebrauch mit der Playstation 2
• Befolgen Sie die Anweisungen im Handbuch zur Playstation 2.

BEDIENUNGSANLEITUNG
3
DE
Gebrauch mit dem PC
• Stellen Sie sicher, dass der Controller als bevorzugtes Gerät eingestellt ist (Windows XP) bzw. dass die ID 1
ist (Windows 98SE/ME/2000), siehe Abbildung 5.
• Das Spiel muss diesen Gamecontrollertyp unterstützen. Ziehen Sie die Anleitung des Spiels zu Rate, um die
besten Einstellungen zu finden.
• Verwendete USB-Kabel dürfen nicht länger als 5 m sein.
Die aktuellen FAQ und Anleitungen finden Sie unter www.trust.com/14863. Registrieren Sie sich auf
www.trust.com/register, um unseren umfassenden Service in Anspruch nehmen zu können.

MANUEL DE L’UTILISATEUR
1
FR
Informations sur le produit
Ordinateur PlayStation2
A Boutons 1 - 4 Boutons ∆, O, X,
B Bouton 5 L2
C Bouton 6 R2
D Bouton 7 L1
E Bouton 8 R1
F Bouton 9 Sélection
G Bouton 10 Démarrer
H Axe X/Y + bouton 11 (appuyer)
fonctionne uniquement en mode
analogique
Direction gauche + L3 (appuyer)
fonctionne en modes analogique et
numérique
I Axe Z + bouton 12 (appuyer)
fonctionne uniquement en mode
analogique
Direction droite + R3 (appuyer)
fonctionne en modes analogique et
numérique
J Mode numérique : Axe X/Y
Mode analogique : Interrupteur de
contrôle (Point de vue)
Pavé des directions
K Interrupteur mode analogique /
numérique Interrupteur mode analogique / numérique
L Turbo : Action continue (jouer) Turbo : Action continue (jouer)
M Macro : Programmer une séquence de
boutons dans un seul bouton Macro : Programmer une séquence de
boutons dans un seul bouton
N Témoin Macro Témoin Macro
O - Raccordement du boîtier de commande
P Connexion USB -
Installation sur l’ordinateur
1 (1) Allumez l’ordinateur. (2) Effectuez le raccordement USB sur l’ordinateur.
2 Ouvrez le contrôleur de jeux dans le Panneau de configuration Windows.
3 Sélectionnez ce produit (État doit être OK), puis cliquez sur Propriétés.
4
(1) Cliquez sur Test :
Mode numérique
Appuyez sur le pavé 8-D dans chaque direction et vérifiez si la croix affichée sur l’écran répond en
conséquence.
Si tout fonctionne correctement, cliquez sur OK. Le produit peut être utilisé.

MANUEL DE L’UTILISATEUR
2
Sinon recommencez les étapes 5 et 6.
Mode analogique
Appuyez sur le bouton Analogique pour activer le mode correspondant.
Appuyez sur les 12 boutons afin de vérifier qu’ils répondent à 1-12 sur l’écran.
Appuyez sur le pavé 8-D dans chaque direction et vérifiez que Contrôle du point de vue répond en
conséquence.
Déplacez le mini stick vers la gauche afin de vérifier que la croix affichée sur l’écran répond en
conséquence.
Déplacez le mini stick vers la droite afin de vérifier que la barre de l’axe Z répond en conséquence.
(2) Cliquez sur OK. Le contrôleur peut être utilisé.
Remarque
Force Vibration ne fonctionne qu’avec les jeux PlayStation2 prenant en charge la vibration.
Mode Turbo
• (1) Maintenez enfoncé le bouton Turbo, appuyez sur un bouton Fire (1 – 8 / ∆, O, X, , L1, L2, R1, R2) =
activation du mode de déclenchement turbo.
• (2) Maintenez enfoncé le bouton Turbo, appuyez de nouveau sur ce bouton = activation du mode turbo
automatique.
• (3) Maintenez enfoncé le bouton Turbo, appuyez de nouveau sur ce bouton = désactivation du mode turbo.
Mode Macro : Affectation de boutons au bouton Fire
• Programme : (1) maintenez enfoncé le bouton Macro <
témoin allumé
>, (2) choisissez un bouton Macro (5,
6, 11, 12 / L2, L3, R2, R3) <
témoin clignotant
, (3) sélectionnez la séquence de boutons en appuyant sur un
ou plusieurs boutons du pavé D ou 1 – 8 / ∆, O, X, , L1, L2, R1, R2, (4) appuyez sur Macro <
témoin
désactivé
>.
• Utilisation : appuyez sur le bouton défini pour activer la séquence de boutons programmée <
le témoin
clignote pour chaque bouton
>.
Il est possible de programmer 15 actions au maximum.
• Désactivation : (1) appuyez sur Macro <
témoin allumé
>, (2) appuyez sur le bouton défini <
témoin
clignotant
>, (3) appuyez sur Macro <
témoin éteint
>.
• Paramètre Vitesse de Macro (0,03 ou 0,1 secondes) :
- Rapide : (1) Maintenez enfoncé le bouton Macro, (2) appuyez sur le bouton ↑du pavé D <
le témoin
clignote rapidement pendant 2 secondes
>.
- Lent : (1) Maintenez enfoncé le bouton Macro, (2) appuyez sur le bouton ↓du pavé D <
le témoin clignote
lentement pendant 2 secondes
>.
Utilisation sur PlayStation2
• Consultez le mode d’emploi de PlayStation2.
Utilisation sur l’ordinateur

MANUEL DE L’UTILISATEUR
3
FR
• Vérifiez que le contrôleur est défini comme périphérique principal (Windows XP), ou que ID est égal à 1
(Windows 98SE/ME/2000), voir l’image 5.
• Vérifiez que votre jeu prend en charge ce type de contrôleur de jeux. Pour connaître les meilleurs
paramètres, consultez le mode d’emploi.
• La longueur des câbles USB ne doit pas dépasser 5 mètres.
Allez sur le site www.trust.com/14863 pour accéder aux réponses aux questions fréquemment posées et aux
manuels d’instructions. Pour obtenir un service étendu, enregistrez-vous sur le site www.trust.com/register.

IT
MANUALE UTENTE
1
Informazioni sul prodotto
PC PlayStation2
A Tasti 1-4 Tasti ∆, O, X,
BTasto 5 L2
C Tasto 6 R2
D Tasto 7 L1
E Tasto 8 R1
F Tasto 9 Select
G Tasto 10 Start
H Asse X/Y + tasto 11 (premere)
Funziona solo in modalità analogica
Direzione sinistra + L3 (premere)
Funziona in modalità analogica e digitale
I Asse Z + tasto 12 (premere)
Funziona solo in modalità analogica
Direzione destra + R3 (premere)
Funziona in modalità analogica e digitale
J Modalità digitale: Asse X/Y
Modalità analogica: Tasto HAT (Punto di
vista)
Pad direzionale
K Interruttore modalità analogica/digitale Interruttore modalità analogica/digitale
L Turbo: azione continua (sparo) Turbo: azione continua (sparo)
MMacro: programma una sequenza di azioni
per un solo tasto Macro: programma una sequenza di azioni per
un solo tasto
N Indicatore Macro Indicatore Macro
P - Connettore gamepad
Q Connettore USB -
Installazione - PC
1 (1) Accendere il PC. (2) Effettuare la connessione USB con il PC.
2 Aprire “Gaming control” (“Periferiche di gioco”) nel Pannello di controllo di Windows.
3 Selezionare questo prodotto (la voce “Status” (“Stato”) deve essere impostata su “OK”), quindi fare
clic su “Properties” (“Proprietà”).
4
(1) Fare clic su “Test”:
Modalità digitale
Premere il pad 8-D in ogni direzione e verificare che la croce visualizzata a schermo risponda di
conseguenza.
Se tutto funziona correttamente, fare clic su “OK”. Il prodotto è pronto per l'utilizzo.

MANUALE UTENTE
2
In caso contrario, ripetere i passaggi 5-6.
Modalità analogica
Premere il tasto Analog per attivare la modalità analogica.
Premere i 12 tasti e verificare che rispondano alla sequenza 1-12 visualizzata a schermo.
Premere il pad 8-D in ogni direzione e verificare che il punto di vista HAT risponda di conseguenza.
Muovere il mini stick di sinistra e verificare che la croce visualizzata a schermo risponda di conseguenza.
Muovere il mini stick di destra e verificare che le barre dell’asse Z rispondano di conseguenza.
(2) Fare clic su OK. La periferica di gioco è pronta per l'uso.
Note
Il sistema Force Vibration funziona solo con i giochi per PlayStation2 che supportano la vibrazione.
Modalità Turbo
• (1) Tenere premuto il tasto Turbo, premere un pulsante di fuoco (1 – 8 / ∆, O, X, , L1, L2, R1, R2) = fuoco
“turbo” attivo.
• (2) Tenere premuto il tasto Turbo, quindi premere nuovamente il tasto = fuoco “turbo” automatico.
• (3) Tenere premuto il tasto Turbo, quindi premere nuovamente il tasto = fuoco “turbo” disattivo.
Modalità Macro: assegnazione tasti al pulsante di fuoco
• Programmazione: (1) tenere premuto il tasto Macro <
l’indicatore si accende
>. (2) Scegliere il tasto che
diventerà il tasto macro (5, 6, 11, 12 / L2, L3, R2, R3) <
l’indicatore lampeggia
>. (3) Selezionare la sequenza
di tasti premendo uno o più tasti sul D-pad o 1 – 8 / ∆, O, X, , L1, L2, R1, R2. (4) Premere il tasto Macro
<
l’indicatore si spegne
>.
• Utilizzo: premere il tasto definito dall'utente per attivare la sequenza di tasti programmata <
l’indicatore
lampeggia per ogni tasto
>.
E possibile programmare fino a un massimo di 15 azioni.
• Disattivazione: (1) premere il tasto Macro <
l’indicatore si accende
>. (2) Premere il tasto definito dall’utente
<
l’indicatore lampeggia
>. (3) Premere il tasto Macro <
l’indicatore si spegne
>.
• Impostazione della velocità della funzione Macro (0,03-0,1 secondi):
- Veloce: (1) tenere premuto il tasto Macro. (2) Premere il tasto ↑sul D-pad <
l’indicatore lampeggia
velocemente per 2 secondi
>.
- Lento: (1) Tenere premuto il tasto Macro. (2) Premere il tasto ↓sul D-pad <
l’indicatore lampeggia più
lentamente per 2 secondi
>.
Utilizzo con la PlayStation2
• Consultare il manuale di istruzioni della PlayStation2.
Utilizzo con il PC
• Verificare che la periferica di gioco sia impostata come periferica preferita (Windows XP), o che l’ID sia
impostato su 1 (Windows 98SE/ME/2000). Vedere l’immagine 5.

IT
MANUALE UTENTE
3
• Verificare che il gioco supporti questo tipo di periferica. Per informazioni sulle impostazioni ottimali, leggere il
manuale di istruzioni del gioco.
• Non utilizzare cavi USB più lunghi di 5 metri.
Per le FAQ aggiornate e i manuali di istruzioni andare all'indirizzo www.trust.com/14863. Per un'assistenza
completa, registrarsi all'indirizzo www.trust.com/register.
MANUAL DEL USARIO
1
ES
Información sobre el producto
PC PlayStation2
ABotones 1 - 4 Botones ∆, O, X,
BBotón 5 L2
CBotón 6 R2
DBotón 7 L1
EBotón 8 R1
FBotón 9 Seleccionar
GBotón 10 Arrancar
HEje X/Y + botón 11 (pulsar)
funciona solamente en modo analógico Dirección izquierda + L3 (pulsar)
funciona en ambos modos analógico y
digital
IEje Z + botón 12 (pulsar)
funciona solamente en modo analógico Dirección derecha + R3 (pulsar)
funciona en ambos modos analógico y
digital
JModo digital: eje X/Y
Modo analógico : Hat switch (punto de
vista)
Sección de desplazamiento
KConmutador modo analógico / digital Conmutador modo analógico / digital
LTurbo: Acción (disparo) continua Turbo: Acción (disparo) continua
MMacro: Programar una secuencia de
acciones en un solo botón Macro: Programar una secuencia de acciones
en un solo botón
NIndicador de macro Indicador de macro
O- Conector para panel de control de juegos
PConexión USB -
Instalación en ordenador
1 (1) Encienda el ordenador. (2) Conecte el cable USB al ordenador.
2 Abra el control de juegos en el Panel de control de Windows.
3 Seleccione este producto (Estado debe ser OK) y haga clic en Propiedades
4
(1) Haga clic en Prueba:
Modo digital
Pulse el D-pad de 8 direcciones en cada dirección y verifique si la cruz en la pantalla responde
correctamente.
Si todo funciona bien, haga clic en OK. El dispositivo está listo para ser usado.
Si no funciona bien, repita los pasos 5-6.
Modo analógico

MANUAL DEL USARIO
2
Pulse el botón de modo Analógico para activar el modo analógico.
Pulse los 12 botones y observe en la pantalla si responden a 1-12.
Pulse el D-pad de 8 direcciones en cada dirección y verifique si el Hat switch (punto de vista) responde
correctamente.
Mueva la minipalanca izquierda para verificar si la cruz en la pantalla responde correctamente.
Mueva la minipalanca derecha para verificar si las barras del eje Z responden correctamente.
(2) Haga clic en OK. El mando está listo para ser usado.
Nota
El sistema Force Vibration funciona solamente con juegos PlayStation2 con soporte para vibración.
Modo Turbo
• (1) Pulse y sostenga el botón de Turbo, pulse un botón de disparo (1 – 8 / ∆, O, X, , L1, L2, R1, R2) =
disparo turbo activado.
• (2) Pulse y sostenga el botón de Turbo, vuelva a pulsar el mismo botón = disparo turbo automático.
• (3) Pulse y sostenga el botón de Turbo, vuelva a pulsar el mismo botón = disparo turbo desactivado.
Modo macro: Asignar botón(es) al botón de disparo
• Programar: (1) pulse y sostenga el botón de Macro <
indicador encendido
>, (2) seleccione un botón, que se
convertirá en botón de macro (5, 6, 11, 12 / L2, L3, R2, R3) <
indicador parpadea
>, (3) seleccione la
secuencia de botones, pulsando uno o varios botones del D-pad o 1 – 8 / ∆, O, X, , L1, L2, R1, R2, (4)
pulse Macro <
indicador apagado
>.
• Usar: pulse el botón programado para activar la secuencia de botones programada <
indicador parpadea por
cada botón
>.
Se puede programar un máximo de 15 acciones.
• Desactivar: (1) pulse Macro <
indicador encendido
>, (2) pulse el botón programado <
indicador parpadea
>,
(3) pulse Macro <
indicador apagado
>.
• Ajuste de velocidad para Macro (0,03 o 0,01 segundos):
- Rápido: (1) Pulse y sostenga el botón Macro, (2) pulse ?en D-pad <
indicador parpadea rápidamente
durante 2 segundos
>.
- Lento: (1) Pulse y sostenga el botón Macro, (2) pulse ?en D-pad <
indicador parpadea más despacio
durante 2 segundos
>.
Uso con PlayStation2
• Siga las instrucciones en el manual del PlayStation2.
Uso con ordenador

MANUAL DEL USARIO
3
ES
• Asegúrese de que el mando ha sido configurado como dispositivo preferido (Windows XP), o que la ID es 1
(Windows 98SE/ME/2000), véase la figura 5.
• Asegúrese de que su juego soporta este tipo de mando. Lea el manual de instrucciones del juego para
aproximar la mejor configuración posible.
• Los cables USB no deben extenderse más de 5 metros.
Visite www.trust.com/14863 para consultar las últimas FAQ y los manuales de instrucción. Para un servicio más
extenso, regístrese en www.trust.com/register

PODRĘCZNIK UŻYTKOWNIKA
1
PL
Informacje o produkcie
Komputer PC PlaySation2
APrzyciski 1 - 4 Przyciski ∆, O, X, 天
BPrzycisk 5 L2
CPrzycisk 6 R2
DPrzycisk 7 L1
EPrzycisk 8 R1
FPrzycisk 9 Wybierz
GPrzycisk 10 Rozpocznij
HOśX/Y + przycisk 11 (naciśnij)
działa tylko w trybie analogowym
Lewy kierunkowy + L3 (naciśnij)
działa w trybach analogowym i cyfrowym
IOśZ + przycisk 12 (naciśnij)
działa tylko w trybie analogowym
Prawy kierunkowy + R3 (naciśnij)
działa w trybach analogowym i cyfrowym
JTryb cyfrowy: ośX/Y
Tryb analogowy: przycisk HAT (przełączanie
widoku)
Pad pozycyjny
KPrzełącznik trybu analogowego/cyfrowego Przełącznik trybu analogowego/cyfrowego
LPrzycisk Turbo: akcja ciągła (ostrzał) Przycisk Turbo: akcja ciągła (ostrzał)
MPrzycisk Macro: przypisanie sekwencji
działańdo pojedynczego przycisku
Przycisk Macro: przypisanie sekwencji działań
do pojedynczego przycisku
NKontrolka macra Kontrolka makra
O- Złącze gamepada
PZłącze USB -
Instalacja na komputerze PC
1 (1) Włącz komputer. (2) Podłącz kabel USB do komputera.
2 Otwórz "Kontrolery gier" w "Panelu sterowania" systemu Windows.
3 Wybierz to urządzenie (w oknie stanu musi znajdowaćsię"OK") i kliknij "Właściwości".
4
(1) Kliknij "Testuj":
Tryb cyfrowy
Naciśnij pad pozycyjny w każdym kierunku, aby sprawdzić, czy krzyżyk na ekranie reaguje w
odpowiedni sposób.
Jeśli wszystko działa poprawnie, kliknij "OK". Urządzenie jest gotowe do pracy.
W przeciwnym wypadku powtórz kroki 5-6.

PODRĘCZNIK UŻYTKOWNIKA
2
Tryb analogowy
Ustaw przełącznik trybu w pozycji trybu analogowego.
Naciśnij kolejno 12 przycisków i sprawdź, czy odpowiadająprzyciskom 1-12 na ekranie.
Naciśnij pad pozycyjny w każdym kierunku, aby sprawdzić, czy widok zmienia sięw odpowiedni sposób.
Przesuńlewy minijoystick, aby sprawdzić, czy krzyżyk na ekranie reaguje we właściwy sposób.
Przesuńprawy minijoystick, aby sprawdzićczy paski osi Z reagująwe właściwy sposób.
(2) Kliknij "OK". Kontroler jest gotowy do użytku.
Uwaga
Funkcja wytwarzania drgańdostępna jest tylko dla gier na konsolęPlayStation2, które obsługujątę
funkcję.
Tryb Turbo
• (1) Naciśnij i przytrzymaj przycisk Turbo, naciśnij przycisk akcji (1 – 8 / ∆, O, X, , L1, L2, R1, R2) = tryb
Turbo jest aktywny.
• (2) Naciśnij i przytrzymaj przycisk Turbo, naciśnij ponownie ten sam przycisk = automatyczny tryb Turbo.
• (3) Naciśnij i przytrzymaj przycisk Turbo, naciśnij ponownie ten sam przycisk = wyłączenie automatycznego
trybu Turbo.
Tryb Macro: przypisywanie przycisku lub przycisków do przycisku akcji
• Programowanie: (1) naciśnij i przytrzymaj przycisk Macro <kontrolka świeci się>, (2) wybierz przycisk,
któremu ma byćprzypisane makro (5, 6, 11, 12 / L2, L3, R2, R3) <kontrolka miga>, (3) podaj sekwencję
przycisków poprzez naciśnięcie jednego lub więcej przycisków na padzie pozycyjnym lub spośród przycisków
1 – 8 / ∆, O, X, , L1, L2, R1, R2, (4) naciśnij przycisk Macro
<kontrolka gaśnie>
.
• Obsługa: naciśnij zaprogramowany przycisk, aby aktywowaćprzypisanąmu sekwencję
<kontrolka miga dla
każdego przycisku>
.
Zaprogramowaćmożna maksymalnie 15 sekwencji.
• Wyłączanie: (1) naciśnij przycisk Macro <kontrolka świeci się>, (2) naciśnij zaprogramowany przycisk
<kontrolka miga>, (3) naciśnij przycisk Macro
<kontrolka gaśnie>
.
• Wybór szybkości sekwencji (0,03 lub 0,1 sekundy):
- Szybka: (1) Naciśnij i przytrzymaj przycisk Macro, (2) naciśnij ↑na padzie pozycyjnym <kontrolka miga
szybko przez 2 sekundy>.
- Wolna: (1) Naciśnij i przytrzymaj przycisk Macro, (2) naciśnij ↓na padzie pozycyjnym <kontrolka miga
wolniej przez 2 sekundy>.
Użytkowanie z konsoląPlaySation2
• Postępuj zgodnie z instrukcjąobsługi konsoli PlayStation2.
Użytkowanie z komputerem PC
• Upewnij się, że kontroler jest ustawiony jako preferowane urządzenie (Windows XP) lub jego ID to 1
(Windows 98SE/ME/2000), patrz rysunek 5.

PODRĘCZNIK UŻYTKOWNIKA
3
PL
• Upewnij się, że gra obsługuje ten rodzaj kontrolerów. Zapoznaj sięz instrukcjąobsługi gry, aby wybrać
najlepsze ustawienia.
• Nie używaj kabli USB o łącznej długości ponad 5 metrów.
Poszukaj odpowiedzi na często zadawane pytania i instrukcji obsługi na stronie www.trust.com/14863. W celu
uzyskania kompleksowej pomocy zarejestruj sięna stronie www.trust.com/register.
Table of contents
Languages:
Other Trust Video Game Controllers manuals

Trust
Trust 17416 User manual

Trust
Trust Vibration Feedback Sight Fighter PSX User manual

Trust
Trust Thunder Wheel 3D User manual

Trust
Trust 17735 User manual

Trust
Trust GXT 28 User manual

Trust
Trust Predator Digital 3D User manual

Trust
Trust 850F User manual

Trust
Trust FORMULA 1 RACE MASTER User manual

Trust
Trust COMPACT VIBRATION FEEDBACK STEERING WHEEL User manual

Trust
Trust GXT 580 User manual