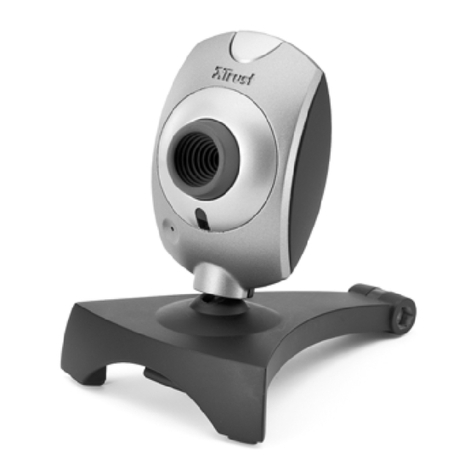
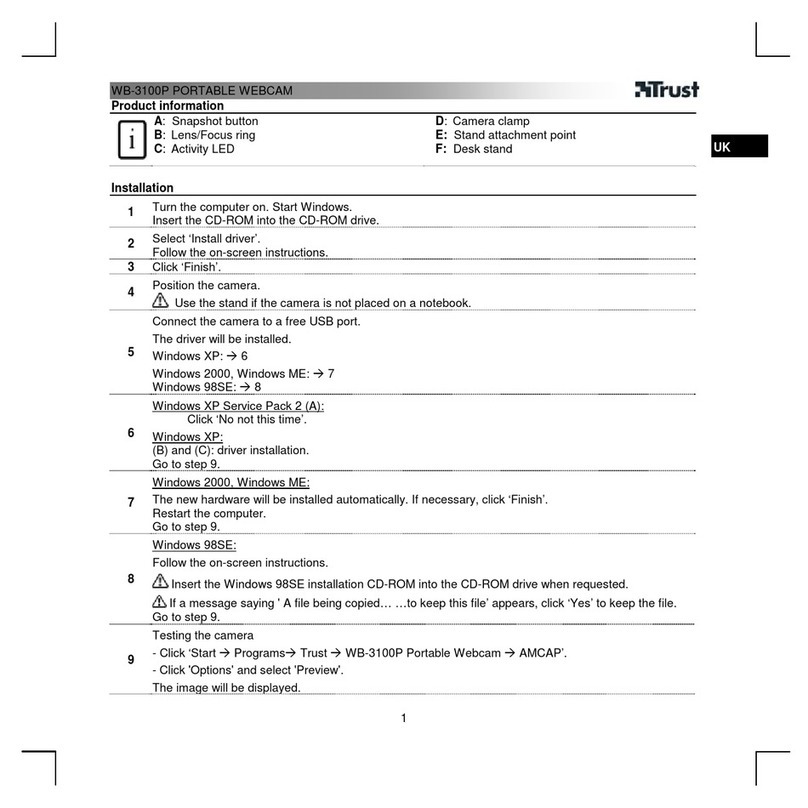
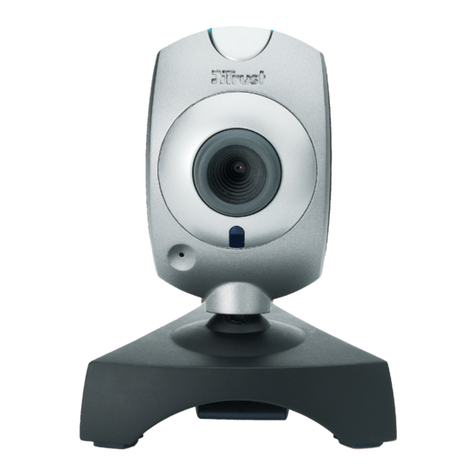
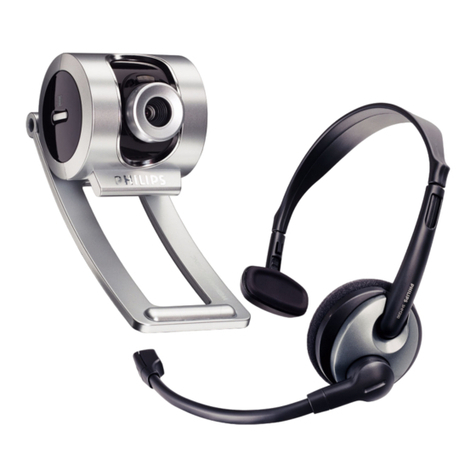
Trust SpaceC@m 300 User manual

Trust SpaceC@m 300
NL
TRUST SPACEC@M 300
Instruction Manual
Version 3.0

Trust SpaceC@m 300
01 UK 11995 SPACE300V3.DOC
Thank you
Thank you very much for purchasing this product from the Trust range. We wish you hours of fun
with it. Please read this manual carefully before using the product.
Registration
Register your purchase now at the Trust Internet site, www.trust.com, so that you are able to
receive optimal guarantee and service support. You will be automatically informed of
developments to your product and of other Trust products. You will also have the chance to win
some spectacular prizes.
Copyright statement
No part of this instruction manual may be reproduced or transmitted, in any form or by any means,
electronic or mechanical, including photocopying, recording, or information storage and retrieval
systems, for any purpose other than the purchaser's own personal use, without prior written
permission from the manufacturer.
Disclaimer statement
The manufacturer specifically disclaims all warranties, either express or implied, including, but not
limited to, implied warranties for the marketability and suitability for a particular purpose, with
respect to the software, the accompanying product manual(s) and written material, and all other
accompanying hardware. The manufacturer reserves the right to revise or make improvements to
its product at any time and without obligation to notify any person of such revisions or
improvements.
In no event shall the manufacturer be liable for any consequential or incidental damages, including
any loss of business profits or any other commercial damages, arising out of the use of its
products.
All company or product names are trademarks or registered trademarks of their respective
owners.

Trust SpaceC@m 300
1
NL
Contents
1. Introduction ..................................................................................................................................... 2
1.1 Conventions used in this manual .......................................................................................... 2
1.2 Contents of the package ......................................................................................................... 2
1.3 Minimum system requirements .............................................................................................. 2
2. Safety ............................................................................................................................................... 3
2.1 General...................................................................................................................................... 3
3. Functions of the ‘Trust SpaceC@m 300’...................................................................................... 3
4. Installation ....................................................................................................................................... 4
4.1 Installing the ‘Trust SpaceC@m 300’ driver.......................................................................... 4
4.2 Installing Ulead Photo Express 3.0 SE .................................................................................. 5
4.3 Installing Acer EasyXpress VideoMail 2.2 ............................................................................. 9
4.4 Installation Microsoft ® NetMeeting (Windows 98 / Me / 2000) ......................................... 12
5. Using the camera and the applications ...................................................................................... 16
5.1 Trust SpaceC@m 300 Software............................................................................................ 16
5.1.1 Description of the functions .......................................................................................... 16
5.1.2 Advanced image settings............................................................................................... 17
5.1.3 Taking a snapshot........................................................................................................... 18
5.1.4 Zoom in & zoom out ....................................................................................................... 19
5.2 Using Ulead PhotoExpress 3.0 SE ....................................................................................... 19
5.3 Using Acer EasyXpress VideoMail 2.2 ................................................................................. 21
5.4 Using Microsoft ® NetMeeting.............................................................................................. 24
6. Troubleshooting ........................................................................................................................... 28
7. Specifications................................................................................................................................ 29
8. Trust Customer Care Centres...................................................................................................... 30
Trust SpaceC@m 300
2
1. Introduction
This instruction manual is intended for users of the Trust SpaceC@m 300. Prior knowledge of computers is
not necessary to install and use this product. If you have any questions, please consult one of the Trust
Customer Care Centres. You can find more information about these Customer Care Centres on the last page
of this electronic manual, as well as at the back of the quick installation manual.
1.1 Conventions used in this manual
The following conventions have been used in this manual to indicate instructions:
<key> Here you should press a key. The name of the key is given between brackets.
‘System’ This is a specific term used in a program. These are the terms used by, for example,
Microsoft Windows 98.
[DIR] Key in the text shown in square brackets [….].
{Term} The text between the accolades {….} is the term in English, e.g. {File} which occurs in the
associated figure.
Additional information will be shown as follows:
Note: If you connect the Trust Spacec@m 300 to a USB HUB, then the USB HUB should have its own
power supply.
The examples assume that the letter “D” has been assigned to your CD-ROM drive. If your system uses a
different drive letter for your CD-ROM drive, for example “E”, you should replace “D” by “E”.
1.2 Contents of the package
Please check the contents of the package before reading the instruction manual. It should contain the
following:
•Trust SpaceC@m 300
•Headphones with microphone
•CD-ROM containing the drivers, software and instruction manuals
•Quick installation manual
If anything is missing or damaged, please contact one of the Trust Care Centres. You can find more
information at the back of this instruction manual.
1.3 Minimum system requirements
•Intel Pentium 166 MMX CPU
•USB port
•Windows 98
•32 MB RAM
•60 MB hard disk space available
•4X CD-ROM drive
Recommended system configuration for full operation of the programs:
•ISDN adapter or modem
•Sound card with speakers and microphone
•Internet account

Trust SpaceC@m 300
3
NL
2. Safety
2.1 General
1. Do not use the device in a damp environment.
2. Do not try to repair the device yourself.
3. Under the following circumstances have the device repaired by qualified personnel:
a) The cable or plug is damaged or worn.
b) Liquid has entered the device.
c) The device has fallen and/or the casing has been damaged.
4. Position the device so that the cables cannot be damaged.
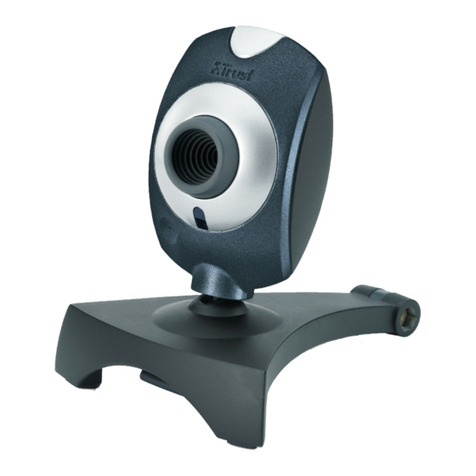
3. Functions of the ‘Trust SpaceC@m 300’
Figure 1: Functions of the ‘Trust SpaceC@m 300’
ASnapshot button; Takes a picture when this button is pressed.
BLens; turn the lens to make the image sharp.
CLED; goes on when the camera is in use.
DUSB connection
Table 1: Functions of the SpaceC@m 300

Trust SpaceC@m 300
4
4. Installation
4.1 Installing the ‘Trust SpaceC@m 300’ driver
1. Insert the CD-ROM into your CD-ROM drive and the program will start automatically. Should this not
happen, start up ‘Setup.exe’ in the CD. Figure 2 will appear.
Figure 2: Installating the driver
2. Click on ‘TRUST SPACEC@M 300’ to install the driver. Figure 3 will appear.
Figure 3: Installation of driver
3. Click on ‘Next’ to start the installation. Figure 4 will appear.

Trust SpaceC@m 300
5
NL
Figure 4: Installation of driver
4. Click on ‘Next’ to start the installation. After the driver has been installed, figure 5 will appear.
Figure 5: Installing the driver
5. Connect the camera’s USB connection D(see Figure 1) to a free USB port of your computer. Windows
98 will detect the new hardware and automatically install the Trust SpaceC@m 300 driver program.
6. Now connect the headphones with the microphone to the sound card. For this see the symbol on both
plugs.
You have now completed the installation of the driver program. Continue to chapter 4.2 for the installation of
Ulead Photo Express 3.0 SE.
4.2 Installing Ulead Photo Express 3.0 SE
Ulead Photo Express 3.0 SE is an image editor which you can use to load and edit the images on your
computer that you have taken using the SpaceC@m 300. Follow the instructions below to install Ulead Photo
Express 3.0 SE.
1. In the installation screen, click on 'Install Ulead Photo Express 3.0 SE'. See figure 2. Figure 6 will
appear.

Trust SpaceC@m 300
6
Figure 6: Installing Ulead Photo Express 3.0 SE
2. Click on 'Install'. Figure 7 will appear.
Figure 7: Installing Ulead Photo Express 3.0 SE
3. Click on 'Next'. Figure 8 will appear.
Figure 8: Installing Ulead Photo Express 3.0 SE
4. Click on 'Yes' to accept the license agreement and continue with the installation. Figure 9 will appear.

Trust SpaceC@m 300
7
NL
Figure 9: Installing Ulead Photo Express 3.0 SE
5. Click on 'Next'. A screen similar to figure 10 will appear.
Figure 10: Installing Ulead Photo Express 3.0 SE

Trust SpaceC@m 300
8
6. Click on ‘Typical’. Figure 11 will appear.
Figure 11: Installing Ulead Photo Express 3.0 SE
7. Click on 'Next'. Figure 12 will appear.
Figure 12: Installing Ulead Photo Express 3.0 SE
8. Click on 'Next'. Ulead Photo Express 3.0 SE will now be installed. Figure 13 will appear after the
installation.

Trust SpaceC@m 300
9
NL
Figure 13: Installing Ulead Photo Express 3.0 SE
9. Disable the option for 'online' registration and click on 'Finish'. Figure 14 will appear.
Figure 14: Installing Ulead Photo Express 3.0 SE
10. Click on 'Finish' to restart your computer.
You have now completed the installation of Ulead Photo Express 3.0 SE. See chapter 4.3 for the installation
of Acer EasyXpress VideoMail 2.2.
4.3 Installing Acer EasyXpress VideoMail 2.2
You can use Acer EasyXpress VideoMail 2.2 to send video and audio multimedia e-mails. To use this
program, you need to have a modem or ISDN connection, a sound card with speakers and a microphone,
and an Internet account.
Follow the instructions below to install EasyXpress VideoMail 2.2.
1. In the installation screen, click on 'Install Acer EasyXpress VideoMail 2.2'. See figure 2. Figure 15 will
appear.

Trust SpaceC@m 300
10
Figure 15: Selecting the language
2. Select the language you wish to use for the installation of Acer EasyXpress VideoMail 2.2 and click on
'OK'. Figure 16 will appear.
Figure 16: Installing Acer EasyXpress VideoMail 2.2
3. Click on 'Next'. Figure 17 will appear.
Figure 17: Installing Acer EasyXpress VideoMail 2.2
4. Fill in your details and click on 'Next'. Figure 18 will appear.

Trust SpaceC@m 300
11
NL
Figure 18: Installing Acer EasyXpress VideoMail 2.2
5. Click on 'Next'. Figure 19 will appear.
Figure 19: Installing Acer EasyXpress VideoMail 2.2
6. Click on 'Next'. Figure 20 will appear.
Figure 20: Installing Acer EasyXpress VideoMail 2.2
7. Click on 'Next'. EasyXpress VideoMail will now be installed.

Trust SpaceC@m 300
12
8. After the installation, figure 21 will appear. Click on 'Finish' to complete the installation.
Figure 21: Installing Acer EasyXpress VideoMail 2.2
9. Click on 'Finish' to complete the installation.
You have now completed the installation of Acer EasyXpress VideoMail 2.2.
4.4 Installation Microsoft ® NetMeeting (Windows 98 / Me / 2000)
NetMeeting is a program which is included in Windows 98 / Me / 2000. The program makes it possible to use
your Trust SpaceC@M as webcam.
To install NetMeeting you have to follow the next steps:
Figure A: Installation Microsoft ® NetMeeting
1. Click the ‘Start’ button left below of your desktop.
Go to NetMeeting (Programs -> Accessories -> Internet Tools -> NetMeeting) (See Figure A)
2. Click your left mouse button to start the installation. Figure B appears.
Figure B: Installation Microsoft ® NetMeeting

Trust SpaceC@m 300
13
NL
3. Click “Next” to continue. Figure C appears.
Figuur C: Installation Microsoft ® NetMeeting
4. Enter the information about yourself like Fill in your surname, family name, e-mail address place or
country and a greeting text. Then click op “Next”. Figure D appears.
Figure D: Installation Microsoft ® NetMeeting
5. If you do not want to list your name in the directory list, select ‘Do not list my name in the directory’. Click
“Next” to continue. Figure E appears.
Figure E: Installation Microsoft ® NetMeeting
6. Select the connection you use and click “Next” to continue. Figure F appears.

Trust SpaceC@m 300
14
Figure F: Installation Microsoft ® NetMeeting
7. Select the camera you want to use for NetMeeting and click “Next” to continue. Figure G appears.
Figure G: Installation Microsoft ® NetMeeting
8. Select “Put a shortcut to NetMeeting on my desktop” if you like to have a shortcut of NetMeeting on your
desktop of Windows.
Select “Put a shortcut to NetMeeting on My Quick Launch bar” if you like to have a shortcut of
NetMeeting in your Windows taskbar.
9. Click ‘Next’ to continue. Figure H appears.
Figure H: Installation Microsoft ® NetMeeting
10. Click “Next” to configure and test the audio settings of NetMeeting. Figure I appears.

Trust SpaceC@m 300
15
NL
Figure I: Installation Microsoft ® NetMeeting
11. Click the “Test” button to test your connected speakers. The“Test” button will change into a “Stop”
button”. You will hear sound of your speakers now.
12. You can set the volume by using the slide button. If there is no sound, your soundcard probably is not
installed correctly. Refer to the manual of your soundcard manufacturer to install your soundcard. If you
can hear sound, click the “Stop” button followed by ‘Next’. Figure J appears.
Figure J: Installation Microsoft ® NetMeeting
Note: Be sure your microphone is connected to your soundcard.
13. Speak through the microphone to test. The indicator will beat out. Use the ‘Record Volume’ slide switch
to set the sensitivity of the volume in the green zone, If the volume is in the red or yellow zone the volume
is too high. Click “Next” to continue. Figure K appears.
Figure K: Installation Microsoft ® NetMeeting
14. Click ‘Finish’ to finish the installation of NetMeeting. NetMeeting will start automatically. Read chapter
“Using Microsoft® NetMeeting” for using the program.

Trust SpaceC@m 300
16
5. Using the camera and the applications
5.1 Trust SpaceC@m 300 Software
The 'Trust SpaceC@m 300' program is installed during the installation of the camera. Follow the instructions
below for the use of this program.
5.1.1 Description of the functions
1. Go to ‘Start - Programs - Trust - SpaceC@m 300' and click on ‘Trust SpaceC@m 300’.
2. Figure 22 will appear. See the table below for the description of the program's functions.
Figure 22: SpaceC@m 300 Software
Function Description
AThe present camera image is shown in this screen. See chapter 4.1.2 to adjust the
image.
B‘Snapshot’ button: Takes a snapshot of the image (A). The snapshot taken is shown in
screen (G) and added to the 'Thumbnails' (H). You can also take a snapshot using the
button on the camera.
C‘Transfer’ button: Opens the snapshot that is shown in the screen (G) in the image editing
program that you have selected (F). See chapter 4.2. for the use of this program.
D‘Format’ button: Selects the file format used to save the snapshot. You can choose
between BMP and JPEG. You can also adjust the image compression for a JPEG image.
E‘Exit’ button: Closes the program
FShows the program selected in which the snapshot (G) is opened if you click on the
'Transfer' button (C).
GThe snapshot is shown in this screen.

Trust SpaceC@m 300
17
NL
Function Description
HThumbnails' (small example of the image) of the snapshots are placed here. Click on the
'Thumbnails' to view the snapshot in the screen (G). See chapter 4.2. for the use of this
program.
Table 2: Functions of the driver program
5.1.2 Advanced image settings
Follow the instructions below to adjust the camera image.
Note: Only change the settings if it is necessary. Incorrect settings can cause problems for other
programs (e.g. NetMeeting).
1. Go to the Menubar and click on 'Options'.
2. Select ‘Capture Filter’. Figure 23 will appear. See the table below for the description of the program's
diverse functions.
Figure 23: Changing the camera settings

Trust SpaceC@m 300
18
Function Description
IAdjusts the image brightness
JAdjusts the image contrast
KAdjust the image colour depth
LAdjusts the sharpness of the image
MAdjusts the hue
NAdjusts the background
OAdjusts the exposure
PColour or Black / White
QScreen position
RZoom In / Zoom Out
SFactory settings
Table 3: Settings
3. Go to the Menubar and click on 'Options'.
4. Select ‘Video Format’. Figure 24 will appear. See the table below for the description of the diverse
functions.
Figure 24: Adjusting the image size and colour depth
Function Description
TSelects the desired image size.
USelects the desired colour depth. You can choose between 24 bit RGB and I420.
Table 4: Settings
5.1.3 Taking a snapshot
Follow the directions below to take and edit a snapshot.
1. Click on the 'Snapshot' button (B) (Figure 22) or on the camera button to capture an image. The image
is shown in the screen (G) and also as a small image with the 'Thumbnails' (H). See figure 22.
2. No more than 10 'Thumbnails' can be placed there. If you take more snapshots, you will receive a
message telling you to save or delete images. Go to the Menubar and click on 'Photo'. See figure 22.
3. Click on 'Save As' if you want to save the selected image. Click on 'Delete' if you want to delete the
selected image.
Table of contents
Other Trust Webcam manuals

Trust
Trust Webcam User manual

Trust
Trust 12440 User manual

Trust
Trust WB-3250P User manual

Trust
Trust SPACECAM 150 User manual

Trust
Trust 110T User manual

Trust
Trust WB-5600R User manual

Trust
Trust WB-3100P User manual

Trust
Trust WB-1200P User manual

Trust
Trust WB-3400T User manual

Trust
Trust 17855 User manual