TFP318
Page 6 of 8
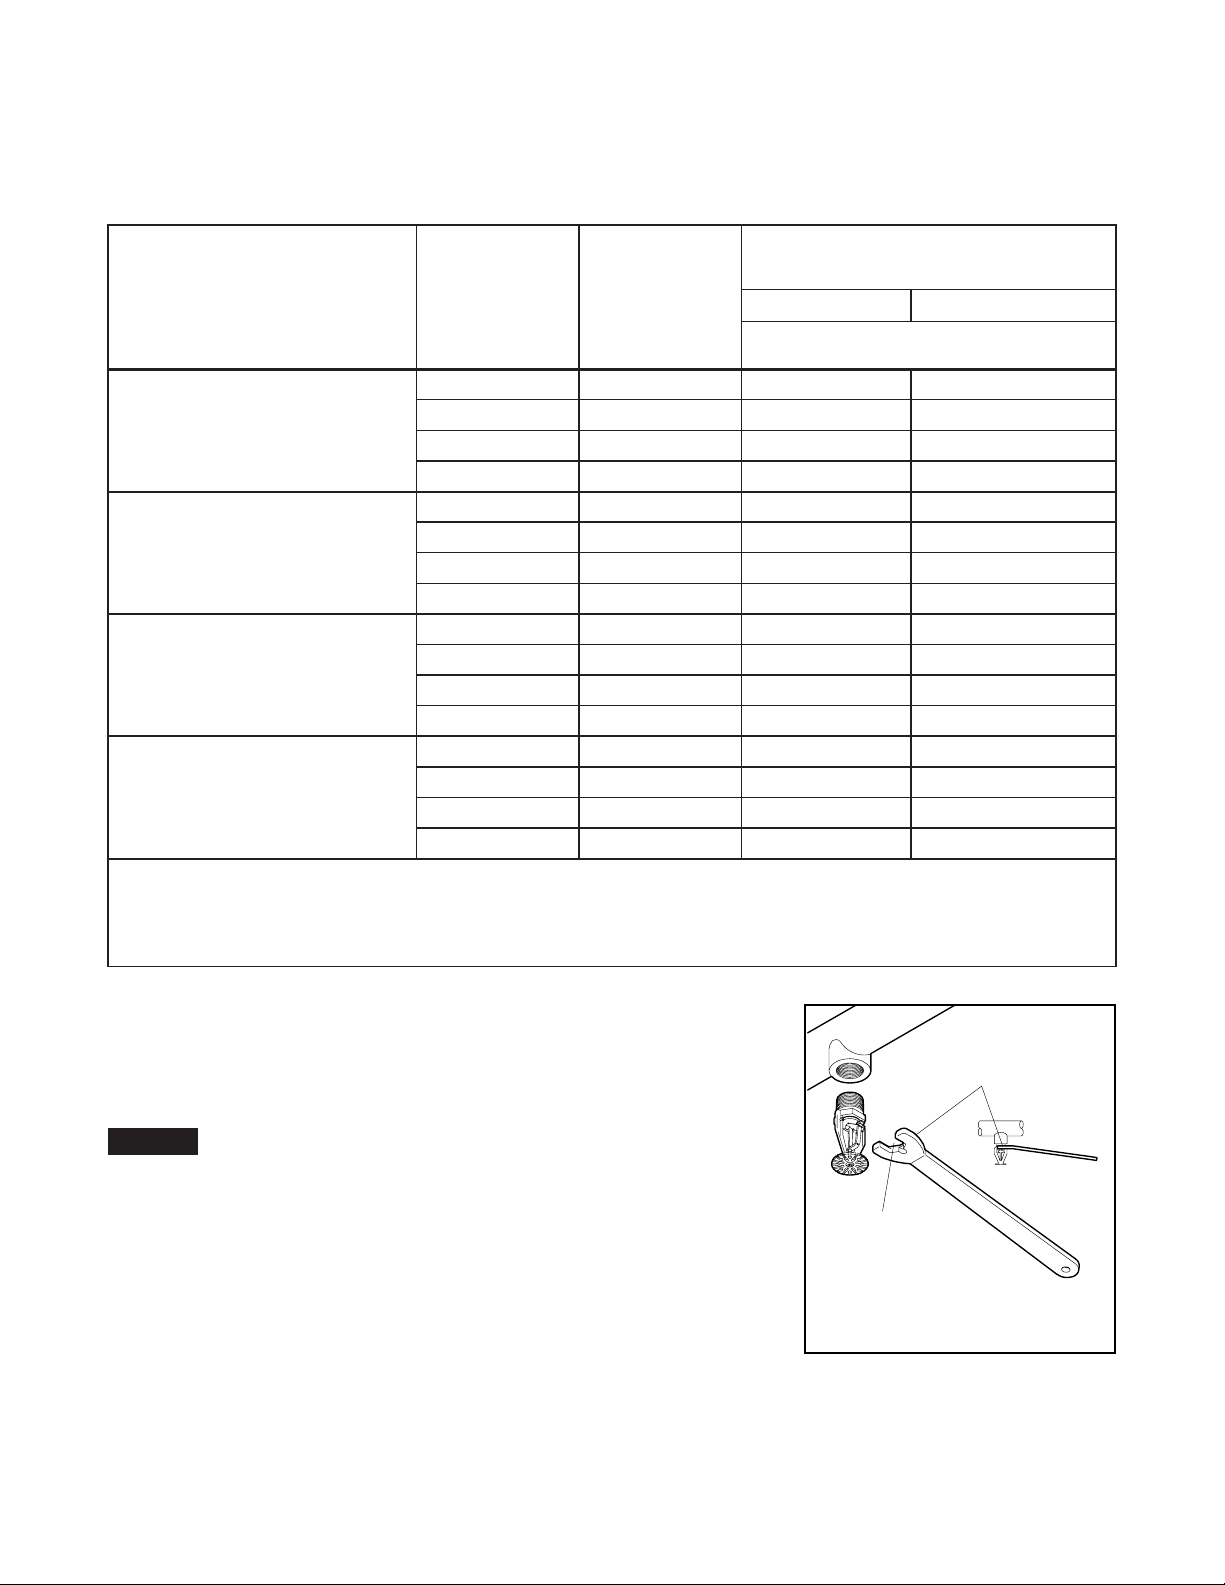
FIGURE 2
W-TYPE 1
SPRINKLER WRENCH
"FITTING SIDE"
FITTING
TOWARDS SPRINKLER
RECESS
WRENCH
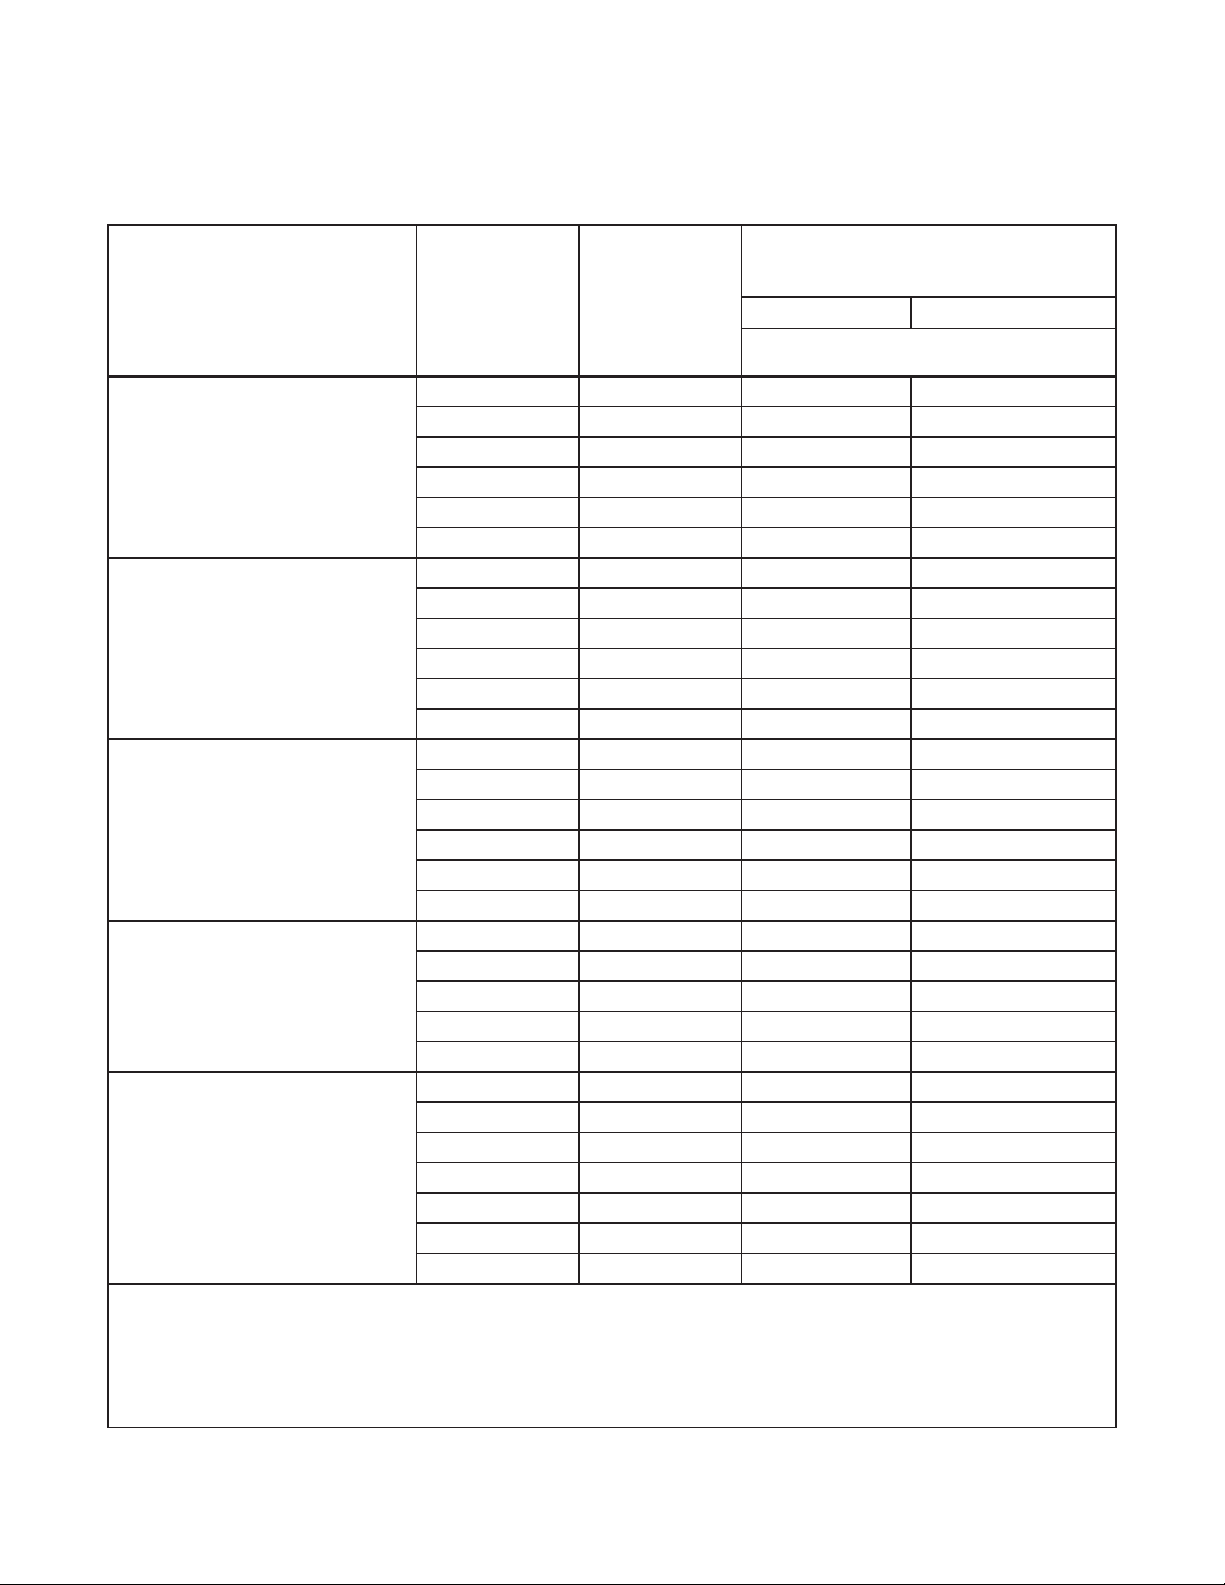
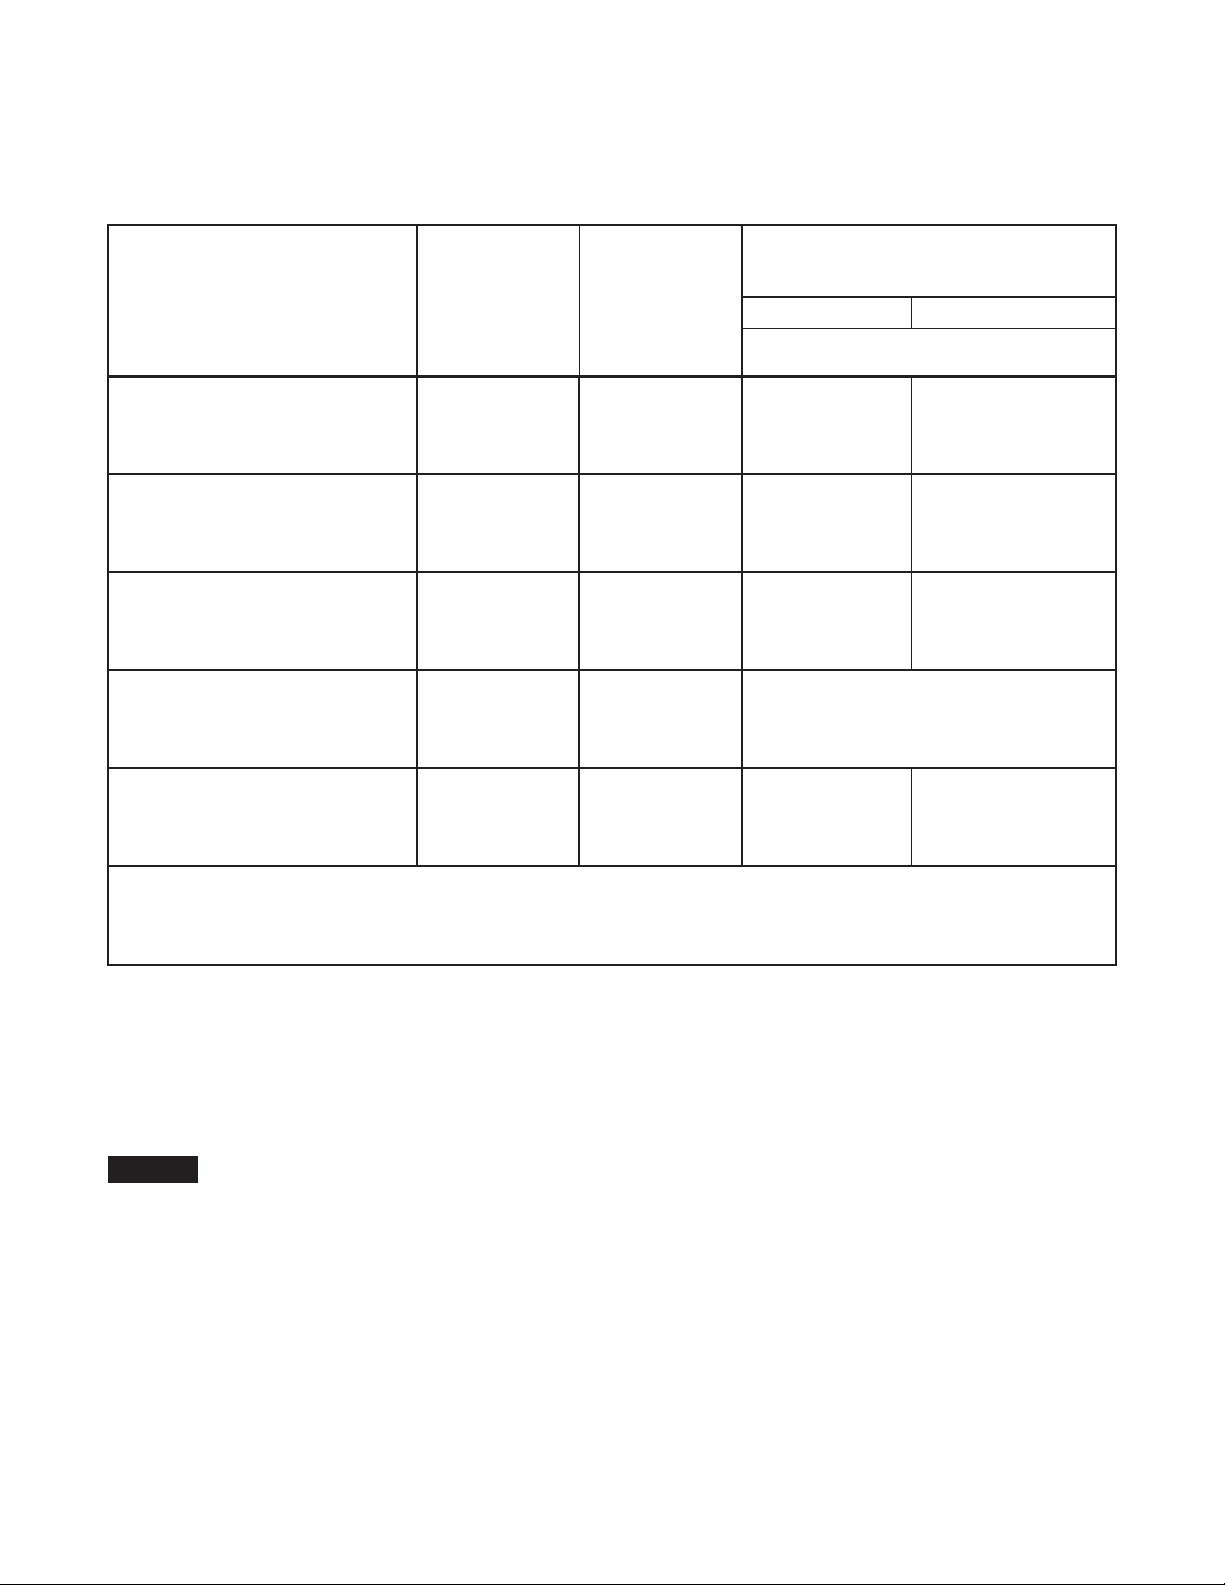
TABLE 4
NFPA AND FM DESIGN CRITERIA FOR IDLE PALLET STORAGE OF
ESFR-1 PENDENT SPRINKLERS
Commodity
Maximum
Building Height,
Ft. (m)
Maximum
Storage Height,
Ft. (m)
Minimum
Residual Pressure,
psi (bar)
NFPA FM
The number of design sprinklers at listed
pressure is 12 unless specified otherwise.
Wood on Floor
45 (13,7) 25 (7,6) N/A 90 (6,2)
40 (12,2) 35 (10,7) 75 (5,2) 75 (5,2)
32 (9,7) 25 (7,6) 60 (4,1) 75 (5,2)
30 (9,1) 25 (7,6) 50 (3,4) 50 (3,4)
Plastic on Floor
45 (13,7) 25 (7,6) N/A 90 (6,2)
40 (12,2) 35 (10,7) 75 (5,2) 75 (5,2)
32 (9,7) 25 (7,6) 60 (4,1) 75 (5,2)
30 (9,1) 25 (7,6) 50 (3,4) 50 (3,4)
Wood in Rack
45 (13,7) 40 (12,2) N/A 90 (6,2) w/IRS
40 (12,2) 35 (10,7) 75 (5,2) 75 (5,2)
32 (9,7) 25 (7,6) 60 (4,1) 75 (5,2)
30 (9,1) 25 (7,6) 50 (3,4) 50 (3,4)
Plastic in Rack
45 (13,7) 40 (12,2) N/A 90 (6,2) w/IRS
40 (12,2) 35 (10,7) 75 (5,2) 75 (5,2)
32 (9,7) 25 (7,6) 60 (4,1) 75 (5,2)
30 (9,1) 25 (7,6) 50 (3,4) 50 (3,4)
Abbreviations: N/A = Non-Applicable; IRS = In-Rack Sprinklers
References: NFPA 13, 2007 Edition, Chapter 12, Tables 12.12.1.2 (d) and 12.12.2.1
FM Global, June 2009, Property Loss Prevention Data Sheet 8-9 uses criteria for uncartoned,
unexpanded plastics, Table 2.3.7.5(a) for rack scenarios and Table 2.3.7.5(b) for on-floor scenarios
Installation
The Tyco®Model ESFR-1 Pendent
Sprinklers are to be installed in accor-
dance with the following instructions.
NOTICE
Damage to the fusible Link Assembly
during installation can be avoided by
handling the sprinkler by the frame
arms only (i.e., do not apply pres-
sure to the fusible Link Assembly),
and by using the appropriate sprinkler
wrench. Failure to do so can lead to an
unstable link assembly and premature
activation of the sprinkler. Damaged
sprinklers must be replaced.
Obtain a leak-tight 3/4 inch NPT sprin-
kler joint by applying a minimum-to-
maximum torque of 10 to 20 ft.lbs.
(13,4 to 26,8 Nm). Higher levels of
torque can distort the sprinkler inlet
with consequent leakage or impair-
ment of the sprinkler.
Step 1. Install the ESFR-1 Pendent
Sprinkler in the pendent position.
Step 2. With pipe-thread sealant ap-
plied, hand-tighten the sprinkler into
the sprinkler fitting. Do not apply pres-
sure to the Link Assembly, and han-
dle the ESFR-1 Sprinkler only by the
Frame arms.
Step 3. Wrench-tighten the ESFR-1
Sprinkler using only the W-Type 1
Sprinkler Wrench (Figure 2) and by
fully engaging (seating) the wrench on
the sprinkler wrench flats.
Step 4. After installation, inspect the
Link Assembly of each ESFR-1 Sprin-
kler for damage. In particular, verify
that the Link Assembly and Hook are
positioned as illustrated in Figure 1,
and that the Link Assembly has not
been bent, creased, or forced out of
its normal position in any way. Replace
damaged sprinklers.