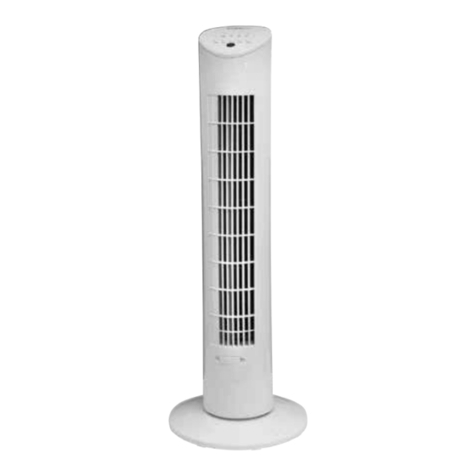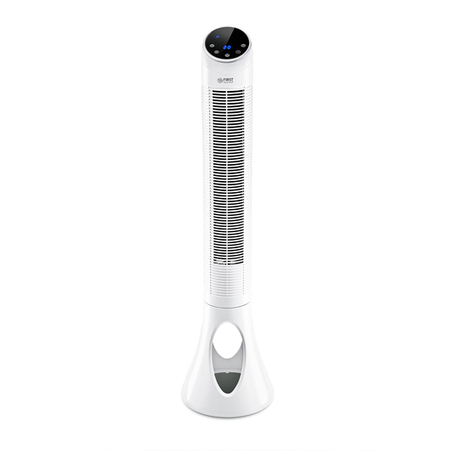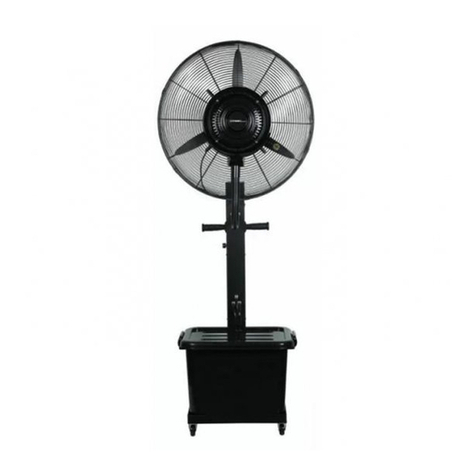
COMPONENTS DIAGRAM (Fig. A)
TOUCH BUTTON AND DISPLAY SYMBOL
1. Display
2. Air outlet
3. Front shell
4. Water level window
5. base
6. Handle
7. Back shell
8. Fix screw
9. Back net
10. Rotary
11. Water tank
12. Power cord
OPERATION
Take out the product from gift box
ASSEMBLING (Fig. B)
Step 1: First insert the snap of the base into the
square hole.
Step 2: Align the four xing screw holes of the
assembled base with the screw posts of the
fuselage, and lock the fuselage and the base with
4 self-tapping screws. At the same time, lock the
two xing screws of the base and put the product
in the right direction.
FILL THE WATER TANK:
1. Pull out the water tank
2. Fill the water tank with cold and clean water.
Make sure that water level is between “Min”
minimum level and“Max” maximum level.
3. To increase the cool eect insert the ice box in
the water tank.Before use ice box, they must
be lled by water and put in the refrigerator
until they are completely frozen.
4. Close the water tank.
ATTENTION!
1. Make sure the product is unplugged from the
mains before lling or refelling the water.
2. Only use water in the water tank. Do not add
any chemicals ,oils or other additives.
3. Only use cold water in the water
tank(previously boiled)
4. Make sure the water level in the water tank is
between minimum level .( indicated by“Min”)
and maximum level(indicated by“Max”)
Place the unit on a rm level surface and plug it
into a socket. Power indicator light reminding this
products in standby mode. Turn on button,
default setting is in middel speed. Turn it again,
products in standby.
1. Speed key : Press this key, automatically
starting from mid, high, low
2. Mode key , default setting is in normal
wind. Press this key, automatically setting from
normal wind, natural wind, sleep wind
3. Swing key : press this key, the wind
direction can swing atly, and the swing
indicator light is on. Press again to cancel the
function
Swing the blades transversely by your hands,
choosing the wind direction up an down.
4. Timer key : press this key, the timer from 0
to 8 hours, each pressing 1 hour.
5. Cooling key : press this key, start this
function, and if you add the freezing ice
crystal box in the water tank, air blow out
temperature will much more cooling. It
cancels this function when you press again.
(make sure water level is above min.line)
Remote control and panel display:
CLEANING & DRAINING THE
WATER TANK
WARNING:
Before cleaning the unit, switch the unit OFF and
disconnect from the electrical socket. Unscrew
the water pump knob, pull out the water tank,
clean the water tank and put it back, and screw
the water pump knob to the water pump. See
Figure C (2)
Rell the water tank with clean water and drain it
completely. Rell the water tank with clean water,
up to the maximum level. Use a damp cloth to
remove the dirt and dust from the surface of the
unit. Never use corrosive elements or chemicals to
clean this product. When the product is not in use,
store the unit in a dry place out of direct sunlight.
CLEANING THE WATER PAD
Make sure all parts are dry by running the fan
Only mode for about 30 minutes before storing
(time depends on ambient humidity conditions).
3
ENGLISH
2
ENGLISH
INSTRUCTION MANUAL
•Please read the instruction manual carefully
and keep it for future use.
IMPORTANT INSTRUCTIONS
When using electrical appliances, basic
precautions should always be followed to
reduce the risk of fire, electrical shock, burns
and other injury, including the following:
1. Study this instruction manual carefully before
using the product.
2. The device is only intended for private and
not for any commercial use.
3. Remove the unit from its packaging and check
to make sure it is in good condition before
using.
4. Do not let children play with parts of the
packing (such as plastic bags).
5. Check the household voltage to ensure it
matches the fan’s rated specification.
6. Check the power cord and plug carefully
before use to make sure that they are not
damaged.
7. Before unplugging the power cord, be sure to
turn off the power. When touching the unit,
be sure your hands are dry to prevent from
electric shock.
8. Do not run the cord under carpeting. Do not
cover cord with throw rugs,runners or the like.
Arrange cord away from traffic area and where
it will not be tripped over.
9. Do not use a soft surface, like a bed, where
openings may become blocked.
10. Avoid the use of an extension cord because
the extension cord may overheat and cause a
risk of fire.
11. Do not use outdoors.
12. Avoid contact with moving parts. Keep hands,
hair, clothing, spatulas and other utensils away
during operation to reduce the risk of injury to
persons and/or damage to the machine.
13. This appliance is not intended for use by
persons (including children) with reduced
physical, sensory or mental capabilities, or lack
of experience and knowledge, unless they
have been given supervision or instruction
concerning use of the appliance by a person
responsible for their safety.
14. Children should be supervised to ensure that
they do not play with the appliance.
CAUTIONS
• This appliance is not a toy.
•To avoid the risk of fire or electric shock do not
remove the housing by yourself.
•Any servicing other than cleaning and user
maintenance should be performed by an
authorized service representative.
•If the supply cord is damaged, it must be
replaced by a special cord or assembly
available from the manufacturer or its service
agent.
•Repair should be done by an authorized
service personal only.
• To reduce the risk of electric shock, do not
immerse or expose the product, flexible cord
or plug to rain, moisture or any liquid.
• Do not operate the appliance with wet hands,
in order to avoid damage.
• Do not use the appliance near explosive and
combustible gas.
• Do no turnover the appliance. Unplug the
power supply If it is toppled over and there
have some water in the body. Dry the body
before use.
• Do not knock or shake the body when use,
otherwise it may cause stop.
• The appliance must not located immediately
below a socket outlet.
• The rating current of socket should exceed
10A.
• Do not use the appliance in the immediate
surrounding of a bath, a show or a swimming
pool.
• Don’t keep the device in the watery
environment;
• Keep the device away the place of high
temperature, ray and wetly.
• Please turn off the power supply in the watery
environment.
• In the event where the appliance is dropped
into the water, turn off the power at the power
outlet and remove the plug immediately. DO
NOT REACH INTO THE WATER TO RETRIEVE IT.
• It is important to note that the appliance will
have to be inspected by a qualified technician
before using it again.
• The level of water tank should be not over
"MAX" scale at any time, when humidifying,
the total level of water tank should be "MIN"
scale.
• After adding water to the water tank, do not
tilt or knock over the appliance when you put
or move it. If you want to move, please drive it
at side, in order to avoid spilling the water.


