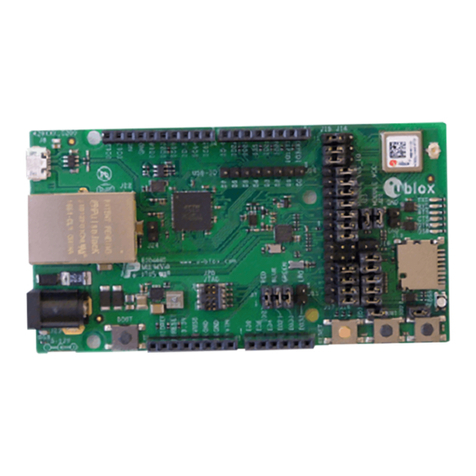
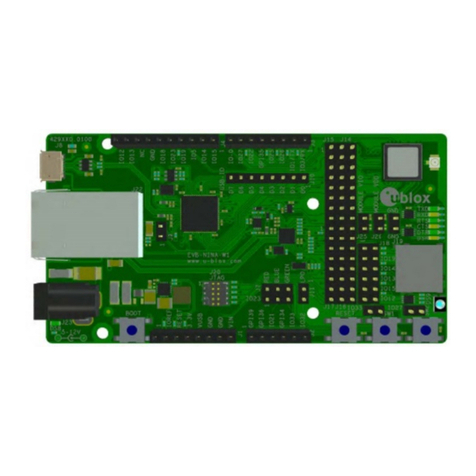
Ublox EVK-ODIN-W2 User manual

EVK-ODIN-W2
Evaluation Kit for ODIN-W2
User guide
Abstract
This document describes how to set up the EVK-ODIN-W2 evaluation kit and provides information
for evaluating and testing the u-blox ODIN-W2 multiradio standalone module with u-connectXpress
software or for embedded custom applications using the Arm®Mbed™ development tool.
www.u-blox.com
UBX-16007132 - R07

EVK-ODIN-W2 - User guide
UBX-16007132 - R07 Page 2 of 22
Document information
Title
EVK-ODIN-W2
Subtitle
Evaluation Kit for ODIN-W2
Document type
User guide
Document number
UBX-16007132
Revision and date
R07
6-Sep-2019
Disclosure restriction
This document applies to the following products:
Product name
Type number
Software version
PCN reference
EVK-ODIN-W260
EVK-ODIN-W260-00
-
-
EVK-ODIN-W262
EVK-ODIN-W262-00
-
-
u-blox or third parties may hold intellectual property rights in the products, names, logos and designs included in this
document. Copying, reproduction, modification or disclosure to third parties of this document or any part thereof is only
permitted with the express written permission of u-blox.
The information contained herein is provided “as is” and u-blox assumes no liability for its use. No warranty, either express or
implied, is given, including but not limited to, with respect to the accuracy, correctness, reliability and fitness for a particular
purpose of the information. This document may be revised by u-blox at any time without notice. For the most recent
documents, visit www.u-blox.com.
Copyright © u-blox AG.

EVK-ODIN-W2 - User guide
UBX-16007132 - R07 Page 3 of 22
Contents
Document information................................................................................................................................ 2
Contents ..........................................................................................................................................................3
1Product description ..............................................................................................................................4
1.1 Overview........................................................................................................................................................4
1.2 Kit includes ................................................................................................................................................... 5
1.3 Jumper description ....................................................................................................................................5
1.4 LEDs............................................................................................................................................................... 5
1.5 Connectors ................................................................................................................................................... 6
1.6 ODIN-W2 pin assignment..........................................................................................................................7
1.7 Buttons..........................................................................................................................................................7
1.8 Antenna connectors and internal antenna............................................................................................7
1.9 Configurations options ..............................................................................................................................8
1.9.1 UART selection for virtual COM port ..............................................................................................8
1.9.2 A1 and A2 analog in vs digital I/O .................................................................................................... 8
1.9.3 ODIN-W2 boot .....................................................................................................................................9
1.9.4 SWD Cortex debug connector.......................................................................................................... 9
1.9.5 32.768 kHz LPO oscillator...............................................................................................................10
2Getting started...................................................................................................................................... 11
2.1 ST-link .........................................................................................................................................................11
2.2 Power up the evaluation board...............................................................................................................11
2.3 Getting started with u-connectXpress software ...............................................................................11
2.3.1 Usage with UART flow control .......................................................................................................12
2.3.2 Restore the u-connectXpress software firmware .....................................................................12
2.4 Getting started with Arm®Mbed™ ........................................................................................................12
2.4.1 Github..................................................................................................................................................12
2.4.2 Mbed OS 3 ..........................................................................................................................................13
2.4.3 Mbed OS 5 ..........................................................................................................................................13
Appendix ........................................................................................................................................................ 14
Updating the ST-link software........................................................................................................ 14
A.1 Repairing an older board already connected to a Windows 10 PC..................................................14
A.2 Updating the ST-link firmware of the debug chip ..............................................................................14
A.2.1 Upgrading the USB mass storage device driver.........................................................................14
Schematic .............................................................................................................................................. 15
Glossary ................................................................................................................................................. 20
Related documents .................................................................................................................................... 21
Revision history........................................................................................................................................... 21
Contact...........................................................................................................................................................22
EVK-ODIN-W2 - User guide
UBX-16007132 - R07 Contents Page 4 of 22
1Product description
1.1 Overview
The ODIN-W2 is a compact and powerful stand-alone multiradio module, designed for
Internet-of-Things gateway applications. The module includes embedded Bluetooth®stack, Wi-Fi
driver, IP stack, and an application for wireless data transfer, all configurable using AT commands.
The wireless support includes dual-mode Bluetooth v4.0 (BR/EDR and low energy) and dual-band
Wi-Fi (2.4 and 5 GHz bands).
This document describes how to set up the EVK-ODIN-W2 evaluation kit and provides information for
evaluating and testing the u-blox ODIN-W2 multiradio standalone module with u-connectXpress
software or using the Arm®Mbed™development tool. The main features of the EVK-ODIN-W2 are:
RJ45 Ethernet connector for ODIN-W2 RMII-PHY interface
Can be powered through USB or external power supply
Onboard ST-Link v2.1 debugger
32.768 kHz LPO oscillator
Pin headers in 1.8 V I/O domain and Arduino sockets in 3.3 V I/O domain
Micro SD-card slot
The EVK-ODIN-W2 evaluation kit is available in the following two different versions depending on the
ODIN-W2 series module that is mounted:
EVK-ODIN-W260
EVK-ODIN-W262
This section describes the main connectors and settings required to get started. Figure 1 shows the
EVK-ODIN-W2 evaluation board.
Figure 1: EVK-ODIN-W2 Evaluation kit overview

EVK-ODIN-W2 - User guide
UBX-16007132 - R07 Contents Page 5 of 22
1.2 Kit includes
EVK-ODIN-W2 evaluation board
USB cable
Quick Start card
1.3 Jumper description
Function
Description
Name
Default
Onboard debugger
power
Selects whether to power the onboard debugger or not
J6
Mounted
Virtual COM port
UART selection
Selects UART1 or UART3 for virtual COM port over USB
J13
UART1
A1 and A2 Analog
in or Digital I/O
selection
Selects whether the A1 and A2 socket pins on J2 connector can
be used for analog in or Digital I/O.
J26
Digital I/O
32.768kHz LPO
oscillator
Selects whether the 32.768 kHz LPO oscillator is connected to
ODIN-W2 or not
J21
Not mounted
ODIN-W2 Boot
Selects whether to force ODIN-W2 into Boot mode or not
J15
Not mounted
Table 1: EVK-ODIN-W2 jumper description
1.4 LEDs
Function
Description
Name
Color
RGB/SPA status
RGB LED shows status for u-connectXpress. Also available for
user applications in ARM Mbed.
See the ODIN-W2 series data sheet [4]
.
DS1
RGB
Onboard
debugger/virtual
COM port status
Indicates status for the onboard debugger and virtual COM port
over USB
DS6
Green or Red
Table 2: EVK-ODIN-W2 LEDs description

EVK-ODIN-W2 - User guide
UBX-16007132 - R07 Contents Page 6 of 22
1.5 Connectors
The available connectors of the EVK-ODIN-W2 are shown in Figure 2.
Figure 2: EVK-ODIN-W2 connectors and pin assignment
Connector
Description
J1, J2, J3, J4
Socket connectors with 3.3 V I/O level
J22, J23, J24
Pin header connectors with 1.8 V I/O level
J25
SWD Cortex debug connector for ODIN-W2
J12
RJ45 Ethernet connector
J11
Power jack (5-12 V), positive center
J8
USB connector
Table 3: EVK-ODIN-W2 connector description
On the EVK-ODIN-W2 evaluation board, there are two sets of connectors for accessing the ODIN-W2
pins. The socket connectors (J2, J3, and J4) placed closely to the board edges are connected to ODIN-
W2 through level shifters and have 3.3 V I/O level. The pin header connectors (J22, J23, and J24) are
directly connected to ODIN-W2 and have 1.8 V as I/O level.
⚠Be careful to connect only the 1.8 V level or 3.3 V level pin in a pair if the ODIN-W2 pin is used as
input. For example, A14 on J22 and J3.

EVK-ODIN-W2 - User guide
UBX-16007132 - R07 Contents Page 7 of 22
1.6 ODIN-W2 pin assignment
Refer to ODIN-W2 series System Integration Manual [1] for information about pin assignment.
1.7 Buttons
The EVK-ODIN-W2 evaluation board has three buttons. All these buttons are directly connected to
pins on the ODIN-W2 module. The SW0 and SW1 buttons are grounded only when pressed; otherwise
they float. Hence, they need to be configured as pull-ups in the application software.
Button
Description
RESET
ODIN-W2 reset button connected to ODIN-W2 pin A1
SW0
General function button connected to ODIN-W2 pin A6
SW1
General function button connected to ODIN-W2 pin A8
Table 4: EVK-ODIN-W2 buttons description
1.8 Antenna connectors and internal antenna
The ODIN-W260 module has two RF antenna U.FL. coaxial connectors with a characteristic
impedance of 50 Ω. The main antenna connector supports both Bluetooth and dual-band Wi-Fi. The
second (MIMO) antenna connector provides support for 2x2 MIMO 2.4 GHz single band Wi-Fi.
The ODIN-W262 module has an internal dual-band PIFA antenna and supports Bluetooth and
dual-band Wi-Fi (SISO).
Figure 3: ODIN-W260 with connectors for external antennas and ODIN-W262 with an internal antenna

EVK-ODIN-W2 - User guide
UBX-16007132 - R07 Contents Page 8 of 22
1.9 Configurations options
1.9.1 UART selection for virtual COM port
It is possible to select either UART1 or UART3 to be relayed through the onboard debugger as a virtual
COM port available at the USB connector.
Depending on the selected UART, the jumpers on header J13 can be configured in two different ways.
The default configuration uses UART1 as shown in Figure 4. If you select UART3, configure the two
jumpers as shown in Figure 5 .
1.9.2 A1 and A2 analog in vs digital I/O
On the J2 socket connector, there are two pins - A1 and A2 that can be configured either as analog
inputs or digital I/Os in the 3.3 V I/O domain. By default, these two pins will be configured as digital
I/Os, as shown in Figure 6. To use them as analog inputs, configure the jumpers on pin header J26 as
shown in Figure 7. You can also use one pin as analog input and another as digital I/O as long as you
configure the jumpers accordingly. The analog level conversion down to the ODIN-W2 1.8 V I/O level is
handled by onboard voltage follower op amps.
To use the corresponding pins on the 1.8 V I/O level pin header, J23, remove the jumpers on J26 pin
header.
Figure 5: UART3 virtual COM port
Figure 4 UART1 virtual COM port

EVK-ODIN-W2 - User guide
UBX-16007132 - R07 Contents Page 9 of 22
☞Due to the dual functionality of the A1 and A2 pins, there is a slight degradation of accuracy when
using the pins as analog inputs. If you require full accuracy, it is recommended to disable the digital
feature permanently by unmounting resistor R81 and R82 as shown in Figure 8.
Figure 8: Resistors R81 and R82
1.9.3 ODIN-W2 boot
The boot jumper J15 is used to force the boot mode. This is helpful when the SWD pins have been
mistakenly configured as GPIOs and it is no longer possible to communicate with the module.
1.9.4 SWD Cortex debug connector
The EVK-ODIN-W2 has an onboard ST-Link v2.1 debugger. You can also connect an external debugger
to the ODIN-W2 module via the 10-pin SWD Cortex debug connector J25.
The onboard debugger should be enabled (jumper on position J6 mounted) even if using an external
debugger.
Figure 7: A1 and A2 as digital I/O on J2
Figure 6: A1 and A2 as analog in on J2

EVK-ODIN-W2 - User guide
UBX-16007132 - R07 Contents Page 10 of 22
1.9.5 32.768 kHz LPO oscillator
There is an onboard 32.768 kHz oscillator on the EVK-ODIN-W2. The output signal of this oscillator
can be connected to ODIN-W2 by putting a jumper on pin header J21. The LPO is used for the Wi-Fi
chip to enable entering low power modes. If the external LPO is not connected, an internal clock will be
generated by the MCU on the module. The benefit of using an external LPO is that the MCU on the
module can enter the lowest power mode, that is, the stop mode.
Figure 9: 32.768 kHz oscillator and pin header J21

EVK-ODIN-W2 - User guide
UBX-16007132 - R07 Contents Page 11 of 22
2Getting started
2.1 ST-link
The ST-link utility and drivers used by the EVK-ODIN-W2 can be obtained from http://st.com (search
for STSW-LINK004). Note that registration is required and it can take a few hours before you can
download the software.
☞You should install the ST-link utility and drivers before connecting the USB cable to your PC.
⚠There can be some issues while using the EVK-ODIN-W2 with Windows 10. To avoid these issues,
upgrade the ST-link firmware on the debug chip and make sure that you have the latest USB mass
storage device driver. See Appendix A for additional information.
2.2 Power up the evaluation board
To power up the evaluation board, plug in an external power supply in J11 connector or connect to a
USB host with a USB cable attached to the J8 connector.
⚠Be careful to check polarity before connecting the external power supply to the EVK-ODIN-W2
evaluation board. Center conductor is positive (+) and the ring is negative (-).
2.3 Getting started with u-connectXpress software
The EVK-ODIN-W2 evaluation board is delivered with u-connectXpress software flashed to the ODIN-
W2 module. The UART application can be accessed through the USB connector with the following
limitations:
1. No UART flow control
2. Recommended baud rate: 115 200
These limitations are due to the UART being routed through the ST-link debug chip. The virtual
comport that is used should present itself as "STMicroelectronics STLink Virtual COM Port". You can
check the port number using the Windows Device Manager if you did not observe it during installation.
The default baudrate settings are provided below:
Baudrate: 115 200
Data: 8 bit
Parity: none
Stop: 1 bit
Flow control: none
☞Notice that the UART setting differs from the default configuration of the ODIN-W2 modules
where flow control using CTS and RTS is enabled.
⚠If the serial settings are reset by holding SW1 during boot, flow control will be enabled again. To
communicate with ODIN-W2 after this, disable the flow control again by following the steps 4-7 in
section 2.3.2.
For more information about the u-connectXpress application of ODIN-W2, refer to the
u-connectXpress software User Guide [5].

EVK-ODIN-W2 - User guide
UBX-16007132 - R07 Contents Page 12 of 22
2.3.1 Usage with UART flow control
To set up the EVK-ODIN-W2 evaluation board for use with the u-blox connectivity software and flow
control, see Table 4 for pin description. If you require the USB interface, a Serial to USB FTDI cable can
be used on the headers in the 1.8 V I/O domain.
Signal
EVK-ODIN-W2 3.3V I/O
EVK-ODIN-W2 1.8V I/O
GND
J4, GND
J23, GND
CTS
J3, A10
J22, A10
VCC
J1, IOREF
J23, 1V8
TXD
J4, A11
J22, A11
RXD
J3, A13
J22, A13
RTS
J3, A12
J22, A12
Table 4: EVK-ODIN-W2 UART pin description
2.3.2 Restore the u-connectXpress software firmware
After downloading an Arm Mbed application, you might want to restore the EVK-ODIN-W2 evaluation
board for usage with the u-connectXpress software. To restore the EVK-ODIN-W2 evaluation board,
perform the steps mentioned below:
1. To program the bootloader to flash on your EVK-ODIN-W2, just copy the bootloader binary
(ODIN-W2-BOOT-v0.8.1.bin or later) to your Mbed USB mass storage device. The bootloader
is available in the software package downloaded from the u-blox webpage [3].
2. The Windows application s-center is used to download the application firmware. In s-center
“Firmware update dialog”, select mode “Rescue mode (Bootloader)”.
3. After download, reset your EVK-ODIN-W2 device.
The UART settings will be set to default in the ODIN-W2 module, which means that you will not be
able to read from the device without using flow control. Since flow control is not supported on the
UART provided through the ST-link debug chip on the USB connector, you need to execute the
following steps to disable the flow control:
4. Open s-center at baudrate 115200 without flow control enabled.
5. Issue AT command to disable the flow control (AT+UMRS=115200,2,8,1,1,0).
6. Issue AT command to store the settings (AT&W).
7. Reset the device (AT+CPWROFF or button).
☞You will not be able to see that the command is accepted, because the flow control is still enabled
on the module.
2.4 Getting started with Arm®Mbed™
When using the EVK-ODIN-W2 for Mbed development, the USB connector (J8) is used to debug, drag,
and drop the firmware flash programming and access the UART.
2.4.1 Github
GitHub is a web-based Git repository hosting service. It offers revision control and source code
management.
Drivers and example code for Mbed from u-blox are distributed through GitHub. It is recommended to
create your own GitHub account, which is free of charge. Go to https://github.com and create a normal
user account.

EVK-ODIN-W2 - User guide
UBX-16007132 - R07 Contents Page 13 of 22
In addition to creating a GitHub user account, it is recommended to install a Git command-line tool to
manage the Git repositories. Go to https://git-scm.com/downloads and follow the installation
instructions.
☞Ensure “Use Git from the Windows Command Prompt” is selected in the “Adjusting your PATH
environment” step.
2.4.2 Mbed OS 3
Yotta is a command-line tool from Arm that provides an offline toolchain for build and development
of Mbed applications. Go to http://yottadocs.mbed.com/ and follow the installation instructions.
Bluetooth and Wi-Fi driver including API documentation is available at:
https://github.com/u-blox/ublox-odin-w2-drivers-binary
Example applications for using the Bluetooth and Wi-Fi driver can be found at:
https://github.com/u-blox/mbed-examples-odin-w2
2.4.2.1 Licenses
In your Arm Mbed application, licenses of each integrated module must be considered. The Permissive
Binary License applies for u-blox binary deliverables of Bluetooth and Wi-Fi driver. The permissive
binary license is available at https://github.com/u-blox/ublox-odin-w2-drivers-
binary/blob/master/permissive-binary-license-1.1-for-u-blox-odin-w2-drivers.txt
For other modules, see the respective license in the github archive of the module.
2.4.3 Mbed OS 5
Mbed CLI is the name of the Arm Mbed command line tool, which enables the full Mbed workflow:
repositories version control, maintaining dependencies, updating from remotely hosted repositories
(GitHub, GitLab and mbed.org), and invoking Arm Mbed's own build system. The document
https://github.com/ARMmbed/mbed-cli#introduction covers the installation and usage of Mbed CLI.
Wi-Fi driver documentation is available at:
https://github.com/u-blox/ublox-odin-w2-drivers-docs-mbed-5
Example application for using the Wi-Fi driver can be found at:
https://github.com/ARMmbed/mbed-os-example-wifi
For Bluetooth low energy support, the Cordio stack by Arm is used. For more details and examples see
Cordio Bluetooth low energy.
⚠Note that Bluetooth BR/EDR is not supported on ODIN-W2 in Mbed OS 5.
2.4.3.1 Licenses
In your Arm Mbed application, licenses of each integrated module must be considered. The Permissive
Binary License applies for u-blox binary deliverables of Bluetooth and Wi-Fi driver. The permissive
binary license is available at:
https://github.com/ARMmbed/mbed-
os/blob/master/targets/TARGET_STM/TARGET_STM32F4/TARGET_UBLOX_EVK_ODIN_W2/sdk/LI
CENSE-permissive-binary-license-1.0.txt
For other modules, see the respective license in the github archive of the module.

EVK-ODIN-W2 - User guide
UBX-16007132 - R07 Appendix Page 14 of 22
Appendix
Updating the ST-link software
Due to an incompatibility between the ST-link software in the debug chip and Windows 10, the EVKs
produced before December 01, 2016 will not work with Windows 10. Connecting them to a PC running
Windows 10 will corrupt the bootloader of ODIN-W2 and the EVK will stop working. Also, the latest
EVKs might have issues with flashing if the USB mass storage device driver is not up to date.
A.1 Repairing an older board already connected to a Windows 10
PC
To fix this issue, the bootloader of ODIN-W2 must be reflashed. To reflash the bootloader, follow step
1 mentioned in section 2.3.2.
A.2 Updating the ST-link firmware of the debug chip
To update the ST-link firmware, do the following:
1. Download the following application from ST
http://www.st.com/content/st_com/en/products/embedded-software/development-tool-
software/stsw-link007.html
⚠Note that the drivers are bundled with the ST-LinkUpgrade file so the latest file can be
downloaded.
2. Run the executable
ST-LinkUpgrade.exe
.
3. Press Device Connect as shown in the screenshot below and the current Firmware version will
be shown. The firmware should be upgraded to the version - V2.J32.M22 at least as shown in
the screenshot below.
4. Click Yes and wait for the update to complete.
A.2.1 Upgrading the USB mass storage device driver
Make sure that the computer has the latest USB mass storage device driver (10.0.17134.1 or later).
If it is not possible to upgrade the driver to the correct version, disable the driver to avoid this issue.

EVK-ODIN-W2 - User guide
UBX-16007132 - R07 Appendix Page 15 of 22
Schematic
Figure 10: Placement on EVK-ODIN-W2

EVK-ODIN-W2 - User guide
UBX-16007132 - R07 Appendix Page 16 of 22

EVK-ODIN-W2 - User guide
UBX-16007132 - R07 Appendix Page 17 of 22

EVK-ODIN-W2 - User guide
UBX-16007132 - R07 Appendix Page 18 of 22

EVK-ODIN-W2 - User guide
UBX-16007132 - R07 Appendix Page 19 of 22

EVK-ODIN-W2 - User guide
UBX-16007132 - R07 Appendix Page 20 of 22
Glossary
Name
Definition
COM
Communication
CTS
Clear to send
EDR
Enhanced data rate
EVK
Evaluation kit
GND
Ground
GPIO
General-Purpose Input/Output
LED
Light-Emitting Diode
LPO
Low power oscillator
MCU
Multipoint control unit
MIMO
Multiple input multiple output
PIFA
Planar Inverted-F Antenna
PHY
Physical layer (of the OSI model)
RMII
Reduced media-independent interface
RTS
Request to send
SISO
Single input single output
SPA
Serial port application
SWD
Serial wire debug
UART
Universal Asynchronous Receiver/Transmitter
UMRS
Universal microfilm reader scanner
USB
Universal serial bus
VCC
IC power-supply pin
Table 6: Explanation of abbreviations used
Table of contents
Other Ublox Motherboard manuals

Ublox
Ublox EVK-M101 User manual

Ublox
Ublox EVK-M10QSAM User manual

Ublox
Ublox EVK-M9DR User manual

Ublox
Ublox EVK-JODY-W3 User manual

Ublox
Ublox EVK-U201SARA User manual

Ublox
Ublox EVK-NINA-B3 Series User manual

Ublox
Ublox EVK-NINA-B3 Series User manual

Ublox
Ublox EVK-NINA-W1 Series User manual

Ublox
Ublox EVK-JODY-W3 User manual

Ublox
Ublox EVK-G45 User manual

Ublox
Ublox EVK-R4 Series User manual

Ublox
Ublox EVK-ANNA-B112 User manual

Ublox
Ublox EVK-JODY-W2 User manual

Ublox
Ublox BMD-34 EVK Series User manual

Ublox
Ublox EVK-M8U User manual

Ublox
Ublox SARA-R5 Series User manual

Ublox
Ublox EVK-R6 User manual

Ublox
Ublox EVK-NINA-B50 User manual

Ublox
Ublox EVK-M8L User manual

Ublox
Ublox EVK-LILY-W1 User manual