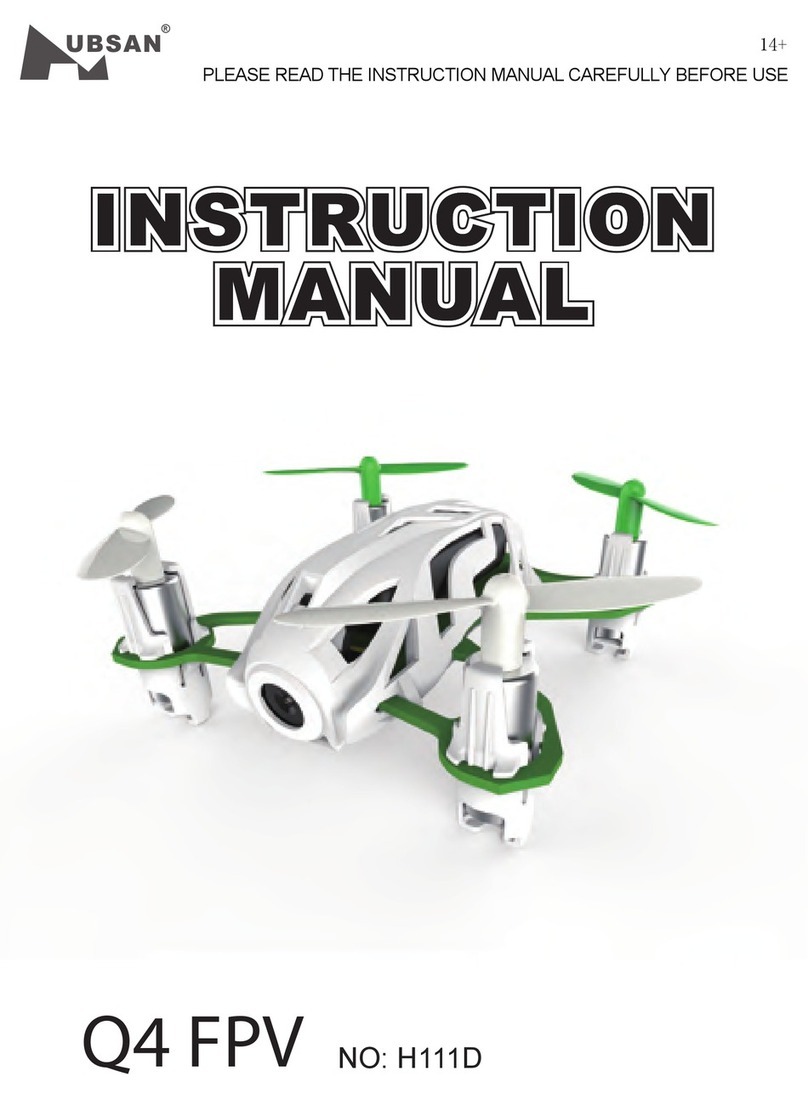
UBSAN Q4 User manual

No.H111
Alter 14+
Bitte lesen Sie die Anweisungen vor dem Gebrauch sorgfältig durch.
Ages 14+
Please read the instructions carefully before use.

1
1 INTRODUCTION
Thank you for buying HUBSAN products. The Q4 Nano quad is designed as an easy-to-use,
full-featured RC model capable of hovering, fast forward, and aerobatic ight maneuvers.
The product is an electrically powered helicopter-like model which is wirelessly controlled
via the remote control system included in the delivery. The model is designed exclusively for
private use in the model making sector and within the related operating times. The model is
designed for indoor use, but may also be used outdoors at totally calm or at low wind
conditions. The product must not become damp or wet.
The product is not suitable for children under the age of 14.
This system is not suitable for any other use. Any use other than the ones described above
could damage this product and might involve the risk of short circuit, re, electric shock, etc.
Please read the manual carefully and follow all instructions in this. Be sure to retain the
manual for future reference, routine maintenance, and tuning.
2.1 Important Notes
This RC Nano quad is not a toy.
Any improper use of this product will result in serious injury. Be aware of your personal
safety, safety of others and your surrounding environment.
We recommend beginners learn to y with more experienced pilots playing nearby before
attempting to y the Q4 for the rst time.
2.2 Caution
The Q4 Nano quad has parts that move at high speed, which poses a certain degree of
danger.
Choose a wide open space without obstacles. Do not operate the Q4 near buildings, crowds
of people, high voltage cables, or trees to ensure the safety of yourself, others and your
model.
Improper operation may cause damage to people and property.
2.3 LiPo Battery Safety Notes
The Q4 is powered by a Lithium-Polymer (LiPo) battery.
If you do not plan to y the Q4 for a week or more, store the battery approximately 50%
charged to maintain battery performance and life.
2 SAFETY NOTES

2
Charge and store LiPo batteries in a location where a battery re or explosion
(including smoke hazard) will not endanger life or property.
Keep LiPo batteries away from children and animals.
Never charge the LiPo battery that has ballooned or swelled .
Never charge the LiPo battery that has been punctured or damaged.
After a crash, inspect the battery pack for the sign of damage. Discard in
accordance with your country’s recycling laws.
Never charge the LiPo battery in a moving vehicle.
Never overcharge the LiPo battery.
Never leave the LiPo battery unattended during recharging.
Do not charge LiPo batteries near ammable materials or liquids.
Ensure that charging leads are connected correctly. Reverse polarity charging can
lead to battery damage or a re or explosion.
Have a suitable re extinguisher (electrical type) OR a large bucket of dry sand near
the charging area . Do not try to extinguish electrical (LiPo) battery res with water.
Reduce risks from re/explosion by storing and charging LiPo batteries inside a
suitable container.
Protect your LiPo battery from accidental damage during storage and
transportation. (Do not put battery packs in pockets or bags where they can short
circuit or can come into contact with sharp or metallic objects.).
If your LiPo battery is subjected to a shock (such as a crash), place it in a metal
container and observe for signs of swelling or heating for at least 30 minutes.
Do not attempt to disassemble or modify or repair the LiPo battery.
LiPo batteries are dierent from conventional batteries in that their chemical contents
are encased in a relatively lightweight foil packaging. This has the advantage of
signicantly reducing their weight, but does make them more susceptible to damage if
roughly or inappropriately handled. As with all batteries, there is a risk of re or
explosion if safety practices are ignored:
!

3
2.4 Prevent Moisture
The Q4 contains many precision electrical components.
Store the battery and the Q4 in a dry area at room temperature. Exposure to water or
moisture may cause malfunction resulting in loss of responsiveness, or a crash.
2.5 Proper Operation
For safety only use the included HUBSAN spare parts for replacement.
2.6 Always Be Aware of the Rotating Blades
When in operation, the main and tail rotor blades will be spinning at high speed. The blades
are capable of inicting serious body injury or property damage.
Be careful to keep your body and loose clothing away from the blades. Never take your eyes
o the Q4 or leave it unattended while it is turned on. Stop operating immediately if the Q4
ies out of your view. Once landed, immediately turn o the Q4 and transmitter
2.7 Avoid Flying Alone
Beginners should avoid ying alone when learning ight skills. We recommend ying with
an experienced pilot nearby in case you need help.
CAREFULLY INSPECT THE Q4 BEFORE EVERY FLIGHT
• Before operation, check the batteries of the transmitter and Q4 are charged for the ight.
• Before turning on the transmitter, check that the throttle stick is pulled completely
backward (down position).
• Carefully check rotor blades and rotor holders. Broken parts will pose risk of injury and
hazard.
• Check the battery and power plug are securely fastened. Severe vibration during ight may
detach the plug and result in loss of control.
• When turning on the unit, always turn on the transmitter rst, and then turn on the Q4 .
To power o, always turn o the Q4 rst and then the transmitter. Improper procedure may
cause loss of control of the nano quad .
3 SAFETY CHECK BEFORE FLYING

5.1 Identication and functions of the Main Menu
TRANSMITTER
(MODE 1)
(4) Elevator Trim
(2) Elevator/Rudder Stick
(1) Throttle /Aileron stick
(5) Power SW
(3) Aileron Trim
5 TRANSMITTER
The nano quad is equipped with a 3.7V 100mAh Lipo battery
4.2 Power on the Q4
ON OFF
4.1 Charge the Q4
4 Nano quad
Connect the battery with USB charger, then connect the USB charger to a computer or
other USB connector, such as a smartphone charger. The LED lights up while charging and
turns o when charging is complete. The voltage of the USB is +5±0.5V.
4

(MODE 2)
(4) Elevator Trim
(1) Throttle/Rudder Stick (2 ) Elevator/Aileron stick
(5) Power SW
(3) Aileron Trim
5
!
• Correct polarity must be observed while inserting the batteries.
• Batteries should be removed from the device if it is not used for a long period of time
to avoid damage through leaking. Leaking or damaged batteries might cause acid
burns when in contact with skin, therefore use suitable protective gloves to handle
corrupted batteries.
• Batteries must be kept out of reach of children. Do not leave batteries lying around,
as there is risk, that children or pets swallow them.
• All batteries should be replaced at the same time. Mixing old and new batteries in the
device can lead to battery leakage and device damage.
• Batteries must not be dismantled, short-circuited or thrown into re. Never recharge
non-rechargeable batteries. There is a risk of explosion!
5.2 Transmitter Battery Installation
Notice: Do not mix dierent types of batteries.

6
Mode 2: Push both sticks to the upper left position and hold, then power on the
transmitter. Rotate both sticks twice. Hold down any trim until the LED on the transmitter
blinks red, indicating successful calibration.
Mode 1: Push the left stick to the upper left position and right stick to the upper right
position and hold, then power on the transmitter. Rotate both sticks twice. Hold down any
trim until the LED on the transmitter blinks red, indicating successful calibration.
5.3 TRANSMITTER STICK CALIBRATION

6.2 Transmitter Sticks And Q4 Control Responses
CAUTION: To avoid loss of control, always move the transmitter sticks slowly. Be aware that
control inputs will reduce available lift. Be ready to use a little extra throttle to maintain height
during maneuvers.
Throttle increases/decreases the ying height of your Nano quad.
MODE 2 MODE 1
7
6.1.2 Power on the transmitter and the red LED will blink. Do not move any other stick or
trim before the transmitter and Q4 nish pairing, or the Q4 will drift. The transmitter LED
will turn green after pairing is successfully completed.
6 START TO FLY
6.1 Power-On (Failsafe) Procedure
Your Q4's ight controller is designed with a Power-On safety feature that ensures the
Q4's motor will not start unless it detects a suitable radio-control signal when the Q4 and
the transmitter both power on and paired.
6.1.1 Make sure the throttle stick is in the full down position.

8
Rudder rotates your Nano quad’s fuselage left or right.
MODE 2 MODE 1
Elevator moves your Nano quad forward and backward.
Aileron moves your Nano quad left and right.
MODE 2 MODE 1
MODE 2 MODE 1

9
7 Sensitivity Setup
The nano Q4 can perform in 3 stages: low--middle--high
Click the elevator sticker to enter the 3 dierent stages:
The LED on the transmitter is Solid Green = the Q4 is in the low stage (about 30%
sensitivity)
The LED on the transmitter is blinking green = the Q4 is in the middle stage (about 60%
sensitivity)
The LED on the transmitter is blinking orange = the Q4 is in the high stage (about 100%
sensitivity)
Press (a)Elevator Trim /(b)Aileron Trim to change the sensitivity values and then hold
down the elevator stick for 1 second to conrm or exit. The Q4 will be more sensitive and
responsive with the correspondence values.
MODE 2 MODE 1
8 Aerial Flip Tips
The ip will only work in HIGH STAGE. press the elevator stick to switch into the High
Stage.
!
For proper ip execution, make sure the Q4 is close to level, within a 30°
angle with the ground, and add throttle to climb before you perform a ip.
Press the Throttle stick to enter Flip Mode, indicated by two "beeps".
Press the Throttle stick again to exit Flip Mode, indicated by one "beep".

8.2 Right Flip
Push the Aileron stick fully to the left and then quickly push it fully to the right.
Release the stick to the center after the ip.
8.3 Forward Flip
Pull the Elevator stick backward and then quickly push it forward. Release the stick
to the center after the ip.
8.4 Backward Flip
Push the Elevator stick forward and then quickly pull it backward. Release the stick to
the center after the ip.
!
MODE 2 MODE 1
MODE 2 MODE 1
MODE 2 MODE 1
10
8.1 Left Flip
Push the Aileron stick fully to the right and then quickly push it fully to the left. Release
the stick to the center position after the ip.
MODE 2 MODE 1
Note: when the Q4 battery is low, performing ip is not possible.

The Q4’s propellers are not identical. Each propeller is labeled with an A or B. When installing
replacement propellers, be certain to install as shown below. The Q4 will not y, and will ip
and crash if the propellers are not installed correctly.
FRONT
9 REPLACING PROPELLERS
A B
AB
Install Propellers: Pinch the propeller hub, align the hole to the motor
shaft, and press it straight down rmly but gently.
11
BLADE GUARD

1
2
3
4
5
6
7
8
9
10
2
3
5
Exploded View
1Mini RX 6Shell
7White blade A
8White blade B
9Black blade A
10 Black blade B
2612 motor (clockwise)
3
612 motor (counterclockwise)
4Li-po battery
5motor supportor
No PART NAME QTY QTYNo PART NAME
1
2
2
1
4
1
1
1
1
1
12

1. Transmitter and Q4 will do not pair.
Throttle position needs to be fully minimized. Please do not move the transmitter sticks or
trims during initial power-on binding.
2. Gyro not working well
(1) Battery voltage too low.
(2) Re-bind
(3) Land on to the ground with the throttle fully minimized for 3 seconds and take o again.
3. Unable to Flip
(1) Press the Elevator stick briey to switch into high stage(transmitter LED blinks orange,
three "Beep"). Please check Elevator 7. Sensitivity Setup;
(2) Press the throttle stick to turn o the anti-ip;
(3) Lipo power is too low and needs to be re charged.
4. Nano quad is shaking or oscillating with noise.
Please check to see that the motors, canopy, body and props are all properly positioned.
5. Switching between Elevator and high rates on the transmitter is not very user-friendly.
Press the elevator stick briey to swtich into high stage(transmitter LED blinks orange, three
"Beep").
6. Can not take o.
(1) Wrong installation of the props. Props are marked with "A"(CW) and "B"(CCW). Please check
the pictures below for the correct order.
(2) Wrong installation of motors. Please check to make sure that each motor is installed in its
correct position. There are two dierent types of motors with dierent motor wire colors.
Please check the pictures below for the correct order.
7. One or more motors stop working
(1) Motor is damaged. Replace the motor.
(2) The motor connections(s) are disconnected. Resolder.
(3) An FET on the ight controller looks burnt. Replace the ight controller.
H111 TROUBLESHOOTING
White
White
Black
Black
Blue
Blue
Red
Red
(Top View) (Bottom View)
FRONT
A B
AB
13
8. The Q4 always drifts to one direction.
Calibrate the accelerometer as follows:

H111 SPARE PART CHART
Body Shell And Motor
Supportor Set
H111-01
Rx Set
H111-02
Motor Set
H111-03
Lipo Battery Set
H111-04
Transmitter Crash Pack
H111-07 H111-09
Q4 Protection Cover
H111-10
Blades Set
H111-05
Usb Charger Set
H111-06
14
(1) Before calibration the accelerometer, make sure that the propellers, motors and body are
in good condition with the battery fully charged.
(2) Pair the Q4 and transmitter, then hold the Throttle stick to the left and right repeatedly
until the two headlights blink, indicating successful calibration. This calibration will reduce
excessive drifting when doing level yaw turns.
(3) If the Q4 still drift to one side, set it on a level surface then add a few sheets of paper (the
number of sheets will vary depending on the amount of drift) to the side of the Q4 that
drifts. The paper will help counterbalance and create a level oset angle.


16
1. EINLEITUNG
Vielen Dank, dass Sie sich für ein Produkt von HUBSAN entschieden haben. Der Q4 Nano
Quadrokopter wurde als ein einfach zu bedienendes, vollständiges RC-Modell entwickelt,
das Schweben, schnell vorwärts iegen und Kunstugmanöver ausführen kann.
Das Produkt ist ein elektrisch angetriebenes hubschrauberähnliches Modell, das mit Hilfe
der beiliegenden Funk-Fernsteueranlage drahtlos gesteuert wird. Der Quadrocopter ist
ausschließlich für den privaten Einsatz im Modellbaubereich mit den damit verbundenen
Betriebszeiten ausgelegt. Das Modell ist für den Einsatz in Innenräumen vorgesehen, kann
aber bei Windstille oder schwachwindigen Tagen auch im Außenbereich eingesetzt werden.
Das Produkt darf nicht feucht oder nass werden.
Das Produkt ist nicht für Kinder unter 14 Jahren geeignet.
Für einen anderen Einsatz ist dieses System nicht geeignet. Eine andere Verwendung als
zuvor beschrieben kann zur Beschädigung des Produktes mit den damit verbundenen
Gefahren wie z.B. Kurzschluss, Brand, elektrischer Schlag etc. führen.Bitte lesen Sie die
Bedienungsanleitung sorgfältig durch und befolgen Sie alle darin enthaltenen
Anweisungen. Heben Sie die Bedienungsanleitung zum späteren Nachschlagen, für
Wartungs- und Einstellungszwecke gut auf.
2.1 Wichtige Hinweise
Dieses ferngesteuerte Nano Quadrokopter-Modell ist kein Spielzeug.
Falsche Handhabung des Produktes kann zu schweren Verletzungen führen. Achten Sie
stets auf Ihre persönliche Sicherheit, die Sicherheit anderer und Ihrer Umgebung.
Wir empfehlen Ihnen, die Hilfestellung eines erfahrenen Piloten in Anspruch zu nehmen,
bevor Sie versuchen, unsern Q4 zum ersten Mal zu benutzen.
2.2 Vorsicht
Der Q4 Nano Quadrokopter verfügt über Teile, die sich in hoher Geschwindigkeit bewegen
und somit eine gewisse Gefahr beinhalten.
Wählen Sie eine große, freie Fläche, ohne Hindernisse. Lassen Sie den Q4 nicht in der Nähe
von Gebäuden, Menschenmengen, Hochspannungskabeln oder Bäumen iegen, um Ihre
Sicherheit, die Sicherheit anderer und die Sicherheit Ihres Fluggerätes zu garantieren.
Eine unsachgemäße Bedienung kann zu Verletzungen und Sachschäden führen.
2.3 Sicherheitshinweise zu LiPo-Akkus
Der Q4 wird mithilfe eines Lithium-Polymer (LiPo)-Akkus betrieben.
Er könnte Feuer fangen, was zur vollständigen Zerstörung des Gerätes führen würde.
Wenn Sie beabsichtigen den Q4 für einen Zeitraum von einer Woche oder länger nicht zu
benutzen, laden Sie ihn auf etwa 50 % auf, um seine Leistung und Lebensdauer zu
optimieren.
2. SICHERHEITSHINWEISE

17
Laden und lagern Sie LiPo-Akkus an einem Ort, an dem ein Batteriebrand oder
eine Explosion (einschl. Rauchgefahr) weder Lebensgefahr noch Sachschäden
verursachen kann.
Halten Sie LiPo-Akkus von Kindern und Tieren fern.
Laden Sie niemals einen LiPo-Akku auf, der aufgebläht oder angeschwollen ist.
Laden Sie niemals einen LiPo-Akku auf, der durchlöchert oder bei einem Absturz
beschädigt wurde.
Kontrollieren Sie nach einem Absturz das Akkupack auf Schäden. Entsorgen Sie
ihn nur im Rahmen der Recyclingvorschriften Ihres Landes.
Laden Sie den LiPo-Akku niemals in einem sich fortbewegenden Fahrzeug auf.
Laden Sie den LiPo-Akku niemals zu stark auf.
Lassen Sie den LiPo-Akku während des Ladevorgangs niemals unbeaufsichtigt
Laden Sie LiPo-Akkus niemals in der Nähe von entammbaren Materialien oder
Flüssigkeiten auf.
Achten Sie darauf, dass die Ladeleitungen einwandfrei angeschlossen sind. Ein
Ladevorgang bei umgekehrter Polarität kann zur Beschädigung des Akkus, zu
Feuer- und Explosionsgefahr führen.
Bitte stellen Sie immer einen Feuerlöscher (für elektrisches Feuer) ODER einen
großen Eimer mit trockenem Sand bereit. Versuchen Sie nicht, elektrische
(LiPo-Akku) Feuer mit Wasser zu löschen.
Reduzieren Sie die Gefahren durch Feuer/Explosion, indem Sie die LiPo-Akkus in
einem geeigneten Behälter auaden.
Schützen Sie Ihren LiPo-Akku vor versehentlichen Schäden während der Lagerung
und dem Transport. (Stecken Sie Akkupacks nicht in Hosentaschen oder Taschen,
in denen sie kurzgeschlossen oder in Kontakt mit scharfkantigen oder
metallischen Gegenständen kommen können).
Wenn Ihr LiPo-Akku Stößen ausgesetzt wurde (wie z. B. ein Absturz), sollten Sie ihn
in einen Metallbehälter geben und mindestens 30 Minuten lang auf Anzeichen
von Schwellung oder Erwärmen beobachten.
Versuchen Sie auf keinen Fall, den LiPo-Akku zu zerlegen, abzuändern oder zu
reparieren.
LiPo-Akkus unterscheiden sich von herkömmlichen Batterien dadurch, dass ihr
chemischer Inhalt in einer relativ leichten Folienverpackung eingehüllt ist. Dies bringt
den Vorteil einer erheblichen Gewichtsreduzierung mit sich, macht ihn aber auch
anfälliger für Schäden, wenn er grob oder unsachgemäß gehandhabt wird. Wie dies
mit allen Batterien der Fall ist, besteht auch hier Brand- oder Explosionsgefahr, wenn
die Sicherheitshinweise nicht beachtet werden:
!ZUSÄTZLICHE SICHERHEITSHINWEISE
Lithium-Polymer (LiPo)-Akkus

18
2.4 Feuchtigkeit verhindern
Der Q4 besteht aus vielen elektrischen Präzisionsbauteilen.
Lagern Sie Akku und Q4 bei Zimmertemperatur an einem trockenen Ort. Wasser oder
Feuchtigkeit können zu Funktionsstörungen des Modelluggerätes führen und einen
Reaktionsverlust, bzw. Absturz zu Folge haben.
2.5 Funktionstüchtigkeit
Aus Sicherheitsgründen sollten Sie nur HUBSAN-Ersatzteile zum Austauschen der Teile
benutzen.
2.6 Achten Sie stets auf die drehenden Rotorblätter
Während des Flugs drehen sich die Rotorblätter in hoher Geschwindigkeit. Die Rotorblätter
können schwere Verletzungen und Sachschäden verursachen.
Halten Sie Körper und weite Kleidung von den Rotorblättern fern. Verlieren Sie niemals den
Q4 aus den Augen oder lassen Sie ihn unbeaufsichtigt, während er läuft. Stoppen Sie die
Bedienung sofort, wenn der Q4 außer Sichtweite geraten ist, Schalten Sie sofort nach der
Landung den Q4 und die Fernsteuerung aus.
2.7 Allein iegen vermeiden
Anfänger sollten es vermeiden, während der Lernphase allein zu iegen. Es wird empfohlen,
einen erfahrenen Piloten neben sich zu haben.
PRÜFEN SIE DEN Q4 EINGEHEND VOR JEDEM FLUG
•Stellen Sie vor der Bedienung sicher, dass die Akkus/Batterien von Fernsteuerung und Q4
für den Flug ausreichend aufgeladen sind.
•Bevor Sie die Fernsteuerung einschalten, sollten Sie prüfen, dass der Gashebel bis zum
Anschlag nach unten gedrückt wurde (untere Stellung).
•Prüfen Sie Rotorblätter und Rotorhalter sorgfältig. Gerissene Teile führen zu gefährlichen
Situationen.
•Vergewissern Sie sich, dass Akku und Stecker einwandfrei und sicher befestigt sind. Starke
Vibrationen während des Fluges können zum Lockern des Steckers und damit zu
Kontrollverlust über den Q4 führen.
•Zum Einschalten des Gerätes sollten Sie folgendermaßen vorgehen: Schalten Sie immer
zuerst die Fernsteuerung und dann erst den Q4 ein. Zum Ausschalten schalten Sie zuerst
den Q4 und dann die Fernsteuerung aus. Die Nichtbeachtung dieses Vorgangs kann zum
Kontrollverlust über den Nano Quadrokopter führen.
3. SICHERHEITSPRÜFUNG VOR DEM FLUG

5.1 Übersicht der Bedienelemente und Funktionen
FERNSTEUERUNG
(MODUS 1)
(4) Trimmen des
Höhenruders
(2) Steuerknüppel
Höhenruder/Seitenruder
(1) Steuerknüppel Gas/
Querruder
(5) Ein-/Ausschalter
(3) Trimmen des
Querruders
5. FERNSTEUERUNG
Der Nano Quad istmit einem 3,7 V 100 mAh LiPo-Akku ausgestattet.
4.2 Den Q4 einschalten
ON OFF
4.1 Den Q4
4. Nano Quadrokopter
Schließen Sie den Akku am USB-Ladegerät an und verbinden Sie dann das USB-Ladegerät mit
einem Computer oder einem anderen USB-Anschluss, z. B. einem Smartphone-Ladegerät. Die
LED bleibt während des Ladevorgangs eingeschaltet und erlischt, sobald der Ladevorgang
beendet ist. Die USB-Spannung beträgt +5 ± 0,5 V.
19
This manual suits for next models
1
Table of contents
Languages:
Other UBSAN Quadcopter manuals

UBSAN
UBSAN ZINO MINI SE User manual

UBSAN
UBSAN H507A User manual

UBSAN
UBSAN ZINO MINI SE User manual

UBSAN
UBSAN ZINO MINI PRO User manual

UBSAN
UBSAN ZINO MINI PRO User manual

UBSAN
UBSAN ZINO PRO+ User manual

UBSAN
UBSAN ZINO PRO+ User manual

UBSAN
UBSAN H216A X4 STAR PRO User manual

UBSAN
UBSAN ZINO MINI SE User manual

UBSAN
UBSAN H501A User manual
Popular Quadcopter manuals by other brands

Reely
Reely Green Racer FPV operating instructions

HobbyZone
HobbyZone Zugo instruction manual

Robitronic
Robitronic ETB250-ARF instruction manual

RC-Upgrade
RC-Upgrade Globe Flight Black Snapper CFK Preliminary assembly manual

Eachine
Eachine TYRO109 quick start guide

Parrot
Parrot MAMBO FLY quick start guide