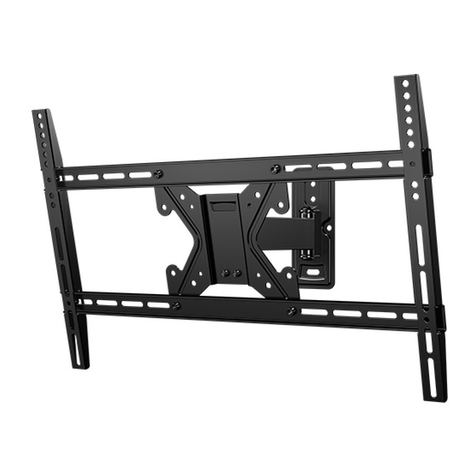
Uniteck Unifix C100 User manual

2/22 www.uniteck.fr
FR
Cher client, nous vous remercions pour votre achat de l'un de nos produits Uniteck. Veuillez lire avec
attention toutes les instructions avant d'utiliser le produit.
Les supports UNIFIX C100, C150, C200 et C300 ont été conçus pour être utilisés sur une surface plane (ex :
toit de camping-car, mobile home, péniche…).
CONSIGNES DE SÉCURITÉ
•Prenez les mesures appropriées pour prévenir les accidents pendant vos travaux de montage.
•Si le support et le matériel de montage sont exposés aux rayons du soleil pendant une longue
période, il y a un risque de brûlure. Protégez-vous.
•A la fin des travaux et après 48h, vérifiez que vos supports et panneaux soient bien fixés.
UNIFIX - COMPOSITION
ITION DU KIT
Éléments fournis
x2
x2
x2
x12
Prévoir pour le montage, un chiffon légèrement humide, de la colle et du dégraissant.
Pour les étapes de nettoyage avant collage : utilisez uniquement un chiffon humide et un
dégraissant spécifique (non fourni). Ne pas utiliser d'alcool/ de white spirit.
Respectez 24 heures de temps de séchage au minimum. Ne pas bouger ou manipuler les pièces
pendant cette période.
La colle doit être appliquée à une température comprise entre 5°C et 35°C, la température
optimum d’application étant entre 15°C et 25°C. Si ces conditions ne sont pas réunies,
augmenter le temps de séchage.

www.uniteck.fr 3/22
FR
UNIFIX –PRÉ-MONTAGE
Montez les caches latéraux grâce aux 12 vis fournies et un tournevis TORX T20 (non fourni).
UNIFIX - FIXATION PANNEAU
Votre surface de pose doit être propre, sèche, exempte de graisse et dépoussiérée. Nettoyez au préalable
la surface avec un chiffon humide (non fourni), puis laissez sécher quelques minutes.
Ne pas utiliser d'alcool/ de white spirit.
•Nettoyez la zone de pose de vos supports avec un dégraissant (non fourni).
•Nettoyez vos supports sur les 3 zones indiquées ci-dessous avec un dégraissant (non fourni).
1
1
1
1
2
3

4/22 www.uniteck.fr
FR
R
UNIFIX - FIXATION PANNEAU (SUITE)
•Mettre 2 filets de colle sur la partie préalablement dégraissée (partie adaptée pour recevoir le
panneau solaire).
•Insérer le panneau solaire dans les 2 supports UNIFIX.
•Mettre de côté l’ensemble et tracer votre zone de pose.
2 filets de colle

www.uniteck.fr 5/22
FR
UNIFIX - FIXATION PANNEAU (SUITE)
•Mettre 4 filets de colle sur le dessous de chaque support préalablement dégraissé.
•Positionnez l’ensemble sur la surface de collage préalablement dégraissée.
Respectez 24 heures de temps de séchage minimum.
Ne pas bouger ou manipuler les éléments pendant cette période.
Pendant ce temps d'attente, vous pouvez réaliser la pose du passe toit. (Produit non inclus,
cf partie passe-toit)
!

6/22 www.uniteck.fr
FR
R
COLLAGE DU PASSE-TOIT (PRODUIT NON INCLUS)
•Percez la cloison grâce à une scie cloche. Diamètre compris entre 15 et 20mm.
•Nettoyez la zone de pose avec un dégraissant (ne pas utiliser d'alcool/de white spirit...).
•Appliquez la colle sur la zone indiquée en blanc sur l’image ci-dessous, puis positionnez-le à
l’endroit du perçage.
•Passez les câbles. Gardez une longueur suffisante pour votre câblage. Serrez les écrous du presse-
étoupe pour assurer une étanchéité.
2 filets de colle

8/22 www.uniteck.fr
FR
R
SPÉCIFICATIONS TECHNIQUES
UNIFIX C100
UNIFIX C150
UNIFIX C200
Panneaux
compatibles
UNISUN 50.12 M
UNISUN 80.12 M
UNISUN 100.12 M
UNISUN 110.12 BC
UNISUN 150.12 M
UNISUN 150.12 BC
UNISUN 200.12 M
Dimensions
en mm
(L x l x H)
555 x 65 x 60
680 x 65 x 60
813 x 65 x 60
Poids
1,45 Kg
1,75 Kg
2,55 Kg
Matière
PVC anti-UV (chlorure de polyvinyle)
GARANTIE
La garantie couvre tout défaut ou vice de fabrication pendant 2 ans, à compter de la date d’achat (pièces
et main d’œuvre).
La garantie ne couvre pas :
- l’usure normale des pièces
- les erreurs de montage
En cas de défauts, retournez le produit à votre distributeur, en y joignant :
- un justificatif d’achat daté (ticket de sortie de caisse, facture…)
- une note explicative du défaut.
Attention : notre SAV n’accepte pas les retours en port dû.
Après la garantie, notre SAV assure les réparations après acceptation d’un devis.
Contact SAV :
Uniteck- 1 Avenue de Rome
Zae Via Europa - bâtiment Cassis
34350 Vendres -France
France mail: sav@uniteck.fr
Fax: +33 (0)4 88 04 72 20

www.uniteck.fr 9/22
EN
Dear customer, thank you for purchasing one of our Uniteck products. Please read all the instructions
carefully and thoroughly before using the product.
The UNIFIX C100, C150, C200 et C300 mounting bracket have been designed to be used on a flat
surface (ex.: campervan roof, houseboat).
SAFETY INSTRUCTIONS
•Take the appropriate measures to prevent accidents during your mounting steps.
•If the bracket and the mounting tools are exposed to sunlight for a long period, there is a risk
of getting burnt. Make sure to protect yourself accordingly.
•When finished, check and ensure that all of your brackets and panels are fixed properly.
UNIFIX - COMPOSITION
I Provided elements
x2
x2
x2
x12
For the mounting, make sure you have a damp cloth.
For the preparation of the surface before gluing the brackets: only use a slightly wet cloth
and the degreaser provided. Do not use alcohol/white spirit...
Respect 24 hours of drying time. Do not move or manipulate during this time.
Sika flex must be used at a temperature between 5°C and 35°C, the optimum application
temperature being between 15°C and 25°C.

www.uniteck.fr 10/22
EN
UNIFIX –PRE-ASSEMBLY
Mount the side covers thanks to the 12 screws provided, and with a TORX T20 screwdriver (not included).
UNIFIX –PANEL FIXING
The surface must be clean, dry, free from grease and dust. First, clean the surface with a damp cloth (not
provided), then let dry for a few minutes. Do not use alcohol/white spirit.
•Clean the area with a degreaser (not provided).
•Clean your mounting brackets on the 3 areas such as indicated below with a degreaser (not
included).
1
1
1
1
2
3

12/22 www.uniteck.fr
EN
UNIFIX –PANEL FIXING (FOLLOWING)
•Put 4 glue threads on each underside of the mounting brackets (previously degreased).
•Place the whole set on the fixing area previously degreased.
Respect 24 hours of drying time. Do not move or manipulate during this time.
During drying time, you can fix the roof-pass (product not included, cf. roof-pass part)
!

www.uniteck.fr 13/22
EN
ROOF-PASS FIXING (NOT INCLUDED)
•Drill through bulkhead using a hole saw. Diameter between 15 and 20mm.
•Clean the fixing area with a degreaser. Do not use alcohol/white spirit.
•Put glue on the indicated zone (in white on the image below), and place the roof-pass on the
drilled area.
•Run the cables. Keep a sufficient length for wiring. Tighten the gland nuts to ensure a proper sealing.
2 glue threads

14/22 www.uniteck.fr
EN
ROOF-PASS FIXING (PRODUCT NOT INCLUDED)
•Close the cover with the 2 plastic screws
•Connect the connectors between them. (No risk of error, connectors are polarized).
x2

www.uniteck.fr 15/22
EN
TECHNICAL SPECIFICATIONS
UNIFIX C100
UNIFIX C150
UNIFIX C200
Compatible
panels
UNISUN 50.12 M
UNISUN 80.12 M
UNISUN 100.12 M
UNISUN 110.12 BC
UNISUN 150.12 M
UNISUN 150.12 BC
UNISUN 200.12 M
Dimensions
in mm
(L x l x H)
555 x 65 x 60
680 x 65 x 60
813 x 65 x 60
Weight
1,45 Kg
1,75 Kg
2,55 Kg
Material
Anti-UV PVC (polyvinyl chloride)
WARRANTY
The warranty covers any defect, manufacturing flaws for 2 years from the date of its purchase (pieces and
labour).
Warranty does not cover:
- normal wear of parts
- falty mounting of bracket
In case of failure, return the product to your distributor by attaching:
- the dated proof of purchase (receipt, bill…)
- explanatory note of the failure
Caution: Our after-sales service does not accept carriage forward/ collected returns.
After the warranty, our after-sales service ensures repairs after acceptance of a quotation.
After-sales service contact :
Uniteck
1 Avenue de Rome
Zae Via Europa - bâtiment Cassis
34350 Vendres
France
E-mail : sav@uniteck.fr
Fax: +33 (0)4 88 04 72 20

www.uniteck.fr 16/22
ES
Estimado cliente, gracias por comprar nuestro producto Uniteck. Por favor lea con cuidado todas
las instrucciones antes de usar el producto.
Los soportes UNIFIX C100, C150, C200, y C300 están previstos para estar utilizados sobre una
superficie plana (ej: tejado de autocaravana, casa móvil, barcaza...).
CONSIGNAS DE SEGURIDAD
•Tome las medidas apropiadas para prevenir los accidentes durante sus trabajos de montaje.
•Si el soporte y equipo de montaje están expuestos a los rayos del sol durante una larga duración, hay
un riesgo de quemadura. Protéjase.
•Al finalizar los trabajos, verifique que sus soportes y paneles están bien fijados.
UNIFIX - COMPOSICIÓN
NFIX COMPOSITION DU KIT
Elementos proporcionados
x2
x2
x2
x12
Prever para el montaje un trapo ligeramente húmedo.
Para las etapas de limpieza antes de pegar: use únicamente un trapo suave y el
desengrasante proporcionado. No use alcohol/aguarrás...
Respete mínimo 24 horas de secado. No mueva o manipule durante este periodo
Sika flex debe aplicarse a una temperatura entre 5°C y 35°C, la temperatura óptima de aplicación
siendo entre 15°C y 25°C.

www.uniteck.fr 17/22
ES
UNIFIX –PRE-MONTAJE
Monte las cubiertas laterales con los 12 tornillos proporcionados y un destornillador TORX T20 (no
incluído).
UNIFIX –FIJACIÓN PANEL
La superficie de instalación debe estar limpia, seca, libre de grasa y de polvo. Primero limpie la superficie
con un trapo húmedo, y deje secar unos minutos.
No utilizar alcohol o aguarrás.
•Limpie la zona de fijación de sus soportes con un desengrasante (no incluído)
•Limpie sus soportes en las 3 zonas indicadas aquí abajo, con un desengrasante (no incluído) :
1
1
1
1
2
3

18/22 www.uniteck.fr
ES
UNIFIX –FIJACIÓN PANEL (CONTINUACIÓN)
•Aplique 2 hilos de pegamento en la parte previamente desengrasada (parte adaptada para fijar
el panel solar).
•Inserte el panel solar en los 2 soportes UNIFIX
•Dibuje el área de fijación
2 hilos de pegamento

www.uniteck.fr 19/22
ES
UNIFIX –FIJACIÓN PANEL (CONTINUACIÓN)
•Aplique 2 hilos de pegamento en la parte inferior de cada soporte previamente desengrasado.
•Coloque el conjunto en la superficie de fijación previamente desengrasada.
Respete un tiempo mínimo de secado de 24 horas.
No mover o manipular los elementos durante este tiempo.
Mientras tanto, puede realizar la instalación de su pasa-techo (artículo no incluído, referirse a
la parte pasa-techo).
!

20/22 www.uniteck.fr
ES
PEGAMENTO DEL PASA-TECHO (PRODUCTO NO INCLUÍDO)
•Perfore la cubierta con una sierra de agujero. Diámetro entre 15 y 20mm.
•Limpie la zona de fijación con un desengrasante. No utilizar alcohol o aguarrás.
•Aplique el pegamento en la zona indicada en blanco en la imagen a continuación, y coloque el
pasa-techo en el área perforada.
•Deje pasar los cables. Guarde una longitud suficiente para su cableado. Apriete las tuercas del
prensaestopa para asegurar una estanqueidad correcta.
2 hilos de pegamento
This manual suits for next models
3
Table of contents
Languages:
Other Uniteck TV Mount manuals

Uniteck
Uniteck UNIFIX User manual
Uniteck
Uniteck UNIFIX 100 B User manual
Uniteck
Uniteck UNIFIX 100WP User manual

Uniteck
Uniteck 50.2 WB User manual

Uniteck
Uniteck UNIFIX 5 SF User manual

Uniteck
Uniteck UNIFIX 150 B User manual

Uniteck
Uniteck UNIFIX 500B User manual
Uniteck
Uniteck UNIFIX 300 B User manual

Uniteck
Uniteck UNIFIX 50 User manual