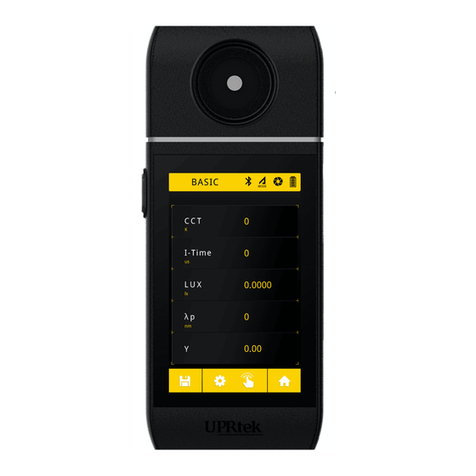
UPRtek MK350S PREMIUM Dimensions and installation guide

*To ensure your warranty validaon, please place your agent's stamp in the box and fill in the purchase
date. If the agent stamp and purchase date cannot be supplied, the warranty period will based on the
manufacturing date of the product.
*為確保您的權益,請要求經銷商蓋上店章及填寫購買日期;未蓋店章與購買日期者,則以出廠日期為依據。
*お客様の権利を確保するために、販売店に店の印章または、購入日を記入することを依頼してください。
販売店の印章または購入日のない場合、製造日に基とづいて取り扱いいたします。
Original / Authorized Agent Stamp
Product Serial Number
Purchase Date
:
:
52-72-00003-0200
TEL:+886-37-580885
FAX:+886-37-580398
Website:www.uprtek.com
Address:No.38, Keyi St., Zhunan Township, Miaoli County 35059, Taiwan
The informaon contained herein is the exclusive property and confidenal document of United Power Research Technology Corporaon
,and shall not be distributed,reproduced,or disclosed in whole or in part without prior wrien permission of United Power Research
Technology Corporaon.
LED Meter User Manual and Warranty
LED 光譜計使用說明書與保固手冊
LED メーター使用說明書び保証書
MK350S
uSPECTRUM PC Software
Download File 下載檔案 ファイルをダウンロードする
www.uprtek.com Membership Login Support Download Center

Contents
Home Screen (Page 1)
5.1 BASIC
5.2 SPECTRUM
5.3 CIE 1931
5.4 CIE 1976
5.5 CRI
5.6 BROWSER
5.7 COMPARE
............................................................................................
...................................................................................
.........................................................................................
........................................................................................
................................................................................................
.....................................................................................
.....................................................................................
..............................................19
21
25
26
27
28
29
30
Introduction
1.1 Features
1.2 Package Contents
1.3 Product Description
1.4 Annual Product Calibration
1.5 Product Notes and Precautions
1
Product Setup
2
Getting Started
3.1 Taking a Measurement
3
Additional Setup and Notes
4.1 SD Card
4.2 Other Notable Setup Items in OPTION
4
.........................................................................................
..........................................................................
........................................................................
.............................................................
......................................................
...............................................................
.........................................................................................
............................................
...................................................................
............................................................
.......................................
..........................................................
1
7
11
15
2
3
4
5
6
12
16
17
Home Screen (Page 2)
6.1 LUX. G
6.2 LOG
6.3 CHECKER
6.4 BIN
6.5 TRANSMIT
6
Specification
8
FAQ
9
Warranty
10
............................................................................................
................................................................................................
......................................................................................
.................................................................................................
.....................................................................................
..............................................
..............................................................
....................................................................
...........................................................................
35
51
55
57
37
38
41
43
45
Miscellaneous
7.1 Bracket
7.2 PC Connection
7.3 System Reset
7
...........................................................................................
................................................................................
.................................................................................
............................................................47
48
49
50
Contents

- 1 -
1
Introduction
1.1 Features
1.2 Package Contents
1.3 Product Description
1.4 Annual Product Calibration
1.5 Product Notes and Precautions
- 2 -
1.1 Features
Enhanced screen resolution improvements from predecessor models
More than 30 light unit-of-measures to choose from
Standalone LED meter – No other equipment necessary (e.g. PC, Smartphone
etc.)
Illumination distribution charts provide assistance in fixture design
“BIN” ranking features allow for fast CIE 1931 inspection and confirmation of LED
quality
Visual aim ‘n click display (on-screen viewport) - No more blind measurements
Automatic continuous measurements with data-save to an SD card
Easy, on-the-spot data comparison features – Comparing 2 LEDs, or comparing
against historical data
Maximum and minimum acceptable ranges for evaluating LED quality.
Built-in file browser allows for quick access to previously saved data
■
■
■
■
■
■
■
■
■
■
The MK350S is a lightweight, portable, easy-to-operate LED meter with WiFi remote
control operations and SD card data storage. This product has basic features for fast,
easy LED readings, as well as advanced light analytics, and efficient work-flow features
for LED production environments.
Features

- 3 -
1.2 Package Contents
Strap Neck Strap
Baery USB Cable Power Adaptor
Protection Bag
Case
User Manual
and Warranty
The informaon contained herein is the exclusive property and confidenal document of UPR Technology Inc.,andshall not be distributed,
reproduced,or disclosed in whole or in part without prior wrien permission of UPR Technology Inc.
LED Meter User Manual and Warranty
LED 光譜計使用說明書與保固手冊
LED メーター使用説明書及び保証書
MK350S
Screen Wipe
MK350S LED Meter
Tripod /
Stand Bracket
- 4 -
1.3 Product Description
DC Power Connector
USB Connector
Measure Buon
Back Cover
Video Cam Lens
Light Sensor
Strap Holder
Power On LED
Baery Recharge LED
System Reset Pinhole
SD Card Slot
Touch Screen
Power On Buon

- 5 -
1.4 Annual Product Calibration
This product is a high-precision measurement device with sensitive components –
handle with care. To ensure the accuracy of measurements, it is recommended to have
the unit calibrated once a year. Please contact your agent or our customer service
department for calibration service.
- 6 -
1.5 Product Notes and Precautions
The MK350S LED Meter contains sensitive components. Please unpack with care,
as any trauma to the unit may damage the equipment. Contact your agent if the unit
appears not to be operating normally. Do not attempt any repairs – all repairs must
be performed by qualified service agents.
Most LCD screens have a very small and inconsequential defective pixel rate
(usually less than 0.1%). This results in occasional pinpoints of white or other colors
but will not affect the accuracy of measurements.
1.
2.
Please read the following precautions to avoid fire, excessive heat, chemical leakage
and explosion.
Precauons / Warnings
Do not disassemble or modify the battery.
Do not expose the battery to heat (fire) or water/moisture.
When disposing used/old batteries, wrap with insulation tape to shield the battery
from electrical contact with metallic objects, which might ignite a fire or explosion.
If the unit is plugged into the power adapter and the battery seems to be
overheating, or if there is smoke or peculiar odors emanating from the unit, unplug
immediately to avoid the possibility of fire.
However, do not touch the cables if there is heat emanating from near the cables
as melted or deformed cables could expose wiring and result in burns or electric
shock.
Do not use cloth or anything to wrap or cover the equipment while charging – this
could cause the unit to overheat, melting the casing or causing fire.
If the unit is accidently immersed in water, or if moisture has seeped inside, or
metal objects have dropped into the casing, immediately remove the battery to
avoid fire or electric shock.
Do not operate or store the battery in high-temperature environments - it will cause
battery leakage and/or shorten the life of the battery .
Do not use paint thinner, benzene or other organic solvents to clean the equipment
– this may damage the exterior finish or touch screen, and may even ignite fire.
■
■
■
■
■
■
■
■
■

- 7 -
2
Product Setup
- 8 -
Attach the “Sensor Cover” using the
cover strap (attachment wire) and the
strap holes.
1
Replace the back cover.
5
Install the battery as shown with the
correct orientation. The battery will install
in only one direction – do not force the
battery in.
4
Use the Power Adapter cable supplied in
the packaging to connect it to the
MK350S and charge the battery – the
battery recharge light will flash if
recharging and will stop flashing when
fully charged.
(Charge for 6 hours on this first time use)
6
You can attach a lanyard (neck strap)
onto one of the two strap holes on top of
the corners of the MK350S unit.
2
Remove the back cover from underneath
the MK350S by inserting your fingernail
into the notch, located below the end of
the cover, and sliding your nail along the
underside of the edge to unhinge one
side - do the same for the other side.
3
notch

- 9 -
The MK350S will initialize and then an
MK350S splash screen will display.
8
The unit will ask you if you want to
perform a “Dark calibration”. Tap “No” on
the screen.
9
The Home Screen will appear on the
screen.
Tap the “Flip Page” corner to access the
second page of menu items.
10
While the unit is charging, set the Date
and Time by turning on the MK350S by
pressing the On/Off button on the right
side of the unit. A green light, on the
same side as the On/Off button, will
illuminate.
7
- 10 -
Tap the “OPTION” icon.
11
Set the Date or the Time by tapping the
items shown above.
12
Set current Time.
You have completed the product setup.
13
Set current Date.
To turn off the MK350S, press the On/Off button for 5 seconds.

- 11 -
3
Getting Started
3.1 Taking a Measurement
- 12 -
3.1 Taking a Measurement
This section describes how to get started by taking a quick measurement. Note that
some of the references to buttons and lights are described in the Product Description
section.
Turn on the MK350S by pressing the
On/Off button. A green light on the same
side as the On/Off button will illuminate.
1
The unit will ask you if you want to
perform a “Dark Calibration”. Tap “Yes”.
2
When Dark Calibration is finished, tap
“OK” again.
4
The unit will then ask you to place the
“Sensor Cover” over the sensor. Place
the cover over the sensor and tap “OK”.
3

- 13 -
3.1 Taking a Measurement
The Basic screen will appear.
6
The Home Screen will appear on the
screen, tap the “BASIC” item.
5
Press the “Measure” button on the left
side (marked with an M).
7
A viewport will display on the screen with
a “cross hair” mark in the middle.
8
- 14 -
3.1 Taking a Measurement
Aim the “cross hair” by pointing the
camera lens on top of the unit in the
direction of a light. Press the “Measure”
button again.
9
The results will be instantly displayed on
the screen.
Congratulations! You’ve taken your first
recording.
10

- 15 -
4
Additional Setup and Notes
4.1 SD Card
4.2 Other Notable Setup Items in OPTION
- 16 -
4.1 SD Card
This unit can write measurement data onto an SD
Card (only support for above 1GB ~ up to 32GB).
Simply insert the card into the card reader slot. Data
is written as excel files (.xls) or jpg image files (for
light spectrums and color gamuts).
BINYYYY MMDD HHMMSS
TRANSMITYYYY MMDD HHMMSS
BIN
TRANSMIT
Normal View:IMGYYYY MMDD HHMMSS LUX0
LUX View:IMGYYYY MMDD HHMMSS LUX1
LUX.G
LOGYYYY MMDD HHMMSSLOG
CHKYYYY MMDD MMSSCHECKER
CRI IMGYYYY MMDD HHMMSS
CIE1976 JPG File:
CIE1931
ESPDYYYY MMDD HHMMSS
SPECTRUM
Excel File:
BASIC
Naming RuleExcel File JPG FileMode
/SD/CHECKER /SD/PICTURE
/SD/BIN /SD/LOG

- 17 -
4.2 Other Notable Setup Items in OPTION
Other setup items to note in the System Options Menu.
1234
SD card ready:
User can storage function.
No SD card:
System can’t read the SD card
or no SD card inside.
- 18 -
4.2 Other Notable Setup Items in OPTION
Remaining power displayed
a
b
c
The Battery Status indicator appears on most
screens at the very top right corner. The status
shows remaining charge in bluea.
When charging with the AC adapter, a lightning
boltbicon will appear – it will disappear when fully
chargedc. If the battery cannot maintain a charge,
you need to purchase a new battery.
5678
Please refer 5.1 BASIC (P22) for Basic list setup. Other setup options are covered
in other sections.

- 19 -
5
Home Screen(Page 1)
5.1 BASIC
5.2 SPECTRUM
5.3 CIE 1931
5.4 CIE 1976
5.5 CRI
5.6 BROWSER
5.7 COMPARE
- 20 -
5.1 BASIC
5.3 CIE 1931
5.5 CRI
5.4 CIE 1976
5.6 BROWSER
5.2 SPECTRUM
5.7 COMPARE

- 21 -
5.1 BASIC
This screen shows a list of light measurements recorded
after pressing the “Measure” button as demonstrated in the
“Getting Started” section.
You can save your data by tapping the save icon in
the lower right corner. All of the data that is present
in the Basic list is saved to the SD card and can be
recalled through the “Browser” function.
Saving Data
- 22 -
5.1 BASIC
Customizing the Basic List
The 5 items on the Basic list can be customized with different units of measure (e.g.
PPF, fc, R9, λp) .
Tap the box of measuring unit1and select an item from the list2and then the new data
item will be displayed3.
1 3
2

- 23 -
5.1 BASIC
Tool Options(Measurement)
This is found on screens like the BASIC screen (also CRI, CIE1931 & CIE1976) where
there is a “Tools” icon in the lower left cornera. Note that this icon is the Measurement
Tools Icon as opposed to the System Tools icon on the Home Screen.
When saving data (e.g. from
the BASIC screen), you can
choose to save to an Excel
file, or Excel & JPG files
(screen shots)
Integration time can be
automatically set by the
MK350S (Auto Mode) or
Manually (Manual Mode). If
Manual Mode is chosen, you
must set “Integration time”
This option is turned on in low
light conditions (LUX ≤ 50). It
allows you to set the
Integration time (exposure
time) higher.
The length of time, in msec,
that the MK350S captures
light data in one
measurement (like exposure
time).
a
- 24 -
5.1 BASIC
I-Time
Setup
Auto Auto Manual Manual
Off On Off On
6ms
~
1000ms
1001ms
~
5000ms
6ms
~
1000ms
1001ms
~
5000ms
You can set the MK350S to
take snapshots continuously
(Continuous capture). As
soon as you press the
“Measure” button, the unit will
begin to capture at 3 second
intervals. Press “Measure”
again to stop capturing.
This turns on and off the
audible beep that occurs
when you take a
measurement - it takes up to
3 seconds take a
measurement – the unit
beeps when it is done.
This item gives you the option
of reviewing the viewport
before you take a
measurement with the
“Measure” button.
You are always prompted to
do a Dark calibration when
you turn on the unit.
However, you can perform a
dark calibration anytime with
this option.
a
b
c
a
b
c
1. Continuous capture function allows users to take consecutive measurements and review results quickly
without bothering with buttons - however, it does NOT allow you to save data to the SD Card. (see the
LOG function for continuous captures with data-save to an SD Card).
2. Live view mode only for BASIC, SPECTRUM, CIE1931, CIE1976, CRI measurements
The system will prompt you to do Dark
calibration after you turn on/off “Long
exposure time”. This procedure will take
you around 1min and 15 secs. We strongly
recommend that you to execute Dark
Calibration every time you on/off “Long time
exposure” setup.
-Automatic
A-Automatic+Long Time Exposure
AL
-Manual
M-Manual+Long Time Exposure
ML

- 25 -
5.2 SPECTRUM
Light Spectrum of the latest measurement taken.
- 26 -
5.3 CIE 1931
The CIE1931 chromaticity x, y values of the latest
measurement taken.

- 27 -
5.4 CIE 1976
The CIE1976 chromaticity u’, v’ values of the latest
measurement taken.
- 28 -
5.5 CRI
The CRI R1-R15 values of the latest measurement taken.

- 29 -
The Browser (on Home Screen) allows you to review
historical data that was previously saved to the SD card.
5.6 BROWSER
1 23
If you select an excel file, a
review menu will display,
similar to the Home Screen.
You will have access to all the
data and charts that were
available when the
measurement was taken.
Press any of the icons to
review the data.
When you press the
“Browser” icon, a file browser
will display showing the files
on the SD card.
All of the data screens will
have 3 navigation icons at the
bottom of the screen. The
BLUE up¹ and down² arrows
will scroll through the other
Excel files on the SD card in
order, displaying the same
data items. The RED³ up
arrow will return you to the
previous screen.
- 30 -
5.7 COMPARE
The Compare item allows you to compare two
measurements side by side. You can compare two
consecutive measurements or compare a measurement
against historical data (SD card).
When you press the COMPARE
icon (on Home Screen), the
COMPARE Menu will display,
which is similar to the Home
Screen. You can tap any of the
icons depending on what type of
data you want to compare.
The examples in the following pages only describe how to compare data in the BASIC and SPECTRUM
screens, - comparing CRI, CIE 1976, CIE 1931 data are similar.
BASIC
CIE1931
SPECTRUM
CIE1976
CRI

- 31 -
5.7 COMPARE
Compare two consecutive measurements
Select the BASIC icon
The left column and right
column will represent the
data you are comparing.
1.
2.
1
2
First, tap the right column. A
green border will appear
around the right column.
Point the MK350S to a light
source and take a
measurement.
The measurement data will
fill the right column.
3.
4.
5.
3
5
4
6.
7.
8.
Next, tap the left column. A
red border will appear.
Take another measurement.
The new data will fill the left
column. You can now
compare the two
measurements.
6
8
7
- 32 -
5.7 COMPARE
Compare against historical data
The list items in the COMPARE screen (e.g. CCT, CRI, LUX etc.) is the same list configured for the BASIC
Screen. If you change the list items on the BASIC screen, it will also change on the COMPARE screen..
2
1
4
The data will appear in
the column4you
selected.
3
A file browser appears
showing the files on the
SD card. Select one of
the Excel files3.
To compare against historical data (saved on
SD Card), first tap either the left or right
column1, and then tap the “Folder”2icon in the
lower right corner.
Folder icon

- 33 -
5.7 COMPARE
Spectrum data comparison
2
3
1
4
3
Select the SPECTRUM icon.
You will get a screen with a
similar left/right column
format, similar to the Basic
List comparison.
1.
2.
You can tap one of the
columns.
Take a measurements or
access historical data.
(do the same for the other
column)
3.
4.
5.
The spectrum data will fill
the chart with the data in the
form of a red graph line and
a green graph line,
representing the left and
right columns respectively.
5
5
4
- 34 -
5.7 COMPARE
It is also possible to see the relative difference between the spectrum data between the
first measurement and the second measurement.
2
1
3
Press the Tools icon on the
bottom left bottom corner.
Press the “Compare mode”
item
Select the “Absolute” radial
button and tap “Yes”.

- 35 -
6
Home Screen(Page 2)
6.1 LUX. G
6.2 LOG
6.3 CHECKER
6.4 BIN
6.5 TRANSMIT
6.1 LUX.G
6.3 CHECKER 6.4 BIN
6.5 TRANSMIT
6.2 LOG
You can access the Home
Screen Page 2 by tapping
the “Flip Page” icon in the
lower right corner on Page 1.
- 36 -
Other manuals for MK350S PREMIUM
2
Table of contents
Other UPRtek Measuring Instrument manuals
UPRtek
UPRtek MK350S PREMIUM User manual
UPRtek
UPRtek MK550T User manual

UPRtek
UPRtek PG200N User manual

UPRtek
UPRtek MK350N PLUS Dimensions and installation guide

UPRtek
UPRtek MF250N Dimensions and installation guide

UPRtek
UPRtek PG200N User manual

UPRtek
UPRtek MK350S PREMIUM User manual

UPRtek
UPRtek PG100N User manual

UPRtek
UPRtek MK350N PREMIUM User manual
UPRtek
UPRtek MK350D User manual