urmet domus Grothe CALIMA 400 Series User manual

Installation and Operating Instructions
Wireless Doorbell Set CALIMA 400 Series
Wireless plug-in doorbell
with LED light ring plus
wireless doorbell button
in set

2
Dear Customer,
You have purchased a high-quality product that was designed and
manufactured with utmost care and to the highest standards. The statutory
warranty period applies. The warranty does not cover defects that are due
to improper handling or use or failure to observe the installation and
operating instructions.
Package contents (please check for completeness)
o
1 x wireless plug-in doorbell CALIMA 400
o
1 x wireless doorbell button
o
2 x dowels and 2 x Phillips screws for mounting the
wireless doorbell button
o
1 x Allen key to open the cover on the wireless doorbell button
Also required (not included in delivery)
o
Tools/aids such as a drill, screwdriver
Alternative mounting option (not included in delivery)
o
Velcro strip or double-sided tape instead of mounting with
screws
Warranty / package contents / materials required

3
Safety instructions / cleaning
Do not expose the wireless doorbell to water droplets or splash water!
Do not place any objects filled with liquids on it! Do not cover it with objects or
blankets, curtains etc. and protect it from direct sunlight and open fire sources!
Do not expose the batteries in the wireless doorbell button to excessive
heat (e.g. direct sunlight, fire etc.)!
Intended use
The devices described here are only intended for private use as a wireless
doorbell or signalling system. Function may be impaired by various
influences (dead batteries, radio interference, etc.). Do not use the wireless
doorbell set in safety-relevant areas!
You are REQUIRED to take additional safety measures if the device's failure
could endanger people or cause other consequential damage!
Cleaning
Only use a damp cloth for cleaning. Do not use microfibre, as this could
damage the surface.

4
Basic information:
• Warranty
. . . . . . . . . . . . . . . . . . . . . . . . . . . . . . . . . . . . . . . . . . . . . . . . . . . . . . . . . . . . . . . . . . . . . . . . . . . . . . . . . . . . . . . . . . . . . . . . . . . . . . 2
• Package contents . . . . . . . . . . . . . . . . . . . . . . . . . . . . . . . . . . . . . . . . . . . . . . . . . . . . . . . . . . . . . . . . . . . . . . . . . . . . . . . . . . . . . . . . 2
• Additional tools required . . . . . . . . . . . . . . . . . . . . . . . . . . . . . . . . . . . . . . . . . . . . . . . . . . . . . . . . . . . . . . . . . . . . . . . . . . . . . . 2
• Other mounting option . . . . . . . . . . . . . . . . . . . . . . . . . . . . . . . . . . . . . . . . . . . . . . . . . . . . . . . . . . . . . . . . . . . . . . . . . . . . . . . . . . 2
• Intended use . . . . . . . . . . . . . . . . . . . . . . . . . . . . . . . . . . . . . . . . . . . . . . . . . . . . . . . . . . . . . . . . . . . . . . . . . . . . . . . . . . . . . . . . . . . . . . . . 3
• Safety information . . . . . . . . . . . . . . . . . . . . . . . . . . . . . . . . . . . . . . . . . . . . . . . . . . . . . . . . . . . . . . . . . . . . . . . . . . . . . . . . . . . . . . . . 3
• Cleaning
. . . . . . . . . . . . . . . . . . . . . . . . . . . . . . . . . . . . . . . . . . . . . . . . . . . . . . . . . . . . . . . . . . . . . . . . . . . . . . . . . . . . . . . . . . . . . . . . . . . . . . . 3
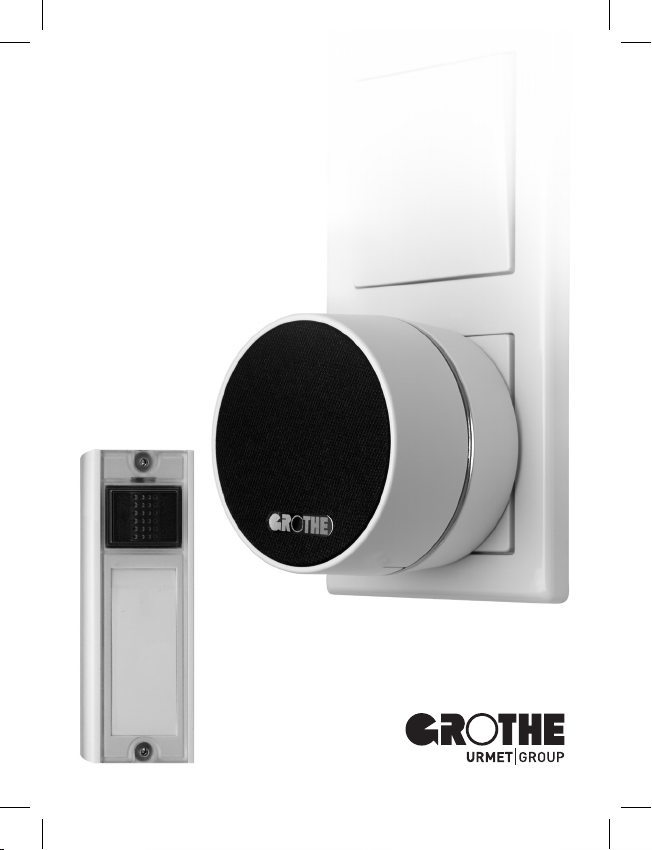
CALIMA 400 – Overview of main features . . . . . . . . . . . . . . . . . . . . . . . . . . . . . . . . . . . . . . . . . . . . . . . . . . . . . . . 6
Add-on product: Information about the Calima 200 . . . . . . . . . . . . . . . . . . . . . . . . . . . . . . . . . . . . . . . . . 8
Product overview . . . . . . . . . . . . . . . . . . . . . . . . . . . . . . . . . . . . . . . . . . . . . . . . . . . . . . . . . . . . . . . . . . . . . . . . . . . . . . . . . . . . . . . . . . . . 9
Using the wireless doorbell button for the first time
• Assembly, inserting batteries, labelling the name plate . . . . . . . . . . . . . . . . . . . . . . . . . . . . . . 10
• Wiring (optional) – use on an existing doorbell system . . . . . . . . . . . . . . . . . . . . . . . . . . . . . . . 12
Custom settings of the wireless doorbell
• Setting the melody . . . . . . . . . . . . . . . . . . . . . . . . . . . . . . . . . . . . . . . . . . . . . . . . . . . . . . . . . . . . . . . . . . . . . . . . . . . . . . . . . . . . . . 14
• Setting the LED light ring colour . . . . . . . . . . . . . . . . . . . . . . . . . . . . . . . . . . . . . . . . . . . . . . . . . . . . . . . . . . . . . . . . . 16
• Setting the night light . . . . . . . . . . . . . . . . . . . . . . . . . . . . . . . . . . . . . . . . . . . . . . . . . . . . . . . . . . . . . . . . . . . . . . . . . . . . . . . . . 18
• Setting the volume . . . . . . . . . . . . . . . . . . . . . . . . . . . . . . . . . . . . . . . . . . . . . . . . . . . . . . . . . . . . . . . . . . . . . . . . . . . . . . . . . . . . . . 20
Mute/snooze function
• Description of functions . . . . . . . . . . . . . . . . . . . . . . . . . . . . . . . . . . . . . . . . . . . . . . . . . . . . . . . . . . . . . . . . . . . . . . . . . . . . . 22
• Switching muting on / off (indefinitely) . . . . . . . . . . . . . . . . . . . . . . . . . . . . . . . . . . . . . . . . . . . . . . . . . . . . . . . . 23
• Switching on / prematurely ending the snooze function for 1, 3, 9 hours . . . . . 24
Table of contents

5
Pairing
• Pairing the wireless doorbell and the wireless doorbell button . . . . . . . . . . . . . . . . . . 26
• Optional: Adding additional wireless doorbell buttons / doorbells . . . . . . . . . . . . . . . 27
• Disconnecting the wireless doorbell and wireless doorbell button . . . . . . . . . . . . 28
Using the alarm function
• Alarm function . . . . . . . . . . . . . . . . . . . . . . . . . . . . . . . . . . . . . . . . . . . . . . . . . . . . . . . . . . . . . . . . . . . . . . . . . . . . . . . . . . . . . . . . . . . . 29
Low batteries / keeping the settings . . . . . . . . . . . . . . . . . . . . . . . . . . . . . . . . . . . . . . . . . . . . . . . . . . . . . . . . . . . . . . 30
Wireless range . . . . . . . . . . . . . . . . . . . . . . . . . . . . . . . . . . . . . . . . . . . . . . . . . . . . . . . . . . . . . . . . . . . . . . . . . . . . . . . . . . . . . . . . . . . . . . 31
Combination options / networking . . . . . . . . . . . . . . . . . . . . . . . . . . . . . . . . . . . . . . . . . . . . . . . . . . . . . . . . . . . . . . . . . 32
Technical data . . . . . . . . . . . . . . . . . . . . . . . . . . . . . . . . . . . . . . . . . . . . . . . . . . . . . . . . . . . . . . . . . . . . . . . . . . . . . . . . . . . . . . . . . . . . . . . 33
Troubleshooting and help . . . . . . . . . . . . . . . . . . . . . . . . . . . . . . . . . . . . . . . . . . . . . . . . . . . . . . . . . . . . . . . . . . . . . . . . . . . . . . 34
Declarations of conformity . . . . . . . . . . . . . . . . . . . . . . . . . . . . . . . . . . . . . . . . . . . . . . . . . . . . . . . . . . . . . . . . . . . . . . . . . . . . 35
Disposal and recycling . . . . . . . . . . . . . . . . . . . . . . . . . . . . . . . . . . . . . . . . . . . . . . . . . . . . . . . . . . . . . . . . . . . . . . . . . . . . . . . . . . 35
Warranty and liability . . . . . . . . . . . . . . . . . . . . . . . . . . . . . . . . . . . . . . . . . . . . . . . . . . . . . . . . . . . . . . . . . . . . . . . . . . . . . . . . . . . . 36
Quick guide
• Melody . . . . . . . . . . . . . . . . . . . . . . . . . . . . . . . . . . . . . . . . . . . . . . . . . . . . . . . . . . . . . . . . . . . . . . . . . . . . . . . . . . . . . . . . . . . . . . . . . . . . . . . . 37
• Colour of LED light ring. . . . . . . . . . . . . . . . . . . . . . . . . . . . . . . . . . . . . . . . . . . . . . . . . . . . . . . . . . . . . . . . . . . . . . . . . . . . . . . . 37
• Night light. . . . . . . . . . . . . . . . . . . . . . . . . . . . . . . . . . . . . . . . . . . . . . . . . . . . . . . . . . . . . . . . . . . . . . . . . . . . . . . . . . . . . . . . . . . . . . . . . . . . 38
• Volume . . . . . . . . . . . . . . . . . . . . . . . . . . . . . . . . . . . . . . . . . . . . . . . . . . . . . . . . . . . . . . . . . . . . . . . . . . . . . . . . . . . . . . . . . . . . . . . . . . . . . . . . 38
• Pairing. . . . . . . . . . . . . . . . . . . . . . . . . . . . . . . . . . . . . . . . . . . . . . . . . . . . . . . . . . . . . . . . . . . . . . . . . . . . . . . . . . . . . . . . . . . . . . . . . . . . . . . . . 39
• Mute / snooze function . . . . . . . . . . . . . . . . . . . . . . . . . . . . . . . . . . . . . . . . . . . . . . . . . . . . . . . . . . . . . . . . . . . . . . . . . . . . . . . . 39
Table of contents

6
x
CALIMA 400 – Overview of main features
1(only wireless doorbells of the ECHO, MISTRAL and CALIMA series)
The set contains one wireless plug-in doorbell and one wireless doorbell
button.
The CALIMA 400 is a wireless plug-in doorbell that is always ready for use. It
not only announces your visitors reliably, but it can also be used as a night
light thanks to the integrated LED light ring. When the night light function is
activated, the LED light ring lights up discreetly in the colour selected.
Simply plug the wireless doorbell into an easy-to-see indoor socket or on the
terrace within an audible range. The powerful melodies are easy to
distinguish from common ambient noise, which means that you can still
hear the doorbell clearly even from a distance. The coloured blinking
LED light ring is clearly visible and also helps to ensure that no visitors or
family members are missed, even when you cannot hear the wireless
doorbell. The specially wide range of the wireless signal also allows you to
roam freely around your house.
Ready to use: The wireless doorbell button is already paired from factory with
the wireless plug-in doorbell, so that you can use the wireless doorbell set
almost immediately. All you have to do is insert the batteries into the wireless
doorbell button. Individual settings such as the desired ring melody, the
colour of the LED light ring for call signalling as well as for the night light and
the volume can be changed later.
Networking and custom settings: Several wireless doorbell buttons and
wireless doorbells1can be combined with each other. It is even possible to
configure a different melody and LED light ring colour for each wireless
doorbell button. This allows you to determine where the signal is coming
from.

7
CALIMA 400 – Overview of main features
Alarm function: You may use the included wireless doorbell button as an alarm
transmitter. Additional SE03-type wireless doorbell buttons can also be
purchased separately. Using this type of wireless doorbell button in
combination with a wireless doorbell of the CALIMA series enables you to set
up a quickly usable, flexible and, above all, mobile in-house emergency call
system. A person in distress can conveniently use this to alert others. Simply
press and hold the wireless doorbell button for about three seconds.
Expandable system: Wireless doorbell sets of the CALIMA series can be
expanded with additional wireless doorbell buttons and wireless doorbells.
Wireless doorbell buttons can be paired with any number of wireless doorbells;
Up to 11 wireless doorbell buttons are possible per wireless doorbell.
Malfunctions are excluded as each wireless doorbell button sends a unique
code.

The perfect addition:
CALIMA 200
Our mobile
wireless
doorbell!
No matter where you
are in the house or
garden, never miss a
visitor again with our
wireless doorbell.
No cables
Menu with voice message
Powerful sound
Optical signal display
Sleep mode
Mute function

9
Product overview of wireless plug-in doorbell set CALIMA 400
WIRELESS PLUG-IN DOORBELL
WIRELESS
DOORBELL
BUTTON
Loudspeaker
LED light ring
Button Name plate
Screws
LED
Selection
button
Menu
button
Euro plug
The perfect addition:

10
Initial use / starting up – Wireless doorbell button
Wireless doorbell button: assembly, inserting batteries, labelling the name plate
1
1
Release the screws of the cover of the wireless doorbell button with the
Allen key to remove the top.
Releasing the screws
Release the screws of the cover of the wireless doorbell button with the
Allen key to remove the top.
2
2
Note: If possible, do not install the wireless doorbell button on metallic
parts, as this reduces the transmission range significantly.
Fasten the lower part of the wireless doorbell button to the wall through the
fastening holes with the screws provided.
Mounting holes

11
Starting up – Using the wireless doorbell button with batteries
To write on the label, pull out the name tag to the side and push it back in
afterwards. Fasten the upper part of the wireless doorbell button to the lower
part again with the Allen screws.
4
4
3
3
Insert two 1.5V batteries (type AAA) in the lower part of the wireless doorbell
button. Pay attention to the polarity (see markings).

12
Wireless doorbell button – Battery operation / optional wiring
Option A: Two 1.5V batteries (type AAA, LR03)
Option B: 6-12VDC via terminals '0' for negative pole (-) and V for positive pole (+)
Attention: The batteries must be removed from the wireless doorbell button when
electricity is connected!
6
6
Two connection options of the wireless doorbell button
Strip the insulation from the wires to approx. 6mm and carefully push them
through the sealing grommets on the back of the wireless doorbell button.
If necessary, cut off the upper tip of the sealing grommets first.
Electrical connection to an existing doorbell system
5
5
V O C T

13
Using the wireless doorbell button with the existing doorbell system
Use the 'C' and 'T' terminals to connect the wireless doorbell button to a
doorbell system with a mechanical chime or bell (3-12VAC/DC).
When triggering with DC voltage, the minus pole (-) is connected to 'C' and
the plus pole (+) to 'T'.
8
8
The terminals '0'and 'C' are used for connection to a potential-free button.
7
7

14
Custom settings – Melody
The wireless doorbell is
configured and operated with
two buttons:
• Select button (left)
• Menu button (right)
The voice output of the wireless
doorbell reports the status of the
settings.
Good to know: All settings
are permanently stored – even
without power supply.
Then press the menu button on the
wireless doorbell once in the default
state.
2
2
1x
To confirm, the LED light ring flashes
blue.
3
3
FLASHES BLUE
Press the wireless doorbell button
for which you want to set the
melody.
1
1
1x

15
Custom settings – Melody
From now on, you will hear the last
played melody when the wireless
doorbell button is pressed.
Note: The wireless doorbell
automatically returns to its default
state if no button is pressed for
7 seconds.
Repeat this process to set the
melody for other wireless doorbell
buttons.
You will hear the device say "melody
selection".
4
4
MELODY SELECTION
To confirm, the device will say
"settings finished".
6
6
SETTINGS FINISHED
Press the select button repeatedly
until the melody you want plays.
5
5

16
Custom settings – LED light ring colour
Good to know: You can select the
colour of the LED light ring
individually for each wireless
doorbell button.
This enables you to determine
which doorbell has been been
rung if you have several wireless
doorbell buttons.
2
2
2x
Press the wireless doorbell button
for which you want to set the colour
of the LED light ring.
Then press the menu button twice
in the default state.
You will hear the device say "colour
selection". The LED light ring lights
up in the currently set colour.
3
3
COLOUR SELECTION
1
1
1x

17
Custom settings – LED light ring colour
5
5
SETTINGS FINISHED
Seven seconds after the last button
was pressed, you will hear the
device say "settings finished".
The LED light ring now lights up in
the set colour when the wireless
doorbell button is pressed.
Now press the select button
repeatedly until the LED light ring
lights up in the desired colour.
Your selection is automatically
saved if no button is pressed for
7 seconds.
4
4
Note: The wireless doorbell
automatically returns to its default
state if no button is pressed for
7 seconds.

18
Custom settings – Night light colour / deactivating
1
1
3x
Press the menu button 3 times in the
default state.
Press the
select button
repeatedly
until the LED light ring lights up in the
desired colour or goes out.
Your selection is automatically saved if
no button is pressed for 7 seconds.
You will hear the device say "night
light". The LED light ring lights up in
the currently set colour.
2
2
NIGHT LIGHT
3
3

19
Custom settings – Night light colour / deactivating
Note: The wireless doorbell
automatically returns to its default
state if no button is pressed for
7 seconds.
To confirm, the device will say
"settings finished".
4
4
SETTINGS FINISHED
Seven seconds after the last button
was pressed, you will hear the
device say "settings finished".
The LED light ring now lights up
in the set colour.

20
Settings – Volume
To confirm, the LED light ring flashes
green.
Press the menu button 4 times in the
default state.
Note: The volume
of the wireless
doorbell is always adjusted
simultaneously for all wireless
doorbell
buttons.
3
3
VOLUME
2
2
FLASHES GREEN
1
1
4x
You will hear the device say "volume".
Table of contents
Other urmet domus Accessories manuals

urmet domus
urmet domus 1033/132 User manual

urmet domus
urmet domus 1033/351 Installation and operation manual

urmet domus
urmet domus 729 User manual

urmet domus
urmet domus scs sentinel PRO AAM0114 User manual

urmet domus
urmet domus 9854 Series User manual

urmet domus
urmet domus 4850/1 User manual

urmet domus
urmet domus BitronHome 902010/22 User manual

urmet domus
urmet domus 694 User manual