manuals.online logo
Brands
  1. Home
  2. •
  3. Brands
  4. •
  5. VADO
  6. •
  7. Plumbing Product
  8. •
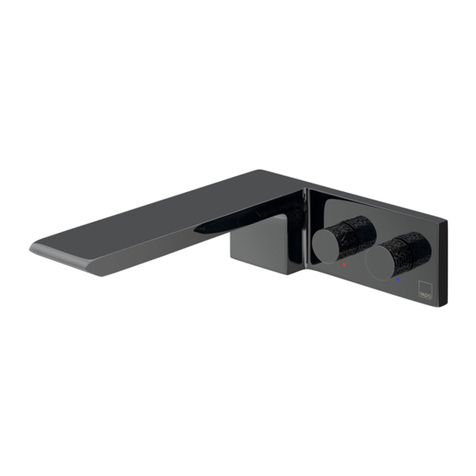
  9. VADO watergames Installation and operating instructions

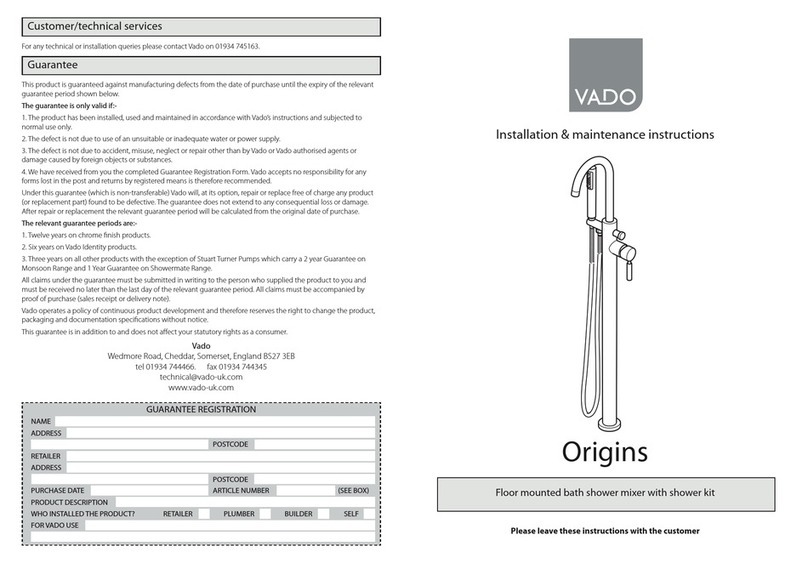
VADO watergames Installation and operating instructions

watergames
Vado
Wedmore Road, Cheddar, Somerset, England BS27 3EB
tel 01934 744466. fax 01934 744345
technical@vado-uk.com
www.vado-uk.com
guarantee
customer/technical services
For any technical or installation queries please contact Vado on 01934 745163.
GUARANTEE REGISTRATION
NAME
ADDRESS
RETAILER
ADDRESS
PURCHASE DATE
PRODUCT DESCRIPTION
WHO INSTALLED THE PRODUCT?
FOR VADO USE
POSTCODE
POSTCODE
ARTICLE NUMBER (SEE BOX)
RETAILER PLUMBER BUILDER SELF
This product is guaranteed against manufacturing defects from the date of purchase until the expiry of the relevant
guarantee period shown below.
The guarantee is only valid if:-
1. The product has been installed, used and maintained in accordance with Vado’s instructions and subjected to
normal use only.
2. The defect is not due to use of an unsuitable or inadequate water or power supply.
3. The defect is not due to accident, misuse, neglect or repair other than by Vado or Vado authorised agents or
damage caused by foreign objects or substances.
4. We have received from you the completed Guarantee Registration Form. Vado accepts no responsibility for any
forms lost in the post and returns by registered means is therefore recommended.
Under this guarantee (which is non-transferable) Vado will, at its option, repair or replace free of charge any product
(or replacement part) found to be defective. The guarantee does not extend to any consequential loss or damage.
After repair or replacement the relevant guarantee period will be calculated from the original date of purchase.
The relevant guarantee periods are:-
1. Twelve years on chrome nish products.
2. Three years on all other products with the exception of Stuart Turner Pumps which carry a 2 year Guarantee on
Monsoon Range and 1 Year Guarantee on Showermate Range.
All claims under the guarantee must be submitted in writing to the person who supplied the product to you and
must be received no later than the last day of the relevant guarantee period. All claims must be accompanied by
proof of purchase (sales receipt or delivery note).
Vado operates a policy of continuous product development and therefore reserves the right to change the product,
packaging and documentation specications without notice.
This guarantee is in addition to and does not aect your statutory rights as a consumer.
exposed riser rail kit with diverter
installation & maintenance instructions
please leave these instructions with the customer
important - please read
27
Please read these instructions carefully before starting installation and keep for future
reference.
Remove all packaging and check the product for missing parts or damage before
starting installation.
Any alterations made to this product and ttings may infringe water regulations and
will invalidate the guarantee.
The installation must comply with all Local/National Water Supply Authority
Regulations/Byelaws and Building and Plumbing (UK:BS6700) Regulations.
We strongly recommend that you use a qualied and registered plumber.
Installer must comply with current regulations.
Please note if installing in an enclosed environment, access should be left for servicing
and maintenance. No costs relating to inadequate access can be accepted.
maintenance
To remove any build up of limestone on the shower head, just rub your ngers lightly
over the nozzles.
installers/users notes
care of the mixer
Our products are nished to the highest standard and due care needs to be taken to
ensure their looks are retained.
We recommend cleaning all products with a soft damp cloth ONLY and advise strongly
against the use of ALL cleaning products i.e. powders and liquids.
If the above instructions are not followed this will invalidate your guarantee in the
event of a problem occurring.
6
dimensions
3
operation
installation
Handset
Place one of the rubber washers into the
cone end of the hose and screw to the
handset slot the cone into the shower
head holder on the riser.
Place the second rubber washer into the
other end of the hose and attach it to
the diverter.
Rotate the control handle 90°
clockwise to divert the water from the
handset to the riser.
Rotate the control handle 90°anti -
clockwise to divert the water from the
riser to the handset.
Place the cone part of the hose into
the handset holder, the holder can
be repositioned by pressing the
button at the back and sliding up
and down.
1048mm
62mm
554mm
110mm
200mm
400mm
installation
45
installation
Warning! Please check for any
hidden cables and pipes before drilling
holes in the wall.
Before installing your new riser rail,
ush through the pipe work to ensure
removal of debris, turn o the water
supply.
Mark the position of the diverter on
the wall at the required height. Mark a
vertical line up the wall from the centre
of the diverter.
Prepare the wall with a ush ½”
connector, and connect to the water
supply coming from the mixer.
Using the supplied PTFE tape screw the
adaptor into the wall.
Riser rail
Assemble by sliding the support bracket
onto the top riser, make sure that the
top riser is pointing away from the wall
and the grub screw is on the underside
of the bracket.
Screw the riser into the bottom of the
top riser.
Reposition the bracket over the joint and
tighten the 2 screws within the bracket
to secure the bracket to the riser.
Temporarily hold the riser assembly onto
the adaptor, with a pencil mark around
the support bracket.
Remove the riser rail assemble.
Place the mounting bracket centrally
within the marked position and mark the
screw hole.
Using a 6mm drill bit for the wall plug,
drill the wall at the centre of the marked
position and x the mounting bracket
in position using the supplied wall plug
and screw.
Push the riser rail assembly onto the
adaptor being careful not to damage the
seals.
Push the support bracket onto the
mounting bracket and secure from
underneath with the hexagonal grub
screw using the supplied Allen key.
Secure the diverter to the adapter
by tightening the grub screw on the
underside using the supplied Allen key.
Finally, make sure there is a rubber
washer in place in the shower head and
screw onto the top riser.
Diverter
Wall plug
Shower head
Mounting
bracket
Handset
holder
Screw
Top riser
Riser
Support bracket
Grub screw
Control
handle
Shower hose connection
Connector
(not supplied)
Allen key
Screw driver
Top riser
Support
bracket
Shower hose
connection
Riser
Adaptor
Riser
Grub screw
Diverter

This manual suits for next models

1

Other VADO Plumbing Product manuals

VADO PHOTON PHO-100FW/SB-CP User manual

VADO

VADO PHOTON PHO-100FW/SB-CP User manual

VADO Axces METIZ Instruction Manual

VADO

VADO Axces METIZ Instruction Manual

VADO AXCES ASTRA Series Instruction Manual

VADO

VADO AXCES ASTRA Series Instruction Manual

VADO AXCES MATRIX AX-MAT-145A-CP Instruction Manual

VADO

VADO AXCES MATRIX AX-MAT-145A-CP Instruction Manual

VADO ZOO Installation and operating instructions

VADO

VADO ZOO Installation and operating instructions

VADO te Installation and operating instructions

VADO

VADO te Installation and operating instructions

VADO ALTITUDE TAB-148/2WO-ALT-CP User manual

VADO

VADO ALTITUDE TAB-148/2WO-ALT-CP User manual

VADO AXCES IRLO AX-IRO-123+K-CP Instruction Manual

VADO

VADO AXCES IRLO AX-IRO-123+K-CP Instruction Manual

VADO LIFE LIF-200-CP User manual

VADO

VADO LIFE LIF-200-CP User manual

VADO Metiz MET-100 User manual

VADO

VADO Metiz MET-100 User manual

VADO INDIVIDUAL OMIKA NOIR User manual

VADO

VADO INDIVIDUAL OMIKA NOIR User manual

VADO life Installation and operating instructions

VADO

VADO life Installation and operating instructions

VADO NOTION User manual

VADO

VADO NOTION User manual

VADO synergie Installation and operating instructions

VADO

VADO synergie Installation and operating instructions

VADO warwick Installation and operating instructions

VADO

VADO warwick Installation and operating instructions

VADO Te Installation and operating instructions

VADO

VADO Te Installation and operating instructions

VADO Axces Astra AX-AST-130+K-CP Instruction Manual

VADO

VADO Axces Astra AX-AST-130+K-CP Instruction Manual

VADO ELEMENTS ELE-148D/3/SQ-CP User manual

VADO

VADO ELEMENTS ELE-148D/3/SQ-CP User manual

VADO ALTITUDE TAB-128/3WO-ALT-CP User manual

VADO

VADO ALTITUDE TAB-128/3WO-ALT-CP User manual

VADO AXCES NURI AX-NUR-137-CP Instruction Manual

VADO

VADO AXCES NURI AX-NUR-137-CP Instruction Manual

VADO AXCES ASTRA AX-AST-106/CD-CP User manual

VADO

VADO AXCES ASTRA AX-AST-106/CD-CP User manual

VADO OMIKA SFSRK User manual

VADO

VADO OMIKA SFSRK User manual

VADO NOTION TAB-148/2WO-NOT-CP User manual

VADO

VADO NOTION TAB-148/2WO-NOT-CP User manual

VADO Zoo Installation and operating instructions

VADO

VADO Zoo Installation and operating instructions

Popular Plumbing Product manuals by other brands

Kraus Britt KSF-1691 manual

Kraus

Kraus Britt KSF-1691 manual

Porcelanosa noken SMART BOX SLIM TERMO 100238318... manual

Porcelanosa

Porcelanosa noken SMART BOX SLIM TERMO 100238318... manual

ZURN Sundara Z5005.01 Installation, operation, maintenance and parts manual

ZURN

ZURN Sundara Z5005.01 Installation, operation, maintenance and parts manual

ALT Via Dante/Misto 30882 Installation & Care Guide

ALT

ALT Via Dante/Misto 30882 Installation & Care Guide

Sanela SLPN 10E Instructions for use

Sanela

Sanela SLPN 10E Instructions for use

American Standard EverClean Toilet Seat 5320.110 brochure

American Standard

American Standard EverClean Toilet Seat 5320.110 brochure

Rubi LEXA RLX18 Installation

Rubi

Rubi LEXA RLX18 Installation

Hans Grohe 13439181 Installation/User Instructions/Warranty

Hans Grohe

Hans Grohe 13439181 Installation/User Instructions/Warranty

Moen Castleby T6988 Series installation instructions

Moen

Moen Castleby T6988 Series installation instructions

Kohler 73087T-B4 installation instructions

Kohler

Kohler 73087T-B4 installation instructions

Hagleitner XIBU SEAT DISINFECT analog installation instructions

Hagleitner

Hagleitner XIBU SEAT DISINFECT analog installation instructions

Elkay Lustertone ELU1618 Specifications

Elkay

Elkay Lustertone ELU1618 Specifications

Lefroy Brooks CB-4060 Installation, operating,  & maintenance instructions

Lefroy Brooks

Lefroy Brooks CB-4060 Installation, operating, & maintenance instructions

Hans Grohe Fixfit S Assembly instructions

Hans Grohe

Hans Grohe Fixfit S Assembly instructions

Hans Grohe AXOR Montreux 27982 1 Series Installation instructions / warranty

Hans Grohe

Hans Grohe AXOR Montreux 27982 1 Series Installation instructions / warranty

miseno MNO5882CP quick start guide

miseno

miseno MNO5882CP quick start guide

safgard 550 Series manual

safgard

safgard 550 Series manual

Bristan Prism Eco Click Fitting Instructions & Contents List

Bristan

Bristan Prism Eco Click Fitting Instructions & Contents List

manuals.online logo
manuals.online logoBrands
  • About & Mission
  • Contact us
  • Privacy Policy
  • Terms and Conditions

Copyright 2025 Manuals.Online. All Rights Reserved.