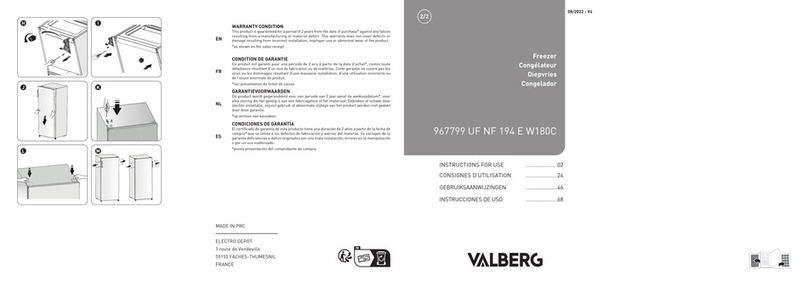
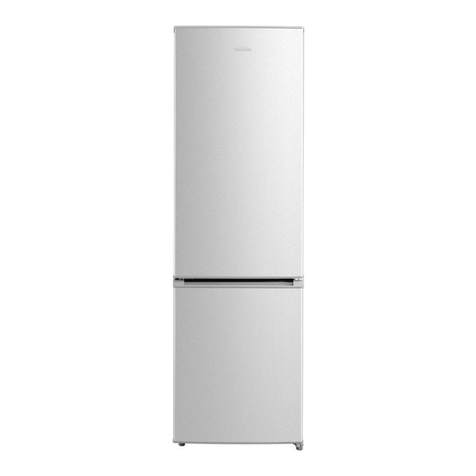
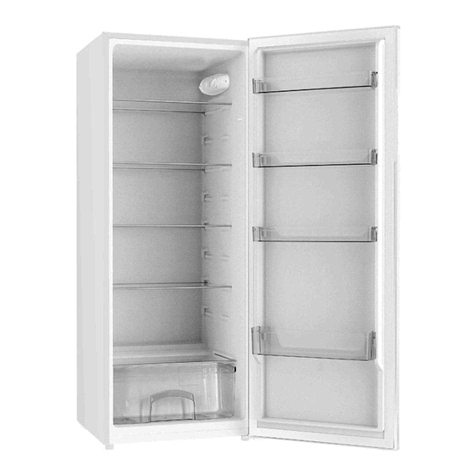
VALBERG 2D 206 E S180C User manual

M
O
N
P
J
L
I
K
977332 - 2D 206 E S180C
INSTRUCTIONS FOR USE ....................02
CONSIGNES D'UTILISATION ....................24
GEBRUIKSAANWIJZINGEN ....................44
INSTRUCCIONES DE USO ....................70
2/2 08/2022 - V4
Fridge - freezer
Réfrigérateur - congélateur
Koelvrieskast
Frigorífico - congelador
EN
WARRANTY CONDITION
This product is guaranteed for a period of 2 years from the date of purchase* against any failure
resulting from a manufacturing or material defect. This warranty does not cover defects or
damage resulting from incorrect installation, improper use or abnormal wear of the product.
*as shown on the sales receipt.
FR
CONDITION DE GARANTIE
Ce produit est garanti pour une période de 2 ans à partir de la date d’achat*, contre toute
défaillance résultant d’un vice de fabrication ou de matériau. Cette garantie ne couvre pas les
vices ou les dommages résultant d’une mauvaise installation, d’une utilisation incorrecte ou
de l’usure anormale du produit.
*sur présentation du ticket de caisse.
NL
GARANTIEVOORWAARDEN
Dit product wordt gegarandeerd voor een periode van 2 jaar vanaf de aankoopdatum*, voor
elke storing die het gevolg is van een fabricagefout of het materiaal. Gebreken of schade door
slechte installatie, onjuist gebruik of abnormale slijtage van het product worden niet gedekt
door deze garantie.
*op vertoon van kassabon.
ES
CONDICIONES DE GARANTÍA
El certificado de garantía de este producto tiene una duración de 2 años a partir de la fecha de
compra* que se limita a los defectos de fabricación y averías del material. Se excluyen de la
garantía deficiencias o daños originados por una mala instalación, errores en la manipulación
o por un uso inadecuado.
*previa presentación del comprobante de compra.
MADE IN PRC
ELECTRO DEPOT
1 route de Vendeville
59155 FACHES-THUMESNIL
FRANCE

A
C
E
1
2
F
B
12 3
D
H
1
2
G
1
2
3
4
5
6
7
8
9
10
11
12

2 3
FR FR
Aperçu de l’appareil
A A
Overview of the
appliance
A
Recommended ambient temperature
Setting the thermostat
Description of the appliance
Installation of your new appliance
Inverting the door
Using the appliance
B
Using your appliance
Operation
Useful information
CMaintenance and cleaning
Useful tips and advice
Troubleshooting
3EN
Table of contents
2EN
Thanks!
Thank you for choosing this VALBERG product.
Chosen, tested and recommended by ELECTRO DEPOT,
VALBERG branded products are easy to use, reliable,
and of an impeccable standard.
With every use of this appliance, you can be sure of
complete satisfaction.
Welcome to ELECTRO DEPOT.
Visit our website: www.electrodepot.fr

4 5
FR FR
Aperçu de l’appareil Aperçu de l’appareil
A A
4 5
EN EN
Overview of the appliance Overview of the appliance
A A
Description of the appliance
1Freezer tray 7Freezer door
2Control box and LED lighting 8Upper door shelves
3Refrigerator shelf 9Lower door shelf
4Vegetable crisper rack 10 Refrigerator door
5Crisper 11 Freezer
6Adjustable feet 12 Refrigerator
PLEASE NOTE
Due to the constant development of our products, your
refrigerator may differ slightly from the description
provided in this instruction manual, but its functions and
use remain the same. To get more space in the freezer,
you can remove the shelf inside the freezer.
Ambient temperatures of use
Respect the climate classes indicated in the product information on the appliance's nameplate.
You can use this to check the recommended temperature range of the room where the appliance
is located:
– SN: Between 10 and 32°C
– N: Between 16 and 32°C
– ST: Between 16 and 38°C
– T: Between 16 and 43°C
A multi-class appliance can handle the lowest and highest temperature of all classes covered.
Using the appliance outside the recommended temperature range will lead to inferior
performance and premature ageing.
Adjusting the thermostat
For optimal use and to save energy, adjust the temperature control(s) of the appliance according
to the ambient temperature of the room in which it is being used, and respect the climate class.
Refer to the product sheet to find out the climatic class associated with the minimum and
maximum recommended ambient temperatures for the appliance as well as the temperature
setting recommended for storing food under optimal conditions.
The ambient temperatures in °C are given as a rough guide.
The set positions can be affected by the location of the appliance in the room, how often the
door is opened or the load of food inside.
The thermostat may need to be changed to compensate for these factors.
Examples of locations:
– Unheated room in winter like a garage in a cold region.
– Kitchen/lounge area with normal heating.
– Room that is not air-conditioned in summer in a hot region.

6 7
FR FR
Aperçu de l’appareil Aperçu de l’appareil
A A
6 7
EN EN
Overview of the appliance Overview of the appliance
A A
• Install your appliance in a dry location to prevent damage from moisture.
• Keep your appliance away from direct sunlight, rain or frost. Keep your appliance away
from heat sources such as cookers, fires and radiators.
Levelling the appliance
•
To ensure proper levelling and air circulation
at the back and bottom of the appliance, you
may need to adjust the feet.
•
You can set them manually with a suitable
key.
To allow the doors to close automatically, tilt the
top of the appliance back about 10 mm.
10 mm
Installing your new appliance
Before using the device for the first time, please note the following tips.
Ventilation of the appliance
CAUTION!
To improve the efficiency of the cooling system and
save energy, you must maintain good ventilation
around the unit. For this reason, sufficient clearance
should be left around it. It is recommended to
leave a space of 50-70 mm between the rear wall
of the appliance and the wall, a minimum space of
100 mm above the appliance, a minimum space of 100
mm between its side walls and the walls, as well as a
free space at the front that allows the door to open to
135°. Please observe the following diagrams.
100
100
100
50-70
100
1105-1125
940
592-612
135
PLEASE NOTE
This appliance functions properly for climate classes
N to ST, as shown in the table below. If exposed to
temperatures above or below the specified range for an
extended period of time, the unit may malfunction.

8 9
FR FR
Aperçu de l’appareil Aperçu de l’appareil
A A
8 9
EN EN
Overview of the appliance Overview of the appliance
A A
A
Set the refrigerator vertically. Open the doors to remove all the shelves (to avoid damaging
them), then close the doors.
Remove the door shelf
B
Use a spatula or a thin, flat screwdriver to prise off the screw hole cover on the top left
corner of the refrigerator and the right hinge cover on the top right corner of the refrigerator.
CUnscrew the self-tapping collar screws used to secure the top right hinge using an 8mm
socket spanner or screwdriver (while doing so, please hold the top door with your other
hand).
D
Remove the upper hinge pin, transfer it in the opposite direction and tighten it firmly before
storing it in a safe place.
E Remove the top door from the centre hinge by carefully lifting the door vertically.
PLEASE NOTE
When removing the door, pay attention to the washers
between the centre hinge and the bottom of the freezer
door: they may remain attached to the door. Do not lose
them.
FPlace the top door on a smooth surface with the outer panel facing up. Loosen the screw
2and the stopper 1and install them on the left side, tightening them firmly.
GUnscrew the two self-tapping collar screws used to secure the centre hinge and remove
the centre hinge that holds the bottom door in place.
H
Place the bottom door on a smooth surface; with the outer panel facing up. Loosen the
screw 2and the stopper 1and install them on the left side, tightening them firmly.
IRemove the screw hole covers on the left of the centre cover plate and place them on the
right (as shown below).
J
Place the refrigerator on some soft foam packing or similar material. Remove both the
adjustable foot and the bottom hinge by unscrewing the self-tapping collar screws.
K
Install the bottom hinge on the left side, securing it with self-tapping collar screws. Install
the adjustable foot on the other side and secure it.
L
Transfer the bottom door to the appropriate position, place the bottom hinge, insert the
hinge pin into the bottom hole of the refrigerator door and tighten the bolts.
Inverting the door
If necessary, the direction of the door opening can be reversed from the right (as supplied)
to the left.
WARNING
When reversing the door, the appliance must be
unplugged. Make sure the power plug is pulled out of
the socket.
Tools you will need
Not included
Socket spanner
8 mm
Thin flat-head
screwdriver
Spatula
Cross-point
screwdriver
Monkey
spanner
Spanner 8 mm
Additional part
(in the plastic pouch)
Left hinge cover
PLEASE NOTE
If necessary, the refrigerator can be placed on its rear
side for better access to the base.
To avoid damage to the rear wall, we recommend that
you rest the appliance on soft foam packaging or similar
material. To reverse the door, the following steps are
generally recommended.

10 11
FR FR
Aperçu de l’appareil Aperçu de l’appareil
A A
10 11
FR FR
Utilisation de l’appareil Utilisation de l’appareil
B B
10 11 EN
Overview of the appliance
A A
10 11
EN EN
Overview of the appliance Using the appliance
A B
Using your appliance
Accessories 1)
Removable shelves/trays
•
Various glass and plastic storage shelves or racks are included on your appliance.
Depending on the model, the refrigerator has different combinations and features.
•
The refrigerator walls are fitted with different runners so that you can position the shelves
as you wish.
Removing and installing door shelves
Warning: the door shelf must not be removed and installed by the user! If the door shelf is
damaged, contact customer service for assistance. To replace the door shelf, following these
steps:
Remove the door shelf
Press the right inner side of the door shelf while
holding the left side.
When the shelf catch has come off the
refrigerator door, remove the shelf by tilting
it upwards.
Installing the door shelf
First, tilt the left side of the door shelf, making
sure that the catch is properly inserted into the
door. Then press the right inner side down into
place.
M
Turn the centre hinge 180 degrees and place it in position. Insert the centre hinge pin into
the top hole of the refrigerator door and tighten the bolts.
NTransfer the top door into position. Secure the door level and insert the centre hinge pin
into the bottom hole of the freezer door.
O
Transfer the top hinge and insert the top hinge pin into the top hole of the freezer door,
adjusting the position of the freezer door (while doing so, please hold the top door with
your other hand). Secure the top hinge with the self-tapping collar screws.
P
Install the screw hole cover on the top right corner of the refrigerator. Install the top hinge
cover (found in the plastic pouch) on the left corner of the unit. Put the other top hinge
cover away in the plastic pouch.
QOpen the top door, install the door shelves and close it.
CAUTION
When reversing the door, the appliance must be
unplugged. Remove the power plug from the mains
socket beforehand.

12 13
FR FR
Aperçu de l’appareil Aperçu de l’appareil
A A
13 FR
Informations pratiques
C
12 FR
Utilisation de l’appareil
B
12 13 EN
Overview of the appliance
A A
13 EN
Using the appliance
B
12 EN
Using the appliance
B
Replacing the LED lighting
CAUTION
If the LED light is damaged, USERS MUST NOT
REPLACE IT BY THEMSELVES!
Replacing the LED lighting by inexperienced persons may result in injury or serious malfunction.
This must be replaced by a qualified person to avoid any danger. Contact your local service
centre for assistance.
• Before replacing the LED light, switch
off the appliance and unplug it or
remove the corresponding fuse or switch
the circuit breaker.
• LED lighting features: 220-240 V, 2 W
max.
• Disconnect the plug from the mains
socket.
• To replace the LED light, unscrew the
screw.
• Replace the defective LED light.
• Turn the refrigerator back on.
Refrigerator compartment
•
For storing food that does not need to be frozen. It has different sections for different
types of food.
Freezer compartment 2)
• For the freezing of fresh food and the long-term storage of frozen or deep-frozen food.
Thawing food products 2)
• In the refrigerator compartment.
• At room temperature.
• In a microwave oven.
• In a traditional or convection oven.
• Once defrosted, food must not be refrozen under any circumstances.
1. If the appliance has the corresponding accessories and functions.
2. If the appliance has a freezer compartment.
Crisper
• To store fruit and vegetables.
Operation
Switching on and setting the temperature
• Insert the plug of the connecting cable into a socket equipped with a grounding contact.
When the refrigerator compartment door is opened, the interior light comes on. Once
the refrigerator is installed, wait 5 minutes before plugging it in. Do not place any food
inside until the temperature inside has dropped sufficiently.
•
The temperature selector switch is located on the right side of the refrigerator compartment.
Position “0” means:
The appliance is off.
Turn the dial clockwise to switch on the
appliance.
Position “1” means:
Highest temperature, warmest setting.
Position “7” (furthest) means:
Lowest temperature, coldest setting.

14 15
FR FR
Aperçu de l’appareil Aperçu de l’appareil
A A
14 15
FR FR
Informations pratiques Informations pratiques
C C
14 FR
Aperçu de l’appareil
A
14 FR
Informations pratiques
C
14 EN
Overview of the appliance
A
14 EN
Useful information
C
• Before servicing the appliance, switch it off and remove the plug from the mains socket.
•
Do not clean the appliance with metal objects, steam cleaners, essential oils, organic
solvents or abrasive cleaners.
• Do not use sharp objects to remove ice from the appliance. Use a plastic scraper.
•
Any electrical operations required when maintaining the appliance should be carried out
by a qualified electrician or another competent person.
• An approved maintenance centre should carry out maintenance on this appliance; Only
original spare parts may be used.
1. If the appliance is equipped with a frost removal function.
2. If the appliance has a freezer compartment.
For hygiene reasons, the appliance (and its external and internal accessories) should be
cleaned regularly (at least once every two months).
CAUTION
When cleaning, the appliance must be unplugged from
the mains because of the risk of electric shock. Risk of
electrocution! Before cleaning, switch off the appliance
and remove the power plug from the mains socket.
Exterior cleaning
• Wipe the control panel with a soft, clean cloth.
•
Spray water on the cleaning cloth rather than directly on the surface of the appliance.
This will moisten the surface evenly.
•
Clean the doors, handles and surfaces of the appliance with a neutral detergent and wipe
with a soft cloth.
CAUTION
- Do not use sharp objects; they may scratch the
surface.
- Do not use thinner, car detergent, chlorine bleach,
essential oils, abrasive cleaners, or organic solvents
such as benzene for cleaning.
15 FR
Aperçu de l’appareil
A
15 FR
Informations pratiques
C
15
A
15 EN
Useful information
C
These may damage the surface of the device and could cause a fire.
Interior cleaning
You should clean the inside of the appliance regularly.
Clean the inside of the freezer with a dilute solution of bicarbonate of soda, then rinse with
lukewarm water using a wrung-out cloth or sponge. Wipe down the shelves and trays so that
they are completely dry before replacing them. Dry all surfaces and attachments thoroughly.
Although the appliance removes frost automatically, a layer of frost may regularly form inside
the freezer or if it is left open too long. If the frost layer becomes too thick, choose a time
when there is little food in your refrigerator and proceed as follows:
1.
Remove food and accessory trays, unplug the appliance and leave the doors open. Ventilate
the room properly to speed up the defrosting process.
2. Once defrosting is complete, clean your freezer as described above.
CAUTION
Do not use sharp objects to remove frost from the
freezer compartment. The appliance should only be
reconnected to the mains and switched on again when
the interior is completely dry.
Cleaning the door seals
Make sure to keep the door seals clean. If there is sticky food and drink residue, the seals
may stick to the appliance and tear when you open the door. Wash the joints with a neutral
detergent and lukewarm water. Rinse and dry thoroughly after cleaning.
CAUTION
The appliance may only be switched on again when the
door seals are completely dry.
Replacement of the LED lighting:
Warning: the LED lighting must be replaced by a competent person!
If the LED light is damaged, contact customer service for assistance.
Care and maintenance

16 17
FR FR
Aperçu de l’appareil Aperçu de l’appareil
A A
16 17
FR FR
Informations pratiques Informations pratiques
C C
16 FR
Aperçu de l’appareil
A
16 FR
Informations pratiques
C
16 EN
Overview of the appliance
A
16 EN
Useful information
C
Defrosting
Why you should defrost the appliance:
•
Water in the food or that gets into the air inside the refrigerator when the doors are opened
can form a layer of frost inside the appliance. As the frost layer thickens, it reduces the
cooling effect of the appliance. When it is more than 10 mm thick, you should defrost
the appliance.
Defrosting the refrigerator
•
This compartment is automatically regulated by switching the temperature control on
and off; it does not require defrosting. The defrosting water will automatically flow into
a drip tray via a drain pipe at the back of the refrigerator.
Defrosting the freezer
• The freezer is defrosted manually. Before doing so, remove the food from the freezer.
•
Remove the ice cube tray and any food from the trays or place them temporarily in the
refrigerator compartment.
• Set the temperature knob to the “0” position (the compressor will turn off) and leave the
freezer door open until the ice and frost have completely melted and accumulated at the
bottom of the freezer. Wipe up the water with a soft cloth.
•
To speed up the defrosting process, you can place a bowl of hot water (about 50°C) in
the freezer compartment and scrape off the ice and frost with a defrosting spatula. Once
defrosting is complete, be sure to set the temperature control knob to the initial position.
•
To avoid warping of the interior of the appliance, it is not recommended to heat the freezer
compartment by directly applying hot water or using a hairdryer.
• It is also not advisable to scrape off ice and frost or to remove food from containers that
were frozen with it, using sharp tools or wooden rods, so as not to damage the inner lining
or the surface of the evaporator.
CAUTION
Before defrosting, switch off the appliance by turning
the temperature control to the “0” position.
17 FR
Aperçu de l’appareil
A
17 FR
Informations pratiques
C
17
Overview of the appliance
A
17 EN
Useful information
C
IMPORTANT
The appliance should be defrosted at least once a
month. If the door is opened regularly or if the appliance
is used in an extremely humid environment, you are
advised to defrost the appliance once a fortnight.
Extended periods of disuse
• Remove all refrigerated elements.
• Switch off the appliance by turning the temperature control to the “0” position.
•
Remove the power plug from the mains socket, turn off the power or disconnect the
power supply.
• Clean the appliance thoroughly (see “Cleaning and maintenance”).
• Leave the door open to prevent odours from forming.
PLEASE NOTE
If the appliance has a freezer compartment.
Useful tips and advice
Energy-saving tips
• We recommend that you follow these energy-saving tips.
• Avoid leaving the door open for long periods.
•
Make sure that the appliance is away from any heat source (direct sunlight, electric oven,
etc.).
• Do not set the temperature to any colder than necessary.
• Do not place hot food or evaporating liquid in the appliance.
•
Install the appliance in a well-ventilated and moisture-free place. Please refer to the
section “Installing your new appliance”.
•
If the diagram shows the correct combination of shelves, crispers and racks for your
appliance, please do not change it. This combination is designed to be the most energy-
efficient configuration.
Tips for refrigerating fresh food
•
Do not place hot food directly in the refrigerator or freezer;
this would raise the interior temperature, thus increasing the activity of the compressor,
which would then consume more energy.

18 19
FR FR
Aperçu de l’appareil Aperçu de l’appareil
A A
18 19
FR FR
Informations pratiques Informations pratiques
C C
18 FR
Aperçu de l’appareil
A
18 FR
Informations pratiques
C
18 EN
Overview of the appliance
A
18 EN
Useful information
C
• Cover or wrap food; especially if it has a strong flavour.
• Store food in such a way that air can circulate freely around it.
Refrigeration tips
• Meat (all kinds) and food packaged in polyethene: wrap and store on the glass shelf that
rests on the crisper. Always observe the shelf life of foods and consume them by the dates
recommended by the manufacturers.
• Prepared dishes, cold dishes, etc. : these products should be covered and may be placed
on any of the shelves.
• Fruit and vegetables: these should be placed in the specially provided crisper.
• Butter and cheese : they should be wrapped in aluminium foil or airtight plastic film.
• Bottles of milk: these should be capped and kept in the door trays.
Tips for freezing
•
When switching on for the first time or after a period of non-use, allow the appliance to run
for at least 2 hours at the highest settings before placing food in the freezer compartment.
• Prepare small portions so that they can freeze through quickly and so that you have the
option of only defrosting the quantity that you need.
• Wrap the food in aluminium foil or airtight polyethene film.
•
Do not allow fresh, unfrozen food to touch food that has already been frozen to prevent
the temperature of the food from rising.
• Frozen products, if eaten straight from the freezer, can cause frostbite on the skin.
Advice for the storage of frozen food.
• Ensure that the frozen food has been properly stored by the food distributor.
•
Once defrosted, food spoils quickly and should never be refrozen. Avoid exceeding the
use-by date indicated by the manufacturer.
Switching off your appliance
If the appliance is to be taken out of service for an extended period of time, the following steps
should be taken to prevent the formation of mould in the appliance.
1. Remove all food.
2. Disconnect the power plug from the mains socket.
3. Clean and dry the interior thoroughly.
4. Ensure that all doors are wedged open slightly to allow air to circulate.
To avoid contaminating food, please observe the following instructions.
•
Leaving the door open for a long time can cause the temperature inside the appliance
to rise considerably.
• Clean food contact surfaces and accessible drainage systems regularly.
•
In the refrigerator, store raw meat and fish in suitable containers so that they do not come
into contact with or drip onto other foods.
19 FR
Aperçu de l’appareil
A
19 FR
Informations pratiques
C
19
A
19 EN
Useful information
C
• The “two star” freezer compartments are suitable for storing pre-frozen food, storing or
making ice cream or making ice cubes.
• The “one, two and three star” compartments are not suitable for freezing fresh food.
Order Compartment type Target
storage
temperature
[°C]
Appropriate food
1Refrigerator +2 ~ +8
Eggs, prepared dishes, pre-packaged
food, fruit and vegetables, dairy
products, cakes, drinks and other
foods. Compartment not suitable for
freezing.
2Freezer (***)* ≤ -18
Seafood (fish, shrimp, crustaceans),
freshwater products and meat
products (recommended conservation:
3 months. The longer you keep food in
the freezer, the more it loses taste and
nutrients). Compartment suitable for
freezing fresh foodstuffs.
3Freezer *** ≤ -18
Seafood (fish, shrimp, crustaceans),
freshwater products and meat
products (recommended conservation:
3 months. The longer you keep food in
the freezer, the more it loses taste and
nutrients). Compartment not suitable
for freezing fresh food.
4Freezer ** ≤ -12
Seafood (fish, shrimp, crustaceans),
freshwater products and meat
products (recommended conservation:
2 months.) The longer you keep food in
the freezer, the more it loses taste and
nutrients). Compartment not suitable
for freezing fresh food.
5Freezer * ≤ -6
Seafood (fish, shrimp, crustaceans),
freshwater products and meat
products (recommended conservation:
1 month.) The longer you keep food in
the freezer, the more it loses taste and
nutrients). Compartment not suitable
for freezing fresh food.

20 21
FR FR
Aperçu de l’appareil Aperçu de l’appareil
A A
20 21
FR FR
Informations pratiques Informations pratiques
C C
20 FR
Aperçu de l’appareil
A
20 FR
Informations pratiques
C
20 EN
Overview of the appliance
A
20 EN
Useful information
C
Order Compartment type Target
storage
temperature
[°C]
Appropriate food
6No star -6 ~ -0
Fresh pork, beef, fish and chicken,
some pre-packaged processed foods,
etc. (It is recommended to consume
them on the same day, or preferably
within 3 days maximum).
Airtight, partially processed foods
(foods not suitable for freezing)
7Refrigerator
compartment -2 ~ +3
Fresh pock, beef, chicken, fresh/
frozen freshwater products, etc. (7
days below 0°C and above 0°C.
It is recommended to consume them
on the same day, or preferably within
2 days). Seafood (storage below 0°C
for 15 days, it is recommended not to
store above 0°C).
8Fresh foods 0 ~+ 4
Fresh pork, beef, fish and chicken,
prepared dishes, etc. (It is
recommended to eat them the same
day, or preferably within 3 days).
9Wine +5 ~+ 20 Red, white, sparkling wine, etc.
PLEASE NOTE
Please store the different foods according to the
compartments or the target storage temperature of the
purchased products.
• If the refrigeration appliance is left empty for an extended period of time, please turn off
the power, defrost, clean, dry and leave the doors open to prevent mould from forming
inside the appliance.
Cleaning the water dispenser (for appliances with a water dispenser):
•
Clean the water tanks if they have not been used for 48 hours. Flush the water system
connected to a water supply if water has not been drawn for 5 days.
21 FR
Aperçu de l’appareil
A
21 FR
Informations pratiques
C
21
A
21 EN
Useful information
C
Troubleshooting
If you have a problem with your appliance or are concerned that your appliance is not working
properly, there are a few simple things you can check before contacting customer service;
please observe the information below. It will help you to carry out some simple checks before
contacting customer service.
CAUTION
Never try to repair the appliance yourself. If the problem
persists after carrying out the above checks, contact
a qualified electrician, an authorised technician or the
point of sale where you purchased the product.
Problem Possible cause and solution
The appliance is
not working
Check that the power cord is correctly plugged into the mains
socket.
Check the fuse or circuit of your power supply and replace it if
necessary.
The ambient temperature is too low. Try setting the indoor
temperature to a cooler level to solve the problem.
Odours are
emitted from the
compartments
The interior of the appliance may need to be cleaned.
Some foods, containers or packaging give off odours.
The appliance is
making a noise
The following noises are quite normal:
• Compressor running noises.
• Noise from the compartment or other compartments.
• Gurgling sound similar to that of boiling water.
• Dry noise during automatic defrosting.
• Rattling noise before the compressor starts up.
Other unusual noises may be due to the following reasons; in this
case, please check and remedy the problem:
The appliance is not level.
The rear wall of the appliance is touching the wall.
Bottles or containers have fallen or rolled inside the appliance.

22 23
FR FR
Aperçu de l’appareil Aperçu de l’appareil
A A
22 23
EN EN
Useful information Note
C
Problem Possible cause and solution
The motor
is running
continuously.
It is normal to hear the motor noise regularly. It will need to run
more in the following circumstances:
• The temperature setting is colder than necessary.
• A large quantity of hot food has recently been placed in the
appliance.
• The temperature outside the appliance is too high.
• The doors have been opened too often or for too long.
• After installing your appliance or if it has been switched off for
an extended period.
A layer of frost
has formed in the
compartment
Make sure that the food placed in the appliance allows sufficient
ventilation. Check that the door is closed. To remove the frost,
please refer to the “Cleaning and maintenance” section.
The temperature is
too high
You may have opened the doors too often or for too long, or the
correct closing of the doors may be impeded by an obstacle. There
may also be insufficient clearance at the sides, back and top of the
appliance.
The interior
temperature is too
low
Increase the temperature according to the instructions in the
“Operation” section.
Doors have trouble
closing
Check that the top of the refrigerator is tilted back 10-15 mm to
allow the doors to close automatically and ensure that nothing
inside the appliance is preventing the doors from closing.
Water is leaking
onto the floor
The water tank (located at the bottom and rear of the appliance)
may not be properly levelled or the drain nozzle (located under
the top wall of the compressor) may not be correctly positioned to
direct water into the tank. It is also possible that the water drain
is clogged. You may need to move the fridge away from the wall to
check the tank and nozzle.
The lighting does
not work
The lightbulb may be damaged. To replace the lighting, please
refer to the “Operation” section.

Aperçu de l’appareil
A
Température ambiantes d’utilisation
Réglage du thermostat
Description de l’appareil
Installation de votre nouvel appareil
Inversion de la porte
Utilisation de
l’appareil
B
Utilisation de votre appareil
Fonctionnement
Informations
pratiques
CEntretien et nettoyage
Conseils et astuces utiles
Dépannage
25 FR
Table de matières
Les notices sont aussi disponibles sur le site
http://www.electrodepot.fr/sav/notices/
http://www.electrodepot.be/fr/sav/notices
24 FR
Merci !
Merci d’avoir choisi ce produit VALBERG.
Choisis, testés et recommandés par ELECTRO DEPOT,
les produits de la marque VALBERG vous assurent
une utilisation simple, une performance fiable et
une qualité irréprochable.
Grâce à cet appareil, vous savez que chaque utilisation
vous apportera satisfaction.
Bienvenue chez ELECTRO DEPOT.
Visitez notre site Internet: www.electrodepot.fr
www.electrodepot.be
VVOOTRETRE AAVISVIS CCOMPTE !OMPTE !
PARTAGEZ
VOTRE EXPERIENCE
SUR LES PRODUITS
Parce que votre satisfaction est notre priorité, nous vous proposons
de donner votre avis sur ce produit. Il sera transmis et analysé par
nos équipes afin d’améliorer continuellement le produit.
Donnez votre avis sur http://www.electrodepot.fr/avis-client

26 27
FR FR
Aperçu de l’appareil Aperçu de l’appareil
A A
Description de l’appareil
1Clayette congélateur 7Porte du congélateur
2Boîtier de contrôle et éclairage LED 8Balconnets supérieurs
3Clayette réfrigérateur 9Balconnet inférieur
4Clayette du bac à légumes 10 Porte du réfrigérateur
5Bac à légumes 11 Congélateur
6Pieds réglables 12 Réfrigérateur
REMARQUE
En raison de l’évolution constante de nos produits, il se
peut que votre réfrigérateur soit légèrement différent
de la description fournie dans le présent manuel
d’instructions mais ses fonctions et son utilisation
restent les mêmes. Pour obtenir plus d’espace dans
le congélateur, vous pouvez retirer la clayette située à
l’intérieur de celui-ci.
Temperatures ambiantes d’utilisation
Il est recommandé de respecter les classes climatiques indiquées dans la fiche produit sur
la plaque signalétique de l’appareil, cela vous permet de vérifier sous quelles plages de
températures ambiantes l’appareil peut être utilisé :
– SN : Entre 10 et 32°C
– N : Entre 16 et 32°C
– ST : Entre 16 et 38°C
– T : Entre 16 et 43°C
Un appareil multi-classes peut gérer la température la plus basse et la plus élevée de
l’ensemble des classes couvertes.
L’utilisation de l’appareil en dehors de la plage de température ambiante alterne ses
performances et sa durée de vie.
Réglage du thermostat
Pour un usage optimal et des économies d’énergie, il est recommandé de régler le thermostat
de l’appareil selon la température ambiante de la pièce d’utilisation et le respect de la classe
climatique.
Veuillez vous référer à la fiche produit pour connaître la classe climatique associée aux
températures ambiantes minimales et maximales adaptées à l’appareil ainsi que le réglage
de température recommandé pour un stockage optimisé des denrées alimentaires.
Les degrés des températures ambiantes T°C sont donnés uniquement à titre indicatif.
L’emplacement dans la pièce, la fréquence d’ouverture de porte(s) ou encore le niveau de
chargement en denrées alimentaires de l’appareil peuvent impacter les positions précisées.
La position de thermostat peut devoir être modifiée pour compenser ces facteurs.
Exemples de pièce d’utilisation :
– Pièce non chauffée en hiver comme un garage dans une région froide.
– Pièce à vivre normalement chauffée comme une cuisine.
– Pièce non climatisée en été dans une région chaude.

28 29
FR FR
Aperçu de l’appareil Aperçu de l’appareil
A A
• Installez votre appareil dans un endroit sec pour éviter tout dommage dû à l’humidité.
• Tenez votre appareil à l’écart de la lumière directe du soleil, de la pluie ou du gel. Tenez
votre appareil à l’écart de toute source de chaleur telle que des cuisinières, du feu ou
des radiateurs.
Mise à niveau de l’appareil
• Pour garantir une mise à niveau correcte et
une circulation suffisante de l’air au niveau
de la partie arrière et inférieure de l’appareil,
vous pourriez avoir besoin de régler ses
pieds.
•
Vous pouvez les régler manuellement à l’aide
d’une clé adaptée.
Pour permettre la fermeture automatique des
portes, inclinez le dessus de l’appareil d’environ
10 mm vers l’arrière.
10 mm
Inversion de la porte
Si nécessaire, le sens d’ouverture de la porte peut être inversé, de droite (tel que fourni) à
gauche.
AVERTISSEMENT
Lorsque vous procédez à l’inversion de la porte,
l’appareil doit être débranché. Assurez-vous que la
fiche d’alimentation est bien retirée de la prise secteur.
Outils dont vous aurez besoin
Non fournis
Clé à douille
8 mm
Tournevis fin
et plat
Spatule
Tournevis
cruciforme
Clé anglaise Clé 8 mm
Installation de votre nouvel appareil
Avant d’utiliser l’appareil pour la première fois, veuillez prendre note des conseils suivants.
Ventilation de l’appareil
ATTENTION!
Pour améliorer l’efficacité du système de
refroidissement et faire des économies d’énergie, il
est nécessaire de conserver une bonne ventilation
autour de l’appareil. C’est pour cette raison qu’il
convient de prévoir un espace libre suffisant
autour de ce dernier. Il est recommandé de laisser
un espace de 50 à 70 mm entre la paroi arrière
de l’appareil et le mur, un espace minimum de
1000 mm au-dessus de l’appareil, un espace minimum
de 1000 mm entre ses parois latérales et les murs, ainsi
qu’un espace libre à l’avant qui permette d’ouvrir la
porte à 135°. Veuillez respecter les schémas suivants.
REMARQUE
Cet appareil fonctionne correctement pour les classes
climatiques N à ST, tel qu’indiqué dans le tableau ci-
dessous. S’il était exposé à une température supérieure
ou inférieure à la plage indiquée pendant une
période prolongée, l’appareil pourrait présenter des
dysfonctionnements.
100
100
100
50-70
100
1105-1125
940
592-612
135

30 31
FR FR
Aperçu de l’appareil Aperçu de l’appareil
A A
REMARQUE
Lorsque vous retirez la porte, faites attention aux
rondelles qui se trouvent entre la charnière centrale
et le bas de la porte du congélateur : elles pourraient
rester collées à la porte. Ne les égarez pas.
FDéposez la porte supérieure sur une surface lisse ; son panneau vers le haut. Desserrez
la vis 2et le butoir 1puis installez-les sur le côté gauche en les serrant fermement.
G
Dévissez les deux vis auto-taraudeuses à collerette utilisées pour fixer la charnière centrale
et retirez la charnière centrale qui maintient en place la porte inférieure.
HDéposez la porte inférieure sur une surface lisse ; son panneau vers le haut. Desserrez
la vis 2et le butoir 1puis installez-les sur le côté gauche en les serrant fermement.
I
Retirez les caches de trous de vis situés à gauche de la plaque de recouvrement centrale
pour les placer à droite (comme illustré ci-dessous).
J
Posez le réfrigérateur sur un emballage en mousse souple ou une matière similaire.
Retirez à la fois le pied réglable ainsi que la charnière inférieure en dévissant les vis
auto-taraudeuses à collerette.
K
Installez la charnière inférieure sur le côté gauche en la fixant à l’aide de vis auto-
taraudeuses à collerette. Installez le pied réglable de l’autre côté et fixez-le.
L
Transférez la porte inférieure dans la position appropriée, placez la charnière inférieure,
insérez l’axe d’articulation dans le trou inférieur de la porte du réfrigérateur, puis serrez
les boulons.
M
Retournez la charnière centrale à 180 degrés et mettez-la en position. Insérez l’axe
d’articulation central dans le trou supérieur de la porte du réfrigérateur, puis serrez les
boulons.
N
Transférez la porte supérieure dans la position appropriée. Sécurisez le niveau de la
porte, insérez l’axe d’articulation central dans le trou inférieur de la porte du congélateur.
OTransférez la charnière supérieure et insérez l’axe d’articulation supérieur dans le trou
supérieur de la porte du congélateur en ajustant la position de cette dernière (ce faisant,
veuillez maintenir la porte supérieure avec votre autre main). Fixez la charnière supérieure
à l’aide des vis auto-taraudeuses à collerette.
Pièce supplémentaire
(dans le sachet en plastique)
Cache-charnière gauche
REMARQUE
Si besoin, vous pouvez poser le réfrigérateur sur sa
face arrière pour mieux accéder à sa base.
Pour éviter d’endommager la paroi arrière, nous vous
conseillons de déposer l’appareil sur un emballage en
mousse souple ou une matière similaire. Pour inverser
la porte, il est généralement recommandé de suivre les
étapes suivantes.
A
Placez le réfrigérateur à la verticale. Ouvrez les portes pour retirer l’ensemble des
balconnets (afin d’éviter de les endommager), puis refermez les portes.
Retrait du balconnet
BUtilisez une spatule ou un tournevis fin et plat pour faire levier sur le cache de trous de
vis qui se trouve sur le coin supérieur gauche du réfrigérateur, ainsi que sur le cache
charnière droit qui se trouve sur le coin supérieur droit du réfrigérateur.
C
Dévissez les vis auto-taraudeuses à collerette utilisées pour fixer la charnière supérieure
droite à l’aide d’un tournevis à douille 8 mm ou d’une clé (ce faisant, veuillez maintenir
la porte supérieure avec votre autre main).
D
Retirez l’axe d’articulation supérieur, transférez-le dans le sens inverse et serrez-le
fermement avant de le mettre en lieu sûr.
E Retirez la porte supérieure de la charnière centrale en soulevant la porte verticalement
avec précaution.

32 33
FR FR
Aperçu de l’appareil Aperçu de l’appareil
A A
32 33
FR FR
Aperçu de l’appareil Utilisation de l’appareil
A B
Utilisation de votre appareil
Accessoires 1)
Clayettes/plateaux amovibles
•
Des clayettes de rangement variées en verre et plastique ou encore des grilles de
rangement sont inclues sur votre appareil. Selon les modèles, le réfrigérateur présente
différentes combinaisons et caractéristiques.
• Les parois du réfrigérateur sont équipées de diverses glissières pour vous permettre de
positionner les clayettes à votre convenance.
Retrait et installation des balconnets
Avertissement : le balconnet de porte ne doit pas être retiré et installé par l’utilisateur ! Si le
balconnet de porte est endommagé, contactez le service clientèle pour obtenir de l’aide. Pour
remplacer le balconnet de porte, il convient de suivre les étapes suivantes :
Retrait du balconnet
Appuyez sur le côté intérieur droit du balconnet
tout en maintenant le côté gauche.
Lorsque le cran du balconnet s’est détaché de
la porte du réfrigérateur, retirez le balconnet
en l’inclinant vers le haut.
PInstallez le cache de trous de vis sur le coin supérieur droit du réfrigérateur. Installez le
cache charnière supérieur (qui se trouve dans le sachet en plastique), sur le coin gauche
de l’appareil. Rangez l’autre cache charnière supérieur dans le sachet en plastique.
QOuvrez la porte supérieure, installez les balconnets et refermez-la.
ATTENTION
Lorsque vous procédez à l’inversion de la porte,
l’appareil doit être débranché. Retirez la fiche
d’alimentation de la prise secteur au préalable.

34 35
FR FR
Aperçu de l’appareil Aperçu de l’appareil
A A
35 FR
Utilisation de l’appareil
B
34 FR
Utilisation de l’appareil
B
La position 0 signifie :
Appareil éteint.
Tournez le bouton dans le sens horaire pour
mettre en marche l’appareil.
La position 1 signifie :
Température la plus élevée, réglage le plus
chaud.
La position 7 (butée) signifie :
Température la plus basse, réglage le plus froid.
Remplacement de l’éclairage LED
ATTENTION
Si l’éclairage LED est endommagé, L’UTILISATEUR NE
DOIT PAS LE REMPLACER PAR LUI-MÊME !
Le remplacement de l’éclairage LED effectué par des personnes inexpérimentées peut
entraîner des blessures ou de graves dysfonctionnements. Celui-ci doit être remplacé par
une personne qualifiée pour éviter tout danger. Contactez votre centre de service local pour
obtenir de l’aide.
• Avant de remplacer l’éclairage LED,
éteignez l’appareil et débranchez-le
ou retirez le fusible correspondant, ou
encore, actionnez le disjoncteur.
• Caractéristiques de l’éclairage LED :
220-240 V , 2 W maxi
• Débranchez la fiche de la prise secteur.
• Pour remplacer l’éclairageLED,
desserrez la vis.
• Remplacez l’éclairage LED défectueux.
• Remettez le réfrigérateur en marche.
Installation du balconnet
Inclinez tout d’abord le côté gauche du
balconnet, en vous assurant que le cran soit
bien inséré dans la porte. Appuyez ensuite sur
le côté intérieur droit en poussant vers le bas
pour le mettre en place.
Compartiment réfrigérateur
• Pour le stockage d’aliments qui n’ont pas besoin d’être congelés. Il présente différentes
sections adaptées aux différents types de nourriture.
Compartiment congélateur 2)
•
Pour la congélation de denrées fraîches et la conservation prolongée de nourriture
congelée ou surgelée.
Décongélation des produits alimentaires 2)
• Dans le compartiment réfrigérateur.
• À température ambiante.
• Dans un four à micro-ondes.
• Dans un four conventionnel ou à convection.
• Une fois décongelée, la nourriture ne doit en aucun cas être recongelée.
5. Si l’appareil comporte les accessoires et fonctions correspondants.
6. Si l’appareil présente un compartiment congélateur.
Bac à légumes
• Pour le stockage des fruits et légumes.
Fonctionnement
Mise en marche et réglage de la température
•
Insérez la fiche du câble de raccordement dans une prise de courant équipée d’un contact
de mise à la terre. Lorsque la porte du compartiment réfrigérateur est ouverte, l’éclairage
intérieur s’allume. Une fois le réfrigérateur installé, attendez 5 minutes avant de le
brancher. Ne placez aucune nourriture à l’intérieur tant que la température intérieure
n’ait pas suffisamment diminué.
•
Le bouton sélecteur de la température se trouve à droite dans le compartiment réfrigérateur.

36 37
FR FR
Aperçu de l’appareil Aperçu de l’appareil
A A
36 37
FR FR
Informations pratiques Informations pratiques
C C
Nettoyage intérieur
Vous devez nettoyer l’intérieur de l’appareil régulièrement.
Nettoyez l’intérieur du congélateur avec une solution diluée de bicarbonate de soude, puis
rincez à l’eau tiède à l’aide d’un chiffon ou d’une éponge préalablement essorés. Essuyez les
clayettes et les bacs de façon à ce qu’ils soient parfaitement secs avant de les remettre en
place. Séchez parfaitement l’ensemble des surfaces et des pièces amovibles.
Bien que l’appareil dégivre automatiquement, une couche de gel peut régulièrement se former
à l’intérieur du congélateur ou si ce dernier est laissé ouvert trop longtemps. Si la couche de
gel devient trop épaisse, choisissez un moment où votre réfrigérateur contient peu de denrées
alimentaires pour procéder comme suit :
1.
Retirez les denrées alimentaires et les bacs accessoires, débranchez l’appareil et laissez
les portes ouvertes. Aérez convenablement la pièce pour accélérer le processus de
décongélation.
2. Une fois le dégivrage terminé, nettoyez votre congélateur comme décrit plus haut.
ATTENTION
N’utilisez pas d’objets tranchants pour retirer le gel
du compartiment congélateur. L’appareil ne doit être
rebranché au secteur et remis sous tension que lorsque
son intérieur est parfaitement sec.
Nettoyage des joints de porte
Veillez à garder les joints de porte propres. En cas de résidus collants de nourriture et de
boisson, les joints peuvent rester collés à l’appareil et se déchirer lorsque vous ouvrez la porte.
Lavez les joints avec un détergent neutre et de l’eau tiède. Rincez et séchez-les soigneusement
après nettoyage.
ATTENTION
L’appareil ne doit être remis sous tension que lorsque
les joints de porte sont parfaitement secs.
Remplacement de l’éclairage LED :
Avertissement : l’éclairage LED doit être remplacé par une personne compétente !
Si l’éclairage LED est endommagé, contactez le service clientèle pour obtenir de l’aide.
•
Avant de procéder à l’entretien de l’appareil, éteignez-le et débranchez la fiche de la
prise de courant.
•
Ne nettoyez pas l’appareil à l’aide d’objets métalliques, de nettoyeurs vapeur, d’huiles
essentielles, de solvants organiques ou de nettoyants abrasifs.
• N’utilisez pas d’objets pointus pour retirer le givre de l’appareil. Utilisez une raclette en
plastique.
•
Toute opération électrique requise dans le cadre de l’entretien de l’appareil doit être
effectuée par un électricien qualifié ou une personne compétente.
• L’entretien de cet appareil doit être effectué par un centre d’entretien agréé ; seules des
pièces de rechange d’origine doivent être utilisées.
1. Si l’appareil est doté d’une fonction de suppression du givre.
2. Si l’appareil comporte un compartiment congélateur.
Pour des raisons d’hygiène, l’appareil (ainsi que ses accessoires extérieurs et intérieurs) doit
être nettoyé régulièrement (au moins une fois tous les deux mois).
ATTENTION
Lors du nettoyage, l’appareil doit être débranché en
raison du risque de choc électrique. Risque de choc
électrique ! Avant tout nettoyage, mettez l’appareil hors
tension et retirez la fiche d’alimentation de la prise
secteur.
Nettoyage extérieur
• Essuyez le panneau de commande à l’aide d’un chiffon doux et propre.
•
Aspergez l’eau sur le chiffon de nettoyage plutôt que directement sur la surface de
l’appareil. Cela permettra d’humidifier la surface de façon régulière.
•
Nettoyez les portes, les poignées et les surfaces de l’appareil à l’aide d’un détergent
neutre, puis essuyez à l’aide d’un chiffon doux.
ATTENTION
- N’utilisez pas d’objets tranchants ; ils risquent
d’égratigner la surface.
- N’utilisez pas de diluant, de détergent pour voiture, de
produit Clorox, d’huile essentielle, de nettoyant abrasif,
ni de solvant organique tel que du benzène pour le
nettoyage.
Ces derniers endommageraient la surface de l’appareil et pourraient générer un incendie.
Entretien et nettoyage
This manual suits for next models
1
Table of contents
Languages:
Other VALBERG Freezer manuals

VALBERG
VALBERG UF 242 F W742C User manual

VALBERG
VALBERG 967845 User manual

VALBERG
VALBERG CNF 327 E X742C User manual

VALBERG
VALBERG CNF 270 F W625C2 User manual

VALBERG
VALBERG CNF 326 D X742C User manual

VALBERG
VALBERG UF NF 240 E S180C User manual

VALBERG
VALBERG UF NF 384 E X180C User manual

VALBERG
VALBERG CNF 270 E W625C User manual

VALBERG
VALBERG UF 242 E W742C User manual

VALBERG
VALBERG CF 198 E W625C User manual