manuals.online logo
Brands
  1. Home
  2. •
  3. Brands
  4. •
  5. VALCOBABY
  6. •
  7. Stroller
  8. •
  9. VALCOBABY SNAP Installation and operation manual

VALCOBABY SNAP Installation and operation manual

© Copyright
VE 2012
vs140512
FURTHER INFORMATION:
www.valcobaby.com.au
Find us on:
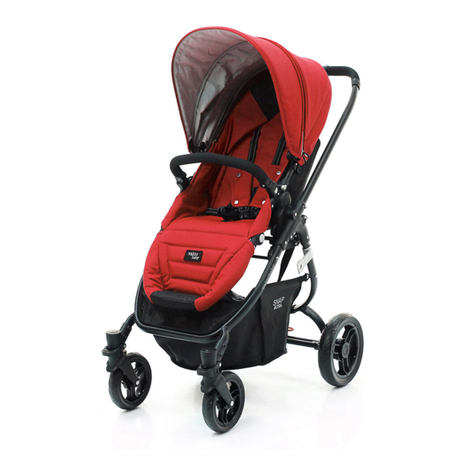
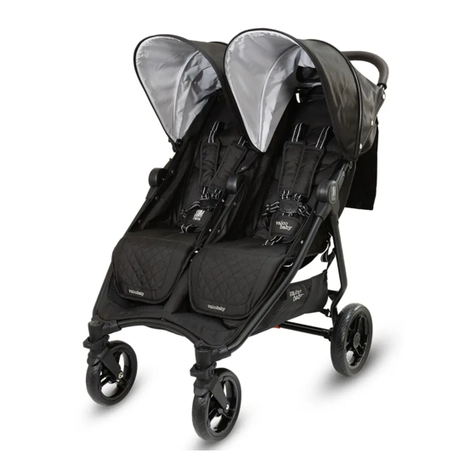
SNAP &
SNAP4
Stroller
PRODUCT REFERENCE GUIDE
Due to our policy of continuous product development,
this product is constantly evolving. It is possible that
some features or procedures outlined here have
changed since this document was written. If you are
unsure of any procedure shown here, please contact
us via the web at [email protected] to obtain the
most up to date information before use. Include the
batch number and model number, which can be found
on a sticker on the frame.
All pictures and diagrams herein are provided for illustration
purposes only.
Actual product, colour or fabric may vary.
VALCO BABY reserves the right to modify or alter any
specification or colour without notice or obligation to
modify any product previously purchased
SNAP &
SNAP4
Stroller
Thank you for purchasing a quality
VALCO BABY product.
Please read and follow the instructions outlined in
this guide carefully. Familiarise yourself with the
construction and safety features; be sure that you
understand all the warnings and safety
guidelines before use.
Important: Please read the following
instructions carefully before assembling this
product. Retain this guide in a safe place for
future reference.
DISCLAIMER
BUMPER
BAR
REAR WHEELS x 2
STROLLER FRAME,
SEAT & HOOD UNIT
1x FRONT DUAL
WHEEL
SNAP SNAP 4
2x FRONT
WHEELS
A
B
a
c
b
e
f
d
C
D
2>TO OPEN
1>PARTS LIST
3>REAR WHEELS
4>FRONT WHEELS
SQUEEZE PULL
5>TO FOLD
6>BUMPER BAR
7>SEAT RECLINE
hij
k
l
m
g
ZIP
8>HARNESS
9>HOOD
10>TETHER STRAP
o
p
q
s
r
n
v
t
u
1>PARTS LIST
Stroller frame with hood attached, 2x rear
wheels, 1x front dual swivel wheel (Snap) or 2x
front swivel wheels (Snap 4), 1x bumper bar.
2>TO OPEN
Release the frame lock (a) by pulling it clear
of the locking pin.
Lift the handle in one continuous motion while
allowing the legs to simultaneously open.
Continue until the frame locks fully open.
IMPORTANT WARNING: ALWAYS TEST
THAT ALL LATCHES ARE SECURELY
ENGAGED BEFORE USE.
3>REAR WHEELS
While depressing the button (b) at the rear
axle junction, insert the rear wheel axle into
the rear axle tube of the stroller. Push the
axle into the tube as far as it will go before
releasing the button.
Repeat for other wheel.
To release your wheel, press button (b) and
pull from axle tube.
IMPORTANT: TEST THAT EACH WHEEL
HAS FULLY ENGAGED IN THE FRAME
TUBE BEFORE USE BY PULLING ON IT.
To use the rear brakes:
Press down on the right side of the red
brake lever located on the rear axle to
simultaneously engage the brake in both
rear wheels.
To release, press down on the left side of the
red brack lever with your foot.
IMPORTANT WARNING: ALWAYS TEST
THAT THE BRAKES ARE SECURELY
DISENGAGED BEFORE USE.
4>FRONT WHEELS
Align each front wheel pin (c) beneath the
housing (d) on each front leg of the stroller.
Be sure that the pin engages securely in the
channel
IMPORTANT: ALWAYS TEST THAT THE
WHEEL HAS SECURELY ENGAGED IN THE
CHANNEL BEFORE USE. ENGAGED THE
CORRECT WAY UP.
To fix the front wheel(s) in the non-swivel
position: Turn the wheel so that the notch at
the front of the wheel channel (e) lines up
with the one in the top plastic housing (f).
Press down firmly on the tab until it locks
into place.
5>TO FOLD
Press down on the secondary lock button
(g) - it will stay down. Squeeze the fold
button in the handle (h), moving the handle
forward slightly.
Grasp the folding handle (i) allowing the
handle to move all the way forward till the
frame automatically locks shut (j).
Your SNAP stroller can stand unaided for
easy storage.
HINT: WHILE NOT NECESSARY FOR
FOLDING, MOVING THE SEAT BACK
FIRST TO THE MOST UPRIGHT POSITION
AND FORWARD THROUGH THE FRAME
WILL MAKE FOR THE MOST SIMPLE AND
COMPACT FOLDING.
6>BUMPER BAR
Insert each side of the bumper bar fitting
into the corresponding housing in the seat
frame until you hear it click into place.
The bumper bar can be opened as a “gate”
for easy access pressing on one of the
release buttons (k) and lifting the side out
of the housing. For full removal, repeat this
process for the other side.
7>SEAT RECLINE
To recline: While squeezing the seat adjuster
tabs (l) together in a pincer like movement,
ease the seat down to the desired
position. Release the tabs and the seat will
automatically lock in that position
To incline: Place your hand in the centre of
the seat at the rear. Pull the incline strap (m)
while gently pushing the seat upward to the
desired position.
8>HARNESS
Your stroller harness is specifically designed
INSTRUCTIONS
with many built in safety features.
This includes the requirement that, when
opened, all straps are released so that no
dangerous loops can be formed causing a
strangulation hazard.
WARNING: USE THIS HARNESS AT ALL
TIMES
Closing your harness:
Slide each of the shoulder strap bottom
guides (n) into the corresponding channel
(o) on the top of each side strap prong.
Insert each completed prong into the central
buckle housing (p).
Carefully adjust the harness straps to snugly
fit your child by adjusting the sliders (q)
located on each strap. The harness should
be fitted to your child’s body, tight enough
so that they cannot wriggle free of the straps
but, loose enough, so as not to cause any
discomfort.
For even more flexibility, the height at which
your shoulder straps are fitted to the stroller
can be adjusted at 3 points. To change the
shoulder strap position:
From the rear of the seat, thread the top of
the strap back through the harness slot (r)
by manoeuvring the locking ring so that it
fits through the slot.
Rethread the strap back through the desired
slot from the front of the seat
Opening your harness:
Press the central housing button (s).
This will release both side prongs from the
central housing. The shoulder and waist
straps will release automatically from each
other.
If the shoulder and waist straps do not
automatically disengage from each other,
manually slide the guides of the waist
channels. Your harness will separate into 5
sections.
IMPORTANT WARNING: WHEN NOT IN
USE, BE SURE THE SHOULDER AND WAIST
STRAPS ARE ALWAYS DISCONNECTED
FROM THE CENTRAL HOUSING AND EACH
OTHER.
9>EXPANDA HOOD
Your SNAP hood is designed to provide
maximum shade and comfort for your child
by incorporating our EXPANDA HOOD
section.
To increase/decrease the hood size
Open the EXPANDA HOOD section fully
using the zip (t)
Gently pull your hood forward; extending it
as far as is required.
When no longer needed, fold the EXPANDA
HOOD backward, allowing it to fold in on
itself.
Gently zip the section closed being mindful
not to catch any of the fabric in the zipper
teeth.
Additional ventilation can be achieved by
rolling up the rear of the hood like a blind
and securing in the open position with the
toggle (u).
10>TETHER STRAP
Your SNAP stroller is fitted with a handy
tether strap which helps keep your stroller
always within reach. Slip the tether cuff (v)
over your wrist and use the stroller normally.
IMPORTANT: ALWAYS USE THE TETHER
STRAP WHEN A CHILD IS IN THE STROLLER
FURTHER INFORMATION:
www.valcobaby.com.au
Find us on:
WARNING: TO AVOID INJURY OR DEATH





 
 



•NEVER USE ON STAIRS OR ESCALATORS.




! .











.





Should the chassis become wet, dry off promptly before storing. If this pram is used near the ocean or salted roads, spray the chassis
and seat frame with water and dry. We recommend a rust inhibiting product should be used to prevent rust and fatigue on metal
parts.

near the beach or in a dusty environment you must wipe down the axles and wheels then lubricate them monthly.



This manual suits for next models

1

Other VALCOBABY Stroller manuals

VALCOBABY URBAN ULTRALIGHT STROLLER Installation and operation manual

VALCOBABY

VALCOBABY URBAN ULTRALIGHT STROLLER Installation and operation manual

VALCOBABY Spark Installation and operation manual

VALCOBABY

VALCOBABY Spark Installation and operation manual

VALCOBABY RAD Installation and operation manual

VALCOBABY

VALCOBABY RAD Installation and operation manual

VALCOBABY REBEL Q Installation and operation manual

VALCOBABY

VALCOBABY REBEL Q Installation and operation manual

VALCOBABY Matrix Installation and operation manual

VALCOBABY

VALCOBABY Matrix Installation and operation manual

VALCOBABY Zee Installation and operation manual

VALCOBABY

VALCOBABY Zee Installation and operation manual

VALCOBABY snap ultra Installation and operation manual

VALCOBABY

VALCOBABY snap ultra Installation and operation manual

VALCOBABY VEEBEE DOUBLETAKE Installation and operation manual

VALCOBABY

VALCOBABY VEEBEE DOUBLETAKE Installation and operation manual

VALCOBABY RunAbout Tri-mode series Installation and operation manual

VALCOBABY

VALCOBABY RunAbout Tri-mode series Installation and operation manual

VALCOBABY ION Installation and operation manual

VALCOBABY

VALCOBABY ION Installation and operation manual

VALCOBABY ZEE Installation and operation manual

VALCOBABY

VALCOBABY ZEE Installation and operation manual

VALCOBABY SNAP User manual

VALCOBABY

VALCOBABY SNAP User manual

VALCOBABY velo Installation and operation manual

VALCOBABY

VALCOBABY velo Installation and operation manual

VALCOBABY REBEL Q SPORT Installation and operation manual

VALCOBABY

VALCOBABY REBEL Q SPORT Installation and operation manual

VALCOBABY Mini Marathon Installation and operation manual

VALCOBABY

VALCOBABY Mini Marathon Installation and operation manual

VALCOBABY Latitude Stroller Installation and operation manual

VALCOBABY

VALCOBABY Latitude Stroller Installation and operation manual

VALCOBABY EZ Rider Installation and operation manual

VALCOBABY

VALCOBABY EZ Rider Installation and operation manual

VALCOBABY Titan User manual

VALCOBABY

VALCOBABY Titan User manual

VALCOBABY trend duo Installation and operation manual

VALCOBABY

VALCOBABY trend duo Installation and operation manual

VALCOBABY Runabout Series Installation and operation manual

VALCOBABY

VALCOBABY Runabout Series Installation and operation manual

VALCOBABY Zeetwo Installation and operation manual

VALCOBABY

VALCOBABY Zeetwo Installation and operation manual

VALCOBABY Tri Mode Series Installation and operation manual

VALCOBABY

VALCOBABY Tri Mode Series Installation and operation manual

VALCOBABY Vee Bee Dash Installation and operation manual

VALCOBABY

VALCOBABY Vee Bee Dash Installation and operation manual

VALCOBABY Twin Sportz User manual

VALCOBABY

VALCOBABY Twin Sportz User manual

Popular Stroller manuals by other brands

Vitea Care Junior Plus 2 user manual

Vitea Care

Vitea Care Junior Plus 2 user manual

Joie aire S1608 instruction manual

Joie

Joie aire S1608 instruction manual

Costway BC10092 user manual

Costway

Costway BC10092 user manual

COLETTO SINTRA ISOFIX Fitting instructions

COLETTO

COLETTO SINTRA ISOFIX Fitting instructions

Chicco LITE WAY manual

Chicco

Chicco LITE WAY manual

Nuna ivvi instruction manual

Nuna

Nuna ivvi instruction manual

Bugaboo bee user guide

Bugaboo

Bugaboo bee user guide

Alvema ITO Series manual

Alvema

Alvema ITO Series manual

Tutek Turran SILVER instruction manual

Tutek

Tutek Turran SILVER instruction manual

Gilis Bebe Stars CITY user manual

Gilis

Gilis Bebe Stars CITY user manual

Schuchmann piper Instructions for use

Schuchmann

Schuchmann piper Instructions for use

Fumagalli Pliko user manual

Fumagalli

Fumagalli Pliko user manual

Chicco SPRINT Instructions for use

Chicco

Chicco SPRINT Instructions for use

Graco Modes DUO owner's manual

Graco

Graco Modes DUO owner's manual

Jole aire instruction manual

Jole

Jole aire instruction manual

Hartan Racer GT instructions

Hartan

Hartan Racer GT instructions

Stokke Xplory Carry Cot User instructions

Stokke

Stokke Xplory Carry Cot User instructions

AneX cross Maintenance manual

AneX

AneX cross Maintenance manual

manuals.online logo
manuals.online logoBrands
  • About & Mission
  • Contact us
  • Privacy Policy
  • Terms and Conditions

Copyright 2025 Manuals.Online. All Rights Reserved.