Valeo SC400 User manual

Rev. 23.11.2018
Id.No. DOK30404
BUS BODY ELECTRONICS
SC400-410 TÜRKEI
OperatingInstructions
-Busdriver

BUS BODY ELECTRONICS
1
Contents
Contents 1
List of Figures 2
List of Tables 2
1Introduction 3
1.1 Intended purpose 3
1.2 Symbols used 3
1.3 Description of the control panel 4
1.3.1 SC400 4
1.3.2 SC410 5
2Use 6
2.1 Activate/deactivate Standby 6
2.1.1 Standby 6
2.1.2 Activation 6
2.1.3 Deactivation 6
2.2 Auto mode 7
2.2.1 Activation 7
2.3 Turning air-conditioning compressor on/off 8
2.3.1 Deactivation 8
2.3.2 Activation 9
2.4 Heating Mode 9
2.5 Setting desired room temperature 10
2.6 Setting blower level 11
2.7 Switch air-conditioning/recirculating air 12
2.8 Additional component 13
2.9 Errors 14
2.9.1 Error display 14
2.9.2 Error code overview 14

BUS BODY ELECTRONICS
2
List of Figures
Figure 1 - SC400 control panel..................................................................................4
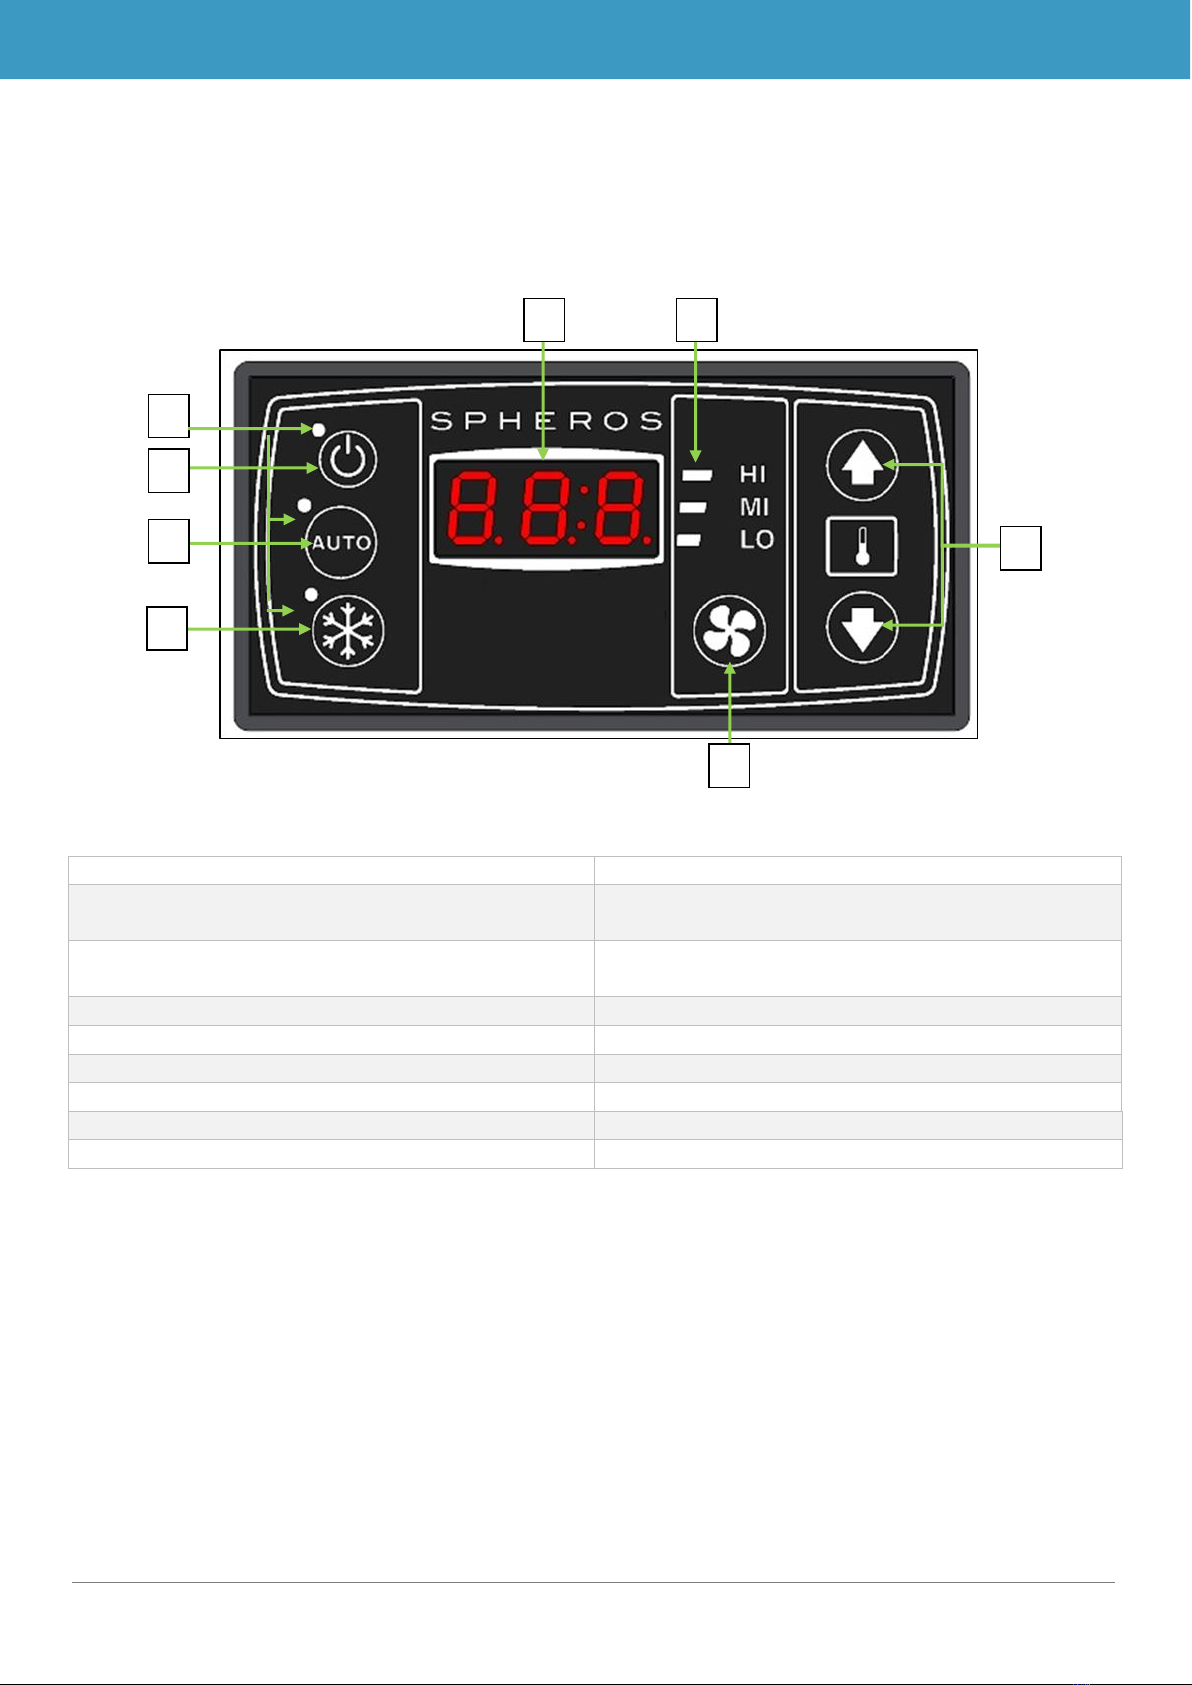
Figure 2 - SC410 control panel..................................................................................5
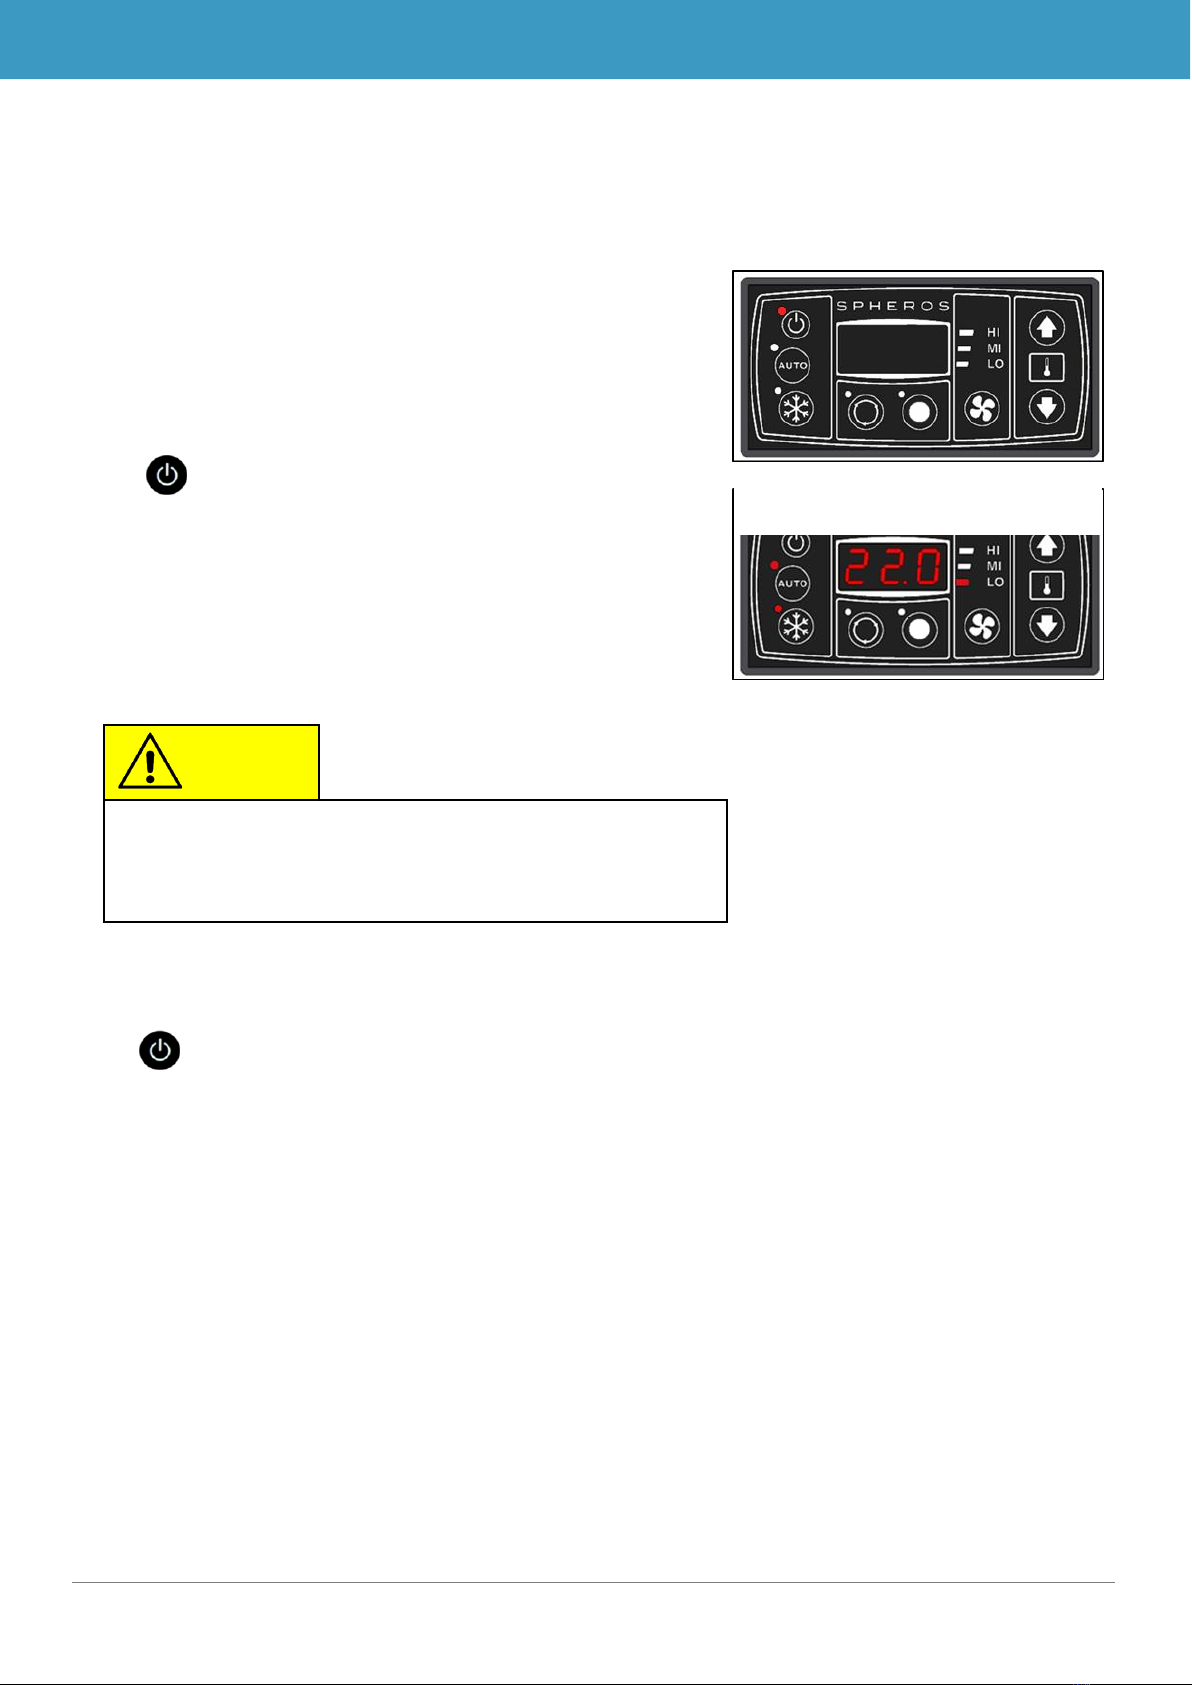
Figure 3 - SC410 Standby........................................................................................6
Figure 4 - SC410 example start display after activation.....................................................6
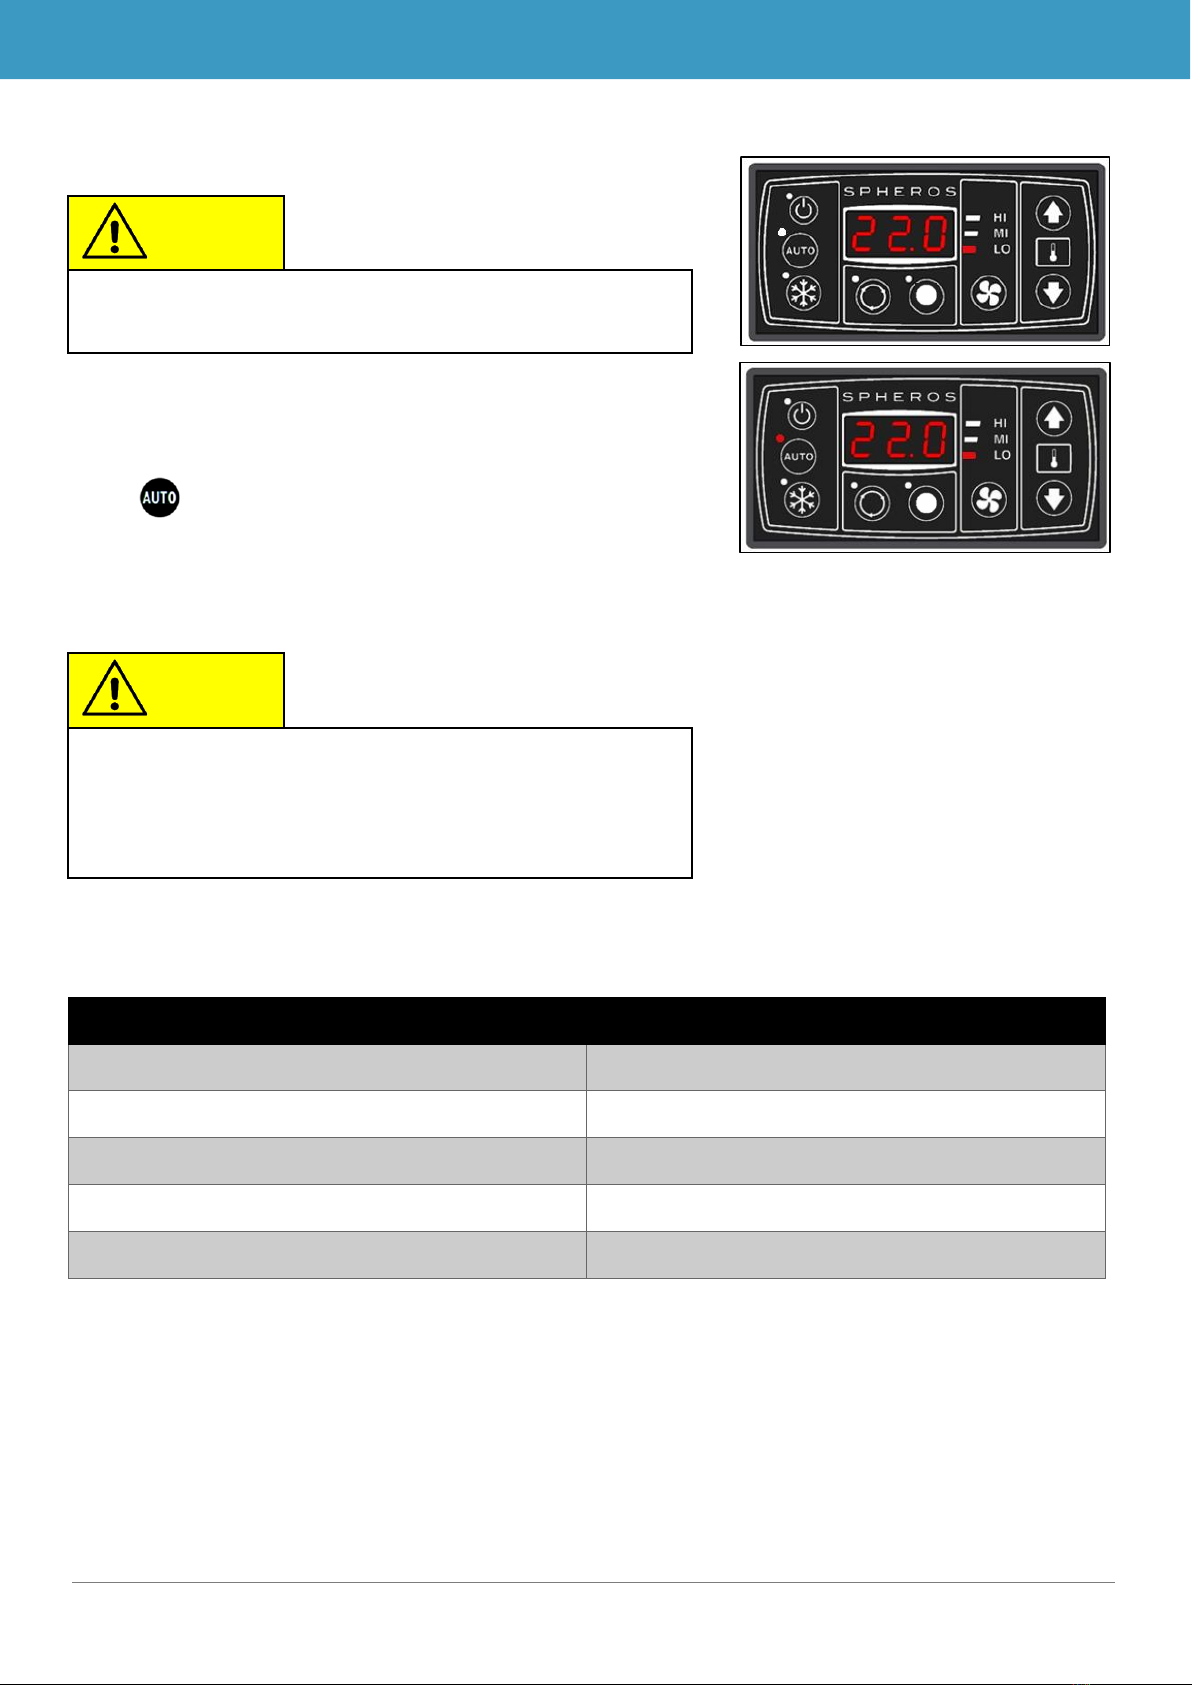
Figure 5 - SC410 control panel before and after activating Auto mode...................................7
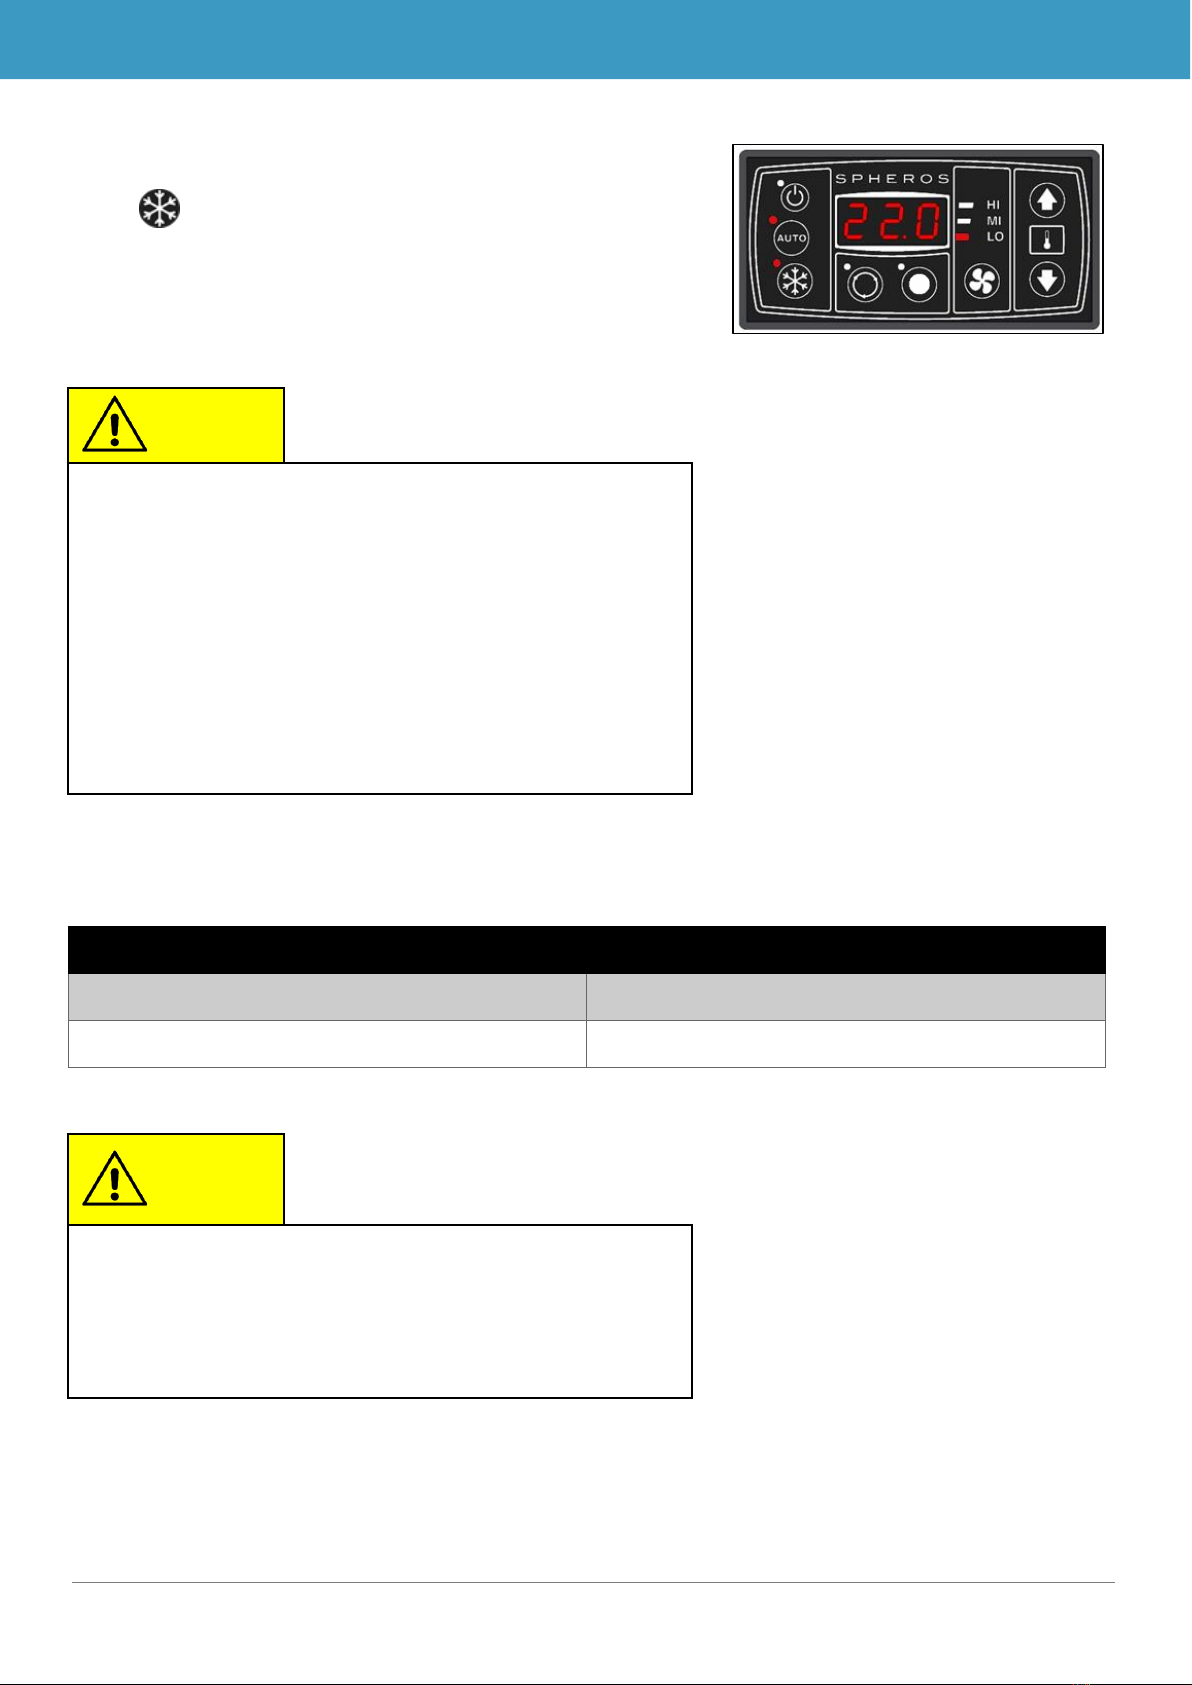
Figure 6 - SC410 air-conditioning compressor deactivated.................................................8
Figure 7 - SC410 air-conditioning compressor/Auto mode activated .....................................9
Figure 8 –SC410 changing the temperature ............................................................... 10
Figure 9 - SC410 changing the temperature ................................................................ 10
Figure 10 - SC410 blower level from lower to medium speed............................................ 11
Figure 11 - SC410 blower level at high speed.............................................................. 11
Figure 12 - SC410 blower level at low speed ............................................................... 11
Figure 13 - SC410 recirculating air function active......................................................... 12
Figure 14 - SC410 fresh air valves open..................................................................... 12
Figure 15 –SC410 additional component switched on.................................................... 13
Figure 16 - SC410 error display............................................................................... 14
List of Tables
Table 1 - SC400/410 temperature difference and blower level in cooling mode ........................7
Table 2 - SC410 temperature difference and blower level in heating mode .............................8
Table 3 - SC410 Temperature Difference Compressor .....................................................8
Table 4 - SC410 Temperatur Difference Water Valve + Electric Water Pump ..........................9
Table 5 - Error code overview ................................................................................. 15

BUS BODY ELECTRONICS
3
1 Introduction
1.1 Intended purpose
The SC400 and SC410 control elements including the SR400 and SR410 relays boards are
systems intended to control the HVAC components (heating, ventilation, air-conditioning) in
buses, for example for roof-top air-condition systems. They consist of a control element inte-
grated into the dashboard (control device as an interface between human and machine) and an
accessible relays board.
The systems are available in basic (SC400/SR400) and standard versions (SC410/SR410),
respectively. In the basic version, the control element allows the driver to control the roof-top
air-conditioning system that has air-conditioning functions. The standard version also has an
optional heating function and can be set between air-conditioning and recirculating air functions.
The controller for the air-conditioning components can operate automatically. To do so, the bus
driver simply has to set the desired room temperature.
These operating instructions apply to the following air conditioning system variants:
➔SC400: Air-conditioning system (AC)
➔SC410: Air-conditioning system with air-conditioning function (VAC), air-conditioning system
with heating function (HAC), air-conditioning system with heating and air-conditioning functions
(HVAC).
1.2 Symbols used
Note

BUS BODY ELECTRONICS
4
1.3 Description of the control panel
The control elements of the SC400 and SC410 have largely the same components. These are
named and their functions described in the following sections.
1.3.1 SC400
Designation
Function
1. Display
Display for current room temperature and for
error codes
2. Status light
Indicates whether a function is active (red sta-
tus light = function active)
3. On/off button
On/off button of the control panel
4. Auto button
Turns on automatic mode
5. AC button
Turns air-conditioning system on/off
6. Blower level button
Manually sets the blower level
7. Status display of blower level
Displays the current blower level
8. Desired room temperature buttons
Sets the desired room temperature
Figure 1 - SC400 control panel
2
4
5
3
1
6
8
7
6

BUS BODY ELECTRONICS
5
Figure 2 - SC410 control panel
1.3.2 SC410
Designation
Function
1. Display
Display for current room temperature and for
error codes
2. Status light
Indicates whether a function is active (red sta-
tus light = function active)
3. On/off button
On/off button of the control panel
4. Auto button
Turns on automatic mode
5. AC button
Turns air-conditioning system on/off
6. Blower level button
Manually sets the blower level
7. Status display of blower level
Displays the current blower level
8. Desired room temperature buttons
Sets the desired room temperature
9. Air-conditioning/recirculating air button
Sets between recirculating air and air-condi-
tioning
10. Function button
On/off for additional component
Note
The image for the SC410 is always used as a repre-
sentative for both versions in the following operating in-
structions.
2
4
5
3
1
6
8
7
9
10

BUS BODY ELECTRONICS
6
2 Use
2.1 Activate/deactivate Standby
2.1.1 Standby
If the motor (KL 61) is running, the system is in Standby mode.
The status light for the On/Off button lights up red (Figure 3).
2.1.2 Activation
Press button
➔The status light for the On/Off button goes out, the preset
temperature (22.0 °C when first initiating the power supply,
thereafter the last set value) displays, Auto mode is acti-
vated and the automatically set blower level displays. (Fi-
gure 4)
2.1.3 Deactivation
Press button
➔Compressor and blowers are deactivated immediately
(turning off the motor has the same effect)
If the motor is running, the device returns to Standby mode, the status light of the On/Off button
lights up red. (Figure 3)
Note
If the current room temperature is below the set desired
room temperature, the device automatically begins to
heat (SC410 only).
Figure 4 - SC410 example start display
after activation
Figure 3 - SC410 Standby

BUS BODY ELECTRONICS
7
2.2 Auto mode
2.2.1 Activation
Press button when status light is off. (Figure 5, above)
➔Mode is active and corresponding status light lights up
(Figure 5, below)
The temperature difference is the difference between the cur-
rent room temperature and the set desired room temperature.
Blower level
Temperature difference
Level 1: T_Room –T_Desired
≤1 K
Level 1 →2: T_Room –T_Desired
>1 K
Level 2 →3: T_Room –T_Desired
>3 K
Level 3 →2: T_Room –T_Desired
<2 K
Level 2 →1: T_Room –T_Desired
<0 K
Table 1 - SC400/410 temperature difference and blower level in cooling mode
Note
When starting the device, Auto mode is reactivated (cor-
responding status light turns on).
Note
When activating Auto mode, the system automatically
turns on the blower. Auto mode has no function in this
case, meaning when pressing the Auto mode during
Auto mode, nothing happens.
Figure 5 - SC410 control panel before
and after activating Auto mode

BUS BODY ELECTRONICS
8
Different blower level than level 1 is only possible when T_duct >33 °C
Gebläsestufe
Temperaturdifferenz
Level 1: T_Duct <35 K
Stufe 1 →2: T_Room –T_Desired
>-1K
Stufe 2 →3: T_Room –T_Desired
>-3K
Stufe 3 →2: T_Room –T_Desired
<-2K
Stufe 2 →1: T_Room –T_Desired
< 0K
Table 2 - SC410 temperature difference and blower level in heating mode
2.3 Turning air-conditioning compressor on/off
Compressor
Temperature Difference
On: T_Room –T_Desired
≥2 K
Off: T_Room –T_Desired
≤-1K
Table 3 - SC410 Temperature Difference Compressor
2.3.1 Deactivation
Press button when status light is on.
➔Air-conditioning compressor is deactivated. The cooling
function is turned off (Figure 6).
Note
After starting the ignition, the axial fans first run for 10
seconds before the air-conditioning compressor acti-
vates, if needed –the status light lights up after starting.
nothing.
Figure 6 - SC410 air-conditioning
compressor deactivated

BUS BODY ELECTRONICS
9
2.3.2 Activation
Press button when status light is off.
➔Air-conditioning compressor is activated and turns on if the
minimum run times are maintained (see following note).
The cooling function then turns on again.
2.4 Heating Mode
Water Valve / Electric Pump
Temperature Difference
Open / On: T_Room –T_Desired
≤-1K
Close / Off: T_Room –T_Desired
≥1 K
Table 4 - SC410 Temperatur Difference Water Valve + Electric Water Pump
Note
The air-conditioning compressor must be deactivated for
at least 2 minutes before it can be turned on again. If the
AC button is pressed during this time, the device reac-
tivates the air-conditioning compressor after 2 minutes.
(AC button blinks).
The air-conditioning compressor runs for at least 2
minutes before it turns off. If it is deactivated directly after
activation, it will continue to run for 2 minutes (AC button
blinks).
Note
An abrupt change in the set temperature results in a
change of heating ↔cooling. Result:
-> Climate compressor is not active for 3 minutes
- The water valve is not opened for 3 minutes
Figure 7 - SC410 air-conditioning
compressor/Auto mode activated

BUS BODY ELECTRONICS
10
2.5 Setting desired room temperature
Press button
➔Desired temperature + 0.5°C
Press button
➔Desired temperature –0.5°C
Note
The temperature can be set between 17 °C to
28 °C in 0.5 °C intervals.
Figure 9 - SC410 changing the
temperature
Figure 8 –SC410 changing the
temperature

BUS BODY ELECTRONICS
11
2.6 Setting blower level
Press button
➔Auto mode is deactivated
Press button
➔Pressing once: Blower goes up one level.
➔Here, from low to medium speed (Figure 10).
➔Pressing repeatedly: Blower goes up one level.
➔Here, from medium to high speed (Figure 11).
➔Pressing again: Blower goes up one level.
➔Here, from high back down to slow speed (Figure 12).
Note
If the blower level is changed manually, Auto mode turns
off. The desired value of the room temperature is main-
tained.
Note
If the Auto button is pressed, Auto mode turns back on.
The blowers will then automatically turn back on.
Figure 11 - SC410 blower level at high
speed
Figure 12 - SC410 blower level at low
speed
Figure 10 - SC410 blower level from lower
to medium speed

BUS BODY ELECTRONICS
12
2.7 Switch air-conditioning/recirculating air
Press button in order to switch between air-condition-
ing and recirculating air.
➔If the status light above the air-conditioning/recirculating
air button lights up, the air-conditioning/recirculating air
function is active and the fresh air supply is deactivated
(Figure 13). The fresh air/recirculating air valves are
closed.
➔If the status light above the fresh air/recirculating air but-
tons does not light up, the fresh air/recirculating air func-
tion is not active. The fresh air valves are open (Figure 14).
Note
If the air-conditioning compressor is active, the fresh
air/recirculating air valves are closed
, as standard. If the
heating function is active, the fresh air/recirculating air
valves are open.
These defaults can be overwritten for 10 minutes by
pressing the fresh air/recirculating air button. Thereafter,
the system returns to the standard configuration.
Note
Close the fresh air/recirculating air valves to heat up
quickly.
Figure 13 - SC410 recirculating air
function active
Figure 14 - SC410 fresh air valves open

BUS BODY ELECTRONICS
13
2.8 Additional component
Press button, for additional component on / off
➔LED illuminates when additional component is switched
on, if an additional component is present (Figure 15).
The button controls output 7, to which the additional compo-
nent is connected.
The functions runs independently of the heating / cooling mode.
Figure 15 –SC410 additional component
switched on

BUS BODY ELECTRONICS
14
2.9 Errors
2.9.1 Error display
2.9.2 Error code overview
Error code
Components
Cause
Remedy
F00
High/low pres-
sure switches
-Refrigerant too
high/low
-High/low pressure
switches defective
-Expansion valve de-
fective
-Axial blower blocked or
failed
-Replace pressure swit-
ches
-Replace compressor
-Inspect axial blower
-Inspect refrigerant level
-Inspect for leakage
-Replace pressure swit-
ches
-Replace expansion valve
F01
Power supply
(relays board)
Power supply <
10V
> 16V
Supply voltage on relay
boards too high or too low
Inspect wiring harness
Replace ECU
F02
Power supply
type (control
panel)
No 12V system recognized.
Supply voltage on control
panel too high or too low.
< 10V
> 16V
Inspect wiring harness
Replace ECU
Note
If an error is present, the display varies between the set
desired temperature and error codes.
The desired temperature will display for 5 seconds then
the series of errors occurring will display for 2 seconds
each.
If an error has been eliminated, it will be automatically no
longer displayed.
Figure 16 - SC410 error display

BUS BODY ELECTRONICS
15
Table 5 - Error code overview
F03
System type
No basic or standard system
recognized
Replace ECU
F04
Room tempera-
ture sensor
Short-circuit to positive
Inspect wiring harness
Replace sensor
Replace ECU
F05
Room tempera-
ture sensor
Short-circuit to ground
Inspect wiring harness
Replace sensor
Replace ECU
F06
Environmental
temperature
sensor (SC410
only)
Short-circuit to positive
Inspect wiring harness
Replace sensor
Replace ECU
F07
Environmental
temperature
sensor (SC410
only)
Short-circuit to ground
Inspect wiring harness
Replace sensor
Replace ECU
F08
EEPROM
No access to EEPROM (data
inconsistency)
Replace ECU
F09
Refrigerant va-
lve (SC410
only)
Refrigerant valve cannot be
calibrated or run to the correct
position.
Inspect wiring harness
Replace motor
Replace ECU
F10
Coupling
Repeated occurrence of
high/low pressure error
See F00 remedy
This manual suits for next models
1
Table of contents
Other Valeo Automobile Electronic manuals

Valeo
Valeo PARK VISION User manual

Valeo
Valeo Park Vision VAL632210 User manual

Valeo
Valeo parking assistance User manual

Valeo
Valeo beep & park User manual

Valeo
Valeo beep & park User manual

Valeo
Valeo Beep&park/keeper User manual

Valeo
Valeo beep&park/vision User manual

Valeo
Valeo park vision 632211 User manual

Valeo
Valeo beep&park/vision User manual

Valeo
Valeo Beep&Park 632200 User manual