Power On / Off
Press the POWER OFF /VOL button to turn the unit on. The buttons
on the front of the unit are lightened and “WELCOME” message
appears briefly on the LCD screen, and then displays the current
mode status. You can also turn on the unit by pressing the POWER
button ( ) on the remote control.
Press and hold the POWER OFF /VOL button on the front panel for
more than 1 second or press the POWER button ( ) on the remote to power off the unit. The
monitor is drawn back into the main compartment and the LCD screen displays “BYE BYE”.
NOTE: The operating voltage range is 10.5v~16v. The unit will power off automatically to protect
Itself, when the voltage is out of this range.
Playing Source Selection
Press the MODE button on the front panel or the (SRC) button on the remote to select among the
available playing sources: TUNER, DVD, iPod,SAT, AUX IN, CAMERA (rear view video camera)
. The selected playing mode is displayed on the TFT or LCD screen.
AUX IN Mode
An external peripheral device can be connected to this unit via RCA cables to the “AUX-IN”.
CAMERA Mode
“CAMERA” mode is only available when the camera is connected and when backing up. To
install a rear view video camera, connect the CAMERA video input cable to the rear view camera
Output cable.
NOTE: If you have not connected a device to the unit, the source can not be selected. Example:
If you have not connected an iPod to the unit, the iPod source will not be available.
Volume Adjustment
To increase or decrease the volume level, turn the POWER OFF /VOL on the front panel or press
the (VOL+/ VOL-) buttons on the remote control. The volume ranges from “0” to “40”.
Audio Control Menu
The Audio Control feature allows you to easily adjust your audio system to meet the acoustical
characteristics of your vehicle, which vary depending on the type of vehicle and its
measurements. To get the best possible sound quality from your new system, be sure to adjust
the settings for the speakers as well. Proper setting of the Fader and Balance enhances the
effects of the cabin equalizer.
Accessing the Audio Control Menu
Press the POWER OFF /VOL on the front panel once or press the (SEL) button on the remote
control to enter the “Audio” menu.
Selecting an Audio Feature for Adjustment
Press the ( ) buttons on the remote or rotate Smart Dial knob on
the front panel or press the POWER OFF/VOL button on the front
panel once to select an audio feature to be adjusted.
Adjusting an Audio Feature
Press the ( ) buttons on the remote or rotate the POWER OFF/VOL
clockwise/counterclockwise to adjust the selected feature to the desired setting.
Operation Instructions
10
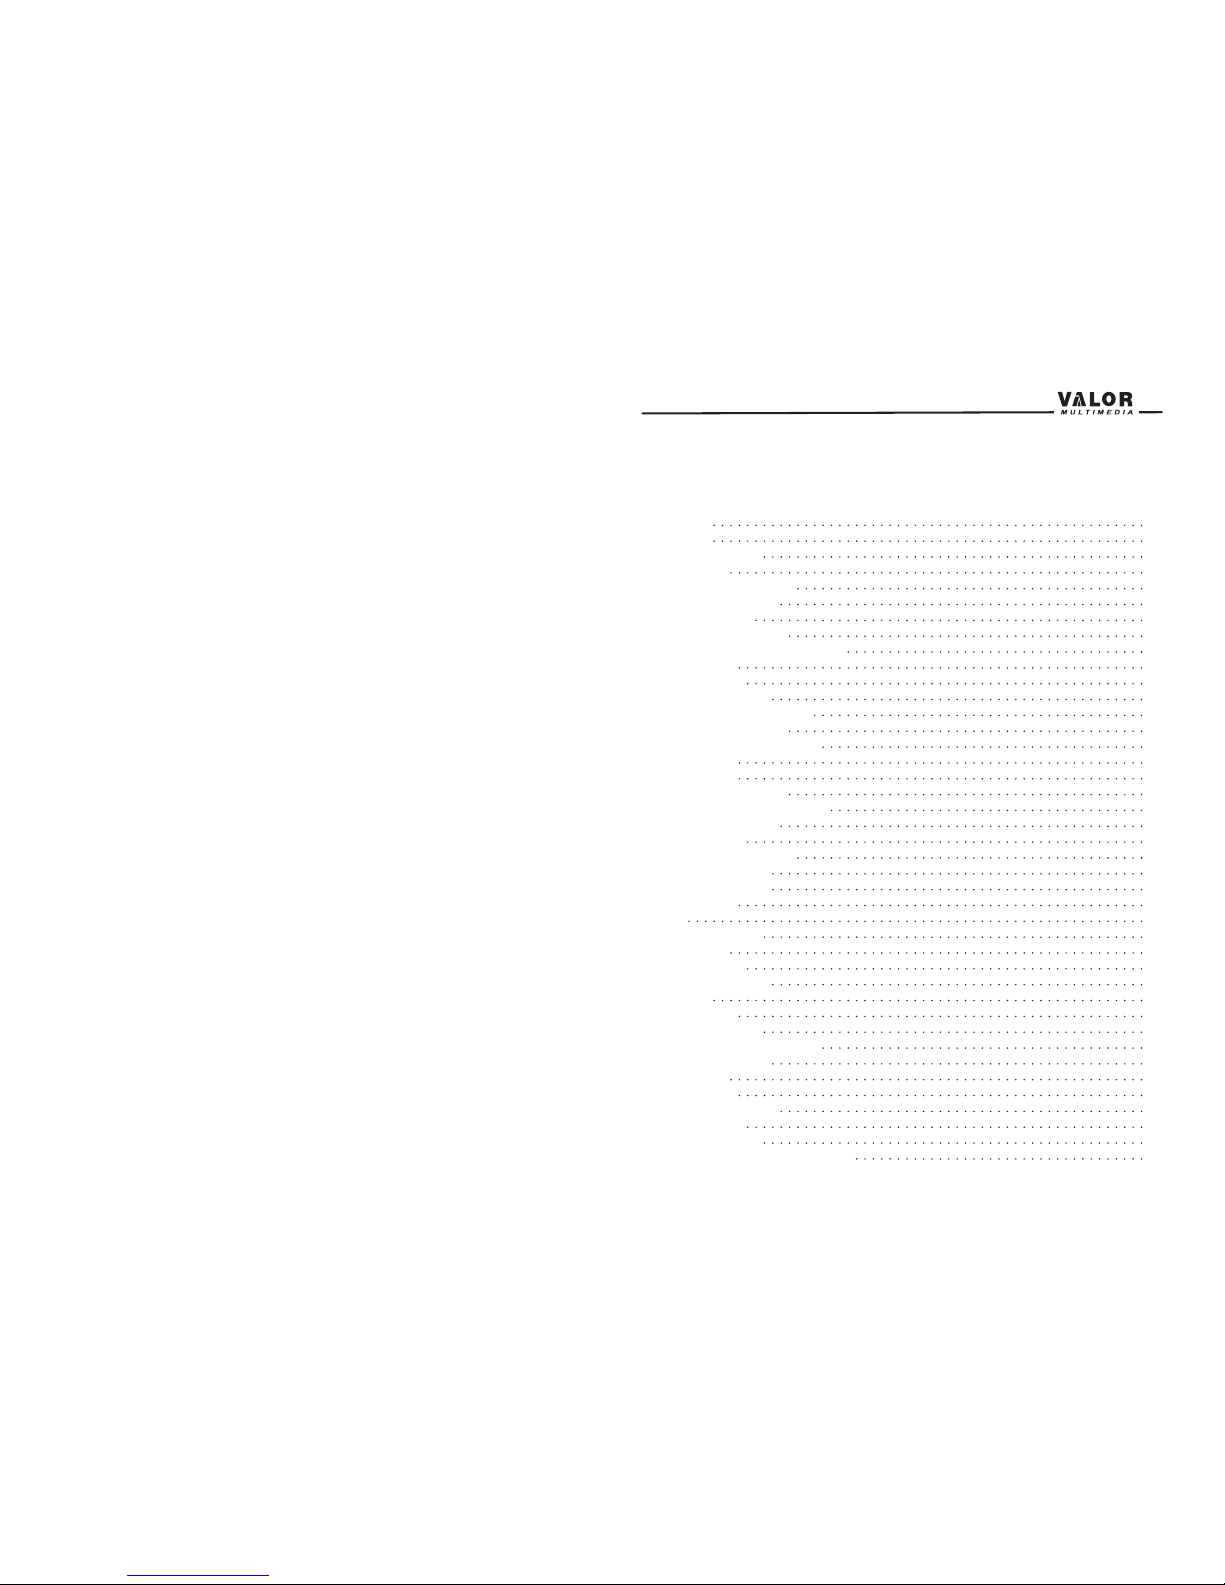
3. Set Parameters:
Press the ( ) buttons on the remote or press the ANGLE button ( ) on the front panel
to Adjust the selected feature to the desired setting.
4. Exit Picture Quality Setting Mode:
Press the PIC button on the remote or press and hold the INFO button on the unit.
NOTE: A video source must be connected to the AUX input and be playing to access the above
Adjustments.
Parking Brake Interlock
1. When the “PARKING” wire on the unit is connected to the brake switch, the display on the TFT
monitor will display video only when the vehicle is stopped and the parking brake is applied.
2. Parking brake function is overridden when the video source is set to CAMERA.
3. When the “parking brake interlock” is active, the front monitor displays a caution message
with a blue background, preventing the driver from watching video while driving to reduce the
risk of a traffic accident. Rear video screens are not affected.
Please see “INSTALLATION SECTION” for installation.
Monitor Movement Mechanism
If an obstruction occurs on the monitor path, the motion will stop automatically to prevent
damage for the mechanism or monitor.
Normal operation is resumed by pressing the OPEN button ( ) or restart the unit while “TFT
Auto Open” is “On”.
9