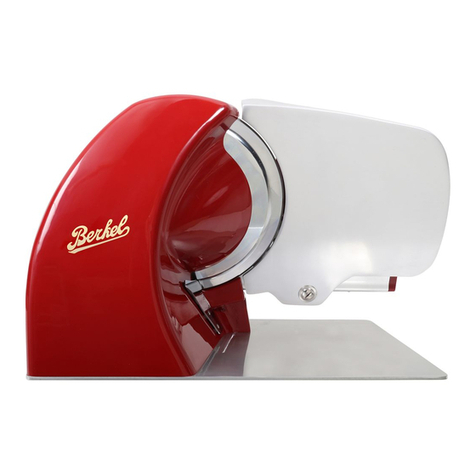
Van Berkel International VOLANO Series User manual

USER MANUAL - US
MANUEL D’INSTRUCTIONS - US
EN
FR
MANUAL DEL USUARIO - US
MANUAL DE INSTRUÇÕES - US
PT
ES
VOLANO SERIES
VOLANO VINTAGE
VOLANO HERITAGE
VOLANO S37-NSF

(Fig. 3-A) (Fig. 3-B) (Fig. 4)
(Fig. 6) (Fig. 7)
(Fig. 9) (Fig. 10)
(Fig. 5-A) (Fig. 5-B) (Fig. 5-C)
(Fig. 8)

3
USER MANUAL: FLYWHEEL SLICER
MODELS:
VOLANO VINTAGE, VOLANO HERITAGE, VOLANO S37-NSF
MAIN
COMPONENTS
1. Receiving plate
2. Slice deector
3. Top clamp
4. Meat table
5. Carriage
6. Flywheel operating handle
7. Flywheel
8. Casing
9. Blade protection
10. Vertical sliding top clamp
11. Feed plate fast forward
lever
12. Feed plate forward handle
13. Slice thickness regulating
knob
14. Blade cover
15. Foot
16. Blade
17. Sharpener
18. Product holder handle
EN
Fig. 1
18

4
DESCRIPTION
Manual, ywheel slicer ma-
chine, equipped with a circular
blade, suitable for cutting only
the food products of the types
and within the dimensional
limits indicated in this manual.
The main parts of the machine
are shown in the general com-
ponent diagram reported in
picture 1.
SAFETY
The machines described in this
manual comply with the latest
European hygiene and safety
standards.
Pay attention to the following
basic safety precautions:
- read all the instructions be-
fore using the machine;
- this product is not intended
to be used by children;
- operate the machine only if
properly trained and in perfect
psycho-physical conditions;
- do not use the machine in any
way other than what indicated
in this manual;
- use the machines only in full
structural, mechanical and sys-
tem efciency;
- install the machine in con-
formity to the instructions
indicated in the “Installation”
section;
- install the machine in a loca-
tion out of the reach of person-
nel unauthorized to operate it
and especially out of the reach
of minors;
- stay highly concentrated when
using the machine and avoid any
distraction during use;
- do not allow the machine to
be used by others who have
not read and fully understood
the content of this manual;
- do not wear baggy clothing or
clothing with open sleeves;
- do not allow anyone else,
other than the operator, to ap-
proach during product cutting
operations;
- do not remove, cover or
modify the tags located on the
machine body and, in case of
damage of these, replace them
promptly;
- do not remove, modify or
bypass any mechanical protec-
tive devices;
- slice only the permitted prod-
ucts, do not attempt cuts on
prohibited type products;
- always keep clean and dry the
sliced product resting surface,
the work area all around the
machine and the operator oor
area;
- do not use the machine as
a resting surface and do not
place any objects on it other
than food used for cutting op-
erations;
- do not use the slicer when,
due to normal wear, the dis-
tance between the edge of
the blade and the blade guard
ring exceeds 6 mm. In this case,
contact the manufacturer or
one of the Authorized Service
Centers to change the blade.
- Immediately stop the ma-
chine in the event of a defect,
abnormal operation, suspicion
of breakdown, incorrect move-
ment, unusual noises;
- use protective gloves for
cleaning and maintenance op-
erations;
- place and remove the goods
to be sliced on the sliding plate
only with the carriage com-
pletely pulled back and put the
blade protection in safety posi-
tion;
- for movement of the meat
table during cutting operations
use only the ywheel;
- never put your hands on the
food product while slicing. Al-
ways keep your hands far from
the blade;
- use of cutting accessories
which were not provided by
the manufacturer with the ma-
chine is prohibited.
The manufacturer declines any
responsibility coming from in-
appropriate use, modications
and/or repairs carried out by
the user or unauthorized per-
sonnel, use of replacement
parts, which are not original
or not specic for the machine
model.
Operating conditions:
- Temperature from -5°C to
+40°C
- Max. humidity 95%
DO NOT SLICE:
- frozen food products;
- food products with bones;
- vegetables in general
- any other product not intend-
ed for food use.
Residual risks
The safety ring around the
blade protects the operator
from incidental contact with
the blade although, in order
to allow the sharpening oper-
ations, the protection in the
sharpening area may not en-
tirely eliminate the risk of cut-
ting.
WARNING: during
the blade cleaning and
sharpening operations, pay
extra attention to keep your
hands as far as possible from
the unprotected area. Use of
protective gloves is recom-
mended.
INSTALLATION
OF THE MACHINE
If you do not use the stand (op-
!

5
tional), install the machine on
a at, smooth and dry surface
suitable for supporting the
weight of the machine itself
plus the goods to be sliced. The
recommended height of the
worktop is approximately 80
cm. Lift the machine careful-
ly and insert all the feet in the
specic lodgings in the base.
For some models, the front
support feet can be unscrewed
and placed in the desired posi-
tion depending on the depth of
the worktop.
To prevent damage, some mod-
els are packaged separately
from the disassembled y-
wheel during transport. If the
received machine ywheel is
not assembled, follow these in-
structions:
- insert the ywheel on the
shaft, checking correct cor-
respondence with the y-
wheel-shaft sleeve holes (Fig.
3-A);
- insert the taper pin in the
sleeve with the tapered end
(smaller diameter) turned to-
ward the sleeve itself (Fig. 3-B);
CAUTION! If the pin is
correctly positioned, it
will insert almost entirely with-
out being forced.
- hammer down the pin to in-
sert it fully.
OPERATION
- Make sure that the blade is
properly protected from the
blade protection: use the blade
protection locking lever, if
present (Fig.4). Check that the
thickness adjustment knob is
in the safety position (position
“0”) (13);
- if the handle is folded toward
the ywheel, lift it to the work-
ing position, perpendicular to
the ywheel;
- using the ywheel handle,
rotate the ywheel (7) to bring
the carriage (5) fully forward
(toward the operator);
- pull back (away from the
blade) the meat table (4) using
the meat table advance mech-
anism (12);
- set the product to be sliced
on the meat table;
- lock with the product press
holder (18), applying pressure;
- arrange the desired slice
thickness, rotating the knob at
the same time and selecting a
thickness;
- move the meat table with
product forward (toward the
blade), using the meat table
rapid advance device (11) or
meat table advanced mecha-
nism (12);
CAUTION!Leavea space
of 0.5 - 1 cm between the
blade and the product.
- uncover the blade guard, de-
pending on the mode: a) pull
the locking lever, if present,
toward the operator, having it
rotate in the anticlockwise di-
rection; b) loosen the locking
knob on the blade guard, pull
toward the operator, re-tight-
en the knob to lock the blade
guard in its stand-by position
(blade uncovered);
CAUTION Sharp blade,
cutting hazard! When
the blade is not covered by the
guard, be extremely careful to
keep your hands as far away
from the unprotected area as
possible.
- activate the ywheel by hav-
ing it rotate it in the clockwise
direction.
WARNING: risk of dam-
ages! Never turn the y-
wheel anti-clockwise, reverse
ywheel rotation may serious-
ly damage the machine.
- during the return movement
of the carriage (towards the
operator) the meat table will
automatically move towards
the blade;
- when the meat table gets to
limit advancing towards the
blade, stop slicing and lift up
the top clamp. Use the meat
table rapid advance device or
the meat table advance mech-
anism to pull the meat table
away from the blade. Reposi-
tion the product, relock it with
the top clamp and restart slic-
ing.;
- unload the product following
the operations in the reverse
order.
CAUTION Cutting haz-
ard! After the cutting
operation has been completed,
turn the lever in the opposite
direction: the protective ring
will overlap the blade, elimi-
nating the hazard.
CLEANING
Clean the machine at the end
of their use and always before
using, after a long period of
inactivity. Use cut and tear re-
sistant gloves and perform all
operations with great care.
Products for cleaning:
use only water and biode-
gradable mild detergent, us-
ing a soft, spongy cloth and a
semi-rigid nylon brush for the
sharp areas of the plate and the
product holder. Do not clean
the machine with jets of water
or steam or similar methods.
DISMANTLING
- Check that the guard is cover-
ing the blade properly (9).
- Unscrew the slice deector
locking screw by hand and re-
move it.
- Remove the pan.
!
!
!
!
!


6
- Rotate the grip and remove the
product press holder (Fig. 10);
- Remove the meat table, rotat-
ing the locking lever in the anti-
clockwise direction, lift the table
only and remove it.
- Remove the collection tray.
If the tray is locked by two side
pins, loosen them before remov-
ing the tray.
WARNING! For some
models, push the meat
table forward before lifting it
with its top clamp arm.
CLEANING
- The blade: press a damp cloth
on the surface of the blade and
move it slowly from the center
toward the outside on the
blade cover side and the oppo-
site side. In the same way, dry it
using a dry cloth;
WARNING! Never acti-
vate the ywheel while
cleaning the blade.
- the safety ring: use a soft
brush to clean the area be-
tween the blade and the safety
ring;
WARNING! Sharp blade,
cutting hazard! When
the blade is not covered by the
guard, be extremely careful to
keep your hands as far away
from the unprotected area as
possible.
- the machine body: use a
damp cloth or a sponge. Dry
carefully.
REASSEMBLING
- Check that the blade protec-
tion duly covers the blade (9);
- put the waste tray in its spe-
cic position;
- close the slice deector;
- using the ywheel handle, ro-
tate the ywheel (7) to bring the
sliding meat table (4) fully for-
ward (towards the operator);
- with a vertical movement
from top to bottom, place the
meat table in its position.
WARNING: risk of inju-
ry from sharp blade! For
some models, after placing the
meat table, push it forward in
order to secure it completely
in the carriage. If present, close
the lever or tighten the knob
on the meat table.
MAINTENANCE
Blade Sharpening
Frequency and duration of
sharpening depend on the use
of the equipment.
WARNING: risk of in-
jury from sharp blade!
When the blade is not covered
with the blade protection, pay
extra attention to keep your
hands as far as possible from
the unprotected area.
For sharpening, follow the
instruction according to the
model:
FOR MODEL
VINTAGE (Fig. 6)
- Clean the blade, freeing it of
residual grease.
- Check that the guard is cov-
ering the blade properly
- Move the meat table away
from the blade.
- Lift the sharpener and rotate
it 180°.
- Carefully lower the sharpen-
er. The blade will be automati-
cally centred between the two
grinding wheels.
- Press the button (B) for ap-
proximately 10-15 seconds
and simultaneously rotate the
ywheel. Release the button
(B), press the button (C) for 2-3
seconds and release it.
- Stop ywheel rotation.
- Reposition the sharpener in
its original position and tighten
the knob only after the blade
has stopped moving.
FOR MODELS
HERITAGE (Fig. 7)
- Clean the blade, freeing it of
greasy residue.
- Check that the guard is cov-
ering the blade properly.
- Loosen the meat table from
the blade.
- Lift the sharpener and rotate
it 180°.
- Lower the sharpener with
care. The blade will be auto-
matically centred between the
two grinding wheels.
- Press the button (B) for ap-
proximately 10-15 seconds
and simultaneously rotate the
ywheel. Release the button
(B), press the button (C) for 2-3
seconds and then release it.
- Stop turning the ywheel.
- Only when the blade is xed,
return the sharpener to its
original position and relock the
knob.
FOR MODEL
S37-NSF (Fig. 8)
- Clean the blade, freeing it of
greasy residue.
- Check that the guard is cov-
ering the blade properly
- Loosen the meat table from
the blade.
- Lift the sharpener cover.
- Lift the sharpener and rotate
it 180° in the direction of the
blade.
- Lower the sharpener with
care. The blade will be auto-
matically centred between the
two grinding wheels.
- Press the button (A) for ap-
proximately 10-15 seconds
and simultaneously rotate the
ywheel. Release the button
!
!
!
!
!

7
(A), pull the lever (B) for 2-3
seconds and then release it.
- Stop turning the ywheel.
- Only when the blade is xed,
return the sharpener to its
original position and relock the
knob.
- Close the cover.
WARNING: risk of dam-
ages! Do not excessively
force (more than 2-3 seconds)
the deburring operation to
prevent damaging of the blade.
Lubrication (Fig. 11)
- Put some drops of oil over the
bar (1) and in the junction of
the slice thickness-regulating
knob (2);
- put some drops of oil in the
holes (3 and 4);
- put some drops of oil on the
ywheel in its junction to the
tree (5);
- briey activate the ywheel.
For lubrication only use acid
free oil (we recommend Vase-
line oil). Do not use vegetable
oil.
SERVICE
No user-serviceable parts
are inside. Referservicing to
qualied personnel. All the
repair and replacement op-
erations (like blade replace-
ment, replacement of the
motor belt, replacement of
the sub-basaplate electrical
system components, repair
of structural parts, repair
and/or re-placement of
sub-baseplate components,
or similar) shall be execut-
ed exclusively by personnel
authorized by the manufac-
turer.
In the event service is need-
ed, please contact Van
Berkel USA, Inc. where the
cost of repair or electrical
or mechanical adjustment
can be estimated before the
repair is undertaken. You
may also return your food
slicer to Van Berkel USA,
Inc. for servicing. Please in-
clude your return address
and a brief description of the
problem or damage to the
slicer on a separate sheet in-
side the box.
Send your slicer, insured and
postage prepaid to:
Van Berkel USA C/O
St. George Logistics
8502 NW 80TH ST
MEDLEY, FL 33166-2133
Retain evidence of shipping
for your protection.
Phone Number - Service De-
partment: (786) 261-0766.
E-mail – Service Department:
service@berkelinternational.
com.
WARRANTY AND
RESPONSIBILITY
Van Berkel USA, Inc. (“Van
Berkel”) warrants to the rst
and original buyer of new
equipment that said equip-
ment, when installed in ac-
cordance with our instruc-
tions within North America
and subjected to normal use
and care, is free from defects
in material or workmanship
for a period of one (1) year
from the date of original
purchase (“Warranty Peri-
od”). Van Berkel will repair
or replace, at our option, any
product or part that is de-
fective in material and work-
manship without charge if
the product is returned to us
postage prepaid with dated
proof of purchase and serial
number within the Warranty
Period. This warranty does
not apply to commercial use
or any product abuse.
VAN BERKEL SPECIFI-
CALLY DISCLAIMS ANY
IMPLIED WARRANTY OF
MERCHANTABILITY OR
EXPRESSED OR IMPLIED
WARRANTY OF FITNESS
FOR A PARTICULAR PUR-
POSE. VAN BERKEL SHALL
NOT BE LIABLE FOR ANY
INCIDENTAL OR CONSE-
QUIENTIAL DAMAGES TO
BUYER OR ANY THIRD
PARTY, INCLUDING, WITH-
OUT LIMITATION, LOSS OF
PROPERTY, PERSONAL IN-
JURY, OR STATUTORY OR
EXEMPLARY DAMAGES,
WHETHER IN NEGLICENCE,
WARRANTY, STRICT LIABIL-
ITY OR OTHERWISE.
This warranty is not trans-
ferable and is limited to the
rst and original buyer from
a Van Berkel Authorized
Channel of Distribution. No
warranty is given to subse-
quent transferees.
THE FOREGOING WAR-
RANTY PROVISIONS ARE
A COMPLETE AND EXCLU-
SIVE STATEMENT OF THE
WARRANTY BETWEEN THE
BUYER AND SELLER. VAN
BERKELNEITHER ASSUMES
NOR AUTHORIZES ANY
PERSONS TO ASSUME ANY
OTHER OBLIGATION OR
LIABILITY IN CONNECTION
!

8
WITH SAID EQUIPMENT.
Example of items not cov-
ered under warranty, but not
limited to just these items:
1. acts of God, re, water
damage, burglary, accident,
theft, vandalism;
2. freight damage;
3. improper installation or
alteration of equipment;
4. use of generic or after-
market parts;
5. repairs made by anyone
other than a Van Berkel des-
ignated servicer;
6. periodic maintenance of
equipment including but not
limited to lubrication and
sharpening, and other adjust-
ments required due to instal-
lation set-up or normal wear;
7. replacement of worn
blades, knives, stones, knobs,
accessories, and miscellane-
ous expendable supply items;
8. cleaning of equipment;
9. misuse or abuse.

9
SPECIFICATIONS
Circular cutting capacity 210 mm 215 mm
Rectangular cutting capacity 270x210 mm 280x215 mm
Max slice thickness 1,5 mm 1,5 mm
Blade diameter 300 mm 319 mm
Weight 44 Kg 53 kg
DATA SHEET
VOLANO
VINTAGE
VOLANO
HERITAGE

10
SPECIFICATIONS
Circular cutting capacity 260 mm
Rectangular cutting capacity 290x260 mm
Max slice thickness 4 mm
Blade diameter 370 mm
Weight 80 Kg
Note: As we actually strive to improve our products, specications are necessarily subject to change
without notice.
VOLANO
S37-NSF

11
MANUEL D’INSTRUCTIONS : TRANCHEUSE MANUELLE À VOLANT
MODÈLES:
VOLANO VINTAGE, VOLANO HERITAGE, VOLANO S37-NSF
ÉLÉMENTS
PRINCIPAUX
1. Plateau de récupération
2. Protège-tranche
3. Presse-produit
4. Plateau port-aliment
5. Chariot
6. Poignée de manoeuvre
du volant
7. Volant
8. Base
9. Anneau protecteur lame
10. Glissement vertical
presse-produit
11. Levier pour l’avance rapide
du plateau supérieur
12. Poignée pour l’avance du
plateau supérieur
13. Poignée de réglage de
l’épaisseur de la tranche
14. Protection de lame
15. Pied d’appui
16. Lame
17. Aiguisoir
18. Poignée du presse-aliment
FR
Fig. 1
18

12
DESCRIPTION
Trancheuses à volant avec
lame circulaire, conçues pour
trancher exclusivement les
produits alimentaires indiqués
dans ce manuel et dans les
limites dimensionnelles pré-
vues. Les parties principales
qui composent la machine sont
illustrées sur la gure 1.
SÉCURITÉ
Les machines décrites dans ce
manuel sont conformes aux
standards européens dictés
par les dernières normes en
vigueur en termes d’hygiène et
de sécurité.
Faire attention aux instruc-
tions suivantes pour votre sé-
curité:
- lire attentivement toutes les
instructions avant d’utiliser la
machine;
- le produit n’est pas indiqué
pour l’utilisation de la part des
enfants;
- utiliser la machine seule-
ment après s’être instruit sur
son fonctionnement et si l’on
se trouve dans des conditions
d’aptitude physique et mentale
parfaites;
- ne pas utiliser la machine de
manière différente que celle
indiquée dans ce manuel;
- installer la machine en
conformité avec les instruc-
tions indiquées dans le para-
graphe «installation»;
- installer la machine dans un
lieu hors de portée de person-
nel étranger aux opérations
relatives à l’utilisation, en par-
ticulier les mineurs;
- utiliser la machine de ma-
nière très concentrée, sans se
distraire pendant l’utilisation;
- ne pas autoriser l’utilisation
de la machine à toute personne
n’ayant pas lu et assimilé plei-
nement ce manuel;
- ne pas porter de vêtements
ottants ou avec des manches
ouvertes;
- ne permettre à personne de
s’approcher pendant le fonc-
tionnement de découpe du
produit;
- ne pas retirer, couvrir ou mo-
dier les plaques situées sur
la structure de la machine et,
en cas d’endommagement de
celles-ci, les remplacer rapide-
ment;
- ne pas retirer les protections
et ne pas modier ou exclure
les protections mécaniques;
- trancher uniquement les pro-
duits autorisés, ne pas essayer
de découper des produits in-
terdits;
- maintenir la zone d’appui du
produit découpé, la zone tout
autour de la machine et le sol
au niveau de l’opérateur tou-
jours propres et secs;
- ne pas utiliser la machine
comme surface d’appui et ne
poser aucun objet étranger
aux opérations normales de
découpe;
- ne pas utiliser la trancheuse
lorsqu’à la suite d’une utilisa-
tion normale, la distance entre
le l de la lame et l’anneau
pare-lame a dépassé 6 mm,
dans ce cas, contacter le fabri-
cant ou l’un des centres assis-
tances agréés pour changer la
lame;
- arrêter immédiatement la
machine et contacter un centre
d’assistance agréé en cas de
dysfonctionnement, de suspi-
cion de casse, de mouvements
incorrects, de bruit insolites,
etc.;
- toujours utiliser des gants de
protection résistant aux cou-
pures et aux lacérations pour
les opérations de nettoyage et
d’entretien;
- placer et déplacer le produit
à trancher sur le plateau su-
périeur coulissant seulement
avec le plat complètement
reculé (loin de la lame) et le
chariot totalement vers l’opé-
rateur;
- faire glisser le plat durant les
opérations de découpe seu-
lement et exclusivement au
moyen du volant;
- ne jamais toucher le produit
avec les mains durant la dé-
coupe. Garder les mains tou-
jours éloignées de la lame;
- l’utilisation d’accessoires
pour la découpe qui n’ont pas
été fournis par le fabricant de
la machine n’est pas autorisé.
Le fabriquant décline toute
responsabilité dérivant d’une
utilisation impropre, de modi-
cations et/ou de réparations
effectuées par l’utilisateur ou
par du personnel non autori-
sé, d’une utilisation de pièces
de rechange non originales ou
non spéciques pour le modèle
de la machine.
Conditions de service am-
biantes:
- Température de -5°C à +40°C
- Humidité max 95%
NE PAS TRANCHER:
- produits alimentaires congelés;
- produits alimentaires surgelés;
- produits alimentaires avec os
(viandes et poissons);
- tout autre produit non desti-
né à une utilisation alimentaire.
Risques résiduels
L’anneau de protection au-
tour de la lame protège l’opé-
rateur du contact accidentel
avec la lame. Toutefois, an de
consentir les opérations d’ai-
guisage, la protection n’élimine
pas complètement le risque de

13
coupure.
ATTENTION! Durant
les opérations de net-
toyage et d’aiguisage de la
lame, faire extrêmement at-
tention à garder les mains le
plus loin possible de la zone
non protégée. L’utilisation
de gants de protection est
conseillée.
INSTALLATION
Si la colonne de support n’est
pas utilisée (en option), ins-
taller la machine sur un plan
bien nivelé, sec et adapté pour
soutenir le poids de la machine,
en plus du produit à trancher.
Vérier l’absence d’obstacles
empêchant le mouvement du
volant, la course du chariot et
le chargement du produit à
trancher. La hauteur conseillée
du plan de travail est d’environ
80 cm. Soulever attentivement
la machine et insérer les pieds
en caoutchouc dans les sièges
correspondant sur la base.
. Pour certains modèles, les
pieds d’appui avant peuvent
être dévissés et placés sur la
position désirée en fonction
de la profondeur du plan de
travail.
Pour éviter des endommage-
ments, certains modèles sont
emballés avec le volant à part,
non monté, durant le trans-
port. Suivre ces instructions si
le volant de la machine reçue
n’est pas monté :
- insérer le volant sur l’arbre
en vériant la juste correspon-
dance des perçages manchon
volant-arbre (Fig. 3-A) ;
- insérer dans le manchon la
che conique avec l’extrémité
conique (diamètre inférieur)
orientée vers le manchon (Fig.
3-B) ;
ATTENTION ! Si la che
est positionnée correc-
tement, elle s’insèrera complè-
tement sans forcer.
- battre la che pour l’insérer
complètement.
OPÉRATION
- Vérier que la lame est bien
protégée par le pare-lame : en
utilisant le levier de blocage de
protection de la lame, s’il existe
(Fig. 4); contrôler que la poi-
gnée de réglage de l’épaisseur
soit en position de sécurité (en
position ‘0’) (13) ;
- Si la poignée est repliée vers
le volant, la soulever en posi-
tion de travail, perpendiculaire
par rapport au volant ;
- En actionnant le volant (7)
placer le chariot (5) totalement
en avant (vers l’opérateur) ;
- reculer complètement (loin
de la lame) le plat porte-ali-
ment (4) en utilisant la poignée
pour l’avance du plateau supé-
rieur (12) ;
- placer le produit à découper
sur le plat porte-aliment;
- bloquer avec le presse-ali-
ment (18) en exerçant une lé-
gère pression ;
- préparer l’épaisseur de la
tranche désirée en tournant le
bouton en même temps et sé-
lectionner l’épaisseur ;
- approcher le plat porte-ali-
ment (vers la lame) en interve-
nant sur le levier pour l’avance
rapide du plateau supérieur
(11) ou sur la poignée pour
l’avance de plateau supérieur
(12) ;
ATTENTION ! Laisser
un espace compris entre
0,5 et 1 cm entre la lame et le
produit.
- Découvrir la lame de sa pro-
tection, en fonction du modèle:
a) tirer vers l’opérateur le levier
de blocage, si présent, en la fai-
sant tourner dans le sens anti-
horaire; b) desserrer le pom-
meau de blocage du pare-lame,
tirer vers l’opérateur, revisser
le pommeau pour bloquer le
pare-lame dans sa position de
repos (lame découverte) ;
ATTENTION Lame ai-
guisée, danger de coupe
! Quand la lame n’est pas cou-
verte par l’anneau protecteur,
faire extrêmement attention à
garder les mains les plus éloi-
gnées possible de la zone non
protégée.
- Actionner le volant en le fai-
sant tourner dans le sens ho-
raire ;
ATTENTION! Risque
d’endommagement! Ne
pas tourner le volant du char-
riot dans le sens contraire, la
rotation inverse du volant peut
endommager sérieusement la
machine.
- durant la course de retour
du chariot (vers l’opérateur),
le dispositif mécanique qui fait
avancer le plateau supérieur
vers la lame est actionné en
sens transversal;
- quand le plat porte-aliment
atteint la limite d’avance vers
la lame, s’arrêter et soulever le
presse-aliment. En utilisant la
poignée pour l’avance de pla-
teau supérieur ou le levier pour
l’avance rapide, éloigner le pla-
teau de la lame. Replacer le
produit, le bloquer à nouveau
au moyen du presse-aliment et
recommencer à trancher;
- Ôter le produit en réalisant
les opérations dans le sens in-
verse.
ATTENTION danger de
coupure ! Une fois que
l’opération de coupe est ter-
minée, tourner le levier dans le
sens opposé : l’anneau de pro-
!
!
!
!
!
!

14
tection se superpose à la lame
en éliminant le danger.
NETTOYAGE
Les machines doivent être
soigneusement nettoyées à la
n de leur utilisation. Après
une période d’inactivité, elles
doivent être nettoyées avant
d’être utilisées.
Utiliser des gants de protec-
tion résistant aux coupures et
aux lacérations et effectuer
très attentivement toutes les
opérations.
Produits pour le nettoyage:
utiliser uniquement de l’eau
avec un torchon doux, spon-
gieux et éventuellement une
brosse à dent en nylon semi-ri-
gide pour les zones du plat
et du presse-aliment. Ne pas
nettoyer la machine avec des
jets d’eau ou de vapeur ou mé-
thodes équivalentes.
DÉMONTAGE
- S’assurer que la protection
couvre dûment la lame (9)
- Desserrer à la main la vis de
blocage du pare-tranche et le
retirer.
- Retirer la cuvette.
- Tourner la poignée et retirer
le presse-aliment (Fig. 10).
- Retirer le plat porte-aliment,
en tournant le levier de blo-
cage en sans antihoraire, sou-
lever le seul plat et le retirer.
- Retirer le plat collecteur. Si le
plat est bloqué par deux pivots
latéraux, les serrer avant de re-
tirer le plat.
ATTENTION! Sur cer-
tains modèles, pousser
le plat porte-aliment en avant
avant de la soulever avec le
porte-aliment.
NETTOYAGE
- lame: presser un torchon hu-
mide sur la surface de la lame
et le déplacer lentement du
centre vers l’extérieur, comme
sur la gure, sur le côté du
couvre-lame et sur le côté op-
posé. De la même manière, sé-
cher en utilisant un chiffon sec.;
ATTENTION! Ne pas ac-
tiver la trancheuse pen-
dant le nettoyage de la lame.
- anneau de sécurité: utiliser
une brosse à dent en nylon se-
mi-rigide pour nettoyer la zone
qui se situe entre la lame et
l’anneau de protection;
ATTENTION! Lame ai-
guisée, danger de coupe
! Quand la lame n’est pas cou-
verte par l’anneau protecteur,
faire extrêmement attention à
garder les mains les plus éloi-
gnées possible de la zone non
protégée.
- structure machine: nettoyer
la structure de la machine
avec un torchon humide ou
une éponge en rinçant avec de
l’eau. Sécher avec soin.
REMONTAGE
- Contrôler que la protection
couvre dûment la lame (9);
- remettre la cuvette à sa place;
- fermer le pare-tranche;
- en utilisant la poignée du
volant, tourner le volant (7)
pour placer complètement en
avant (vers l’opérateur) le plat
porte-aliment coulissant (4);
- avec un mouvement vertical
du haut vers le bas, remettre le
plat porte-aliment en position
initiale.
ATTENTION! Sur cer-
tains modèles, après
avoir placé le plat porte-ali-
ment, le pousser pour le xer
sur le support du plat. Fermer
le levier ou serrer la poignée
sur le plat porte-aliment si pré-
sente.
ENTRETIEN
Aiguisage de la lame
La fréquence et la durée de l’ai-
guisage dépendent de l’utilisa-
tion qui en est faite.
ATTENTION! Lame ai-
guisée, danger de coupe!
Quand la lame n’est pas cou-
verte par l’anneau protecteur,
faire extrêmement attention à
garder les mains les plus éloi-
gnées possible de la zone non
protégée.
Pour l’aiguisage de la lame,
suivre les instructions selon le
modèle indiqué:
POUR LES MODÈLES
VINTAGE (Fig. 6)
- Exécuter le nettoyage de la
lame en la libérant des résidus
de graisse
- Vérier que la protection
couvre dûment la lame
- Éloigner le plat porte-aliment
de la lame
- Soulever l’aiguisoir et le tour-
ner de 180°
- Baisser attentivement l’ai-
guisoir, la lame se centrera au-
tomatiquement entre les deux
ressorts
- Appuyer sur le bouton (B)
pendant environ 10-15 se-
condes et tourner en même
temps le volant. Lâcher le bou-
ton (B), appuyer sur le bouton
(C) pendant 2-3 secondes et le
relâcher.
- Interrompre la rotation du
volant
- Seulement quand la lame est
arrêtée, replacer l’aiguisoir
dans sa position d’origine et
visser le pommeau
!
!
! !
!

15
POUR LES MODÈLES
HERITAGE (Fig. 7)
- Effectuer le nettoyage de la
lame en éliminant les résidus
de la graisse
- Vérier que la protection
couvre dûment la lame
- Éloigner le plat porte-aliment
de la lame
- Soulever l’aiguisoir et le tour-
ner de 180°
- Baisser attentivement l’ai-
guisoir, la lame se centrera au-
tomatiquement entre les deux
ressorts
- Appuyer sur le bouton (B)
pendant environ 10-15 se-
condes et tourner au même
moment le volant. Lâcher le
bouton (B,) appuyer sur le bou-
ton (C) pendant 2-3 secondes
et le relâcher.
- Interrompre la rotation du
volant
- Seulement quand la lame est
arrêtée, replacer l’aiguisoir
dans sa position d’origine et
visser le pommeau.
POUR LE MODÈLE
S37-NSF (Fig. 8)
- Effectuer le nettoyage de la
lame en éliminant les résidus
de la graisse
- Vérier que la protection
couvre dûment la lame
- Éloigner le plat porte-aliment
de la lame
- Soulever le couvercle de l’ai-
guisoir
- Soulever l’aiguisoir et le tour-
ner de 180° en direction de la
lame
- Baisser attentivement l’ai-
guisoir, la lame se centrera au-
tomatiquement entre les deux
ressorts
- Appuyer sur le bouton (A)
pendant environ 10-15 se-
condes et tourner au même
moment le volant. Lâcher le
bouton (A), tirer le levier (B)
pendant 2-3 secondes et le re-
lâcher.
- Interrompre la rotation du
volant
- Seulement quand la lame est
arrêtée, replacer l’aiguisoir
dans sa position d’origine et
visser le pommeau.
- Fermer le couvercle.
ATTENTION: risque
d’endommagement! Ne
pas prolonger excessivement
(pas plus de 2-3 secondes)
l’opération d’ébarbage pour
éviter d’endommager la lame.
Lubrication (Fig. 9)
- Verser quelques gouttes
d’huile sur la barre (1) et dans
la jonction de la poignée de
réglage de l’épaisseur de la
tranche (2);
- verser quelques gouttes
d’huile dans les trous (3 et 4);
- verser quelques gouttes
d’huile dans la jonction entre
le volant et la structure de la
trancheuse (5);
- actionner brièvement le vo-
lant.
Pour la lubrication, utiliser
seulement des huiles sans
acides (on conseille huile de va-
seline). Ne pas utiliser d’huiles
végétales.
ASSISTANCE
Les pièces de rechange ne
sont pas fournies à l’inté-
rieur de l’emballage. Toutes
les activités de réparation
et remplacement (comme
le remplacement ou la ré-
paration de lame, courroie,
composants électriques,
parties structurelles, etc.)
doivent être effectuées
exclusivement par du per-
sonnel autorisé par le fa-
bricant même.
Dans le cas où un service
est nécessaire, contactez
Van Berkel USA, Inc. au-
près duquel le coût de la
réparation ou de l’ajuste-
ment électrique ou mé-
canique peut être estimé
avant que la réparation
soit effectuée. Vous pouvez
également renvoyer votre
trancheuse d’aliments à
Van Berkel USA, Inc. pour
l’entretien. Veuillez inclure
votre adresse de retour et
une brève description du
problème ou des dommages
sur la trancheuse sur une
feuille à part à l’intérieur de
la boîte.
Envoyez votre trancheuse,
assurée et pré-affranchie à :
Van Berkel USA C/O
St. George Logistics
8502 NW 80TH ST
MEDLEY, FL 33166-2133
Gardez la preuve de l’expé-
dition en cas besoin.
Phone Number - Service De-
partment: (786) 261-0766.
E-mail – Service Department:
service@berkelinternational.
com.
WARRANTY AND
RESPONSIBILITY
Van Berkel USA, Inc. (“Van
Berkel”) warrants to the
rst and original buyer of
new equipment that said
equipment, when installed
in accordance with our
instructions within North
America and subjected to
normal use and care, is free
!

16
from defects in material or
workmanship for a period
of one (1) year from the date
of original purchase (“War-
ranty Period”). Van Berkel
will repair or replace, at our
option, any product or part
that is defective in material
and workmanship without
charge if the product is re-
turned to us postage pre-
paid with dated proof of
purchase and serial number
within the Warranty Period.
This warranty does not ap-
ply to commercial use or
any product abuse.
VAN BERKEL SPECIFI-
CALLY DISCLAIMS ANY
IMPLIED WARRANTY OF
MERCHANTABILITY OR
EXPRESSED OR IMPLIED
WARRANTY OF FITNESS
FOR A PARTICULAR PUR-
POSE. VAN BERKEL SHALL
NOT BE LIABLE FOR ANY
INCIDENTAL OR CONSE-
QUIENTIAL DAMAGES TO
BUYER OR ANY THIRD
PARTY, INCLUDING, WIT-
HOUT LIMITATION, LOSS
OF PROPERTY, PERSO-
NAL INJURY, OR STATU-
TORY OR EXEMPLARY
DAMAGES, WHETHER
IN NEGLICENCE, WAR-
RANTY, STRICT LIABILITY
OR OTHERWISE.
This warranty is not trans-
ferable and is limited to the
rst and original buyer from
a Van Berkel Authorized
Channel of Distribution. No
warranty is given to subse-
quent transferees.
THE FOREGOING WAR-
RANTY PROVISIONS ARE
A COMPLETE AND EXCLU-
SIVE STATEMENT OF THE
WARRANTY BETWEEN
THE BUYER AND SELLER.
VAN BERKEL NEITHER AS-
SUMES NOR AUTHORIZES
ANY PERSONS TO AS-
SUME ANY OTHER OBLI-
GATION OR LIABILITY IN
CONNECTION WITH SAID
EQUIPMENT.
Example of items not cove-
red under warranty, but not
limited to just these items:
1. acts of God, re, water
damage, burglary, accident,
theft, vandalism;
2. freight damage;
3. improper installation or
alteration of equipment;
4. use of generic or after-
market parts;
5. repairs made by anyone
other than a Van Berkel de-
signated servicer;
6. periodic maintenance of
equipment including but
not limited to lubrication
and sharpening, and other
adjustments required due
to installation set-up or nor-
mal wear;
7. replacement of worn
blades, knives, stones,
knobs, accessories, and mis-
cellaneous expendable sup-
ply items;
8. cleaning of equipment;
9. misuse or abuse.

17
DONNÉES TECHNIQUES
SPÉCIFICATIONS
Capacité de découpe circulaire 210 mm 215 mm
Capacité de découpe rectangulaire 270x210 mm 280x215 mm
Capacité max. de coupe 1,5 mm 1,5 mm
Diamètre Lame 300 mm 319 mm
Poids 44 Kg 53 kg
VOLANO
VINTAGE
VOLANO
HERITAGE

18
SPÉCIFICATIONS
Capacité de découpe circulaire 260 mm
Capacité de découpe rectangulaire 290x260 mm
Capacité max. de coupe 4 mm
Diamètre Lame 370 mm
Poids 80 Kg
Remarque: En raison de la recherche continue pour améliorer nos produits, les spécications
techniques sont sujettes à des possibles variations.
VOLANO
S37-NSF

19
MANUAL DE INSTRUCCIONES: CORTADORA DE FIAMBRE MANUAL CON VOLANTE
MODELOS:
VOLANO VINTAGE, VOLANO HERITAGE, VOLANO S37-NSF
COMPONENTES
PRINCIPALES
1. Piatto raccoglitore
2. Paralonchas
3. Sujetador de alimentos
4. Plato
5. Carro
6. Manija del volante
7. Volante
8. Basamento
9. Paracuchilla
10. Desplazamiento vertical
prensa producto
11. Palanca de avance rápido
supercie apoyo plato
12. Volante avance supercie
apoyo plato
13. Perilla de regulacion grosor
de la loncha
14. Cubre cuchilla
15. Pie de apoyo
16. Cuchilla
17. Alador
18. Brazo sujetador de
alimentos
ES
Fig. 1
18

20
DESCRIPCIÓN
Cortadoras de ambres de vo-
lante con cuchilla circular, di-
señadas para cortar exclusiva-
mente productos alimentarios
del tipo y dentro de los límites
de tamaño indicados en el pre-
sente manual. Las piezas prin-
cipales de la máquina se han
representado en la gura 1.
SEGURIDAD
Las máquinas descritas en este
manual respetan los están-
dares europeos de higiene y
seguridad establecidos por las
últimas normativas.
Para su seguridad, siga las si-
guientes instrucciones:
- lea atentamente la totalidad
de las instrucciones antes de
usar la máquina;
- el producto no puede ser uti-
lizado por niños;
- utilice la máquina sólo si se
encuentra debidamente entre-
nado y en perfectas condicio-
nes físicas y mentales;
- no use la máquina de forma
alguna que no sea la indicada
en este manual;
- instale la máquina siguiendo
las instrucciones del apartado
‘Instalación’;
- instale la máquina en un lugar
fuera del alcance de personal
ajeno a su uso y, sobre todo, de
los menores de edad;
- use la máquina con gran con-
centración y evite distraerse;
- no permita el uso de la máq-
uina a alguien que no haya
leído y entendido completa-
mente el presente manual;
- no utilice vestimenta dema-
siado holgada o con mangas
abiertas;
- no permita que ninguna per-
sona, además del operario, se
acerque mientras la máquina
se encuentra funcionando;
- no extraiga, cubra o modi-
que las placas informativas si-
tuadas en el cuerpo de la máq-
uina y, si estuvieran dañadas,
cámbielas sin demorarse;
- no extraiga las protecciones,
ni modique o desactive nin-
gun dispoditivo de proteccion
mecánica;
- corte únicamente i productos
admitidos, no realice pruebas
con productos no admitidos;
- mantenga la zona de apoyo
del producto loncheado, la
zona de trabajo alrededor de la
máquina y el pavimento donde
se sitúa el operador siempre
limpios y secos;
- no utilice la máquina como
supercie de apoyo ni apoye
objetos no relacionados con
las operaciones normales de
corte;
- no use la cortadora si, debido
al desgaste normal, la distan-
cia entre el lo de la cuchilla y
el aro protector de cuchilla ha
superado los 6 mm, en ese caso
póngase en contacto con el fa-
bricante o con uno de los cen-
tros de Servicio Autorizados
para cambiar la cuchilla;
- detenga de inmediato la máq-
uina y solicite la intervención
de personal de asistencia au-
torizado en caso de funciona-
miento anómalo, sospecha de
roturas, movimientos incorrec-
tos, ruidos insólitos, etc.;
- utilice siempre guantes del
tipo resistente al corte y al de-
sgarro para las operaciones de
limpieza y de mantenimiento;
- coloque y retire el producto
que desea lonchear sobre la
supercie de apoyo del plato
solo con el plato completamen-
te retraído (lejos de la cuchilla)
y el carro totalmente hacia el
operador;
- deslice el plato durante las
operaciones de corte única y
exclusivamente utilizando el
volante;
- nunca toque con las manos
el producto durante las ope-
raciones de corte. Mantenga
siempre las manos alejadas de
la cuchilla;
- no se permite el uso de ac-
cesorios de corte no sumini-
strados por el fabricante de la
máquina.
El fabricante declina toda res-
ponsabilidad derivada de un
uso inapropiado, modica-
ciones y/o reparaciones efec-
tuadas por el usuario o por
personal no autorizado, uso
de piezas de recambio no ori-
ginales o no especícas para el
modelo de máquina.
Condiciones ambientales de
uso:
- Temperatura de -5°C a +40°C
- Humedad máx. 95%
NO CORTAR:
- productos alimentarios con-
gelados;
- productos alimentarios ultra-
congelados;
- productos alimentarios con
huesos o espinas (carnes y pe-
scados);
- cualquier otro producto no
destinado al uso alimentario.
Riesgos residuales
El aro de protección alrededor
de la cuchilla protege al ope-
rador del contacto accidental
con la cuchilla; sin embargo, a
n de permitir las operaciones
de alado, la protección no eli-
mina completamente el riesgo
de corte.
¡ATENCIÓN! Durante
las operaciones de lim-
pieza y alado de la cuchilla,
mantenga las manos lo más
!
Other manuals for VOLANO Series
1
This manual suits for next models
3
Table of contents
Languages:
Other Van Berkel International Kitchen Appliance manuals

Van Berkel International
Van Berkel International HOME LINE 200 User manual

Van Berkel International
Van Berkel International RM 22E User manual

Van Berkel International
Van Berkel International HOME LINE Series User manual

Van Berkel International
Van Berkel International RED LINE Series User manual

Van Berkel International
Van Berkel International VOLANO Series User manual

Van Berkel International
Van Berkel International HOME LINE Series User manual

Van Berkel International
Van Berkel International PRO LINE XS 25 User manual

Van Berkel International
Van Berkel International GERMAN 25 User manual