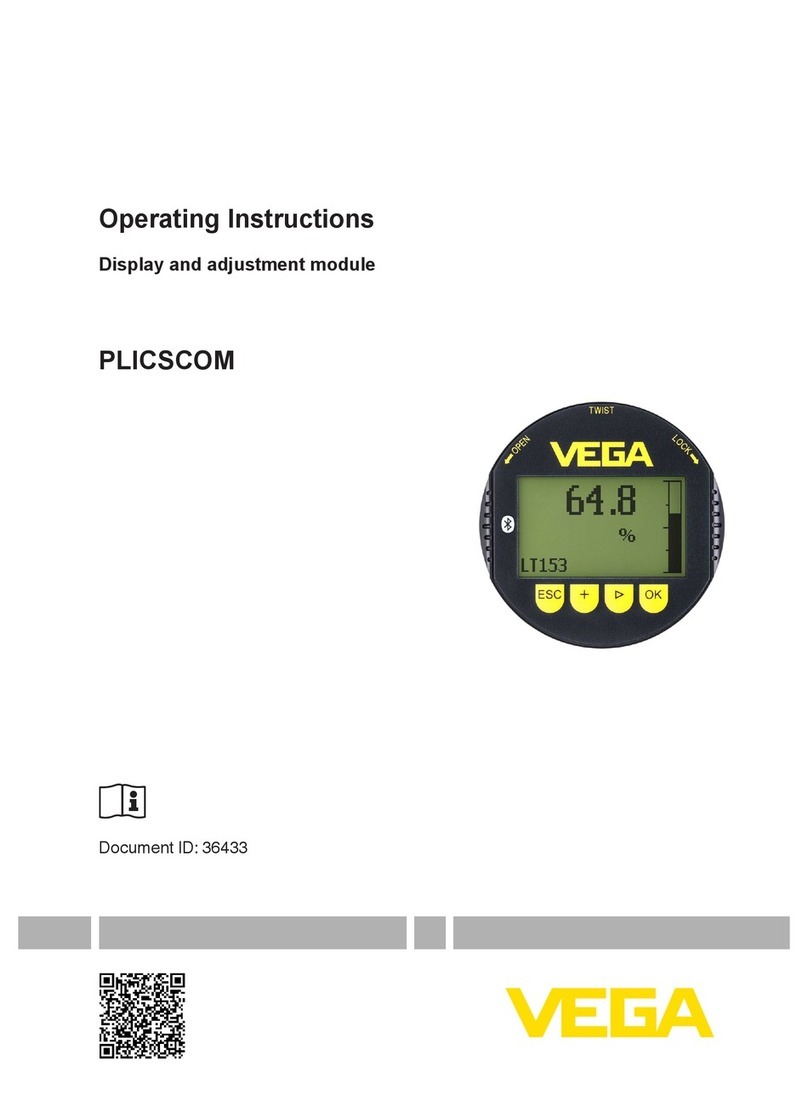
Vega plicscom User manual

Operating Instructions
Indicating and adjustment module PLICSCOM
Document ID:
36433
Indication
and adjustment

Contents
1About this document
1.1Function.................................. 4
1.2Target group .............................. 4
1.3Symbolism used............................ 4
2For your safety
2.1Authorised personnel ........................ 5
2.2Appropriate use ............................ 5
2.3Warning about misuse ....................... 5
2.4General safety instructions . . . . . . . . . . . . . . . . . . . . 5
2.5CE conformity ............................. 6
2.6Fulfillment of NAMUR recommendations . . . . . . . . . . 6
2.7Environmental instructions..................... 6
3Product description
3.1Configuration .............................. 7
3.2Principle of operation ........................ 7
3.3Packaging,transport and storage ............... 8
4Prepare setup
4.1Insert indicating and adjustment module. . . . . . . . . . . 9
4.2Adjustment system .......................... 10
5Set up -Sensors up to SW 3.99
5.1Adjustment menu for all signal outputs. . . . . . . . . . . . 11
5.2Adjustment menu 4…20 mA/HART . . . . . . . . . . . . . 18
5.3Adjustment menu Profibus PA . . . . . . . . . . . . . . . . . . 21
6Set up -Sensors from HW 2.0.0and SW 4.0.0
6.1Adjustment menu for all signal outputs. . . . . . . . . . . . 24
6.2Adjustment menu 4…20 mA/HART . . . . . . . . . . . . . 30
7Maintenance and fault rectification
7.1Maintenance .............................. 32
7.2How to proceed in case of repair. . . . . . . . . . . . . . . . 32
8Dismount
8.1Dismounting steps .......................... 33
8.2Disposal ................................. 33
9Supplement
9.1Technical data ............................. 34
9.2Dimensions ............................... 35
2Indicating and adjustment module PLICSCOM
Contents
36433-EN-091104

Safety instructions for Ex areas
Please note the Ex-specific safety information for installation and
operation in Ex areas.These safety instructions are part of the
operating instructions manual and come with the Ex-approved
instruments.
Indicating and adjustment module PLICSCOM 3
Contents
36433-EN-091104

1About this document
1.1Function
This operating instructions manual provides all the information you
need for mounting,connection and setup as well as important
instructions for maintenance and fault rectification.Please read this
information before putting the instrument into operation and keep this
manual accessible in the immediate vicinity of the device.
1.2Target group
This operating instructions manual is directed to trained qualified
personnel.The contents of this manual should be made available to
these personnel and put into practice by them.
1.3Symbolism used
Information,tip,note
This symbol indicates helpful additional information.
Caution:If this warning is ignored,faults or malfunctions can
result.
Warning:If this warning is ignored,injury to persons and/or serious
damage to the instrument can result.
Danger:If this warning is ignored,serious injury to persons and/or
destruction of the instrument can result.
Ex applications
This symbol indicates special instructions for Ex applications.
lList
The dot set in front indicates a list with no implied sequence.
àAction
This arrow indicates a single action.
1Sequence
Numbers set in front indicate successive steps in a procedure.
4Indicating and adjustment module PLICSCOM
1About this document
36433-EN-091104

2For your safety
2.1Authorised personnel
All operations described in this operating instructions manual must be
carried out only by trained specialist personnel authorised by the plant
operator.
During work on and with the device the required personal protective
equipment must always be worn.
2.2Appropriate use
The pluggable indicating and adjustment module is used for measured
value indication,adjustment and diagnoses with level and pressure
sensors.
You can find detailed information on the application range in chapter
"Product description".
Operational reliability is ensured only if the instrument is properly used
according to the specifications in the operating instructions manual as
well as possible supplementary instructions.
2.3Warning about misuse
Inappropriate or incorrect use of the instrument can give rise to
application-specific hazards,e.g.vessel overfill or damage to system
components through incorrect mounting or adjustment.
2.4General safety instructions
This is a state-of-the-art instrument that fulfils the prevailing regulations
and guidelines.The instrument must only be operated in a technically
flawless and reliable condition.The operator is responsible for the
trouble-free operation of the instrument.
During the entire duration of use,the user is obliged to determine the
compliance of the required occupational safety measures with the
current valid rules and regulations and also take note of new
regulations.
The safety instructions in this operating instructions manual,the
national installation standards as well as the valid safety regulations
and accident prevention rules must be observed by the user.
For safety and warranty reasons,any invasive work on the device
beyond that described in the operating instructions manual may be
carried out only by personnel authorised by the manufacturer.Arbitrary
conversions or modifications are explicitly forbidden.
The safety approval markings and safety tips on the device must be
also observed.
Indicating and adjustment module PLICSCOM 5
2For your safety
36433-EN-091104

2.5CE conformity
The device fulfills the legal requirements of the applicable EC
guidelines.By attaching the CE mark,VEGA provides a confirmation
of successful testing.You can find the CE conformity declaration in the
download area of www.vega.com.
2.6Fulfillment of NAMUR recommendations
The requirements of the following NAMUR recommendations are
fulfilled:
lNE 21 -"Electromagnetic Compatiblity Act of the process and
laboratory control technology"
The sensors as well as the corresponding indicating and adjustment
components are generally upward and downward compatible.
2.7Environmental instructions
Protection of the environment is one of our most important duties.That
is why we have introduced an environment management system with
the goal of continuously improving company environmental protection.
The environment management system is certified according to DIN
EN ISO 14001.
Please help us fulfil this obligation by observing the environmental
instructions in this manual:
lChapter "Packaging,transport and storage"
lChapter "Disposal"
6Indicating and adjustment module PLICSCOM
2For your safety
36433-EN-091104

3Product description
3.1Configuration
This operating instructions manual applies to the following hardware
and software versions of the indicating and adjustment module:
lHardware from 1.0.0
lSoftware from 1.0.0
The indicating/adjustment module consists of a display with full dot
matrix as well as four keys for adjustment.
Abackground lighting is optionally integrated and can be adjusted via
the adjustment menu.
The display can be optionally equipped with heating to ensure good
readability at low temperatures down to -40 °C(-40 °F).
The scope of delivery encompasses:
lIndicating and adjustment module
lDocumentation
-this operating instructions manual
-Supplementary instructions manual 31708 "Heating for in-
dicating and adjustment module"(optional)
3.2Principle of operation
The indicating and adjustment module is used for measured value
indication,adjustment,and diagnostics for the following VEGA plics
®
sensors:
lVEGAPULS series 60
lVEGAFLEX series 60
lVEGASON series 60
lVEGABAR series 50 and 60
lVEGACAL series 60
The indicating and adjustment module is mounted in the sensor
housing.After installation,the sensor as well as the indicating and
adjustment module are splash-proof,even without housing cover.
Another installation possibility is the external indicating and adjustment
unit VEGADIS 61.The operation of two indicating and adjustment
module in parallel in the sensor and in VEGADIS 61 however is not
supported.
The functional range of the indicating and adjustment module is
determined by the sensr and corresponds to the respective software
version of the sensor.
Power is supplied directly by the respective sensor or by VEGADIS 61.
An additional connection is not necessary.
Scope of the operating
instructions manual
Instrument versions
Scope of delivery
Application area
Functional range
Power supply
Indicating and adjustment module PLICSCOM 7
3Product description
36433-EN-091104

The backlight is also powered by the sensor or via VEGADIS 61.
Prerequisite for this is a supply voltage at a certain level.The exact
voltage specifications can be found in the operating instructions
manual of the respective sensor.
The optional heating requires its own power supply.You can find
further details in the supplementary instructions manual "Heating for
indicating and adjustment module".
3.3Packaging,transport and storage
Your instrument was protected by packaging during transport.Its
capacity to handle normal loads during transport is assured by a test
according to DIN EN 24180.
The packaging of standard instruments consists of environment-
friendly,recyclable cardboard.For special versions,PE foam or PE foil
is also used.Dispose of the packaging material via specialised
recycling companies.
Transport must be carried out under consideration of the notes on the
transport packaging.Nonobservance of these instructions can cause
damage to the device.
The delivery must be checked for completeness and possible transit
damage immediately at receipt.Ascertained transit damage or
concealed defects must be appropriately dealt with.
Up to the time of installation,the packages must be left closed and
stored according to the orientation and storage markings on the
outside.
Unless otherwise indicated,the packages must be stored only under
the following conditions:
lNot in the open
lDry and dust free
lNot exposed to corrosive media
lProtected against solar radiation
lAvoiding mechanical shock and vibration
lStorage and transport temperature see chapter "Supplement -
Technical data -Ambient conditions"
lRelative humidity 20 …85 %
Packaging
Transport
Transport inspection
Storage
Storage and transport
temperature
8Indicating and adjustment module PLICSCOM
3Product description
36433-EN-091104

4Prepare setup
4.1Insert indicating and adjustment module
The indicating and adjustment module can be inserted into the sensor
and removed again at any time.It is not necessary to interrupt the
power supply.
Proceed as follows:
1Unscrew the housing cover
2Place the indicating and adjustment module in the desired position
on the electronics (you can choose any one of four different
positions -each displaced by 90°)
3Press the indicating and adjustment module onto the electronics
and turn it to the right until it snaps in.
4Screw housing cover with inspection window tightly back on
Removal is carried out in reverse order.
The indicating and adjustment module is powered by the sensor,an
additional connection is not necessary.
Fig.1:Insert indicating and adjustment module
Note:
If you intend to retrofit the instrument with an indicating and adjustment
module for continuous measured value indication,a higher cover with
an inspection glass is required.
Mount/Dismount indica-
ting and adjustment mo-
dule
Indicating and adjustment module PLICSCOM 9
4Prepare setup
36433-EN-091104

4.2Adjustment system
1
2
Fig.2:Indicating and adjustment elements
1LC display
2Adjustment keys
l[OK]key:
-Move to the menu overview
-Confirm selected menu
-Edit parameter
-Save value
l[->]key:
-Presentation change measured value
-list entry
-Select editing position
l[+]key:
-Change value of the parameter
l[ESC]key:
-interrupt input
-Jump to next higher menu
The sensor is adjusted via the four keys of the indicating and
adjustment module.The LC display indicates the individual menu
items.The functions of the individual keys are shown in the above
illustration.Approx.10 minutes after the last pressing of a key,an
automatic reset to measured value indication is triggered.Any values
not confirmed with [OK]will not be saved.
Key functions
Adjustment system
10 Indicating and adjustment module PLICSCOM
4Prepare setup
36433-EN-091104

5Set up -Sensors up to SW 3.99
5.1Adjustment menu for all signal outputs
With the parameter adjustment,the instrument is adapted to the
application conditions.The parameter adjustment is carried out via an
adjustment menu.
Information:
In this operating instructions,all general parameters are described.
Additional instrument-specific parameters are described in the
operating instructions of the respective sensor.
The following presentations are available in the measured value
display:
lLevel as digital value,sensor TAG
lLevel as digital value and bar graph,sensor TAG
lOnly with pressure transmitters:Level or pressure as digital value,
temperature value
With [->]you select the different presentations of the measured value.
You can reach the menu overview from any presentation with [OK].
With [ESC]you return from the menu overview to the measured value
display.
The main menu is divided into five areas with the following functions:
▶
Basic adjustment
Display
Diagnostics
Service
Info
To damp process-dependent measured value fluctuations,you have to
set an integration time of 0…999 s in this menu item.
Depending on the sensor type,the factory setting is 0s or 1s.
Damping
0s
In this menu item you select the linearization curve:
llinear
lHorizontal cylindrical tank
lSpherical tank
Measured value indica-
tion
Main menu
Basic adjustment/Dam-
ping
Basic adjustment/Li-
nearization curve
Indicating and adjustment module PLICSCOM 11
5Set up -Sensors up to SW 3.99
36433-EN-091104

lUser programmable
User programmable means:Switching on a linearization curve
programmed via PC and PACTware
Alinearization is necessary for all vessels in which the vessel volume
does not increase linearly with the level -e.g.in a horizontal cylindrical
or spherical tank -and the indication or output of the volume is
required.Corresponding linearization curves are preprogrammed for
these vessels.They represent the correlation between the level
percentage and vessel volume.The linearisation applies to the
measured value indication and the current output.By activating the
appropriate curve,the volume percentage of the vessel is displayed
correctly.If the volume should not be displayed in percent but e.g.in l
or kg,a scaling can also be set in the menu item "Display".
Factory setting is linear.
Linearisation curve
linear
Caution:
Note the following,if the respective sensor is used as part of an overfill
protection system according to WHG:
If a linearisation curve is selected,the measuring signal is no longer
compulsorily linear proportional to the level.This must be taken into
consideration by the user,particularly when adjusting the switching
point on the level switch.
In the menu item "Sensor-TAG"you edit a 12-digit measurement loop
name.An unambiguous designation can hence be assigned to the
sensor,e.g.the measurement loop name or the tank or product
designation.In digital systems and in the documentation of larger
plants,a singular designation should be entered for exact identification
of individual measuring sites.
The available digits comprise:
lLetters from A…Z
lNumbers from 0…9
lSpecial characters +, -, /, -
Factory setting is "Sensor".
Sensor-TAG
Sensor
Basic adjustment/Sen-
sor TAG
12 Indicating and adjustment module PLICSCOM
5Set up -Sensors up to SW 3.99
36433-EN-091104

An integrated background lighting can be adjusted via the adjustment
menu.The function depends on the height of the supply voltage,see
operating instructions of the respective sensor.
In the default setting,the lightning is switched off.
Min.and max.measured values are saved in the sensor.The values
are displayed in the menu item "Peak values".
lMin.and max.distance in m(d): Radar,guided microwave,
ultrasonic sensors
lMin.and max.pressure:pressure transmitter1)
lMin.and max.temperature:ultrasonic sensors,pressure trans-
mitters
Pointer
When non-contact level sensors are used,the measurement can be
influenced by the respective process conditions.In this menu item,the
measurement reliability of the level echo is displayed as dBvalue.The
measurement reliability equals signal strength minus noise.The higher
the value,the more reliable the measurement.With a functioning
measurement,the values are >10 dB.
In this menu item,the device status is displayed.If the sensor detects
a fault,"OK"will be displayed.If a fault is detected,aflashing failure
message is outputted sensor-specifically,e.g."E013".The fault is also
displayed in clear text,e.g."No measurement value".
Information:
The fault message as well as the clear text indication are also carried
out in the measured value display.
Meas.reliability
Sensor status
1)Pressure: -50 …+150 %of the nominal pressure range;temperature:
-50 …+150 °C.
Display/Lighting
Diagnosis/Pointer
Diagnosis/Measurement
reliability
Diagnosis/Device status
Indicating and adjustment module PLICSCOM 13
5Set up -Sensors up to SW 3.99
36433-EN-091104

With ultrasonic and radar sensors as well as sensors with guided
microwave,the "Echo curve"represents the signal strength of the
echoes over the measuring range.The units of the signal strength are
"dB"(ultrasonic and radar)and "Volt"(guided microwave). The signal
strength enables the assessment of the quality of the measurement.
With ultrasonic and radar sensors,the "False echo curve"represents
the saved false echoes (see menu "Service")of the empty vessel with
signal strength in "dB"over the measuring range.
Up to 3000 measured values are recorded (depending on the sensor)
when starting a "Trend curve".Then the values can be displayed on a
time axis.The oldest measured values are always deleted.
In the menu item "Choose curve",the respective curve is selected.
Curve selection
Echo curve
▼
Information:
The trend recording is not activated when being shipped.It must be
started by the user via the menu item "Start trend curve".
Acomparison of echo and false echo curve allows a more detailled
specification on the measurement reliability.The selected curve is
updated permanently.With the [OK]key,a submenu with zoom
functions is opened.
The following functions are available with "Echo and false echo
curve":
l"X-Zoom":Zoom function for the meas.distance
l"Y-Zoom":1,2,5and 10-fold signal magnification in "dB"
l"Unzoom":Reset the presentation to the nominal measuring range
with single magnification
In the menu item "Trend curve"the following are available:
l"X-Zoom":Resolution
-1minute
-1hour
-1day
l"Stop/Start":Interrupt a recording or start a new recording
l"Unzoom":Reset the resolution to minutes
As default setting,the recording pattern has 1minute.With the
adjustment software PACTware,this pattern can be also set to 1hour
or 1day.
Diagnosis/Curve selec-
tion
Diagnosis/Curve pre-
sentation
14 Indicating and adjustment module PLICSCOM
5Set up -Sensors up to SW 3.99
36433-EN-091104

In this menu item you simulate a user-defined level or pressure value
via the current output.This allows you to test the signal path,e.g.
through connected indicating instruments or the input card of the
control system.
The following simulation variables are available:
lPercent
lCurrent
lPressure (with pressure transmitters)
lDistance (with radar and guided microwave)
With Profibus PA sensors,the selection of the simulated value is made
via the "Channel"in the menu "Basic adjustments".
How to start the simulation:
1Push [OK]
2Select the requested simulation variable with [->]and confirm with
[OK]
3Set the requested numerical value with [+]and [->].
4Push [OK]
The simulation is now running,with 4…20 mA/HART a current is
outputted and with Profibus PA or Foundation Fieldbus a digital value.
How to interrupt the simulation:
àPush [ESC]
Information:
The simulation is terminated automatically 10 minutes after the last key
has been pushed.
Simulation
Start simulation?
With the reset function,modified values are reset.Three subfunctions
are available:
lBasic adjustment
-Reset the values modified with the indicating and adjustment
module to the sensor-specific basic setting
lFactory setting
Service/Simulation
Service/Reset
Indicating and adjustment module PLICSCOM 15
5Set up -Sensors up to SW 3.99
36433-EN-091104

-As basic adjustment,but also reset of special parameters to
the default values2)
lPeak values measured value and temperature3)
-Reset of the min./max.values of pressure,level and temper-
ature to the current values
Information:
Because the reset values are nearly sensor-specifc,they are listed in
the operating instructions manual of the respective sensor.
Reset
Select reset?
In this menu item you select the internal arithmetic unit of the sensor.
With radar,guided microwave and ultrasonic sensors this is m(d)or
ft(d).
For pressure transmitters more comprehensive units are available.
They are described in the operating instructions manual of the
respective sensor in the menu "Basic adjustments".
Unit of measurement
m(d)
The sensor is already set to the ordered national language.In this
menu item you can change the language.The following languages are
available,e.g.in software version 3.50:
lDeutsch
lEnglish
lFrançais
lEspanõl
lPycckuu
lJapanese
lItaliano
lNetherlands
lJapanese
lChinese
2)Special parameters are parameters which are set customer-specifically on
the service level with the adjustment software PACTware.
3)Temperature only with pressure transmitters and ultrasonic sensors.
Service/Adjustment unit
Service/Language
16 Indicating and adjustment module PLICSCOM
5Set up -Sensors up to SW 3.99
36433-EN-091104

Language
Deutsch
With this function
lLoad parameter adjustment data from the sensor into the
indicating and adjustment module
lWrite parameter adjustment data from the indicating and adjust-
ment module into the sensor
The data are permanently saved in an EEPROM memory in the
indicating and adjustment module and remain there even in case of
power failure.From there,they can be written in one or several
sensors or kept as backup for a probable sensor exchange.
Kind and volume of the copied data depend on the respective sensor.
Information:
Before writing the data into the sensor,it is checked if the data fit the
sensor.If data do not fit,a fault signal is triggered or the function is
blocked.When writing data into the sensor,you will see from which
instrument type the data originate and which TAG-no.this sensor had.
The following items are checked:
lSoftware version
lWHG approval
lSIL activated
lMeasuring principle
lRadar C-band/K-band
lRadar measuring range <30 m or >30 m
lSignal output
lPressure measuring range
Copy sensor data
Copy sensor data?
In this menu item,the PIN is activated/deactivated permanently.
Entering a 4-digit PIN protects the sensor data against unauthorized
access and unintentional modifications.If the PIN is activated
permanently,it can be deactivated temporarily (i.e.for approx.60 min.)
in any menu item.The instrument is delivered with the PIN set to 0000.
Service/Copy sensor
data
Service/PIN
Indicating and adjustment module PLICSCOM 17
5Set up -Sensors up to SW 3.99
36433-EN-091104

Disable permanently?
Only the following functions are permitted with activated PIN:
lSelect menu items and show data
lRead data from the sensor into the indicating/adjustment module.
In this menu item the most important sensor information can be
displayed:
lInstrument type
lSerial number:8-digit number,e.g.12345678
Instrument type
Serial number
12345678
lDate of manufacture:Date of the factory calibration,e.g.10.
January 2008
lSoftware version:Edition of the sensor software,e.g.3.50
Date of manufacture
10.January 2008
Software version
3.50
lDate of last change using PC:Date of the last change of sensor
parameters via PC,e.g.10.January 2008
Last change using PC
10.January 2008
lSensor details,e.g.approval,process fitting,seal,measuring cell,
measuring range,electronics,housing,cable entry,plug,cable
length etc.
Sensor characteristics
Display now?
5.2Adjustment menu 4…20 mA/HART
In the menu item "Display"you can define how the measured value
should be presented on the display.
Info/Info
Display/Display
18 Indicating and adjustment module PLICSCOM
5Set up -Sensors up to SW 3.99
36433-EN-091104

The following values can be displayed:
lHeight
lPressure (only with pressure transmitters)
lDistance (only with radar,guided microwave,ultrasonics)
lCurrent
lScaled
lPercent
lLin.percent
lTemperature (only with pressure transmitters).
The selection "scaled"opens the menu items "Display unit"and
"Scaling".In"Display unit"there are the following options:
lHeight
lMass
lFlow
lVolume
lWithout unit
Depending on selection,the different units are in turn available.
In the menu item "Scaling",the requested numerical value with
decimal point is entered for 0%and 100 %of the measured value.
There is the following relation between the indication value in the menu
"Display"and the adjustment unit in the menu "Basic adjustment":
lWith radar,guided microwave and ultrasonics,displayed value
"Distance"means:presentation of the measured value in the
selected adjustment unit,e.g.m(d)
lWith pressure,displayed value "Pressure"or "Height"means:
presentation of the measured value in the selected adjustment
unit,e.g.bar or m.
Displayed value
Scaled
▼
Display unit
Volume
▼
l
▼
Scaling
0% = 0.0l
100 % = 100.0l
In the menu item "Current output"you determine the behaviour of the
current output during operation and in case of failure.The following
options are available:
Service/Current output
Indicating and adjustment module PLICSCOM 19
5Set up -Sensors up to SW 3.99
36433-EN-091104

Current output
Characteristics curve 4…20 mA
20 …4mA
Failure mode4)Hold value
20.5mA
22 mA
<3.6mA
Min.current5)3.8mA
4mA
Max.current6)20 mA
20.5mA
The values in bold font represent the data of the factory setting.
InHART multidrop mode,the current is constantly 4mA.This value
does not change even in case of failure.
Current output
Output mode:4-20 mA
▼
Failure mode:22 mA
▼
Min.current 3.8mA
▼
The functional safety is already activated Ex factory for instruments
with SIL qualification.For instruments Ex factory without SIL
qualification,the functional safety must be activated by the user for
applications according to SIL via the indicating and adjustment
module.The SIL factory setting cannot be deactivated by the user.
The activation of SIL has the following impact:
lIn the menu item "Failure mode"under "Current output",the
parameters "Hold value"and "20.5mA"are blocked
lIn the menu item "HART mode",the function "Multidrop"is blocked
Note:
For such applications,it is absolutely necessary to take note of "Safety
Manual".
HART offers standard and multidrop mode.
The mode standard with the fixed address 0means output of the
measured value as 4…20 mAsignal.
4)Value of the current output in case of failure,e.g.if no valid measured value
is delivered.
5)This value is not underrun during operation.
6)This value is not exceeded during operation.
Service/Functional safe-
ty (SIL)
Service/HART mode
20 Indicating and adjustment module PLICSCOM
5Set up -Sensors up to SW 3.99
36433-EN-091104
Other manuals for plicscom
3
Table of contents
Other Vega Control Unit manuals

Vega
Vega VEGAKON 61 User manual

Vega
Vega VEGACAP 60 Series User manual

Vega
Vega PT30E.SV User manual

Vega
Vega VEGADIF 65 User manual

Vega
Vega VEGADIS 176 Ex Installation instructions
Vega
Vega VEGABAR series 80 User manual

Vega
Vega VEGAKON 66 User manual
Vega
Vega VEGAKON 66 User manual

Vega
Vega VEGACAL 60 Series User manual

Vega
Vega plicscom User manual

Vega
Vega VEGAPULS 6X User manual

Vega
Vega VEGAMIP 60 Series User manual

Vega
Vega VEGAFLEX 66 User manual

Vega
Vega VEGASWING 66 User manual

Vega
Vega VEGADIS 81 User manual

Vega
Vega VEGASON S 62 User manual

Vega
Vega VEGATOR 132 User manual
Vega
Vega PLICSMOBILE 80 Series User manual
Vega
Vega VEGABAR 80 Series User manual