4
Precautions
1. Please read this manual carefully before using and keep it well for future reference.
2. Before cleaning the display, please unplug the USB cable and wipe with a soft
damp cloth, don’t use any kind of detergents.
3. Please don’t place the display near water sources such as bathtub, washbasin,
sinks, washing machine, damp basement, swimming pool, etc.
4. Do not place this display on an unstable surface.
5. Do not step or place heavy objects on this display as this could damage it.
6. Do not place the display a height for children reaching easily in order to avoid
danger. Make sure that a child does not put the pen or pen tip in his/her mouth.
7. Do not place the display and digital pen close to the magnetic field.
8. To protect your display, please switch off the power when it is not in use. During
blackouts or not using for long time, please unplug the display from the socket.
9. Don’t overload the socket or lengthen the power wire, which may lead to electric
shocks.
10. If the display has a breakdown, do not open the main case and try to repair it by
yourself. Please ask for a service for proper repair and maintenance.
11. When the following situations occur, pleas unplug the power, and you may need a
service for full repair and maintenance:
a. The power wire or plug is damaged or worn out.
b. There is liquid splashed inside of the display.
c. The display has fallen or the LED broken.
d. When obvious abnormalities occur to the display.
12. While getting the components replaced, you are supposed to guarantee that the
repairman is using the substitute components specified by the manufacturer.
Unauthorized component replacement might cause fire, electric shocks, or other
danger.
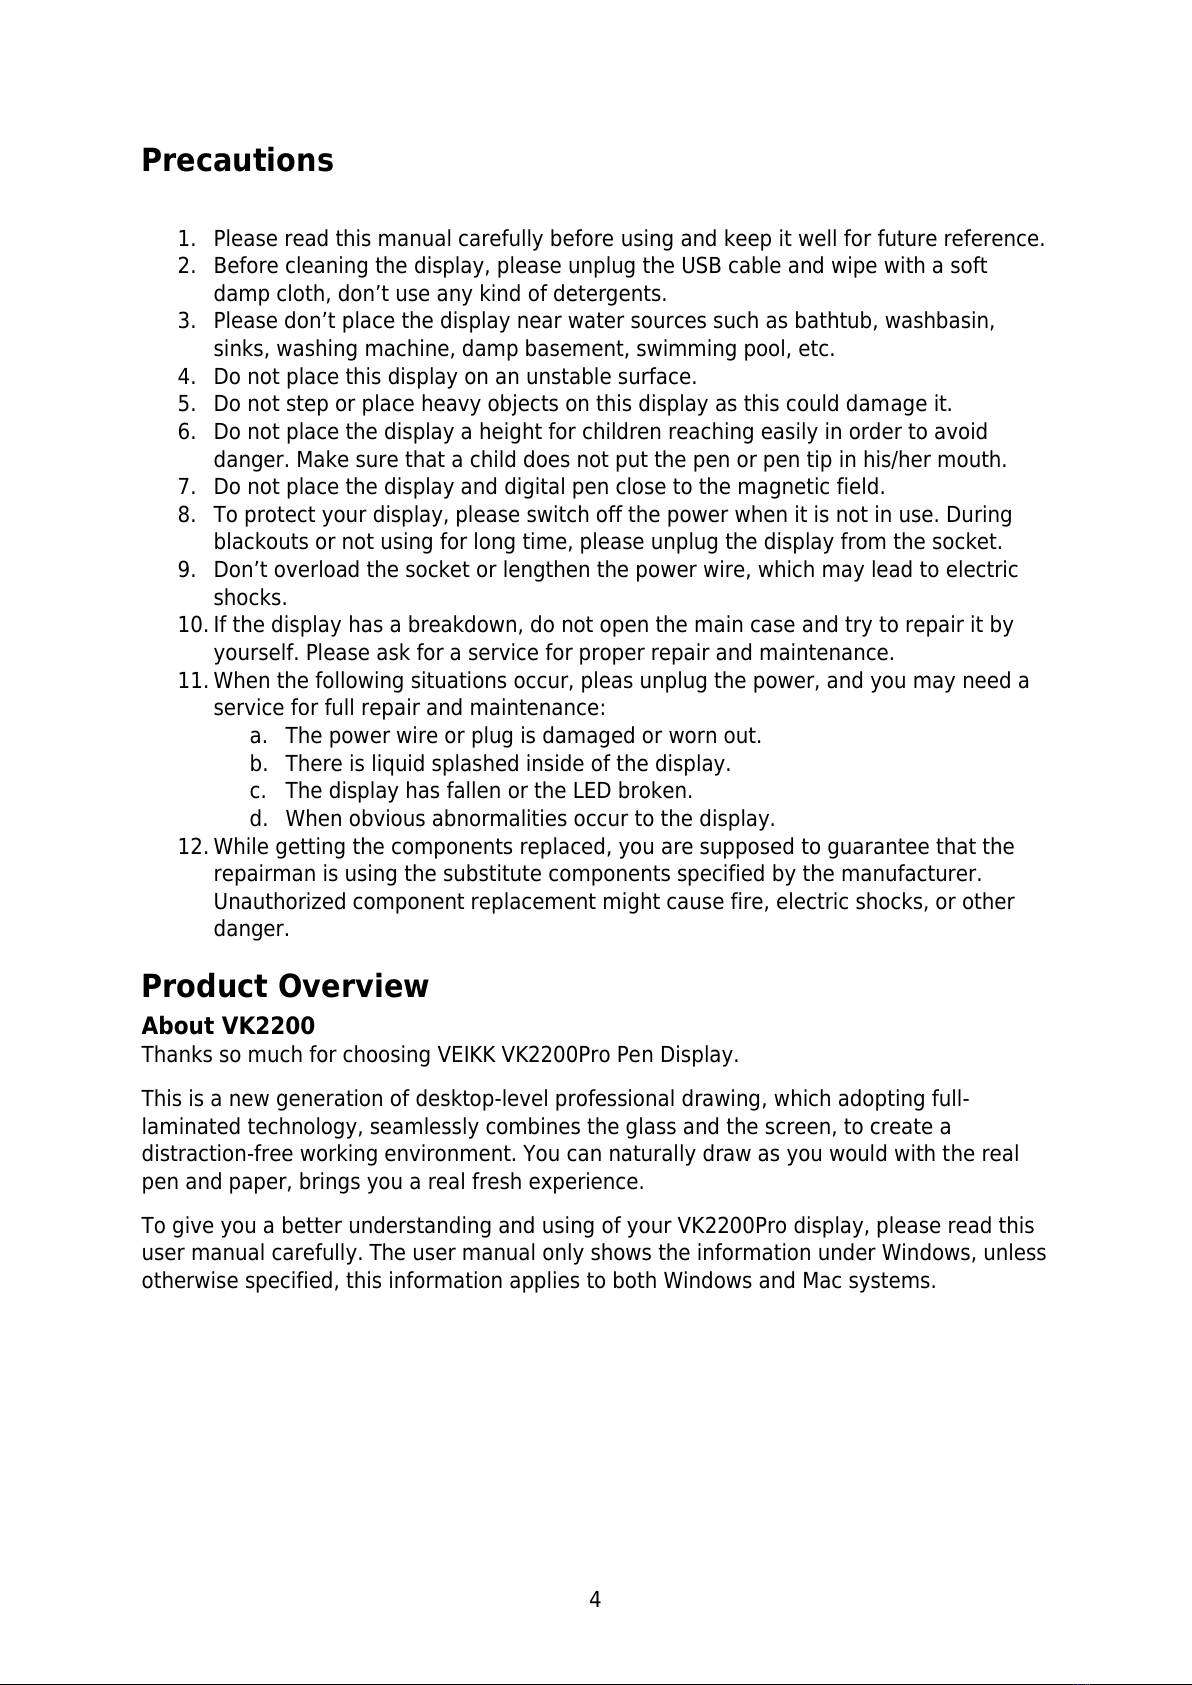
Product Overview
About VK2200
Thanks so much for choosing VEIKK VK2200Pro Pen Display.
This is a new generation of desktop-level professional drawing, which adopting full-
laminated technology, seamlessly combines the glass and the screen, to create a
distraction-free working environment. You can naturally draw as you would with the real
pen and paper, brings you a real fresh experience.
To give you a better understanding and using of your VK2200Pro display, please read this
user manual carefully. The user manual only shows the information under Windows, unless
otherwise specified, this information applies to both Windows and Mac systems.