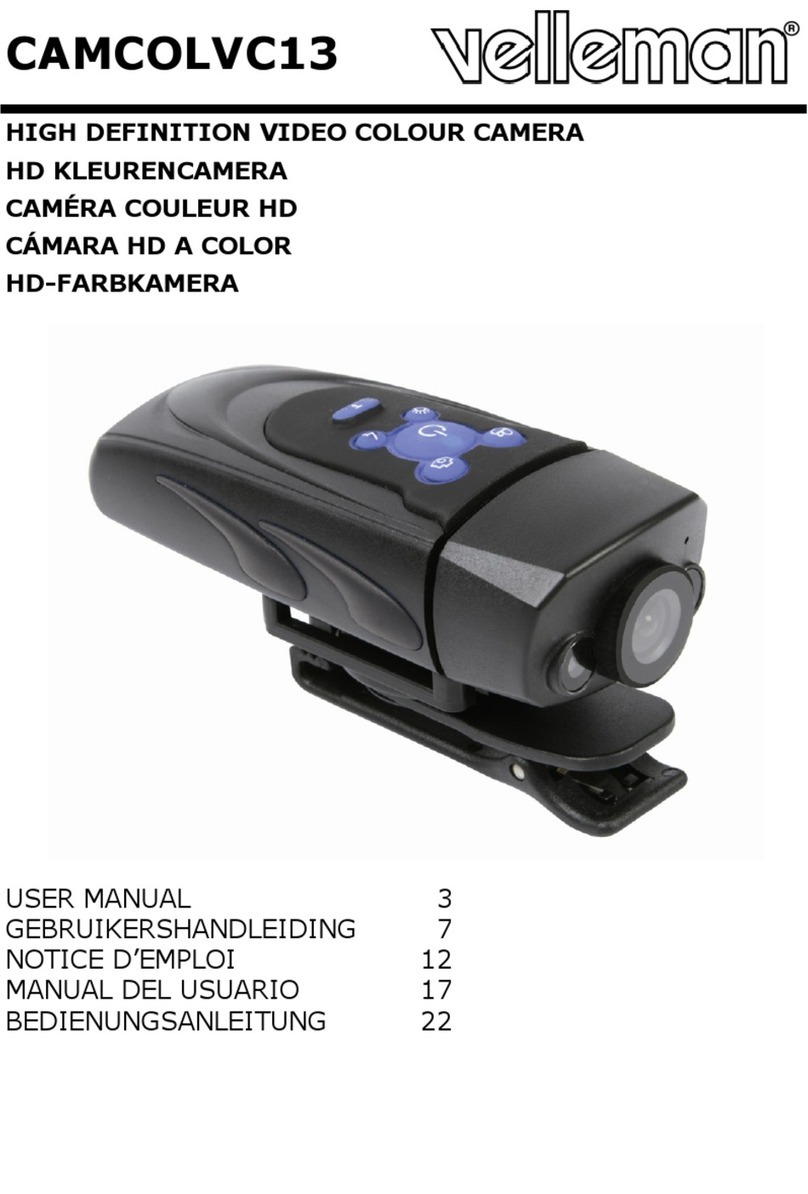
Velleman CAMCOLVC13 User manual

CA
M
HIGH
D
HD KLE
CAM
É
R
A
C
Á
MAR
A
HD-FA
R
USER
M
GEBRU
I
NOTIC
E
MANU
A
BEDIE
N
M
COLV
C
D
EFINITION
V
URENCAMER
A
A
COULEUR
H
A
HD A COLO
R
BKAMERA
M
ANUA
L
I
KERSHANDLEI
E
D’EMPLOI
A
L DEL USUARI
O
N
UNGSANLEITU
C
13
V
IDEO COLO
U
A
H
D
R
4
DING
8
1
2
O
1
6
NG 2
0
U
R CAMERA
4
8
2
6
0

CAMCOLVC13 Rev. 01
23.11.2010 ©Velleman nv
2
* Not incl. – niet meegelev. - non incl. - no incl. - nicht mitgeliefert

CAMCOLVC13 Rev. 01
23.11.2010 ©Velleman nv
3
© COPYRIGHT NOTICE
This manual is copyrighted. The copyright to this manual is owned by Velleman
nv. All worldwide rights reserved. No part of this manual may be copied, reproduced,
translated or reduced to any electronic medium or otherwise without the prior written
consent of the copyright holder.
© AUTEURSRECHT
Velleman nv heeft het auteursrecht voor deze handleiding.
Alle wereldwijde rechten voorbehouden. Het is niet toegestaan om deze handleiding of
gedeelten ervan over te nemen, te kopiëren, te vertalen, te bewerken en op te slaan op
een elektronisch medium zonder voorafgaande schriftelijke toestemming van de
rechthebbende.
© DROITS D’AUTEUR
SA Velleman est l’ayant droit des droits d’auteur pour cette notice.
Tous droits mondiaux réservés. Toute reproduction, traduction, copie ou diffusion,
intégrale ou partielle, du contenu de cette notice par quelque procédé ou sur tout support
électronique que se soit est interdite sans l’accord préalable écrit de l’ayant droit.
© DERECHOS DE AUTOR
Velleman NV dispone de los derechos de autor para este manual del usuario.
Todos los derechos mundiales reservados. Está estrictamente prohibido reproducir,
traducir, copiar, editar y guardar este manual del usuario o partes de ello sin previo
permiso escrito del derecho habiente.
© URHEBERRECHT
Velleman NV besitzt das Urheberrecht für diese Bedienungsanleitung.
Alle weltweiten Rechte vorbehalten. Ohne vorherige schriftliche Genehmigung des
Urhebers ist es nicht gestattet, diese Bedienungsanleitung ganz oder in Teilen zu
reproduzieren, zu kopieren, zu übersetzen, zu bearbeiten oder zu speichern.

23.11.2010
1. Int
To all res
Importa
n
If in dou
b
Thank you
this device
and conta
c
2. Sa
f
K
C
t
3. Ge
n
Refer to th
manual.
•Protect
t
the devi
c
•Protect
t
•Familiar
i
•All modi
f
•Only us
e
way will
•Damag
e
by the
w
defects
•Only us
e
4. Fe
a
•extrem
e
•the vid
e
•records
•built-in
•2 powe
r
•user-fri
e
•comes
w
roduction
idents of the Eu
r
n
t environmenta
l
This symbol on th
device after its lif
e
the unit (or batte
r
to a specialized c
o
your distributor o
r
environmental rul
b
t, contact your
for choosing Velle
into service. If th
e
c
t your dealer.
f
ety Instruct
K
eep this device a
C
aution: do not
o
t
his may lead to h
a
n
eral Guideli
e Velleman® Se
r
t
his device from h
e
c
e.
t
he device against
i
se yourself with t
h
f
ications of the de
v
e
the device for its
void the warranty
e
caused by disreg
w
arranty and the
d
or problems.
e
Lithium batterie
s
a
tures
e
ly portable came
r
e
o capture camera
HD video and pic
t
high-sensitivity m
r
ful LEDs: to illumi
e
ndly setup via pu
w
ith USB cable, bi
k
CAMCO
L
4
User ma
n
r
opean Union
l
information ab
o
e device or the p
a
e
cycle could harm
r
ies) as unsorted
m
o
mpany for recycli
r
to a local recycli
n
es.
local waste disp
o
man! Please read
t
e
device was dama
ions
way from childre
n
o
perate buttons or
a
zardous situatio
n
nes
r
vice and Qualit
y
e
avy shocks and a
b
extreme heat and
h
e functions of the
v
ice are forbidden
f
intended purpose.
.
ard of certain gui
d
d
ealer will not acc
e
s
(3.7V).
r
a with different m
records images o
t
ures
icrophone
nate in dark circu
m
sh buttons
k
e bracket, windo
w
L
VC13
n
ual
o
ut this product
a
ckage indicates t
h
the environment.
m
unicipal waste; i
t
ng. This device s
h
n
g service. Respe
c
o
sal authorities
.
t
he manual thorou
g
ged in transit, don
n
and unauthorize
d
adjust settings w
h
n
s.
y
Warranty on th
b
use. Avoid brute f
o
dust.
device before actu
f
or safety reasons.
Using the device i
d
elines in this ma
n
e
pt responsibility
f
ounting brackets
n micro SD card (
n
m
stances and as
w
w
bracket and str
a
Rev.
0
©Velleman
h
at disposal of the
Do not dispose o
f
t
should be taken
h
ould be returned
t
c
t the local
.
g
hly before bringi
n
't install or use it
d
users.
h
ile in motion as
e last pages of th
i
o
rce when operati
n
ally using it.
n an unauthorised
n
ual is not covere
d
f
or any ensuing
n
ot included)
w
arning signal
a
p bracket
0
1
nv
f
t
o
n
g
i
s
n
g
d

CAMCOLVC13 Rev. 01
23.11.2010 ©Velleman nv
5
5. Overview
Refer to the illustrations on page 2 of this manual.
1 Camera Lens Clean the lens by soft dry cloth before usage
2 LED Light 2 Powerful LED to light/flash during low light
situations.
3 Microphone Advanced sensitivity microphone to record audio
4 Power button + LED Press to turn on/off the camera
5 Live Record Press to record live videos or stop recording.
6 Snapshot Press to take single JPG photos
7 LED Button Press to turn on/ off LED light
8 LED Flash Press to flash LED light or stop flashing LED
9 Open Push to open the casing
10 Wrist Strap Hook Attach wrist strap (included)
11 Mount Base To support brackets and straps
12 Battery compartment Holds 2 rechargeable lithium batteries.
13 USB Port Plug in USB cable to upload data
14 Micro SD Slot Insert Micro SD card (up to 32 GB supported)
6. Use
Refer to the illustrations on pages 2 and 3 of this manual.
Charging
•Open the housing. To do this, press the open button [9] and gently slide the
housing open towards the back. Insert batteries (refer to §8)
•Connect the USB-port [13] to a PC using the included cable. The LED [4] turns
red. The batteries are now being charged. Charging via PC might take from 8 to
12 hours; via an adaptor charging will take ±4h. Make sure batteries are
sufficiently charged before use.
Setting date/time
•Open the housing.
•Insert a micro SD card (not incl.) into the card slot [14]. Refer to the indication
next to the slot for the right direction. Only use a new card from a reliable
brand. Approximate recording times:
HD 1280x720 (30FPS) 2GB 4GB 8GB 16GB 32GB
Recording Time (Hours) 1 2 4 8 16
Note: preferably use an empty formatted card to avoid recording problems.
•Press the power button [4] shortly. After ±10s a blue LED under the power
button starts flashing. Press the live record button [5] to put the camera in
standby mode.
•Connect the USB-port [13] to a PC using the included cable. The LED turns red
and the camera now acts as a removable hard disk.
•To set date and time, locate the program 720Ptime.exe on the included

CAMCOLVC13 Rev. 01
23.11.2010 ©Velleman nv
6
CDROM and double click it. A screen pops up showing date and time; correct
when necessary and click Save, followed by OK. Disconnect the USB cable and
switch the camera on. If setup is successful, then the camera will turn off
automatically by itself in seconds.
•If above procedure fails reconnect the camera to the PC and copy the files
default.exe and default.txt from the manual setup directory to the root
directory of the camera. Edit default.txt and change values (see below):
2 0 (do not delete or change this value)
4 15790001 (do not delete or change this value)
1 0 (do not delete or change this value)
2 2010 set year (four digitals)
2 07 set month (01 ~ 12)
2 26 set day (01 ~ 31)
2 23 set hour (00 ~ 23
2 13 set minutes (00 ~ 59)
Note: do not make any other changes to the file (e.g. add spaces, remove
lines…)
•Save the file and double click on default.exe.
•Make sure to disconnect the device from the USB port in the appropriate
manner. Close the housing and switch on the camera to complete date and time
setup.
Using the camera
•Press the power button [4] shortly, the camera will automatically begin to
record after 5-10 seconds. A blue LED under the power button flashes. This
indicates that the camera is recording. Press the live record button [5] to stop
recording and put the camera in standby mode.
•When no button is pressed for 3 minutes in Standby mode, the camera will
automatically shut off to save battery power.
•Press the live record button [5] to start recording. The power LED [4] starts
flashing. Press the live record button [5] again to stop recording.
•In standby mode, press the snapshot button [6] to take a snapshot.
•When using the camera in dark circumstances, switch on the LEDs [2] at the
front of the camera by pressing the LED button [7]. Press again to switch the
LEDs off.
•Press the LED flash button [8] to make the LEDs [2] flash. This setting can be
used e.g. as a warning signal.
Mounting the camera
•The camera comes with different mounting brackets for different applications
(see image below): bicycle mount (1), helmet mount (2), elastic strap (3), wrist
strap (4) and clip (5).
7. LED overview
blue, fixed standby
blue, one flash snapshot taken
blue, flashing slow (±1s) recording video
blue, fast flashing battery low or memory card full
when battery is low, the camera will switch off

23.11.2010
red, fixed
red, low o
u
8. Ba
t
•When b
a
batterie
s
•Make s
u
•Push th
e
•Insert 2
[12] ac
•Slide th
e
W
D
K
D
9. Te
c
storage ca
water resi
s
pick-up el
e
camera le
n
video reco
image rec
o
auto whit
e
operating
t
power sup
dimension
weight
Use this
d
responsi
b
of this d
e
version o
The infor
m
u
tput
t
teries
a
tteries are worn,
s
. Do not use alk
a
u
re the camera is
s
e
open button [9]
new rechargeabl
e
cording to the pol
a
e
housing back un
W
ARNING:
D
o not puncture
K
eep batteries a
D
ispose of batte
c
hnical speci
f
pacity
s
tance
e
ment
n
s
rding
r
e
fr
a
vi
d
r
e
o
rding r
e
i
m
e
balance (AWB)
t
emperature
ply
s
d
evice with orig
i
b
le in the event
o
e
vice. For more i
n
f this user man
u
m
ation in this
m
CAMCO
L
7
connected to po
w
batteries fully ch
a
replace them by
2
a
line or any other
s
witched off befor
e
and slide the ho
u
e
3.7V Lithium ba
t
a
rity as indicated
til it clicks into pl
a
or throw batter
way from childr
e
ries in accordan
f
ications
max. 32GB
m
IP65
5 Mega pixel
83°
e
cording format
a
me rate (fps)
d
eo resolution
e
cording capacity
e
cording format
m
age resolution
yes
-10°C – 50°
C
5VDC via US
(incl.)
105 x 45 x
3
105g (with
b
i
nal accessories
o
f damage or inj
n
fo concerning
t
u
al, please visit
o
m
anual is subject
L
VC13
w
ered USB port, b
a
a
rged
2
new Lithium 3.7
V
type of battery.
e
replacing the ba
t
u
sing off.
t
teries in the batt
e
inside the compar
a
ce.
ies in fire as the
e
n.
ce with local re
g
m
icro SD card (no
t
CMOS
MPEG-4
30
1280 x 7
2
±30MB/
m
JPEG
2592 x 1
9
C
B cable and 2x Li
3
7mm
b
atteries)
only. Velleman
n
ury resulted fro
m
t
his product and
o
ur website ww
w
to change with
o
Rev.
0
©Velleman
a
tteries charging
V
rechargeable
t
teries.
e
ry compartment
tment.
y might explod
e
g
ulations.
t
incl.)
2
0 pixels
m
in
9
44 pixels
batteries (3.7V)
n
v cannot be hel
m
(incorrect) u
s
the latest
w
.velleman.eu.
o
ut prior notice.
0
1
nv
e
.
d
s
e

23.11.2010
1. Inl
e
Aan alle i
Belangrij
k
Hebt u v
r
verwijde
r
Dank u vo
gebruik n
e
dan niet e
n
2. Vei
H
W
o
3. Alg
Raadpleeg
handleidin
•Besche
r
•Besche
r
•Leer ee
r
•Om veil
i
wijzigin
g
•Gebruik
vervalt
d
•De gara
deze ha
defecte
n
•Gebruik
4. Eig
•draagb
a
•opname
•opname
•ingebou
•2 krach
t
•gemakk
•gelever
d
GEBR
U
e
iding
ngezetenen van
k
e milieu-infor
m
Dit symbool op h
e
zijn levenscyclus
w
toebrengen aan h
niet bij het gewo
n
gespecialiseerd b
e
naar uw verdeler
de plaatselijke mi
r
agen, contactee
r
ing.
or uw aankoop! L
e
e
emt. Werd het to
e
n
raadpleeg uw d
e
ligheidsinst
r
H
oud buiten het b
e
W
aarschuwing:
S
o
m gevaarlijke on
g
emene rich
t
de Velleman
®
s
e
g.
r
m tegen zware sc
r
m tegen stof en e
x
r
st de functies va
n
i
gheidsredenen m
a
g
en die de gebrui
k
het toestel enkel
d
e garantie.
ntie geldt niet vo
o
ndleiding en uw d
e
n
of problemen di
e
enkel lithiumbatte
enschappen
a
re camera geleve
r
op micro SD-kaa
r
van HD video en
wde zeer gevoeli
g
t
ige leds: voor ve
r
elijk in te stellen
v
d
met USB-kabel,
CAMCO
L
8
U
IKERSHA
de Europese U
n
m
atie betreffend
e
e
t toestel of de ve
r
w
ordt weggeworp
e
et milieu. Gooi di
t
n
e huishoudelijke
a
e
drijf terechtkom
e
of naar een lokaa
l
lieuwetgeving.
r dan de plaats
e
e
es deze handleidi
e
stel beschadigd t
e
aler.
r
ucties
e
reik van kindere
n
S
tel de videocam
e
g
elukken te voork
t
lijnen
e
rvice- en kwali
t
hokken. Vermijd
b
x
treme temperat
u
n
het toestel kenn
e
a
g u geen wijzigin
k
er heeft aangebr
a
waarvoor het ge
m
o
r schade door he
t
e
aler zal de veran
t
e
hier rechtstreek
s
rijen (3,7 V).
r
d met meerdere
m
r
t (niet meegelev
e
beelden
g
e mic
r
ofoon
r
lichting en als no
o
v
ia drukknoppen
beugel voor mont
a
L
VC13
NDLEIDI
N
n
ie
e
dit product
r
pakking geeft aa
n
e
n, dit toestel sch
a
t
toestel (en even
t
a
fval; het moet bi
j
e
n voor recyclage.
l
recyclagepunt br
e
lijke autoriteite
n
ng grondig voor
u
ijdens het transp
o
n
en onbevoegden
e
ra niet in terwijl
u
omen.
t
eitsgarantie ac
h
b
rute kracht tijden
u
ren.
e
n voor u het gaa
t
gen aanbrengen.
a
cht valt niet ond
e
m
aakt is. Bij onoor
d
t
negeren van bep
a
t
woordelijkheid af
s
verband mee ho
u
m
ontagebeugels
e
rd)
o
dsignaal
a
ge op fiets, zuig
n
Rev.
0
©Velleman
N
G
n
dat, als het na
a
de kan
t
uele batterijen)
j
een
U moet dit toeste
engen. Respectee
n
betreffende d
e
u
het toestel in
o
rt, installeer het
.
u
in beweging ben
t
h
teraan deze
s de bediening.
t
gebruiken.
Schade door
e
r de garantie.
d
eelkundig gebrui
a
alde richtlijnen i
n
wijzen voor
u
den.
n
ap en riem
0
1
nv
l
r
e
t
k
n

CAMCOLVC13 Rev. 01
23.11.2010 ©Velleman nv
9
5. Omschrijving
Raadpleeg de afbeeldingen op pagina 2 van deze handleiding.
1 cameralens reinig de lans met een droge doek
2 led 2 krachtige leds voor opname bij zwak omgevingslicht
3 microfoon gevoelige microfoon
4 aan-uitknop + led druk op om de camera in/uit te schakelen
5 opname druk op om de opname te starten/stoppen
6 snapshot druk op om een snapshot te maken in JPG-
formaat
7 aan-uitknop led druk op om de leds in/uit te schakelen
8 aan-uitknop
noodsignaal druk op om de leds te doen knipperen
9 openen druk op om de behuizing te openen
10 polsband oog voor de meegeleverde polsband
11 montagebeugel voet voor de montagebeugel
12 batterijvak vak voor 2 lithiumbatterijen
13 USB-poort aansluiting voor data-upload
14 slot voor SD-kaart gebruik een SD-kaart van max. 32 GB
6. Gebruik
Raadpleeg de figuren op pagina 2 en 3 van deze handleiding.
Opladen
•Open de behuizing. Druk hiervoor knop [9] in en schuif het deksel voorzichtig
naar achter. Plaats de batterijen (raadpleeg §8)
•Sluit de camera [13] aan op de computer via de meegeleverde USB-kabel. De
led [4] licht rood op. De batterijen worden nu opgeladen. Laad de batterijen
volledig op voor het eerste gebruik. Laadduur via pc: 8 ~ 12 u; laadduur via
adapter: ± 4 u.
Datum en tijd instellen
•Open de behuizing.
•Plaats de SD-kaart (niet meegeleverd) in het slot [14] volgens de aanduidingen
naast het slot. Opnameduur:
HD 1280x720 (30 fps) 2 GB 4 GB 8 GB 16 GB 32 GB
opnameduur (uren) 1 2 4 8 16
Opmerking: Gebruik bij voorkeur een nieuw geformatteerde kaart.
•Druk kort op de aan-uitknop [4]. Na een tiental seconden knippert de aan-
uitknop blauw. Druk op de opnameknop [5] om de camera in stand-by te
plaatsen.
•Sluit de camera [13] aan op de computer via de meegeleverde USB-kabel. De
led [4] licht rood op. Gebruik de camera als een verwijderbare harde schijf.
•Tijd- en datuminstelling: Dubbelklik op 720Ptime.exe op de meegeleverde cd-
rom. Wijzig tijd en datum in het pop-upvenster. Klik daarna op Save en op OK.

CAMCOLVC13 Rev. 01
23.11.2010 ©Velleman nv
10
Ontkoppel de camera op de gepaste manier van de pc en schakel de camera in.
Wanneer de updateprocedure compleet is zal de camera vanzelf uitschakelen na
een paar seconden.
•Als de procedure hierboven niet helpt, sluit de camera opnieuw aan op de pc en
kopieer de bestanden default.exe en default.txt van de setupdirectory naar
de rootdirectory van de camera. Wijzig de waarden van default.txt:
2 0 (wijzig of wis deze waarde niet)
4 15790001 (wijzig of wis deze waarde niet)
1 0 (wijzig of wis deze waarde niet)
2 2010 stel het jaartal in (vier cijfers)
2 07 stel de maand in (01 ~ 12)
2 26 stel de dag in (01 ~ 31)
2 23 stel het uur in (00 ~ 23
2 13 stel de minuten in (00 ~ 59)
Opmerking: U mag het bestand verder niet wijzigen.
•Bewaar het bestand en dubbelklik op default.exe.
•Ontkoppel de camera op de gepaste manier van de pc. Sluit de behuizing en
schakel de camera in om datum- en tijdsinstelling te vervolledigen.
Gebruik van de camera
•Druk kort op de aan-uitknop [4]. De camera start de opname automatisch na 5
à 10 seconden. De aan-uitknop knippert blauw om aan te geven dat de camera
aan het opnemen is. Druk op de opnameknop [5] om de opname stil te leggen
en de camera in stand-by te plaatsen.
•De camera schakelt automatisch uit als er in stand-by gedurende 3 minuten op
geen enkele knop wordt gedrukt.
•Druk op de opnameknop [5] om een opname te starten. De voedingsled [4]
knippert. Druk opnieuw op de opnameknop [5] om een opname te stoppen.
•Druk in stand-by op de snapshotknop [6] om een snapshot te nemen.
•Bij zwak omgevinglicht kunt u de leds [2] vooraan de camera inschakelen met
de aan-uitknop [7]. Druk op diezelfde knop om de leds uit te schakelen.
•Druk op de noodknop [8] om de leds [2] te doen flitsen en de camera te
gebruiken als noodsignaal.
Montage van de camera
•De camera wordt geleverd met verscheidene montagebeugels voor allerhande
toepassingen (zie afbeelding hieronder): montage op fietsstuur (1), montage op
helm (2), elastische band (3), polsband (4) en riemclip (5).
7. Overzicht van de leds
blauw, vast stand-by
blauw, flits snapshot
blauw, traag flitsen (± 1 s) opname
blauw, snel flitsen zwakke batterijen of volle geheugenkaart
bij zwakke batterij schakelt de camera uit
rood, vast aangesloten op USB-poort, opladen batterijen
rood, zwak batterijen volledig opgeladen

23.11.2010
8. De
•Vervan
g
3,7 V.
G
•Schakel
•Open d
e
naar ac
h
•Plaats 2
volgens
•Sluit de
W
v
w
9. Te
c
opslagcap
a
waterdich
t
opneemel
e
cameralen
video-opn
a
beeldopna
automatis
c
bedrijfste
m
voeding
afmetinge
n
gewicht
Gebruik
d
aanspra
k
toestel.
V
van deze
handleidi
kennisge
v
batterijen
g
versleten batteri
j
G
ebruik geen alkal
i
eerst de camera
u
e
behuizing. Druk
h
te
r
.
nieuwe herlaadb
a
de polariteitaand
u
behuizing.
W
AARSCHUWIN
G
v
uur. Houd batt
e
w
eg volgens de
c
hnische sp
e
a
citeit
t
heid
e
ment
s
a
me
o
p
fr
a
vi
d
o
p
me o
p
b
e
c
he witbalans (A
W
m
peratuu
r
n
d
it toestel enkel
k
elijk voor schad
e
V
oor meer infor
m
handleiding, zi
e
ng kan te allen
t
v
ing.
CAMCO
L
11
j
en door 2 nieuwe
i
nebatterijen.
u
it.
hiervoor knop [9]
a
re lithiumbatterij
e
u
idingen.
G
: Doorboor ge
e
e
rijen uit de buu
plaatselijke mili
e
e
cificaties
max. 32 GB
IP65
5 megapixel
83°
p
nameformaat
a
mesnelheid (fps)
d
eoresolutie
p
namecapaciteit
p
nameformaat
e
eldresolutie
W
B) ja
-10°C ~ 50°
5 VDC via U
S
(3,7 V) (me
e
105 x 45 x
3
105 g (met
b
met originele a
c
e
of kwetsuren
b
m
atie over dit pr
o
e
www.velleman
.
t
ijde worden ge
w
L
VC13
herlaadbare lithi
u
in en schuif het
d
e
n van 3,7 V in h
e
e
n batterijen, go
o
rt van kinderen.
e
uwetgeving.
op micro SD-kaar
t
CMOS
MPEG-4
30
1280 x 7
2
±30 MB/
m
JPEG
2592 x 1
9
C
S
B-kabel of 2x lit
h
e
gelev.)
3
7 mm
b
atterijen)
c
cessoires. Velle
m
b
ij (verkeerd) g
e
o
duct en de me
e
.
eu. De informa
t
w
ijzigd zonder v
o
Rev.
0
©Velleman
u
mbatterijen van
d
eksel voorzichtig
e
t batterijvak [12
]
o
i ze nooit in he
t
Gooi batterijen
t
(niet meegelev.)
2
0 pixels
m
in.
9
44 pixels
h
iumbatterijen
m
an nv is niet
e
bruik van dit
e
st recente versi
e
t
ie in deze
o
orafgaande
0
1
nv
]
t
e

23.11.2010
1. Int
Aux résid
e
Des infor
m
C
e
e
n
él
e
a
u
é
q
convient d
e
En cas de
Nous vous
en service
d
l’installer e
t
2. Co
n
G
A
m
3. Dir
e
Se référer
à
•Protéger
•Protéger
•Se famili
•
T
oute m
o
occasion
•N’utilise
r
•La garan
directive
s
problèm
e
•N’utiliser
4. Ca
r
•caméra
p
•enregist
r
•enregist
r
•microph
o
•2 LED p
u
•facile à
c
•livrée av
e
N
O
roduction
e
nts de l'Union eu
m
ations environn
e
e
symbole sur l'app
a
n
fin de vie peut pol
l
e
ctronique (et des
p
u
tri sélectif ; une d
é
q
uipements usagés
à
e
respecter la régle
m
questions, conta
c
remercions de votr
e
d
e l’appareil. Si l’ap
t
consulter votre re
v
n
signes de s
é
G
arder hors de la p
o
A
vertissement : N
m
ouvement afin d’é
e
ctives gén
é
à
la garantie de s
e
contre les chocs p
u
contre la poussière
ariser avec le fonct
i
o
dification est inter
d
nés par des modific
r
qu’à sa fonction pr
tie ne s’applique pa
s
de cette notice et
e
s et les défauts qu
i
que des piles au lit
h
r
actéristiqu
e
p
ortable livrée avec
r
ement sur microca
r
r
ement vidéo et im
a
o
ne incorporé très s
u
issantes: pour l'écl
a
c
onfigurer depuis le
s
e
c étrier de monta
g
CAMCO
L
12
O
TICE D’
E
ropéenne
e
mentales import
a
a
reil ou l'emballage
l
uer l'environneme
n
p
iles éventuelles) p
a
é
chèterie traitera l’
a
à
votre fournisseur
o
m
entation locale rel
a
c
ter les autorités l
e
achat ! Lire la pré
s
pareil a été endom
m
v
endeur.
é
curité
o
rtée des enfants e
t
e pas configurer la
c
viter des accidents.
é
rales
e
rvice et de qualit
é
u
issants et le traiter
. Protéger contre la
i
onnement avant l’
e
d
ite pour des
r
aison
ations par le client
n
évue. Un usage im
p
s aux dommages s
u
votre revendeur d
é
i
en résultent.
h
ium (3,7 V).
e
s
plusieurs étriers d
e
r
te SD (non incluse
)
a
ges HD
ensible
a
irage et comme si
g
s
boutons-poussoirs
g
e pour vélo, vento
u
L
VC13
E
MPLOI
a
ntes concernant
c
indique que l’élimin
n
t. Ne pas jeter un
a
a
rmi les déchets mu
a
ppareil en question
o
u à un service de
r
a
tive à la protection
ocales pour élimi
n
s
ente notice attenti
v
m
agé pendant le tr
a
t
des personnes no
n
c
améra lorsque vou
é
Velleman
®
en fi
n
avec circonspectio
n
chaleur extrême.
e
mploi.
s de sécurité. Les d
n
e tombent pas so
u
p
ropre annule d'offi
c
u
rvenus en néglige
a
é
clinera toute respo
n
e
montage
)
g
nal de détresse
u
se et sangle
Rev.
0
©Velleman
c
e produit
ation d’un appareil
a
ppareil électrique o
nicipaux non sujets
. Renvoyer les
r
ecyclage local. Il
de l’environnemen
t
n
ation.
v
ement avant la mi
s
a
nsport, ne pas
n
autorisées.
s êtes en
n
de notice.
n
pendant l’opératio
ommages
u
s la garantie.
c
e la garantie.
a
nt certaines
n
sabilité pour les
0
1
nv
u
t
.
s
e
n.

CAMCOLVC13 Rev. 01
23.11.2010 ©Velleman nv
13
5. Description
Se référer aux illustrations en page 2 de cette notice.
1 objectif de caméra nettoyer avec un chiffon doux avant usage
2 LED 2 puissantes LED pour utilisation de la caméra lors d’une
faible luminosité ambiante
3 microphone microphone pour l’enregistrement audio
4 bouton marche/arrêt enfoncer pour allumer/éteindre la caméra
5 bouton
d’enregistrement enfoncer pour démarrer/interrompre un
enregistrement
6 bouton capture d’image enfoncer pour faire une capture d’image en JPG
7 bouton LED enfoncer pour allumer/éteindre les LED
8 bouton de détresse enfoncer pour allumer/éteindre le signal de détresse
9 bouton d’ouverture enfoncer ouvrir le boîtier
10 attache pour dragonne dragonne incluse
11 embase pour étrier de
montage plusieurs étriers inclus
12 compartiment des piles compartiment pour 2 piles au Lithium rechargeables
13 port USB connexion pour téléchargement des données
14 slot pour carte SD utiliser une microcarte SD de max. 32 Go
6. Emploi
Se référer aux illustrations en pages 2 et 3 de cette notice.
Recharge
•Ouvrir la caméra en enfonçant légèrement le bouton d’ouverture [9] et en faisant
glisser le couvercle vers l’arrière. Insérer les piles (se reporter au chapitre §8).
•Connecter la caméra [13] à un ordinateur à l’aide du câble USB inclus. La LED [4]
s’allume en rouge. Le processus de recharge des piles démarre. Veiller à ce que les
piles soient suffisamment rechargées avant chaque utilisation de la caméra. Délai de
recharge depuis PC : 8 ~ 12 heures ; depuis un adaptateur de recharge : ± 4 heures.
Configuration de la date/de l’heure
•Ouvrir la caméra.
•Insérer une microcarte SD (non incluse) dans le slot [14] selon les indications
d’insertion. Durée d’un enregistrement :
HD 1280x720 (30 IPS) 2 Go 4 Go 8 Go 16 Go 32 Go
durée de l’enregistrement 1 h 2 h 4 h 8 h 16 h
Remarque : Il est conseillé d’utiliser une carte fraîchement formatée.
•Enfoncer brièvement le bouton marche/arrêt [4]. La caméra commence à enregistrer
automatiquement après 5 – 10 secondes. Une LED bleue sous le bouton marche/arrêt
clignote. Enfoncer le bouton d’enregistrement [5] pour mettre la caméra en veille.
•Connecter la caméra [13] à un ordinateur à l’aide du câble USB inclus. La LED [4]
s’allume en rouge. La caméra est utilisable comme disque dur amovible.
•Cliquer double sur 720Ptime.exe sur le cédérom inclus pour configurer la date et
l’heure dans la fenêtre pop-up. Cliquer sur Save et ensuite sur OK. Déconnecter

CAMCOLVC13 Rev. 01
23.11.2010 ©Velleman nv
14
dûment la caméra de l’ordinateur et allumer la caméra. Quelques secondes après le
processus de mise à niveau, la caméra s’éteint automatiquement.
•Si la procédure ci-dessus s’avère infructueuse, reconnecter la caméra à l’ordinateur et
copier les fichiers default.exe et default.txt du répertoire d’installation vers le
répertoire racine de la caméra. Modifier les valeurs du fichier default.txt :
2 0 (ne pas modifier ni supprimer cette valeur)
4 15790001 (ne pas modifier ni supprimer cette valeur)
1 0 (ne pas modifier ni supprimer cette valeur)
2 2010 configuration de l’année (quatre chiffres)
2 07 configuration du mois (01 ~ 12)
2 26 configuration du jour (01 ~ 31)
2 23 configuration de l’heure (00 ~ 23
2 13 configuration des minutes (00 ~ 59)
Remarque : Ne pas modifier davantage le fichier.
•Sauvegarder le fichier et cliquer double sur default.exe.
•Déconnecter dûment la caméra de l’ordinateur. Refermer le boîtier et allumer la caméra
pour compléter la configuration de la date et de l’heure.
Utilisation de la caméra
•Enfoncer brièvement le bouton marche/arrêt [4]. La caméra commence à enregistrer
automatiquement après 5 – 10 secondes. Une LED bleue sous le bouton marche/arrêt
clignote. Enfoncer le bouton d’enregistrement [5] pour mettre la caméra en veille.
•La caméra s’éteint automatiquement après 3 minutes d’inactivité en veille.
•Enfoncer le bouton d’enregistrement [5] pour démarrer en enregistrement. La LED
d’alimentation [4] clignote. Renfoncer le bouton pour interrompre l’enregistrement.
•En veille, enfoncer le bouton de capture d’image [6] pour capturer l’image.
•Lors d’une faible luminosité ambiante, allumer les LED [2] à l’avant de la caméra en
enfonçant le bouton des LED [7]. Renfoncer ce même bouton pour éteindre les LED.
•Enfoncer le bouton de détresse [8] pour faire clignoter les LED [2]. Cette fonction est
utile comme signal de secours.
Montage de la caméra
•La caméra est livrée avec plusieurs étriers de montage pour une multitude
d’applications (voir illustrations ci-dessous) : montage sur guidon de vélo (1), montage
sur casque (2), bande élastique (3), dragonne (4) et attache-ceinture (5).
7. Signification des LED
bleu, fixe veille
bleu, un flash capture d’image
bleu, flash lent (± 1 s) enregistrement vidéo
bleu, flash rapide piles faibles ou carte mémoire pleine
la caméra s’éteint automatiquement en cas de piles trop
faibles
rouge, fixe connexion à un port USB, recharge des piles en cours
rouge, faible recharge complète des piles

23.11.2010
8. Le
s
•Remplac
e
utiliser d
•Éteindre
•Enfonce
r
l’arrière.
•Insérer
2
selon les
•Referme
r
A
l
l
9. Sp
é
capacité d
e
étanchéité
capteur d’i
m
objectif de
enregistre
m
capture d’i
m
balance au
t
(AWB)
températu
r
alimentatio
dimensions
poids
N’employ
e
aucunem
e
(incorrect
version la
Toutes le
s
sans notif
i
s
piles
e
r des piles usées
p
es piles alcalines.
la caméra avant le
r
légèrement le bou
t
2
piles au lithium re
c
indications de pola
r
la caméra.
A
VERTISSEMENT
:
l
es piles à l’écart
d
l
a réglementation
é
cifications
t
e
stockage
m
age
la caméra
m
ent vidéo
fo
vi
t
ré
c
a
m
age fo
ré
t
omatique des blan
c
r
e de service
n
e
r cet appareil qu
’
e
nt responsable d
e
) de cet appareil.
plus récente de c
s
informations pr
é
i
cation préalable.
CAMCO
L
15
p
ar 2 piles au lithiu
m
remplacement des
t
on d’ouverture [9]
c
hargeables neuve
s
rité.
:
Ne pas perforer
d
es enfants. Écou
locale relative à
l
t
echniques
microcarte S
D
IP65
CMOS 5 még
a
83°
rmat d’enregistrem
e
t
esse de l’image (I
P
solution vidéo
a
pacité d’enregistre
m
rmat d’enregistrem
e
solution de l’image
c
s oui
-10°C ~ 50°
C
5 VCC depuis
105 x 45 x 3
7
105 g (avec
p
’
avec des accesso
i
e
dommages ou l
é
Pour plus d’infor
m
ette notice, visite
é
sentées dans cet
t
L
VC13
m
rechargeables ne
u
piles.
et faire glisser le c
o
s
de 3,7 V dans le c
o
les piles ni les jet
e
ler les piles usag
é
l
a protection de l’
e
D
de max. 32 Go (n
o
a
pixels
e
nt MPEG-
4
P
S) 30
1280 x
m
ent ± 30 M
o
e
nt JPEG
2592 x
C
USB ou 2 piles au l
7
mm
p
iles)
i
res d’origine. SA
é
sions survenus à
m
ation concernan
z notre site web
w
t
e notice peuvent
Rev.
0
©Velleman
u
ves de 3,7 V. Ne p
a
o
uvercle vers
o
mpartiment [12]
e
r au feu. Garder
é
es en respectant
e
nvironnement.
o
n incl.)
4
720 pixels
o
/min
1944 pixels
ithium (3,7 V) (incl
.
Velleman ne sera
un usage
t cet article et la
w
ww.velleman.eu
être modifiées
0
1
nv
a
s
.
)
.

23.11.2010
1. Int
A los ciu
d
Importa
n
producto
Es
t
ins
e
pil
a
es
p
unidad de
ambiente.
Si tiene
d
¡Gracias p
o
del manu
a
lo instale
y
2. In
s
M
n
A
a
3. No
r
Véase la
G
usuario.
•Protege
manejo
•No exp
o
extrem
a
•Familia
r
•Por raz
o
prohibid
cubiert
o
•Utilice s
ó
incorrec
•Los dañ
o
manual
daño u
o
•Utilice s
o
4. Ca
r
•cámara
•grabaci
ó
•grabaci
ó
•micrófo
n
•2 LEDs
p
MA
N
roducción
d
adanos de la U
n
n
tes informacion
t
e símbolo en este
e
rvibles, podrían
d
a
s, si las hubiera)
p
ecializada en reci
c
reciclaje local. Re
d
udas, contacte
c
o
r haber comprad
o
a
l antes de usarla.
y
póngase en cont
s
trucciones
d
M
antenga el apar
a
n
iños.
A
dvertencia: No
a
ccidentes.
r
mas gener
a
G
arantía de servi
el aparato contra l
y la instalación.
o
nga este equipo
a
a
s.
r
ícese con el funci
o
o
nes de seguridad
,
as. Los daños ca
u
o
s por la garantía.
ó
lo el aparato par
a
to anula la garant
o
s causados por d
invalidarán su ga
r
o
tros problemas r
e
o
lo pilas de litio (3
.
r
acterísticas
portátil entregad
a
ó
n en micro tarjet
a
ó
n vídeo e imágen
n
o de alta sensibil
i
p
otentes: para la
i
CAMCO
L
16
N
UAL DEL
n
ión Europea
es sobre el med
i
aparato o el emb
a
d
añar el medio a
m
en la basura dom
é
c
laje. Devuelva e
s
spete las leyes lo
c
c
on las autorida
d
o
la CAMCOLVC1
Si el aparato ha
s
acto con su distri
b
d
e segurida
d
a
to lejos del alcan
c
configure la cáma
a
les
cio y calidad Ve
l
os choques. Evite
a
polvo. No expon
g
o
namiento del apa
,
las modificacion
e
u
sados por modific
a
las aplicaciones
ía completament
e
escuido de las ins
t
r
antía y su distrib
u
e
sultantes.
.
7V).
a
con varios sopor
t
a
SD (no incl.)
es HD
i
dad incorporado
i
luminación y com
L
VC13
USUARIO
i
o ambiente con
c
a
laje indica que,
s
m
biente. No tire es
t
é
stica; debe ir a u
s
te aparato a su di
c
ales en relación c
o
d
es locales para
3! Lea atentamen
s
ufrido algún daño
b
uido
r
.
d
c
e de personas no
ra si está en movi
l
leman
®
al final d
usar excesiva fue
r
g
a este equipo a t
e
rato antes de utili
e
s no autorizadas
d
aciones no autori
z
descritas en este
e
.
t
rucciones de seg
u
u
idor no será resp
o
t
es de montaje
o señal de alarma
Rev.
0
©Velleman
c
erniente a este
s
i tira las muestra
s
t
e aparato (ni las
na empresa
stribuidor o a la
o
n el medio
residuos.
te las instruccion
e
en el transporte
n
capacitadas y
miento para evita
e este manual del
r
za durante el
e
mperaturas
zarlo.
d
el aparato están
z
adas, no están
manual. Su uso
u
ridad de este
o
nsable de ningú
n
0
1
nv
s
e
s
n
o
r
n

CAMCOLVC13 Rev. 01
23.11.2010 ©Velleman nv
17
•fácil de ajustar con los pulsadores
•se entrega con soporte de montaje para bicicleta, ventosa y correa
5. Descripción
Véase las figuras en la página 2 de este manual del usuario.
1 óptica de la cámara límpiela con un paño suave antes del uso
2 LED 2 potentes LEDs para utilizar la cámara en
caso de poca luz ambiental
3 micrófono micrófono para la grabación audio
4 botón ON/OFF pulse para activar/desactivar la cámara
5 botón de grabación pulse para iniciar/interrumpir una
grabación
6 botón captura de imagen pulse para hacer una captura de imagen
en formato JPG
7 botón LED pulse para activar/desactivar los LEDs
8 botón de señal de alarma pulse para activar/desactivar la señal de
alarma
9 botón de abertura pulse para abrir la caja
10 ojo para fijar la correa pulsera incluida
11 base para soporte de montaje varios soportes incluidos
12 compartimento de pilas compartimento para 2 baterías Li
recargables
13 puerto USB conexión para descargar datos
14 ranura para tarjeta SD utilice una micro tarjeta SD de máx. 32 GB
6. Uso
Véase las figuras en la página Error! Bookmark not defined. y 3 de este manual
del usuario.
Cargar
•Abra la cámara al pulsar ligeramente el botón de abertura [9] y al deslizar la
tapa hacia atrás. Introduzca las baterías (véase §8)
•Conecte la cámara [13] con el cable USB (incl.) a un ordenador. El LED [4] se
ilumina (rojo). Se inicia el procedimiento de recarga de las baterías. Asegúrese
de que las baterías estén suficientemente recargadas antes de cada uso de la
cámara. Tiempo de recarga por el PC: 8 ~ 12 horas; por un adaptador de
recarga: ± 4 horas.
Configurar la hora y la fecha
•Abra la cámara.
•Introduzca una micro tarjeta SD (no incl.) en la ranura [14] según las
indicaciones de introducción. Duración de una grabación:
HD 1280x720 (30 IPS) 2 GB 4 GB 8 GB 16 GB 32 GB
duración de la grabación 1 h 2 h 4 h 8 h 16 h

CAMCOLVC13 Rev. 01
23.11.2010 ©Velleman nv
18
Nota: Utilice una tarjeta completamente formateada.
•Pulse brevemente el botón ON/OFF [4]. La cámara empieza a grabar
automáticamente después de unos 5 – 10 segundos. Un LED azul debajo del
botón ON/OFF parpadea. Pulse el botón de grabación [5] para poner la cámara
en el modo de espera (standby).
•Conecte la cámara [13] con el cable USB (incl.) a un ordenador. El LED [4] se
ilumina (rojo); Es posible utilizar la cámara como disco duro extraíble.
•Haga clic dos veces en 720Ptime.exe del CD-ROM incl. para ajustar la fecha y la
hora en la ventana emergente. Haga clic en Save y luego en OK. Desconecte la
cámara correctamente del ordenador y active la cámara. Algunos segundos
después del procedimiento de actualización, la cámara se apaga automáticamente.
•Si no funciona este procedimiento (véase arriba), vuelva a conectar la cámara al
ordenador y copie los ficheros default.exe y default.txt del directorio de
instalación al directorio raíz de la cámara. Modifique los valores del fichero por
defecto.txt :
2 0 (no modificar ni borrar este valor)
4 15790001 (no modificar ni borrar este valor)
1 0 (no modificar ni borrar este valor)
2 2010 configurar el año (cuatro cifras)
2 07 configurar el mes (01 ~ 12)
2 26 configurar el día (01 ~ 31)
2 23 configurar la hora (00 ~ 23
2 13 configurar los minutos (00 ~ 59)
Nota: No modifique más el fichero.
•Guarde el fichero y haga clic dos veces en default.exe.
•Desconecte la cámara correctamente del ordenador. Vuelva a cerrar la caja y
active la cámara para completar la configuración de la fecha y la hora.
Utilizar la cámara
•Pulse brevemente el botón ON/OFF [4]. La cámara empieza a grabar
automáticamente despues de unos 5 – 10 segundos. Un LED azul debajo del
botón ON/OFF parpadea. Pulse el botón de grabación [5] para poner la cámara
en el modo de espera (standby).
•La cámara se desactiva automáticamente después de 3 minutos de inactividad
en el modo de espera (standby).
•Pulse el botón de grabación [5] para iniciar la grabación. El LED de alimentación
[4] parpadea. Vuelva a pulsar el botón para interrumpir la grabación.
•En el modo de espera, pulse el botón de captura de imagen [6] para capturar la
imagen.
•En caso de poca luz ambiental, active los LEDs [2] de la parte delantera de la
cámara al pulsar el botón de LEDs [7]. Vuelva a pulsar este mismo botón para
desactivar los LEDs.
•Pulse el botón de señal de alarma [8] para hacer parpadear los LEDs [2]. Esta
función puede servir como señal de emergencia.
Instalar la cámara
•La cámara se entrega con varios soportes de montaje para una multitud de
aplicaciones (véase las figuras a continuación): montaje en el manillar de una
bicicleta (1), montaje en casco (2), banda elástica (3), pulsera (4) y clip de
cinturón (5).

23.11.2010
7. Sig
azul, fijo
azul, un fl
a
azul, flash
azul, flash
rojo, fijo
rojo, débil
8. La
s
•Reempl
a
No utili
c
•Desacti
v
•Pulse li
g
•Introdu
z
de pilas
•Vuelva
a
¡
p
r
9. Es
p
capacidad
grado de
p
elemento
d
óptica de l
grabación
captura d
e
balance a
u
temperatu
alimentaci
dimension
peso
Utilice est
e
de daños n
i
informació
n
visite nues
t
contenido
d
nificación d
e
m
a
sh c
a
lento (± 1 s) g
r
rápido b
a
la
b
a
c
o
b
a
r
e
s
pilas
a
ce baterías agota
c
e pilas alcalinas.
v
e la cámara ante
s
g
eramente el botó
n
z
ca dos pilas de li
t
[12]. Controle la
a
cerrar la cámara
¡
OJO!: Nunca pe
r
p
ilas lejos del al
c
r
elación con el
m
p
ecificacion
e
de almacenamien
p
rotección IP
d
e imagen
a cámara
de vídeo
fo
i
m
r
e
c
a
e
imagen fo
r
e
u
tomático de blan
c
ra de funcionami
e
ón
es
e
aparato sólo con l
o
i
lesiones causados
n
sobre este produ
c
t
ra pá
g
ina www.ve
l
d
e este manual sin
p
CAMCO
L
19
e
los LEDs
odo de espera
a
ptura de imagen
r
abación de vídeo
a
terías agotadas
o
cámara se desac
t
a
terías demasiado
o
nexión a un puer
t
a
terías
e
carga completa d
e
dos por 2 nuevas
s
de reemplazar l
a
n
de abertura [9]
t
io recargables nu
e
polaridad.
.
r
fore las pilas ni
c
ance de niños.
m
edio ambiente
a
e
s
to micro tarjet
a
IP65
CMOS 5 me
g
83°
rmato de grabaci
ó
m
ágenes por segu
n
e
solución vídeo
a
pacidad de graba
c
rmato de grabaci
ó
e
solución de la im
a
c
os (AWB) sí
e
nto -10°C ~ 50°
5 VCC por c
a
105 x 45 x
3
105g (con pi
o
s accesorios ori
g
in
por un uso (indebi
d
c
to y la versión má
s
l
leman.eu. Se pued
e
p
revio aviso.
L
VC13
o
tarjeta de memo
r
t
iva automáticam
e
bajas
t
o USB, se están
r
e
las baterías
pilas de litio reca
r
a
s baterías.
y deslice la tapa
h
e
vas de 3,7 V en
e
les eche al fue
g
Respete las ley
e
a
l tirar la pila.
a
SD de máx. 32G
B
g
apíxeles
ó
n MPEG-
4
n
do (IPS) 30
1280
x
c
ión ± 30
M
ó
n JPEG
a
gen 2592
x
C
a
ble USB y 2 x pil
a
3
7 mm
las)
ales. Velleman NV
n
d
o) de este aparat
o
s
reciente de este m
e
n modificar las es
p
Rev.
0
©Velleman
r
ia llena
e
nte en caso de
r
ecargando las
r
gables de 3,7 V.
h
acia atrás.
e
l compartimento
g
o. Mantenga la
s
e
s locales en
B
(no incl.)
4
x
720 píxeles
M
o/min
x
1944 píxeles
a
Li (3.7V) (incl.)
n
o será responsabl
e
o
. Para más
anual del usuario,
p
ecificaciones y el
0
1
nv
s
e

23.11.2010
1. Ein
f
An alle Ei
n
Wichtige
U
Di
E
n
z
u
u
n
s
p
den Händle
Sie die örtl
i
Falls Zwei
f
örtliche B
e
Wir bedan
k
vor Inbetri
e
Sollte dies
d
Händler.
2. Sic
h
H
W
u
3. All
g
Siehe Vell
e
Bedienung
s
•Vermeid
e
Installati
•Schütze
n
•Nehmen
gemacht
•Eigenmä
verursac
•Verwend
Bedienu
n
Garantie
a
•Bei Schä
erlischt
d
Herstell
e
•Verwend
e
4. Eig
•tragbare
•Aufnah
m
•Aufnah
m
•eingeba
u
•2 leistun
g
BEDI
E
f
ührung
n
wohner der Euro
p
U
mweltinformati
o
eses Symbol auf d
e
n
tsorgung dieses Pr
o
u
fügen kann. Entsor
g
n
sortiertes Hausmül
p
ezialisierten Firma
z
r oder ein örtliches
i
chen Umweltvorsc
h
f
el bestehen, we
n
e
hörde.
k
en uns für den Kau
f
e
bnahme sorgfältig
d
er Fall sein, verwe
h
erheitshin
w
H
alten Sie Kinder u
n
W
arnung: Konfigu
r
u
m gefährliche Unf
ä
g
emeine Ric
h
e
man® Service- u
n
s
anleitung.
e
n Sie schwere Ersc
on und Bedienung
d
n
Sie das Gerät vor
Sie das Gerät erst
i
haben.
chtige Veränderung
ht durch eigenmäc
h
en Sie das Gerät n
u
n
gsanleitung sonst
k
a
nspruch.
den, die durch Nich
d
er Garantieanspru
c
e
r keine Haftung.
e
n Sie nur Lithiumb
a
enschaften
Kamera geliefert
m
m
e auf Micro SD-Kar
t
m
e von HD Video un
d
u
tes sehr empfindlic
g
sstarke LEDs: für
B
CAMCO
L
20
E
NUNGSA
p
äischen Union
o
nen über dieses
P
e
m Produkt oder de
r
o
duktes nach seine
m
g
en Sie die Einheit
(
l; die Einheit oder
v
z
wecks Recycling e
n
Recycling-Unterne
h
h
riften.
n
den Sie sich für
E
f
der CAMCOLVC1
3
durch. Überprüfen
S
nden Sie das Gerät
w
eise
n
d Unbefugte vom
G
r
ieren Sie die Kame
r
ä
lle zu vermeiden.
h
tlinien
n
d Qualitätsgara
n
hütterungen. Verm
e
d
es Gerätes.
Staub. Schützen Si
e
i
n Betrieb, nachde
m
en sind aus Sicher
h
h
tige Änderungen e
r
u
r für Anwendunge
n
k
ann dies zu Schäd
e
tbeachtung der Be
d
c
h. Für daraus resul
t
a
tterien (3.7V).
m
it mehreren Monta
g
t
e (nicht mitgeliefe
r
d
Bildern
hes Mikrofon
B
eleuchtung und al
s
L
VC13
NLEITUN
G
P
rodukt
r
Verpackung zeigt
a
m
Lebenszyklus der
(
oder verwendeten
v
erwendeten Batteri
e
n
tsorgt werden. Die
s
h
men retourniert w
e
E
ntsorgungsrichtli
3
! Lesen Sie diese
B
S
ie, ob Transportsc
h
nicht und wenden
S
G
erät fern.
r
a nicht während Si
e
n
tie am Ende dieser
e
iden Sie rohe Gew
a
e
das Gerät vor ext
r
m
Sie sich mit seine
n
h
eitsgründen verbot
e
r
lischt der Garantie
a
n
beschrieben in die
s
e
n am Produkt führ
e
d
ienungsanleitung v
e
t
ierende Folgeschä
d
g
ebügeln
r
t)
s
Notsignal
Rev.
0
©Velleman
G
a
n, dass die
Umwelt Schaden
Batterien) nicht als
e
n müssen von ein
e
s
e Einheit muss an
e
rden. Respektieren
nien an Ihre
B
edienungsanleitun
g
h
äden vorliegen.
S
ie sich an Ihren
e
in Bewegung sind
,
a
lt während der
r
emen Temperature
n
Funktionen vertra
u
e
n. Bei Schäden
a
nspruch.
s
er
e
n und erlischt der
e
rursacht werden,
d
en übernimmt der
0
1
nv
e
r
g
,
n.
u
t
Other manuals for CAMCOLVC13
1
Table of contents
Languages:
Other Velleman Camcorder manuals

Velleman
Velleman CAMCOLMHA9 User manual

Velleman
Velleman CAMCOLVCN User manual

Velleman
Velleman CAMCOLVC2 User manual

Velleman
Velleman CAMCOLC User manual

Velleman
Velleman CAMCOLVC16 User manual

Velleman
Velleman CAMCOLVC17 User manual

Velleman
Velleman CAMCOLVC13 User manual

Velleman
Velleman CAMTVI16 User manual

Velleman
Velleman CAMCOLVC18 User manual

Velleman
Velleman CAMSCC18 User manual