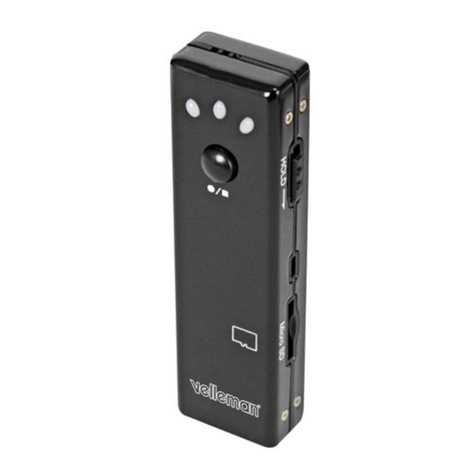
Velleman CAMCOLVC17 User manual

CAMCO
L
MINI HIGH
R
MINI DIGIT
A
MINI CAM
É
S
C
MINI C
Á
MAR
A
DIGITALE H
O
USER MANUAL
GEBRUIKERSH
MODE D’EMPL
O
MANUAL DEL
U
BEDIENUNGS
A
L
VC17
R
ESOLUTION DIGIT
A
A
LE VIDEOCAMERA
–
C
OPE NUM
É
RI
Q
UE
H
A
DE V
Í
DEO DIGIT
A
O
CHAUFLÖSENDE M
I
ANDLEIDING
O
I
U
SUARIO
A
NLEITUNG
A
L CAMERA RECOR
D
–
HOGE RESOLUTIE
H
AUTE R
É
SOLUTIO
N
A
L DE ALTA RESOLU
I
NI-VIDEOKAMERA
3
10
17
24
31
D
ER
N
CI
Ó
N

CAMCOLVC17
V. 01 – 13/07/2012 2 ©Velleman nv

V. 01 – 13/07
/
1. Introduc
t
To all reside
n
Important e
n
This
disp
o
envi
r
unso
spec
i
returned to yo
u
the local envir
o
If in doubt, c
o
Thank you for
before brin
g
in
g
transit, don't i
n
2. Safety I
n
Keep
t
users
.
Keep
t
drippi
This
d
the d
e
accor
d
into t
h
3. General
G
Refer to the V
e
pa
g
es of this
m
•Keep this d
e
•Protect this
operatin
g
t
h
•Do not aim
objects.
CAMCO
L
/
2012 3
USER M
A
t
ion
n
ts of the European
n
vironmental infor
m
symbol on the device
o
sal of the device afte
r
onment. Do not disp
o
rted municipal waste
;
i
alized company for r
e
u
r distributor or to a l
o
nmental rules.
o
ntact your local w
a
choosin
g
Velleman! P
g
this device into ser
v
n
stall or use it and co
n
n
structions
t
his device away fro
m
.
t
his device away fro
m
n
g
liquids.
d
evice contains an int
e
e
vice is end-of-life, it
d
ance with local re
g
ul
h
e fire as it may expl
o
G
uidelines
e
lleman® Service a
n
m
anual.
e
vice away from dust
device from shocks a
h
e device.
the camera at the su
n
L
VC17
©
A
NUAL
Union
m
ation about this pr
o
or the packa
g
e indic
a
r its lifecycle could h
a
o
se of the unit (or bat
;
it should be taken t
o
e
cyclin
g
. This device
s
ocal recyclin
g
service
a
ste disposal auth
o
lease read the manu
a
v
ice. If the device was
n
tact your dealer.
m
children and unauth
m
rain, moisture, spla
s
e
rnal rechar
g
eable ba
t
must be disposed of i
ations. Do not throw
t
o
de.
n
d
Q
uality Warrant
y
and extreme temper
a
nd abuse. Avoid brut
e
n
or other extremely
b
©
Velleman nv
o
duct
a
tes that
a
rm the
teries) as
o
a
s
hould be
. Respect
o
rities.
a
l thorou
g
hly
dama
g
ed in
orized
s
hin
g
and
t
tery. When
n
t
he device
y
on the last
a
tures.
e
force when
b
ri
g
ht

CAMCOLVC17
V. 01 – 13/07/2012 4 ©Velleman nv
•Familiarise yourself with the functions of the device before actually
using it.
•All modifications of the device are forbidden for safety reasons.
Damage caused by user modifications to the device is not covered
by the warranty.
•Only use the device for its intended purpose. Using the device in
an unauthorised way will void the warranty.
•Damage caused by disregard of certain guidelines in this manual
is not covered by the warranty and the dealer will not accept
responsibility for any ensuing defects or problems.
•There are no user-serviceable parts inside the device. Refer to an
authorized dealer for service and/or spare parts.
•Do not use this product to violate privacy laws or perform illegal
activities.
4. Features
•compact design camera recorder
•different mounting brackets and silicone protection sleeve included
•the video capture camera records images on micro SD card (not
included)
•recording quality:
ovideo: 720P HD video - 30FPS
opicture: 1600 x 1200 pixels
•built-in high-sensitivity microphone
•easy and user-friendly setup
•comes with USB cable and brackets
•alloy housing.
5. Overview
Refer to the illustrations on page 2of this manual.
1 lens 7 LED indicators
2 hanging ring 8 record button
3 power switch 9 protection sleeve
4 mode switch 10 bracket
5 micro SD card slot 11 clip
6 USB plug

CAMCOLVC17
V. 01 – 13/07/2012 5 ©Velleman nv
6. Installation
You can use the camera while holding it in your hand. Fit the camera
into the protection sleeve [9] and attach a lanyard to the hanging
ring [2] so you can carry it around easily.
Or you can fix the camera to a wall as follows:
1. Fix the bracket [10] to the wall using screws. Note: you can
also use Velcro or magnetic strips.
2. Attach the clip [11] to the back of the camera.
3. Attach the camera to the bracket [10] using the clip [11].
4. Adjust the viewing angle of the camera.
Caution: Do not aim the camera at the sun or other extremely
bright objects.
7. Operation
Turning the camera on and off
•To switch on the camera, place the power switch [3] in the ON
position.
•To switch off the camera, place the power switch [3] in the OFF
position.
If the camera is idle for more than 1 minute, it switches off
automatically.
Inserting a micro SD card
1. Switch the camera off.
2. Insert a micro SD card (not included) in the card slot [5]. Push
it in until it clicks into place.
3. To remove the micro SD card again, push it gently so that it
pops out.
Using the video function
1. Switch the camera on.
2. Set the mode switch [4] to Video.
3. Press the record button [8] to initialise the camera.
The LED lights blue during initialisation. When the camera is
ready, the LED lights orange continuously.
4. To start recording, briefly press the record button [8].
The LED flashes blue during recording.
5. To stop recording, press the record button [8] again.
The camera saves the video file on the memory card.
CAMCOLVC17
V. 01 – 13/07/2012 6 ©Velleman nv
Note: do not switch the camera off while recording: your video file
will not be saved on the memory card.
Using the photo function
1. Switch the camera on.
2. Set the mode switch [4] to Photo.
3. Press the record button [8] to initialise the camera.
The LED lights blue during initialisation. When the camera is
ready, the LED flashes orange.
4. To take a photo, briefly press the record button [8].
The camera saves the photo on the memory card. The blue LED
lights while the photo is taken and saved.
5. Wait until the LED flashes orange before you take the next
photo.
Connecting to a pc
1. Switch the camera off.
2. Plug one end of the included USB cable into the USB jack [6].
3. Plug the other end into a USB port on your computer.
4. On the pc, open My Computer and look for the drive that
represents the camera.
The photos are in the IMAGE folder; the recorded video files are in
the VIDEO folder. You can copy, delete, or view the files from here.
Note: to disconnect the camera from the pc, use Windows’ Safely
Remove Hardware function to stop the device before you unplug
the USB cable.
Setting the camera time
Setting the camera date and time ensures that your photos and
video have a correct time stamp.
1. Make sure there is a micro SD card in the camera.
2. Switch the camera on.
3. Connect the camera to your computer with the included USB
cable.
4. Insert the included CD in your computer's CD drive.
5. Locate and double-click the WriteTime.exe file on the CD-ROM.
The screen below appears:

CAMCOLVC17
V. 01 – 13/07/2012 7 ©Velleman nv
6. Click Update. The screen below appears:
7. Click OK. The screen below appears:
8. Click Quit to exit.
Using the camera as a webcam
1. Switch the camera on.
2. Connect the camera to your computer with the included USB
cable.
3. Briefly press the record button [8].

V. 01 – 13/07
/
4. On the pc
,
Device to
8. Battery
8.1 Char
g
i
n
To char
g
e the
d
USB cable.
•While char
g
LED flashes
.
•When fully
c
8.2 Dispos
This
Whe
n
acco
into
t
9. Technica
l
stora
g
e capaci
t
pick-up eleme
n
viewing angle
minimum illu
m
video recordin
g
ima
g
e recordi
n
charging time
battery capaci
t
operatin
g
time
dimensions
weight
workin
g
temp
e
CAMCO
L
/
2012 8
,
open My Computer
see the webcam ima
ng
d
evice, connect it to
y
in
g
, the
g
reen LED li
g
.
c
har
g
ed, both LEDs li
g
al
device contains an in
t
n
the device is end-o
f
rdance with local re
gu
t
he fire as it may exp
l
Specifications
t
y max. 16GB
m
n
t 2 Me
g
apixel
C
62°
m
ination 1 lux
g
recordin
g
for
frame rate (
f
video resolu
t
recordin
g
ca
p
ng
recordin
g
for
ima
g
e resolu
2.5 hours
t
y 260mAH
±70 min
55 x 28 x 20
37g
e
rature -10°C ~ 50°
C
L
VC17
©
and double-click US
B
g
es.
y
our computer with t
h
g
hts continuously and
g
ht continuously.
t
ernal rechar
g
eable b
a
f
-life, it must be disp
o
u
lations. Do not thro
w
lode.
m
icro SD-HC card (no
t
C
MOS
mat MJPEG (aud
f
ps) 30
t
ion 1280 x 720
p
acity ±100MB/mi
mat JPEG
tion 1600 x 120
0
mm
C
©
Velleman nv
B
Video
h
e included
the yellow
a
ttery.
o
sed of in
w
the device
t
incl.)
io PCM)
pixels
n
0
pixels

CAMCOLVC17
V. 01 – 13/07/2012 9 ©Velleman nv
Use this device with original accessories only. Velleman nv
cannot be held responsible in the event of damage or injury
resulting from (incorrect) use of this device.
For more info concerning this product and the latest version
of this manual, please visit our website www.velleman.eu.
The information in this manual is subject to change without
prior notice.
© COPYRIGHT NOTICE
The copyright to this manual is owned by Velleman nv. All
worldwide rights reserved. No part of this manual may be copied,
reproduced, translated or reduced to any electronic medium or
otherwise without the prior written consent of the copyright holder.

V. 01 – 13/07
/
G
E
1. Inleiding
Aan alle in
g
e
z
Belan
g
ri
j
ke
m
Dit s
y
als h
e
scha
d
even
t
afval
terechtkomen
v
naar een loka
a
milieuwet
g
evi
n
Hebt u vra
g
e
n
betreffend d
e
Dank u voor u
w
toestel in
g
ebr
transport, inst
a
2. Veili
g
hei
d
Houd
Gebr
u
re
g
en
Dit a
p
u, op
de pl
a
het k
a
3. Al
g
emen
e
Raadpleeg de
V
achteraan dez
e
•Bescherm t
e
•Bescherm t
e
bediening.
CAMCO
L
/
2012 1
0
E
BRUIKERSH
z
etenen van de Eur
o
m
ilieu-informatie b
e
y
mbool op het toestel
e
t na zi
j
n levenscyclu
s
d
e kan toebren
g
en aa
t
uele batteri
j
en) niet
; het moet bi
j
een
g
e
s
v
oor recycla
g
e. U mo
e
a
l recycla
g
epunt bren
g
ng
.
n
, contacteer dan d
e
verwi
j
derin
g
.
w
aankoop! Lees dez
e
uik neemt. Werd het
t
a
lleer het dan niet en
d
sinstructies
buiten het bereik va
n
u
ik het toestel enkel
b
, vochti
g
heid en opsp
p
paraat bevat een int
e
het einde van zi
j
n le
v
a
atseli
j
ke re
g
el
g
evin
g.
a
n immers ontploffen.
e
richtli
j
nen
V
elleman® service-
e
handleidin
g
.
eg
en stof en extreme
eg
en schokken. Verm
i
L
VC17
0
©
ANDLEIDIN
G
o
pese Unie
e
treffende dit produ
of de verpakkin
g
g
e
e
s
wordt we
gg
eworpe
n
n het milieu. Gooi dit
bi
j
het
g
ewone huish
o
s
pecialiseerd bedri
j
f
e
t dit toestel naar uw
g
en. Respecteer de pl
a
e plaatseli
j
ke auto
r
e
handleidin
g
g
rondi
g
t
oestel beschadi
g
d ti
jd
raadplee
g
uw dealer.
n
kinderen en onbevo
e
b
innenshuis.Besche
attende vloeistoffen.
e
rne herlaadbare batt
e
v
ensduur, van dit pro
d
.
Gooi het toestel niet
en kwaliteits
g
ara
n
temperaturen.
ij
d brute kracht ti
j
de
n
©
Velleman nv
G
ct
e
ft aan dat,
n
, dit toestel
toestel (en
o
udeli
j
ke
verdeler of
a
atseli
j
ke
r
iteiten
voor u het
d
ens het
eg
den.
rm te
g
en
e
ri
j
. Ontdoe
d
uct vol
g
ens
in het vuur,
n
tie
n
s de

CAMCOLVC17
V. 01 – 13/07/2012 11 ©Velleman nv
•Richt de camera nooit naar de zon of naar andere weerkaatsende
objecten.
•Leer eerst de functies van het toestel kennen voor u het gaat
gebruiken.
•Om veiligheidsredenen mag u geen wijzigingen aanbrengen.
Schade door wijzigingen die de gebruiker heeft aangebracht valt
niet onder de garantie.
•Gebruik het toestel enkel waarvoor het gemaakt is. Bij
onoordeelkundig gebruik vervalt de garantie.
•De garantie geldt niet voor schade door het negeren van bepaalde
richtlijnen in deze handleiding en uw dealer zal de
verantwoordelijkheid afwijzen voor defecten of problemen die hier
rechtstreeks verband mee houden.
•Er zijn geen door de gebruiker vervangbare onderdelen in dit
toestel. Voor onderhoud of reserveonderdelen, contacteer uw
dealer.
•Installeer en gebruik dit apparaat niet voor illegale praktijken en
respecteer ieders privacy.
4. Eigenschappen
•compacte videocamera
•geleverd met meerdere montagebeugels
•de camera legt de beelden vast op een micro SD-kaart (niet
meegelev.)
•opnamekwaliteit:
ovideo: 720P HD video - 30FPS
obeeld: 1600 x 1200 pixels
•ingebouwde zeer gevoelige microfoon
•gemakkelijke en gebruiksvriendelijke instelling
•geleverd met USB-kabel en montagebeugels
•metalen behuizing.

CAMCOLVC17
V. 01 – 13/07/2012 12 ©Velleman nv
5. Omschrijving
Raadpleeg de afbeeldingen op pagina 2van deze handleiding.
1 lens 7 statusleds
2 ophangoogje 8 opnameknop
3 aan/uit-schakelaar 9 beschermhoesje
4 modusschakelaar 10 montagebeugel
5 slot voor micro SD-kaart 11 clip
6 USB-poort
6. Installatie
U kunt de camera gebruiken terwijl u deze vasthoudt in uw hand.
Steek de camera in het beschermhoesje [9] en bevestig een
polsbandje aan het ophangoogje [2] zodat u de camera gemakkelijk
kunt meenemen.
Ofwel kunt u camera aan de muur bevestigen als volgt:
1. Monteer de beugel [10] aan de muur met schroeven.
Opmerking: u kunt ook velcro of magnetische strips gebruiken.
2. Bevestig de clip [11] aan de achterkant van de camera.
3. Bevestig de camera aan de beugel [10] met de clip [11].
4. Pas de kijkhoek aan van de camera.
Opgelet: Richt de camera nooit naar de zon of andere
weerkaatsende objecten.
7. Gebruik
De camera in- en uitschakelen
•Om de camera in te schakelen, zet de aan/uit-schakelaar [3] op
ON.
•Om de camera uit te schakelen, zet de aan/uit-schakelaar [3] op
OFF.
Indien de camera langer dan 1 minuut niet gebruikt wordt, schakelt
deze automatisch uit.
Een micro SD-kaart plaatsen
1. Schakel de camera uit.
2. Plaats een micro SD-kaart (niet meegelev.) in het kaartslot [5].
Duw de kaart naar binnen, totdat deze op zijn plaats vastklikt.

CAMCOLVC17
V. 01 – 13/07/2012 13 ©Velleman nv
3. Om de micro SD-kaart opnieuw te verwijderen, duw voorzichtig
tegen de kaart tot deze uit de sleuf springt.
De videofunctie gebruiken
1. Schakel de camera in.
2. Zet de modusschakelaar [4] op Video.
3. Druk op de opnameknop [8] om de camera op te starten.
De blauwe led licht op tijdens het opstarten. Wanneer de camera
gebruiksklaar is, blijft de oranje led branden.
4. Om een opname te starten, druk kort op de opnameknop [8].
De blauwe led knippert tijdens de opname.
5. Om de opname te stoppen, druk nogmaals op de opnameknop
[8].
De camera zet het videobestand op de geheugenkaart.
Opmerking: schakel de camera niet uit tijdens de opname: uw
bestand zal niet opgeslagen worden op de geheugenkaart.
De fotofunctie gebruiken
1. Schakel de camera in.
2. Zet de modusschakelaar [4] op Photo.
3. Druk op de opnameknop [8] om de camera op te starten.
De blauwe led blijft branden tijdens het opstarten. Wanneer de
camera gebruiksklaar is, knippert de oranje led.
4. Om een foto te nemen, druk kort op de opnameknop [8].
De camera zet de foto op de geheugenkaart. De blauwe led
brandt tijdens het nemen en het bewaren van de foto.
5. Wacht totdat de oranje led knippert voor het nemen van de
volgende foto.
Aansluiten op een pc
1. Schakel de camera uit.
2. Sluit het ene uiteinde van de meegeleverde USB-kabel aan op
de USB-poort [6] van de camera.
3. Sluit het andere uiteinde aan op een USB-poort van uw
computer.
4. Op de pc, open My Computer en zoek naar de drive van de
camera.
De foto's zijn geplaatst in de map IMAGE; de opgeslagen
videobestanden zijn geplaatst in de map VIDEO. Van hieruit kunt u
de bestanden kopiëren, verwijderen of bekijken.

CAMCOLVC17
V. 01 – 13/07/2012 14 ©Velleman nv
Opmerking: om de camera los te koppelen van de pc, gebruik de
Windows-functie Safely Remove Hardware om het toestel te
deactiveren voordat u de USB-kabel loskoppelt.
De cameratijd instellen
Het instellen van de cameradatum en -tijd zorgt ervoor dat uw foto's
en video voorzien zijn van een correcte tijdstempel.
1. Plaats een micro SD-kaart in de camera.
2. Schakel de camera in.
3. Sluit de camera aan op uw computer met de meeleverde USB-
kabel.
4. Plaats de meegeleverde CD in de CD-rom drive van uw
computer.
5. Lokaliseer en dubbelklik op het WriteTime.exe bestand op de
CD-rom. Het scherm hieronder verschijnt:
6. Klik op Update. Het scherm hieronder verschijnt:

V. 01 – 13/07
/
7. Klik op O
K
8. Klik op
Qu
De camera
ge
1. Schakel d
e
2. Sluit de c
a
kabel.
3. Druk kort
4. Op de pc,
Device o
m
8. Batterij
8.1 Oplad
e
Om het toeste
l
mee
g
eleverde
•Ti
j
dens het
•Wanneer v
o
8.2 Verwi
jd
Dit a
Wan
n
bere
re
g
e
imm
e
CAMCO
L
/
2012 1
5
K
. Het scherm hieron
d
u
it om te verlaten.
e
bruiken als webca
m
e
camera in.
a
mera aan op uw com
op de opnameknop [
8
open My Computer
m
de beelden van de
w
e
n
l
op te laden, sluit he
t
USB-kabel.
laden, brandt de
g
ro
e
o
lledi
g
op
g
eladen, blij
v
d
eren
pparaat bevat een in
t
n
eer het product het
e
ikt, ontdoe u er dan
v
l
g
evin
g
. Gooi het toe
s
e
rs ontploffen.
L
VC17
5
©
d
er verschi
j
nt:
m
puter met de mee
g
el
e
8
].
en dubbelklik op US
B
w
ebcamera te zien.
t
aan op uw compute
r
e
ne led en knippert d
e
v
en beide leds brand
e
t
erne herlaadbare bat
e
inde van zi
j
n levens
d
v
an vol
g
ens de plaats
e
s
tel niet in het vuu
r
,
h
©
Velleman nv
e
verde USB-
B
Video
r
met de
e
gele led.
e
n.
teri
j
.
d
uur heeft
e
li
j
ke
h
et kan

CAMCOLVC17
V. 01 – 13/07/2012 16 ©Velleman nv
9. Technische specificaties
opslagcapaciteit max. 16GB micro SDHC-kaart (niet
meegeleverd)
beeldsensor 2 Megapixel CMOS
kijkhoek 62°
minimale lichtsterkte 1 lux
video-opname opnameformaat MJPEG (audio PCM)
beelden per seconde 30
videoresolutie 1280 x 720 pixels
opnamecapaciteit ±100MB/min
beeldopname opnameformaat JPEG
beeldresolutie 1600 x 1200 pixels
laadtijd 2,5u
capaciteit batterij 260mAH
autonomie ±70 min
afmetingen 55 x 28 x 20mm
gewicht 37g
werktemperatuur -10°C ~ 50°C
Gebruik dit toestel enkel met originele accessoires. Velleman
nv is niet aansprakelijk voor schade of kwetsuren bij
(verkeerd) gebruik van dit toestel.
Voor meer informatie over dit product en de laatste versie van
deze handleiding, zie www.velleman.eu.
De informatie in deze handleiding kan te allen tijde worden
gewijzigd zonder voorafgaande kennisgeving.
© AUTEURSRECHT
Velleman nv heeft het auteursrecht voor deze handleiding.
Alle wereldwijde rechten voorbehouden. Het is niet toegestaan
om deze handleiding of gedeelten ervan over te nemen, te kopiëren,
te vertalen, te bewerken en op te slaan op een elektronisch medium
zonder voorafgaande schriftelijke toestemming van de
rechthebbende.

V. 01 – 13/07
/
1. Introduc
t
Aux résident
s
Des informat
i
ce produit
Ce s
y
l’éli
m
l'env
élect
mun
i
trait
e
usa
g
és à votr
e
convient de re
s
de l’environne
m
En cas de qu
e
élimination.
Nous vous re
m
attentivement
été endomma
g
votre revende
u
2. Consi
g
n
e
Gard
e
autori
Utilis
e
la plu
i
Cet a
p
durée
la lé
gi
feu p
o
CAMCO
L
/
2012 1
7
MODE D’
E
t
ion
s
de l'Union europé
e
i
ons environnemen
t
y
mbole sur l'appareil
o
m
ination d’un appareil
ironnement. Ne pas
je
ronique (et des piles
é
i
cipaux non su
j
ets au
e
ra l’appareil en ques
t
e
fournisseur ou à un
s
s
pecter la ré
g
lementa
m
ent.
e
stions, contacter l
e
m
ercions de votre ach
a
avant la mise en ser
v
g
é pendant le transpo
r
u
r.
e
s de sécurité
e
r hors de la portée d
e
sées.
e
r cet appareil uniqu
e
i
e, de l’humidité et d
e
p
pareil contient une p
de vie, débarrassez-
v
i
slation d'élimination l
o
ur éviter tout risque
L
VC17
7
©
E
MPLOI
e
nne
t
ales importantes c
o
u l'emballa
g
e indiqu
e
en fin de vie peut pol
e
ter un appareil élect
r
é
ventuelles) parmi le
s
tri sélectif ; une déch
t
ion. Renvoyer les éq
u
s
ervice de recycla
g
e l
o
tion locale relative à
l
e
s autorités locales
a
t ! Lire la présente n
o
v
ice de l’appareil. Si l’
a
r
t, ne pas l’installer e
t
e
s enfants et des per
s
e
ment à l'intérieur.
e
s pro
j
ections d’eau.
ile rechar
g
eable. A la
v
ous de ce produit en
ocale. Ne
j
etez pas l'
a
d'explosion.
©
Velleman nv
oncernant
e
que
luer
r
ique ou
s
déchets
èterie
u
ipements
o
cal. Il
l
a protection
pour
o
tice
a
ppareil a
t
consulter
s
onnes non
Protéger de
fin de sa
respectant
a
ppareil au

CAMCOLVC17
V. 01 – 13/07/2012 18 ©Velleman nv
3. Directives générales
Se référer à la garantie de service et de qualité Velleman® en
fin de notice.
•Protéger contre la poussière. Protéger contre la chaleur extrême.
•Protéger contre les chocs et le traiter avec circonspection pendant
l’opération.
•Ne jamais aligner la caméra vers le soleil ou vers tout autre objet
réfléchissant.
•Se familiariser avec le fonctionnement avant l’emploi.
•Toute modification est interdite pour des raisons de sécurité. Les
dommages occasionnés par des modifications par le client ne
tombent pas sous la garantie.
•N’utiliser qu’à sa fonction prévue. Un usage impropre annule
d'office la garantie.
•La garantie ne s’applique pas aux dommages survenus en
négligeant certaines directives de cette notice et votre revendeur
déclinera toute responsabilité pour les problèmes et les défauts
qui en résultent.
•Il n’y a aucune pièce maintenable par l’utilisateur. Commander
des pièces de rechange éventuelles chez votre revendeur.
•Installer et utiliser l’appareil en respectant la législation et la vie
privée des tiers.
4. Caractéristiques
•caméscope compact
•livré avec plusieurs étriers de montage
•la caméra enregistre les images sur une micro carte SD (non incl.)
•qualité d'enregistrement :
ovidéo : 720P HD-Video - 30FPS
oimage : 1600 x 1200 pixels
•microphone incorporé très sensible
•configuration facile
•livré avec câble USB et étriers de montage
•boîtier métallique.

CAMCOLVC17
V. 01 – 13/07/2012 19 ©Velleman nv
5. Description
Se référer aux illustrations en page 2de cette notice.
1 objectif 7 LEDs d’état
2 Œillet de suspension 8 bouton d'enregistrement
3 interrupteur marche/arrêt 9 housse protectrice
4 commutateur de mode 10 étrier
5 slot pour microcarte SD 11 clip
6 port USB
6. Installation
Vous pouvez utiliser le caméscope en le tenant dans votre main.
Glissez la caméra dans la housse protectrice [9] et passez une
dragonne à travers l'œillet de suspension [2] pour l'emporter
facilement avec vous.
Ou vous pouvez également fixer la caméra comme suit :
1. Fixez l'étrier [10] au mur avec des vis. Remarque : vous pouvez
également utiliser du velcro ou des bandes magnétiques.
2. Attachez le clip [11] au dos de la caméra.
3. Attachez la caméra à l'étrier [10] avec le clip [11].
4. Ajustez l'angle de vue de la caméra.
Attention : N'orientez jamais la caméra vers le soleil ou tout autre
objet réfléchissant.
7. Emploi
Allumer et éteindre la caméra
•Pour allumer la caméra, mettez le commutateur de mode [3] sur
ON.
•Pour éteindre la caméra, mettez le commutateur de mode [3] sur
OFF.
Si la caméra n'est pas utilisée pendant plus d'une minute, celle-ci
s'éteindra automatiquement.
Insérer une carte micro SD
1. Eteignez la caméra.
2. Insérez une carte micro SD (non incl.) dans le slot pour carte
mémoire [5]. Poussez la carte jusqu'à ce que vous entendiez un
clic.

CAMCOLVC17
V. 01 – 13/07/2012 20 ©Velleman nv
3. Pour retirer la carte micro SD à nouveau, poussez-la doucement
pour que la carte s'éjecte.
Utiliser la fonction vidéo
1. Allumez la caméra.
2. Mettez le commutateur de mode [4] sur Video.
3. Appuyez sur le bouton d'enregistrement [8] pour initialiser la
caméra.
La LED bleue s'allume durant l'initialisation. Lorsque la caméra
est prête à l'usage, la LED orange s'allume en continu.
4. Pour commencer à enregistrer, appuyez brièvement sur le
bouton d'enregistrement [8].
La LED bleue clignote durant l'enregistrement.
5. Pour arrêter l'enregistrement, appuyez de nouveau sur le bouton
d'enregistrement [8].
La caméra enregistre le fichier vidéo sur la carte mémoire.
Remarque : n'éteignez pas la caméra pendant l'enregistrement :
votre fichier vidéo ne sera pas sauvegardé sur la carte mémoire.
Utiliser la fonction photo
1. Allumez la caméra.
2. Mettez le commutateur de mode [4] sur Photo.
3. Appuyez sur le bouton d'enregistrement [8] pour initialiser la
caméra.
La LED bleue s'allume durant l'initialisation. Lorsque la caméra
est prête à l'usage, la LED orange clignote.
4. Pour prendre une photo, appuyez brièvement sur le bouton
d'enregistrement [8].
La caméra enregistre la photo sur la carte mémoire. La LED
bleue s'allume pendant la prise de la photo et la mémorisation.
5. Patientez jusqu'à ce la LED orange clignote avant de prendre la
photo suivante.
Connecter à un pc
1. Eteignez la caméra.
2. Connectez une extrémité du câble USB livré dans le port USB
[6] de la caméra.
3. Connectez l'autre extrémité dans le port USB sur votre
ordinateur.
4. Sur le pc, ouvrez My Computer et recherchez le lecteur de
disque qui représente la caméra.
Table of contents
Languages:
Other Velleman Camcorder manuals

Velleman
Velleman CAMTVI16 User manual

Velleman
Velleman CAMCOLVC6 User manual

Velleman
Velleman CAMCOLVC2 User manual

Velleman
Velleman CAMCOLVC18 User manual

Velleman
Velleman CAMCOLVCN User manual

Velleman
Velleman CAMCOLC User manual

Velleman
Velleman CAMCOLVC1GB User manual

Velleman
Velleman CAMSCC18 User manual

Velleman
Velleman CAMTVI5 User manual

Velleman
Velleman CAMCOLVC13 User manual