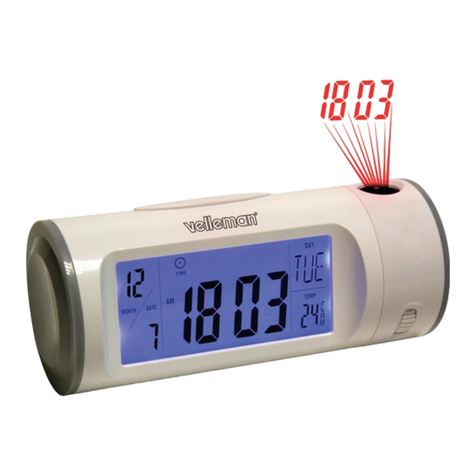
Velleman WT4406 User manual

WT4406 - 1 - VELLEMAN
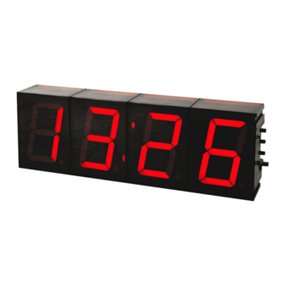
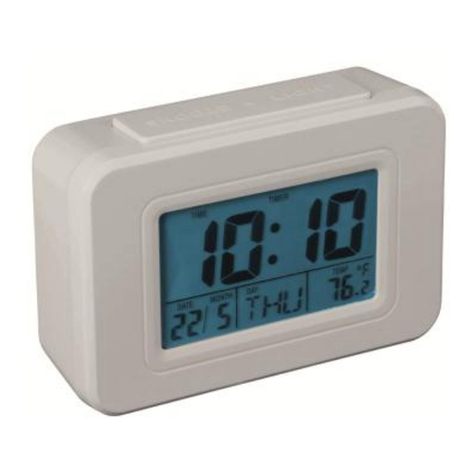
WT4406 – DIGITAL DESIGN CLOCK
1. Introduction
To all residents of the European Union
Important environmental information about this product
This symbol on the device or the package indicates that disposal of the device after its lifecycle could harm
the environment.
Do not dispose of the unit (or batteries) as unsorted municipal waste; it should be taken to a specialised
company for recycling.
This device should be returned to your distributor or to a local recycling service.
Respect the local environmental rules.
If in doubt, contact your local waste disposal authorities.
Thank you for buying the WT4406! Please read the manual thoroughly before bringing this device into service. If the
device was damaged in transit, don't install or use it and contact your dealer.
2. Features
•Temperature, calendar, alarm with snooze/light function
•Blue backlight LCD
•12h/24h function
•Temperature in °C/°F
3. Description
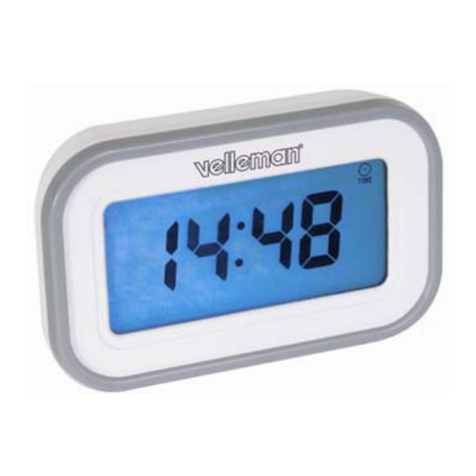
1. LCD display
2. SNOOZE/LIGHT button
3. HR (Hour)/MONTH button
4. MIN (Minute)/Date button
5. TIME set/ALARM set/CALENDAR/LOCK
6. SNOOZE/ALARM ON/ALARM OFF switch
7. 12HR/24HR/YEAR button
8. °C/°F button
4. Batteries
Open the battery compartment on the rear of the unit and insert two AAA batteries respecting the polarity.
5. Setting the correct Date and Time
To set the date, slide the switch (5) to CALENDAR. Press the MONTH, DATE or YEAR button to set the desired
calendar. An incorrect date will automatically be adjusted. For example: February 30 will be adjusted to February 1,
April 31 will be adjusted to April 1.
To set the time, slide the switch (5) to TIME SET. Press the HR or MIN button to set the desired time.

WT4406 - 2 - VELLEMAN
6. Setting the Alarm
•Slide the switch (5) to ALM SET. The ALARM sign will appear on the display.
•Press the HR or MIN button to set the desired alarm time.
•Slide the switch (6) to ALM ON. appears on the display. The alarm function is now activated.
•Slide the switch (6) to SNOOZE to activate the snooze alarm.
7. Lock Function
After setting the time and alarm time, slide the switch (5) to LOCK to protect the set time and alarm time against
unnecessary changes caused by touching the buttons.
8. Using the Snooze Alarm
Slide the switch (6) to SNOOZE. appears on the display. The snooze function is activated.
Once the alarm starts to ring, you can activate the snooze by pressing the SNOOZE/LIGHT button (2). The alarm will
stop for 5 minutes before ringing again. To stop the alarm completely, slide the ALARM switch (6) to OFF. Alarm
duration is 1 minute.
9. Time and Temperature Readout
Press the 12HR/24HR button (7) to choose the desired time readout. In 12HR format, PM appears indicating PM
hours.
Press the °C/°F button (8) to choose the desired temperature readout.
10.Backlight
Press SNOOZE/LIGHT to activate the backlight for approximately 3 seconds. Frequent use of this function will shorten
the life of your batteries.
11.Maintenance
Use a soft cloth moistened with mild detergent to clean the device. Do not use abrasives or solvents on the device. Do
not drop the device on a hard surface. Do not use it outdoors and shield it from direct sunlight.
12.Technical Specifications
Power Supply 2 x 1.5V AAA batteries (not incl.)
Digits 18 x 8mm
Dimensions 77 x 72 x 38mm
The information in this manual is subject to change without prior notice.

WT4406 - 3 - VELLEMAN
WT4406 – DIGITALE DESIGNKLOK
1. Inleiding
Aan alle ingezetenen van de Europese Unie
Belangrijke milieu-informatie betreffende dit product
Dit symbool op het toestel of de verpakking geeft aan dat, als het na zijn levenscyclus wordt weggeworpen,
dit toestel schade kan toebrengen aan het milieu.
Gooi dit toestel (en eventuele batterijen) niet bij het gewone huishoudelijke afval; het moet bij een
gespecialiseerd bedrijf terechtkomen voor recyclage.
U moet dit toestel naar uw verdeler of naar een lokaal recyclagepunt brengen.
Respecteer de plaatselijke milieuwetgeving.
Heeft u vragen, contacteer dan de plaatselijke autoriteiten inzake verwijdering.
Dank u voor uw aankoop! Lees deze handleiding grondig voor u het toestel in gebruik neemt. Als het toestel werd
beschadigd tijdens het transport, stel dan de installatie van het toestel uit en raadpleeg uw dealer.
2. Kenmerken
•Temperatuur, kalender, alarm met snooze/verlichting
•LCD display met blauwe achtergrondverlichting
•12h/24h functie
•Temperatuur weergegeven in °C/°F
3. Omschrijving
(zie fig. op blz. 1)
1. LCD display
2. SNOOZE/LIGHT knop
3. HR (Uur)/MONTH knop
4. MIN (Minuut)/Date knop
5. TIME set/ALARM set/CALENDAR/LOCK
6. SNOOZE/ALARM ON/ALARM OFF schakelaar
7. 12HR/24HR/YEAR knop
8. °C/°F knop
4. Batterijen
Open het batterijvak achteraan het toestel en plaats twee AAA batterijen. Let op de polariteit.
5. Instellen van de correcte datum en tijd
Om de tijd in te stellen, schuif de schakelaar (5) naar CALENDAR. Druk op de MONTH, DATE of YEAR knop om de
gewenste datum in te geven. Een foute datum wordt automatisch verbeterd, bvb. 30 februari wordt 1 februari, 31
april wordt 1 april.
Om de tijd in te stellen, schuif de schakelaar (5) naar TIME SET. Druk op de HR of MIN knop om de gewenste tijd in
te geven.

WT4406 - 4 - VELLEMAN
6. Instellen van het alarm
•Stel de schakelaar (5) op ALM SET. Het symbool ALARM verschijnt op de display.
•Druk op de HR of MIN knop om de gewenste alarmtijd in te stellen.
•Stel de schakelaar (6) op ALM ON. verschijnt op de display. De alarmfunctie is nu actief.
•Stel de schakelaar (6) op SNOOZE om de snoozefunctie te activeren.
7. Knoppen vergrendelen
Nadat u de tijd en de alarmtijd hebt ingesteld, schuif de schakelaar (5) naar LOCK om de knoppen te vergrendelen
en te beschermen tegen ongewenste veranderingen.
8. De snoozefunctie
Stel de schakelaar (6) op SNOOZE. verschijnt op de display. De snoozefunctie is actief.
Wanneer het alarm afgaat, kan u de snoozefunctie activeren door op de SNOOZE/LIGHT knop (2) te drukken. Het
alarm heeft een instelvertraging van 5 minuten. Om de alarmfunctie uit te schakelen, stel de ALARM schakelaar (6)
op OFF. Het alarm luidt gedurende 1 minuut.
9. Weergave van tijd en temperatuur
Druk op de 12HR/24HR knop (7) om de weergave in te stellen. In 12HR mode verschijnt PM om de tijd na de middag
aan te geven.
Druk op de °C/°F knop (8) om de temperatuurweergave in te stellen.
10.Achtergrondverlichting
Druk SNOOZE/LIGHT om de achtergrondverlichting gedurende ongeveer 3 seconden te activeren. Een veelvuldig
gebruik van de verlicht verkort de levensduur van de batterijen.
11.Onderhoud
Gebruik een zachte doek en een milde detergent om de WT4406 te reinigen. Gebruik geen solventen of
schuurmiddelen. Laat de reiswekker niet vallen op een hard oppervlak. Gebruik de wekker enkel binnenshuis en stel
hem niet bloot aan rechtstreeks zonlicht.
12.Technische specificaties
Voeding 2 x 1.5V AAA batterijen (niet incl.)
Digits 18 x 8mm
Afmetingen 77 x 72 x 38mm
De informatie in deze handleiding kan te allen tijde worden gewijzigd zonder voorafgaande kennisgeving.

WT4406 - 5 - VELLEMAN
WT4406 – HORLOGE DESIGN NUMERIQUE
1. Introduction
Aux résidents de l'Union Européenne
Des informations environnementales importantes concernant ce produit
Ce symbole sur l'appareil ou l'emballage indique que, si l'appareil est jeté après sa vie, il peut nuire à
l'environnement.
Ne jetez pas cet appareil (et des piles éventuelles) parmi les déchets ménagers ; il doit arriver chez une
firme spécialisée pour recyclage.
Vous êtes tenu à porter cet appareil à votre revendeur ou un point de recyclage local.
Respectez la législation environnementale locale.
Si vous avez des questions, contactez les autorités locales pour élimination.
Nous vous remercions de votre achat! Lisez attentivement la présente notice avant la mise en service de l'appareil.
Si l’appareil a été endommagé pendant le transport, ne l'installez pas et consultez votre revendeur.
2. Caractéristiques
•Température, calendrier, alarme avec fonction de répétition/éclairage
•Afficheur LCD avec rétro-illumination bleue
•Affichage de l’heure au format 12h/24h
•Affichage de la température au format °C/°F
3. Description
(voir ill. à la page 1)
1. Afficheur LCD
2. Touche SNOOZE/LIGHT
3. Touche HR (Heure)/MONTH
4. Touche MIN (Minute)/Date
5. TIME set/ALARM set/CALENDAR/LOCK
6. Interrupteur SNOOZE/ALARM ON/ALARM OFF
7. Touche 12HR/24HR/YEAR
8. Touche °C/°F
4. Piles
Ouvrez le compartiment à batteries situé à l’arrière de l’appareil et insérez 2 piles de type LR03 tout en respectant la
polarité.
5. Réglage de la date et de l’heure correcte
Pour régler l’heure, glissez l’interrupteur (5) vers CALENDAR. Enfoncez la touche MONTH, DATE ou YEAR pour
établir la date et l’heure. Une date non existante sera corrigée automatiquement, p.ex. le 30 février sera corrigé par
le 1 février, le 31 avril sera corrigé par le 1 avril.
Pour régler l’heure, glissez l’interrupteur (5) vers TIME SET. Enfoncez la touche HR ou MIN pour établir l’heure
souhaitée.

WT4406 - 6 - VELLEMAN
6. Réglage de l’alarme
•Mettez l’interrupteur (5) sur ALM SET. Le symbole ALARM apparaît sur l’afficheur.
•Enfoncez la touche HR ou MIN pour régler l’heure de l’alarme souhaitée.
•Mettez l’interrupteur (6) sur ALM ON. apparaît sur l’afficheur. La fonction d’alarme est activée.
•Mettez l’interrupteur (6) sur SNOOZE pour activer la fonction de répétition.
7. Verrouillage des boutons
Après avoir réglé l’heure et l’alarme, glissez l’interrupteur (5) vers LOCK pour verrouiller les touches et éviter de
modifier les réglages.
8. La fonction de répétition
Mettez l’interrupteur (6) sur SNOOZE. apparaît sur l’afficheur. La fonction de répétition est activée.
Il est possible d’activer la fonction de répétition dès que l’alarme retentit. Enfoncez la touche SNOOZE/LIGHT (2). La
fonction de répétition a une temporisation d'activation de 5 minutes. Mettez l’interrupteur ALARME (6) sur OFF pour
désactiver la fonction d’alarme. L’alarme retentit pendant une durée de 1 minute.
9. Affichage de l’heure et de la température
Enfoncez la touche 12HR/24HR (7) pour établir l’affichage. Au format 12HR, le symbole PM apparaît pour indiquer
l’heure de l’après-midi.
Enfoncez la touche °C/°F (8) pour établir l’affichage de la température.
10.Rétro-illumination
Enfoncez SNOOZE/LIGHT pour activer le rétro-éclairage pendant ± 3 secondes. Un usage fréquent de cette fonction
abrégera la vie de vos batteries.
11.Entretien
Employez un chiffon et un détergent doux pour nettoyer l'appareil. Evitez l'usage de solvants ou d'abrasifs. Faites
attention à ne pas laisser tomber le WT4406 sur une superficie dure. Evitez tout usage à l'extérieur et toute exposition
directe aux rayons solaires.
12.Spécifications techniques
Alimentation 2 piles 1.5V type LR03 (non incl.)
Digits 18 x 8mm
Dimensions 77 x 72 x 38mm
Toutes les informations présentées dans ce manuel peuvent être modifiées sans notification préalable.

WT4406 - 7 - VELLEMAN
WT4406 – RELOJ DE DISEÑO DIGITAL
1. Introducción
A los ciudadanos de la Unión Europea
Importantes informaciones sobre el medio ambiente concerniente este producto
Este símbolo en este aparato o el embalaje indica que, si tira las muestras inservibles, podrían dañar el
medio ambiente.
No tire este aparato (ni las pilas eventuales) en la basura doméstica; debe ir a una empresa especializada
en reciclaje. Devuelva este aparato a su distribuidor o a la unidad de reciclaje local.
Respete las leyes locales en relación con el medio ambiente.
Si tiene dudas, contacte con las autoridades locales para residuos.
¡Gracias por haber comprado el WT4406! Lea cuidadosamente las instrucciones del manual antes de usarlo.
Verifique si el aparato ha sufrido algún daño en el transporte antes de la puesta en marcha. Si es el caso, no
conecte el aparato a la red y póngase en contacto con su distribuidor.
2. Características
•Temperatura, calendario, alarma con función 'snooze'/iluminación
•Pantalla LCD con retroiluminación azul
•Visualización de la hora en el formato 12h/24h
•Visualización de la temperatura en el formato °C/°F
3. Descripción
(véase fig. en la p. 1)
1. Pantalla LCD
2. Tecla SNOOZE/LIGHT
3. Tecla HR (Hora)/MONTH
4. Tecla MIN (Minuto)/Fecha
5. TIME set/ALARM set/CALENDAR/LOCK
6. Interruptor SNOOZE/ALARM ON/ALARM OFF
7. Tecla 12HR/24HR/YEAR
8. Tecla °C/°F
4. Pilas
Abra el compartimento de pilas de la parte trasera del aparato e introduzca 2 pilas del tipo AAA. Controle la
polaridad.
5. Ajustar la fecha y la hora correcta
Para ajustar la hora, deslice el interruptor (5) hacia CALENDAR. Pulse la tecla MONTH, DATE o YEAR para
establecer la fecha y la hora. Una fecha no existente se corregirá automáticamente, p.ej. el 30 febrero se corregirá
por le 1 febrero, el 31 abril se corregirá por el 1 abril.
Para ajustar la hora, deslice el interruptor (5) hacia TIME SET. Pulse la tecla HR o MIN para introducir la hora
deseada.

WT4406 - 8 - VELLEMAN
6. Ajustar la alarma
•Coloque el interruptor (5) en ALM SET. El símbolo ALARM aparece en la pantalla.
•Pulse la tecla HR o MIN para ajustar la hora de la alarma deseada.
•Coloque el interruptor (6) en ALM ON. aparece en la pantalla. La función de alarma está activada.
•Coloque el interruptor (6) en SNOOZE para activar la función ‘snooze’.
7. Bloquear los botones
Después de haber ajustado la hora y la alarma, deslice el interruptor (5) hacia LOCK para bloquear las teclas y
evitar la modificación los ajustes.
8. La función ‘snooze’
Coloque el interruptor (6) en SNOOZE. aparece en la pantalla. La función ‘snooze’ está activada.
Es posible activar la función ‘snooze’ en cuanto la alarma suene. Pulse la tecla SNOOZE/LIGHT (2). La función
‘snooze’ tiene una temporización de activación de 5 minutos. Coloque el interruptor ALARME (6) en OFF para
desactivar la función de alarma. La alarma suena durante 1 minuto.
9. Visualizar la hora y la temperatura
Pulse la tecla 12HR/24HR (7) para seleccionar el formato. En el formato 12HR, el símbolo PM aparece para indicar
la hora PM.
Pulse la tecla °C/°F (8) para seleccionar el formato de la temperatura.
10.Retroiluminación
Pulse SNOOZE/LIGHT para activar la retroiluminación durante ± 3 segundos. Un uso frecuente de esta función
disminuirá la duración de vida de sus baterías.
11.Mantenimiento
Utilice un paño y un detergente suave para limpiar el aparato. Evite el uso de disolventes o abrasivos. ¡Cuidado con no
dejar caer el WT4406 en una superficie dura. No utilice el aparato en exteriores y no lo exponga a rayos solares
directos.
12.Especificaciones
Alimentación 2 pilas 1.5V tipo AAA (no incl.)
Dígitos 18 x 8mm
Dimensiones 77 x 72 x 38mm
Se pueden modificar las especificaciones y el contenido de este manual sin previo aviso.

WT4406 - 9 - VELLEMAN
WT4406 – DIGITALE DESIGNUHR
1. Einführung
An alle Einwohner der Europäischen Union
Wichtige Umweltinformationen über dieses Produkt
Dieses Symbol auf dem Produkt oder der Verpackung zeigt an, dass die Entsorgung dieses Produktes nach
seinem Lebenszyklus der Umwelt Schaden zufügen kann.
Entsorgen Sie die Einheit (oder verwendeten Batterien) nicht als unsortiertes Hausmüll; die Einheit oder
verwendeten Batterien müssen von einer spezialisierten Firma zwecks Recycling entsorgt werden.
Diese Einheit muss an den Händler oder ein örtliches Recycling-Unternehmen retourniert werden.
Respektieren Sie die örtlichen Umweltvorschriften.
Falls Zweifel bestehen, wenden Sie sich für Entsorgungsrichtlinien an Ihre örtliche Behörde.
Danke für den Kauf des WT4406! Bitte lesen Sie vor Inbetriebnahme diese Bedienungsanleitung sorgfältig durch.
Überprüfen Sie, ob Transportschäden vorliegen. Sollte dies der Fall sein, verwenden Sie das Gerät nicht und wenden
Sie sich an Ihren Händler.
2. Eigenschaften
•Temperaturanzeige, Kalender, Alarm mit Snooze/Light-Funktion,
•blaues hintergrundbeleuchtetes LCD
•12h/24h-Funktion
•Temperatur in °C/°F
3. Beschreibung
(siehe Abb. Seite 1)
1. LCD-Display
2. SNOOZE/LIGHT-Taste
3. HR (Hour)(Stunden)/MONTH (Monat)-Taste
4. MIN (Minuten)/Date (Datum)-Taste
5. TIM (Zeit) /ALARM /CALENDAR (Kalender)/LOCK einstellen
6. SNOOZE/ALARM ON/ALARM OFF-Schalter
7. 12HR/24HR/YEAR (Jahr)-Taste
8. °C/°F-Taste
4. Batterien
Öffnen Sie das Batteriefach an der Rückseite der Einheit und legen Sie zwei AAA (Micro)-Batterien ein. Achten Sie
auf die Polarität.
5. Datum & Zeit einstellen
Um das Datum einzustellen, stellen Sie den Schalter (5) auf CALENDAR. Drücken Sie die MONTH, DATE oder
YEAR-Taste um das gewünschte Datum und die gewünschte Zeit einzustellen. Ein falsches Datum wird automatisch
korrigiert; z.B. 30. Februar wird auf 1. Februar geändert, 31. April wird auf 1. April geändert.
Um die Zeit einzustellen, stellen Sie den Schalter (5) auf TIME SET. Drücken Sie die HR oder MIN-Taste um die
gewünschte Zeit einzustellen.
WT4406 - 10 - VELLEMAN
6. Alarm einstellen
•Stellen Sie den Schalter (5) auf ALM SET. Das ALARM-Symbol wird auf dem Display gezeigt.
•Drücken Sie HR oder MIN-Taste um die gewünschte ALARM-Zeit einzustellen.
•Stellen Sie den Schalter (6) auf ALM ON. erscheint auf dem Display. Die Alarmfunktion ist jetzt aktiviert.
•Schieben Sie den Schalter (6) auf SNOOZE um die Snooze-Funktion zu aktivieren.
7. Lock-Funktion
Nachdem Sie die Zeit und die Alarmzeit eingestellt haben, schieben Sie den Schalter (5) auf LOCK um die
Einstellungen zu schützen vor unnötigen Änderungen, verursacht durch das Berühren der Tasten.
8. Snooze Alarm verwenden
Schieben Sie den Schalter (6) auf SNOOZE. erscheint auf dem Display. Die Snooze-Funktion ist aktiviert.
Wenn der Alarm losgeht, können Sie die Snooze-Funktion aktivieren, indem Sie die SNOOZE/LIGHT-Taste (2)
drücken. Der Alarm wird 5 Minuten aufhören bevor er wieder losgeht. Um den Alarm ganz auszuschalten, schieben
Sie den ALARM-Schalter auf OFF. Die Alarmdauer beträgt eine Minute.
9. Zeit- und Temperaturanzeige
Drücken Sie die 12HR/24HR-Taste (7) um die gewünschte Zeitanzeige zu wählen. Im 12-Stunden Format erscheint
PM bei den 'post meridiem'-Stunden.
Drücken Sie die °C/°F-Taste (8) um die gewünschte Temperaturanzeige zu bekommen.
10.Hintergrundbeleuchtung
Drücken Sie SNOOZE/LIGHT-Taste um die Hintergrundbeleuchtung für ungefähr 3 Sekunden. Regelmäßiger
Gebrauch dieser Funktion wird die Lebensdauer der Batterien verkürzen.
11.Wartung
Verwenden Sie ein sanftes, feuchtes Tuch mit mildem Reinigungsmittel. Verwenden Sie keine Scheuermittel oder
Lösungsmittel. Lassen Sie das Gerät nicht fallen. Benutzen Sie es nicht im Außenbereich. Vor direktem Sonnenlicht
schützen.
12.Technische Daten
Stromversorgung 2 x 1.5V AAA Batterien (nicht mitgeliefert)
Zifferhöhe 18 x 8mm
Abmessungen 77 x 72 x 38mm
Alle Änderungen vorbehalten.
Table of contents
Languages:
Other Velleman Clock manuals

Velleman
Velleman WC235RLN User manual

Velleman
Velleman K8089 User manual

Velleman
Velleman WC30D2 User manual

Velleman
Velleman WC25 User manual

Velleman
Velleman WT63 User manual

Velleman
Velleman WC8708 User manual

Velleman
Velleman WT33 User manual

Velleman
Velleman WC8708 User manual

Velleman
Velleman WC103 User manual

Velleman
Velleman WTPC108 User manual

Velleman
Velleman WT51 User manual

Velleman
Velleman WC35 User manual

Velleman
Velleman WT11EL User manual

Velleman
Velleman WT401 User manual

Velleman
Velleman WC8752 User manual

Velleman
Velleman WC50D User manual

Velleman
Velleman K8099 User manual

Velleman
Velleman ED8A800 User manual

Velleman
Velleman WC40D User manual

Velleman
Velleman WT302N User manual