Verfilco Transferpette-12 User manual

Liquid Handling · Easy Handling!
Transferpette
®
-8/-12 electronic
Gebrauchsanleitung
F I R S T C L A S S · B R A N D
Operating Manual
Mode d'emploi
Instrucciones de manejo
Istruzioni per l'uso
3
39
75
111
147
㌷♾⦷www.brand.de/cn/manuals
ₚ戌㦻ℶ❐䤓₼㠖㝜⇫㓚␛ᇭ

English
Table of Contents
Page
Safety Instructions 40
Functions and Limitations of Use 41
Operating Exclusions 41
Operating Elements 42
The First Steps 43
Setting the Volume 44
Setting the Aspiration and Discharging Speed 45
Correct Pipetting 46
The Pipetting Programs 47
PIP mode 48
PIPmix mode 50
revPIP mode 52
Electrophoresis (GEL) mode 54
DISP mode 56
Checking the Volume 58
Accuracy Table 59
Easy Calibration (adjustment) 60
Autoclaving 62
Reference Run (rEF) 62
Servicing and Cleaning 63
Charging and Replacing the Battery 68
Battery Regeneration Function 69
Troubleshooting 70
Ordering Information · Accessories · Spare Parts 71
Repairs · Contact addresses 72
Calibration Service · Warranty Information 73
Disposal 74
39

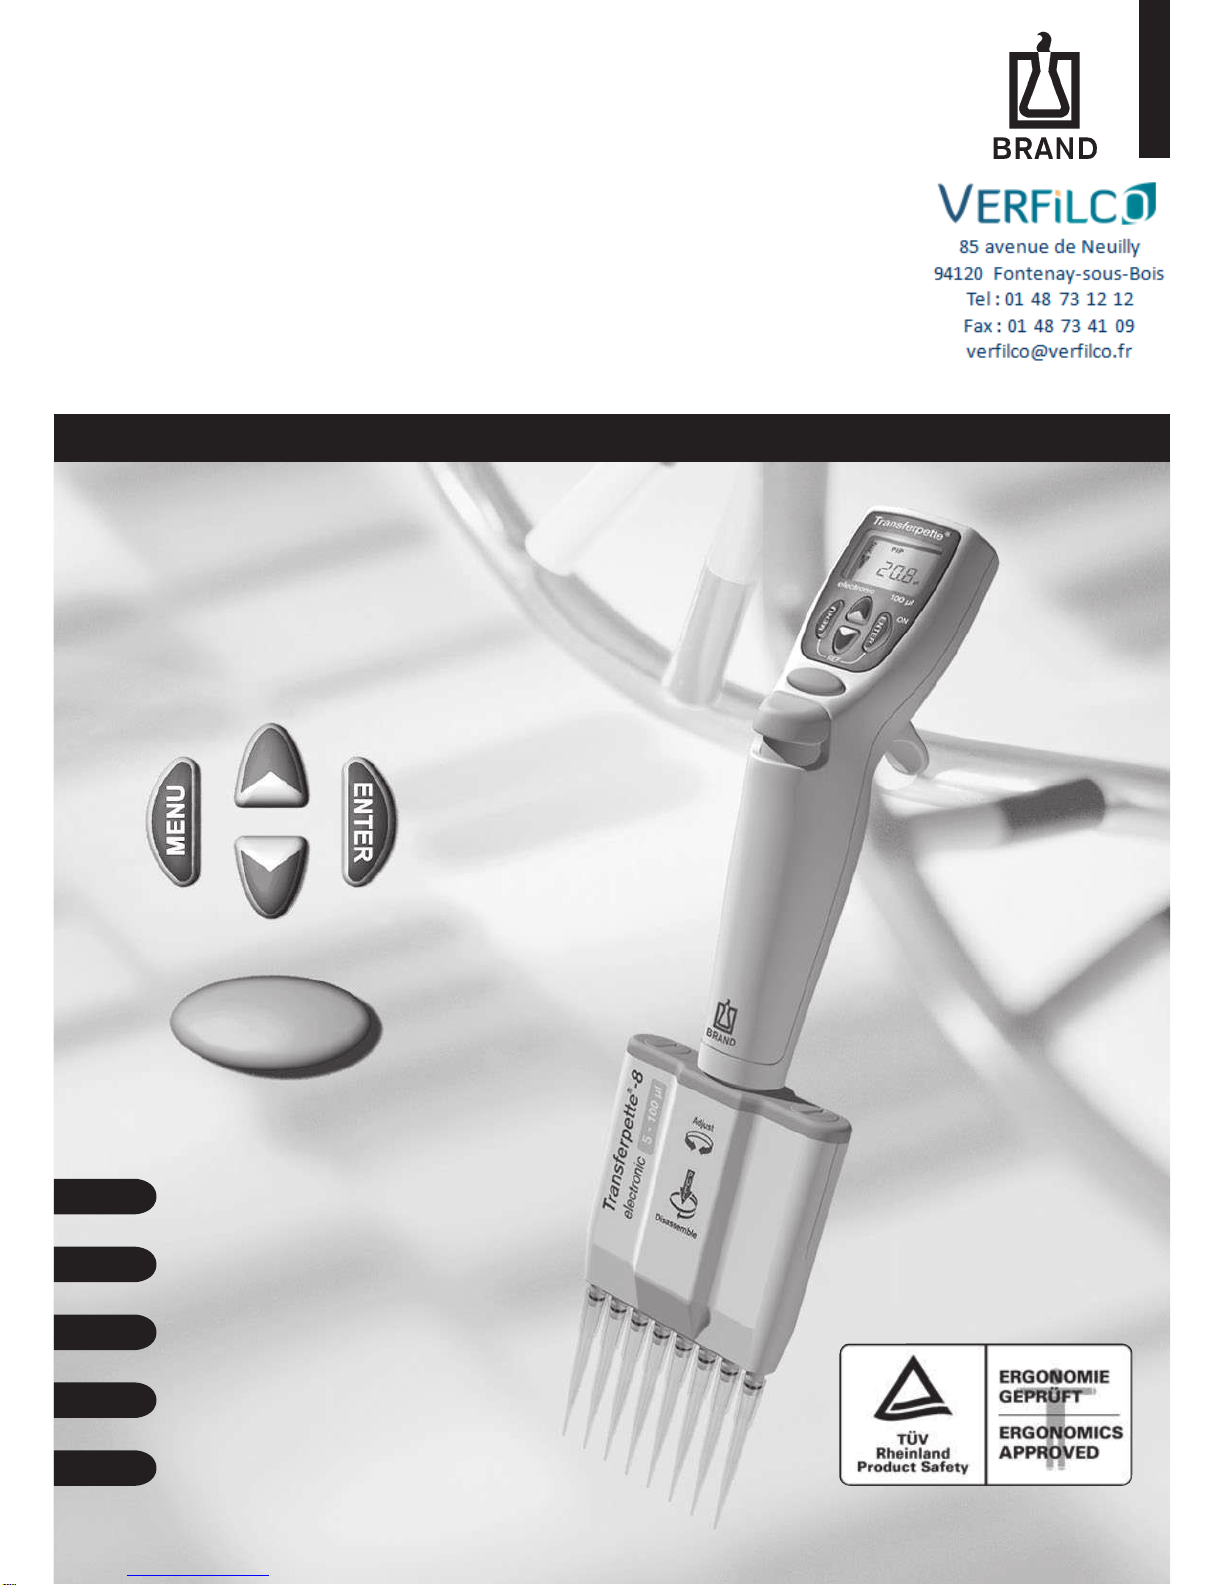
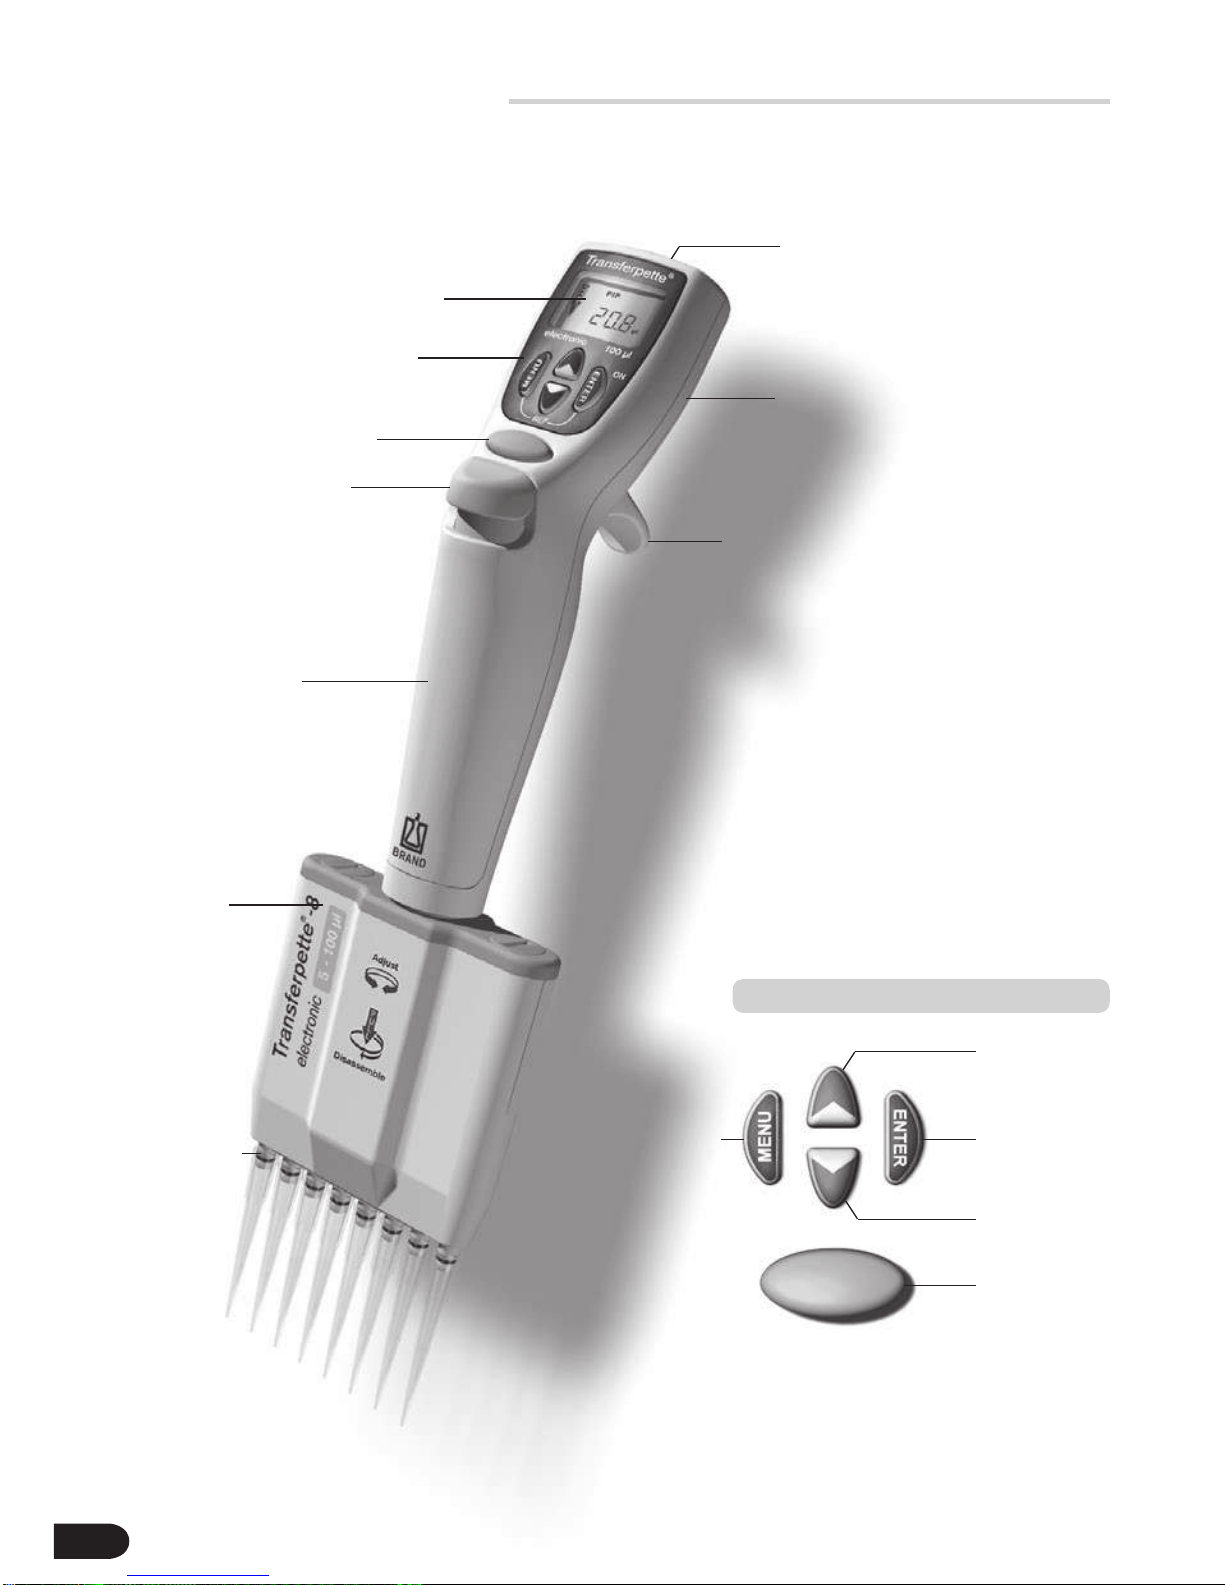
Please read the following carefully!
This instrument may sometimes be used with hazardous materials, operations, and equipment.
It is beyond the scope of this manual to address all of the potential safety problems associated with its
use in such applications. It is the responsibility of the user of this pipette to consult and establish appro-
priate safety and health practices and determine the applicability of regulatory limitations prior to use.
Safety Instructions
1. Every user must read and understand this
operating manual prior to using the instrument
and observe these instructions during use.
2. Follow general instructions for hazard preven-
tion and safety instructions; e.g., wear protec-
tive clothing, eye protection and gloves.
When working with infectious or other hazard-
ous samples, all appropriate regulations and
precautions must be followed.
3. Observe all specifications provided by reagent
manufacturers.
4. Never use the instrument in an atmosphere
with a danger of explosion. Highly flammable
liquids must not be pipetted.
5. Only use the instrument for pipetting liquids
that conform to the specifications defined in
the operating exclusions and limitations
(see page 41). If in doubt, contact the manu-
facturer or supplier.
6. Always use the instrument in such a way that
neither the user nor any other person is
endangered. Avoid splashes and only use suit-
able vessel.
7. Avoid touching the tip orifices when working
with hazardous samples.
8. Never use force on the instrument!
9. Only use original spare parts. Do not attempt
to make any technical alterations. Do not
dismantle the instrument any further than is
described in the operating manual!
10. Before use check the instrument for visible
damages. If there is a sign of a potential
malfunction (e.g., piston difficult to move,
leakage), immediately stop pipetting. Consult
the 'Troubleshooting' section of this manual
(see page 70), and contact the manufacturer
if needed.
11. The original battery must not be replaced with
non rechargeable batteries or rechargeable
batteries of other manufacturers.
12. To charge the NiMH battery pack, use only the
original AC adapter.
13. The AC adapter has to be protected against
moisture and must be used only for this instru-
ment.
14. Dispose of batteries only when discharged and
according to applicable regulations.
Improper use of the instrument or the batteries (short circuit, mechanical damage, overheating, incorrect
AC adapter, etc.) can lead to battery explosion.
!
Warning!
40

English
Functions and Limitations of Use
The Transferpette®-8/-12 electronic is a micropro-
cessor-controlled, battery-operated piston-stroke
multichannel pipette which uses the air-displace-
ment principle for the pipetting of aqueous solu-
tions with an average density and viscosity.
When the instrument is used properly, the sample
only comes into contact with the tips and not with
the Transferpette®-8/-12 electronic.
41
The Transferpette®electronic is intended for the
pipetting of liquids within the following limitations:
– Temperature of both the instrument and solution
should be between 15 °C to 40 °C (59 °F to
104 °F). Consult the manufacturer for use in
temperatures outside of this range.
– Vapor pressure up to 500 mbar
– Viscosity: 260 mPa s (260 cps)
Battery
Nickel-metal hydride battery with 3 cylindrical
individual cells with size AAA, 3.6 V, 700 mAh
AC adapter
Output voltage 6.5 V DC, 200 mA
Limitations of use
Operating exclusions Battery and AC adapter specifications
Viscous and highly adhesive liquids may impair
volumetric accuracy. Volumetric accuracy may also
be impaired when pipetting liquids that differ from
ambient temperature by more than ± 5 °C / 41 °F.
Operating Limitations
The user has to ensure the compatibility of the
instrument with the intended application.
Never use the instrument for pipetting liquids,
that react adversely with polypropylene (PP: shaft
and tips), polycarbonate/polybutyleneterephthalate
(PC/PBT: casing) or EPDM (flexible replacement
pipette shafts). Avoid reactive vapors due to the
danger of corrosion.
The handle is not autoclavable.

Display
Program keys
Tip ejection key
Handgrip
Manifold
Nose cone
Pipetting key
Charging jack
Operating Elements
Menu
selection
key
Entry confir-
mation/
Power 'On'*
Pipetting key
Up key (+)
Down key (-)
The Transferpette®-8/-12 electronic is a microprocessor-controlled, battery-
operated, piston-stroke multichannel pipette, which has been optimized for
ergonomic operation and ease of use.
Battery compartment
Finger rest
*) The instrument is activated by pressing the ENTER
key. After pressing the pipetting key next, the
instrument is ready for pipetting.
The Transferpette®-8/-12 electronic shuts off 10 min
after the last instrument operation (Auto-Power-Off).
Key Functions
42
The Transferpette®-8/-12
electronic rests easily and
ergonomically in your hand.
The finger rest is height adjust-
able with a screw, which allows
fine-tuning of the hand position
for effortless operation of the func-
tion buttons.

1x
C
B
A
English
c) Replace the battery compartment.
1. Insert the
battery
Is everything in the package?
Confirm that your package includes: Transferpette®-8 or -12 electronic
pipette, battery, power supply unit with battery charging cable,
1 TipBox filled, refill unit, 1 instrument stand, 1 reagent
reservoir, silicone oil, operating manual and 1 set of V-rings made of FKM.
a) Open the cover of the battery compartment.
b) Insure that the plug for the battery is firmly
connected to the pipette. Insert the battery.
2. Activate the
instrument
The Transferpette®-8/-12
electronic automatically
requests a reference run
directly after the battery is
inserted. After the pipetting
key is pressed, the refer-
ence run is carried out and
the instrument is now ready
for pipetting.
Battery charge
indicator
Up arrow,
indicating
aspiration
Pipetting mode
Volume setting
The display shows the
standard factory setting
(pipetting mode/PIP); and
the nominal volume (for
example, 100.0 µl). Default
aspiration and discharging
speeds are at maximum.
The adjustment of volume
and speed is described on
the following pages.
The First Steps
Initializing the Transferpette®-8/-12 electronic
43

1x
+
–
Press the up arrow key (+)
to increase the volume.
Holding the arrow key down
accellerates the rate of
change. ‚VOL‘ continues to
blink.
Press the ENTER key.
The display now shows the
new volume setting, in this
case, 102.8 µl in the PIP
mode.
2. Change the volume
3. Confirm volume
setting
The volume for the Transferpette®-8/-12 electronic is set at the factory to the nominal
volume of the instrument and can be changed quickly and easily.
Press the down arrow key
(-) to reduce the volume.
Holding the arrow key down
accellerates the rate of
change. ‚VOL‘ continues to
blink.
Reduce volume
Press one of the arrow keys
to activate volume selection.
‚VOL‘ blinks.
1. Activate volume
setting
Increase volume
Setting the Volume
What to do How to do it Keys to press Display readout
By pressing the MENU key any procedure can be cancelled! The display then moves to the next setting or
back to the initial display (depending on actual selection.)
Important:
44

1x
1x
2x
1x
+
–
+
–
English
Press the MENU key once
to bring up the aspira-
tion speed menu. ‚Speed‘
blinks.
Press one of the arrow keys
(+/-) to select the desired
speed (in this case, level 5).
‚Speed‘ continues to blink.
Press the ENTER key. The
display returns to the start
position for the current pipet-
ting mode (in this case, the
standard PIP mode).
1. Bring up the menu
2. Change the
aspiration speed
3. Confirm speed
level
The aspiration and discharging speeds can be individually adjusted. When the menu is called up, the last
speed setting is shown. Five speed levels are available.
Press the MENU key twice
to bring up the discharg-
ing speed menu. ‚Speed‘
blinks.
Press one of the arrow keys
(+/-) to select the desired
speed (in this case, level 2).
‚Speed‘ continues to blink.
Press the ENTER key. The
display returns to the start
position for the current pipet-
ting mode (in this case, the
standard PIP mode).
1. Bring up the menu
2. Change the
discharging speed
3. Confirm speed
level
Setting the aspiration speed
Setting the discharging speed
Setting the Aspiration and Discharging Speed
What to do How to do it Keys to press Display readout
45

1x
1x
Correct Pipetting
with the Transferpette®-8/-12 electronic
1. Attach the tips
Hold the pipette vertically and immerse the tips
2 to 3 mm into the liquid.
Press the pipetting key to
aspirate the liquid into the
tips. The arrow in the display
points upwards to indicate
the aspiration of liquid.
3. Aspirate liquid
Hold the pipette at an angle between 30º and 45º,
place the tips against the vessel wall.
Press the pipetting key again
and the liquid is completely
discharged including auto-
matic blowout. Afterwards
wipe pipette tips against the
vessel wall.
4. Discharge liquid After the liquid has been aspirated, the arrow in the
display points downwards to indicate discharging.
5. Eject tips Hold the manifold over a
suitable disposal container
and press the tip ejection
key. Tip ejection
key
The volume is set at the factory to the nominal volume for the Transferpette®-8/-12 electronic
and can be changed quickly and easily. See page 44.
Quick start in the standard pipetting mode
Use the correct tips according to the volume range or the color code. Ensure
that the tips are securely seated.
Pipette tips are disposables items!
To avoid the intake of air, leave the tips immersed
into the liquid for approx. 1 sec.
Note:
46
The manifold can turn freely in both directions.
2. Align the manifold
Note:
ISO 8655 prescribes rinsing the pipette tips once with the sample liquid prior
to the actual pipetting process.

English
The Pipetting Programs
1. Normal Pipetting
PIP Mode
Standard program. A previously set volume
is aspirated into the pipette tip and then
discharged.
48
4. Pipetting for Electrophoresis
GEL Mode
Program for loading electrophoresis gels. A
predefined sample volume is aspirated at high,
adjustable speed and then slowly discharged.
54
2. Mixing of Samples
PIPmix Mode
Program for mixing liquids. The sample is
repeatedly aspirated and discharged.
50
3. Reverse Pipetting
revPIP Mode
Program especially for pipetting liquids with a
high viscosity or vapor pressure, or that tend
to foam.
52
5. Dispensing
DISP Mode
Program for dispensing liquids. An aspirated
volume is dispensed repeatedly in defined
steps.
56
47
Page

3x
1x
1x
1x
➞
Press the MENU key three
times to bring up the mode
selection menu. ‚Mode‘
blinks.
Use one of the arrow keys
to scroll through the modes
until ‚PIP‘ appears.
‚Mode‘ continues to blink.
Press the ENTER key.
The display now shows ‚blo‘
for blow-out.
Press the pipetting key once
to aspirate the liquid.
Press the pipetting key once
to move the pistons into the
start position.
The arrow in the display
points upwards (aspiration).
PIP Mode
The Programs · Settings and Use
The standard program – a previously set volume is aspirated and then discharged.
Volume and speed adjustments are described on pages 44 and 45.
1. Bring up the menu
2. Select PIP mode
3. Confirm PIP mode
4. Prepare for
pipetting
5. Aspirate liquid
What to do How to do it Keys to press Display readout
48

1x
1x
➞
1x
English
Press the pipetting key once
to discharge the liquid. The
arrow in the display points
downwards (discharge).
No action required!
When pipetting in the PIP
mode the blow-out function
is performed automati-
cally.
6. Discharge liquid
7. Start blow-out?
Press the ENTER key. The
display shows ‚blo‘
for blow-out.
1. Bring up the
blow-out function
Press the pipetting key
once to initiate the blow-out
process. The display moves
back to the start position of
the selected pipetting mode.
2. Start blow-out
Start blow-out manually
The blow-out function can, if necessary, be initiated manually
at any time.
PIP Mode
What to do How to do it Keys to press Display readout
To accomplish the blow-out, the pistons move to the lowest position.
The user must be certain that any residual liquid is discharged safely.
If the pipetting key is pressed and held, the pistons will be maintained
at their lowest position to avert an accidental aspiration of liquid.
When the key is released, the pistons return to the start position
Note:
49

3x
1x
1x
1x
➞
PIPmix Mode
The Programs · Settings and Use
Program for mixing of liquids. The sample is repeatedly aspirated and discharged.
Volume and speed adjustments are described on pages 44 and 45.
Press the MENU key three
times to bring up the mode
selection menu. ‚Mode‘
blinks.
Scroll through the modes
using the arrow keys until
‚PIPmix‘ appears.
‚Mode‘ continues to blink.
Press the ENTER key. The
Display now shows ‚blo‘ for
blow-out.
Press the pipetting key once
to aspirate the liquid.
Press the pipetting key once
to move the pistons into the
start position.
The arrow in the display
points upwards (aspiration).
1. Bring up the menu
2. Select PIPmix
mode
3. Confirm PIPmix
mode
4. Prepare for
pipetting
5. Aspirate liquid
What to do How to do it Keys to press Display readout
50

➞
➞
1x
English
Press and hold the pipet-
ting key and the liquid is
alternately aspirated and dis-
charged. The display shows
the up arrow for aspiration
and the down arrow for
discharging and the number
of cycles.
6. Discharge liquid
in the PIPmix
mode
7. End pipetting
The display shows a maximum of 19 cycles.
Press the pipetting key once
and the liquid is discharged
and the blow-out function
initiated.
After the discharge of the
residual liquid (blow-out),
the display moves back to
the start position.
PIPmix Mode
What to do How to do it Keys to press Display readout
Note:
press and hold
51

➞
3x
1x
1x
1x
1x
➞
Scroll through the modes
using the arrow keys until
‚revPIP‘ appears.
‚Mode‘ continues to blink.
Press the pipetting key
once. The volume aspirated
will be a little bit more than
set.
To discharge the measured
amount of liquid, press the
pipetting key once. The
arrow in the display points
downwards (discharge).
Some liquid will remain
in the tips.
revPIP Mode
The Programs · Settings and Use
Press the MENU key three
times to bring up the mode
selection menu.
‚Mode‘ blinks.
1. Bring up the menu
2. Select revPIP
mode
Press the ENTER key.
The Display now shows ‚blo‘
for blow-out.
Press the pipetting key once
to move the pistons into the
start position.
The arrow in the display
points upwards (aspiration).
3. Confirm revPIP
mode
4. Prepare for
pipetting
5. Aspirate liquid
6. Discharge liquid
in the revPIP
mode
Program for pipetting of liquids with high viscosity, vapor pressure or that tend to foam.
Volume and speed adjustments are described on pages 44 and 45.
What to do How to do it Keys to press Display readout
52

➞
1x
1x
1x
English
Press the pipetting key
again and the set volume is
aspirated into the tips. Press
the pipetting key again and
the volume is discharged
again, and so on...
7. Repeat aspiration
of liquid in revPIP
mode
Press the ENTER key after
the last pipetting operation.
The display shows ‚blo‘ for
blow-out.
8. Initiate blow-out
Press the pipetting key
once to initiate the blow-out
process. The residual liquid
is discharged.
After the residual liquid is
discharged (blow-out), the
display moves back to the
start position.
9. End pipetting
revPIP Mode
What to do How to do it Keys to press Display readout
53

1x
➞
1x
1x
3x
Press the MENU key three
times to bring up the mode
selection menu.
‚Mode‘ blinks.
Scroll through the modes
using the arrow keys until
‚GEL‘ appears.
‚Mode‘ continues to blink.
Press the ENTER key.
The Display now shows ‚blo‘
for blow-out.
Press the pipetting key
once. The set volume is
aspirated into the tips.
1. Bring up the menu
2. Select GEL mode
3. Confirm GEL mode
5. Aspirate liquid
Press the pipetting key once
to move the pistons into the
start position.
The arrow in the display
points upwards (aspiration).
4. Prepare for
pipetting
Aspirate a larger volume
In order to aspirate a larger
volume than was set (up
to a max. of 110% of the
nominal volume), press
and hold the pipetting key
until the desired volume
has been aspirated. The
display shows a rhombus.
Electrophoresis (GEL) Mode
The Programs · Settings and Use
Program for loading electrophoresis gels. A predefined sample volume is aspirated into
the pipette tips with high adjustable speed and then slowly discharged.
Volume and speed adjustment is described on pages 44 and 45.
What to do How to do it Keys to press Display readout
press and hold
54

➞
1x
1x
1x
1x
English
Press the pipetting key once
to discharge the liquid. The
rhombus is shown in the dis-
play. The liquid is discharged
very slowly.
6. Discharge liquid
in the GEL mode
Interrupt discharging
To interrupt discharging,
press the pipetting key
again. The display shows the
volume discharged prior to
interruption.
Press the ENTER key after
the last pipetting operation.
The display shows ‚blo‘ for
blow-out.
7. Initiate blow-out
Press the pipetting key
once to initiate the blow-out
process. The residual liquid
is discharged.
After the residual liquid is
discharged (blow-out), the
display moves back to the
start position.
8. End pipetting
Electrophoresis (GEL) Mode
What to do How to do it Keys to press Display readout
The GEL mode operates using a very slow discharge speed to prevent swirling of the samples. To assure
optimal discharging into a gel, this discharge speed is fixed for the GEL mode. This speed is significantly
slower than level 1 and cannot be selected individually.
Note:
55

3x
1x
1x
+
–
1x
Scroll through the modes
using the arrow keys until
‚DISP‘ appears.
‚Mode‘ continues to blink.
Press the arrow keys (+/-)
to set the volume. Holding
the arrow key down accel-
lerates the rate of change.
‚VOL‘ blinks.
Press the ENTER key.
The display now shows the
new volume setting for the
dispensing steps and the
max. number of steps.
‚Steps‘ blinks.
DISP Mode
The Programs · Settings and Use
Press the MENU key three
times to bring ap the mode
selection menu.
‚Mode‘ blinks.
1. Bring up the menu
2. Select DISP
mode
Press the ENTER key.
The Display now shows
‚blo‘ for blow-out.
Press the pipetting key once
to move the pistons into the
start position.
The arrow in the display
points upwards (aspiration).
3. Confirm DISP
mode
4. Prepare for
dispensing
5. Set dispensing
step volume
6. Confirm dispens-
ing step volume
Program for discharging an aspirated liquid in pre-defined steps.
The volume aspirated will be a little bit more than actually needed.
Speed adjustment is described on page 45.
What to do How to do it Keys to press Display readout
56

1x
➞
➞
1x
+
–
1x
1x
English
Press the ENTER key.
The display now shows the
number of steps that has
been set.
Press the arrow keys (+/-)
to set the number of steps.
‚Steps‘ continues to blink.
7. Set the number
of steps
8. Confirm the
number of steps
Press the pipetting key once
to aspirate the liquid.
Each time the pipetting key
is pressed one dispens-
ing step is performed. The
arrow in the display points
downwards (discharge). The
display shows the number of
dispensing steps left.
9. Aspirate
liquid
10. Dispense
liquid
Press the ENTER key after
the last dispensing step.
The display shows ‚blo‘ for
blow-out. Press the pipetting
key next once to initiate the
blow-out process (see also
p. 55).
11. Initiate blow-out
After the residual liquid is
discharged (blow-out), the
display moves back to the
start position.
12. End dispensing
DISP Mode
What to do How to do it Keys to press Display readout
57
This manual suits for next models
1
Table of contents
Popular Laboratory Equipment manuals by other brands

Agilent Technologies
Agilent Technologies 1290 infinity user manual

Cole Parmer
Cole Parmer RS-200 Series instruction manual

Sartorius
Sartorius ePET user manual

Applied Biosystems
Applied Biosystems 7300 Getting started guide

National Instruments
National Instruments SCXI-1141 CALIBRATION PROCEDURE

Hach
Hach TitraStir 19400-00 User instructions