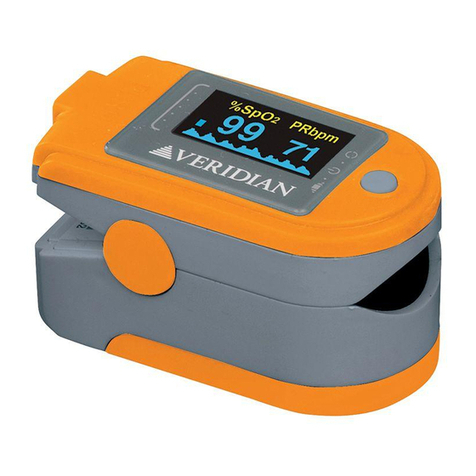
Veridian Healthcare 11-50DP User manual

INSTRUCTION MANUAL • ENGLISH & ES AÑOL
Pulse Ox Fit
Premium Pulse Oximeter
for Sports and Aviation Enthusiasts
Model 11-50DP
2-YEAR
READ THIS INSTRUCTION MANUAL
CAREFULLY BEFORE USE

Introduction . . . . . . . . . . . . . . . . . . . . . . . . . . . . . . . . . . . . . . . . . . . . . . .4
Important Safeguards - Care and Safety Information . . . . . . . .5-6
How Pulse Oximeters Work . . . . . . . . . . . . . . . . . . . . . . . . . . . . . . . . . .7
Features of Your Device . . . . . . . . . . . . . . . . . . . . . . . . . . . . . . . . . . . . . .8
PC Link Software . . . . . . . . . . . . . . . . . . . . . . . . . . . . . . . . . . . . . . . . . . . .9
Display Symbols . . . . . . . . . . . . . . . . . . . . . . . . . . . . . . . . . . . . . . . . . . .10
Display Modes . . . . . . . . . . . . . . . . . . . . . . . . . . . . . . . . . . . . . . . . . . . . .11
Using Your Pulse Oximeter–Measurement . . . . . . . . . . . . . . . .12-14
Using Your Pulse Oximeter–Alarms . . . . . . . . . . . . . . . . . . . . . . .15-17
Using Your Pulse Oximeter–Recording . . . . . . . . . . . . . . . . . . .18-19
Quick-Release Lanyard . . . . . . . . . . . . . . . . . . . . . . . . . . . . . . . . . . . . .20
Care and Maintenance . . . . . . . . . . . . . . . . . . . . . . . . . . . . . . . . . . . . .20
Battery Installation and Replacement . . . . . . . . . . . . . . . . . . . . . . .21
Troubleshooting . . . . . . . . . . . . . . . . . . . . . . . . . . . . . . . . . . . . . . . . . . .22
Specications . . . . . . . . . . . . . . . . . . . . . . . . . . . . . . . . . . . . . . . . . . . . .23
Warranty . . . . . . . . . . . . . . . . . . . . . . . . . . . . . . . . . . . . . . . . . . . . . . .24-25
Instrucciones en Español . . . . . . . . . . . . . . . . . . . . . . . . . . . . . . . .27-51
Toll-Free Customer Care Help Line: 1-866-326-1313
Monday – Friday 8:30 a.m. – 4:30 p.m. CST
Distributed by:
Veridian Healthcare
1175 Lakeside Drive
Gurnee, IL 60031
www.veridianhealthcare.com
Made in China
#93-1132 08/12
©2012 Veridian Healthcare, LLC
2• ENGLISH
INDEX
ENGLISH • 3
STO !
LEASE ENSURE YOU HAVE ALL OF THE
FOLLOWING IECES BEFORE USE:
IF YOU ARE MISSING ANY ARTS, INCLUDING INSERTS OR
INSTRUCTION MANUALS, DO NOT RETURN TO LACE OF
URCHASE. CONTACT CUSTOMER CARE AT 8663261313.
Instruction Manual
Unit with Quick-Release Lanyard
USB Cable
Mini Software Disc
Storage Case

4• ENGLISH
INTROD CTION
Please read all instru tions arefully prior to rst use.
Thank you for purchasing a Premium Pulse Ox Fit Pulse
Oximeter. With proper care and use, your Premium Pulse Ox Fit
will provide you with many years of reliable service. The
Premium Pulse Oximeter measures user blood oxygen saturation
(SpO2) and pulse rate information for sports and aviation
activities in a small, portable, easy-to-use device.
The Premium Pulse Ox Fit is intended for use for persons
engaging in sporting and aviation activities. Persons who need
SpO2 and pulse rate measurements because of a medical
condition should not use the Pulse Ox Fit and should consult
with their physician.

ENGLISH • 5
IMPORTANT SAFEG ARDS
CARE AND SAFETY INFORMATION
GENERAL CAUTIONS AND WARNINGS
• eep unit and lanyard out of reach of children as the included
lanyard may present an entanglement or choking hazard to
small children. Adult supervision required;
never leave children unattended with unit or lanyard.
• To avoid electrical shock keep the unit away from water; never
immerse the unit in liquid as this will damage the unit
• Do not handle the unit with wet hands
• Do not use the unit if it has been submersed in water or dropped
• If any abnormality in product function occurs, discontinue use
until the unit has been examined; discontinue use and return to
the manufacturer for review and replacement under the terms
of the two-year warranty
• Do not shake the unit when in operation
• Do not disassemble the unit or attempt to repair it
LEASE READ ALL INSTRUCTIONS CAREFULLY
BEFORE USE. FAILURE TO READ AND OBSERVE
ALL RECAUTIONS COULD RESULT IN
ERSONAL INJURY OR EQUI MENT DAMAGE.

6• ENGLISH
IMPORTANT SAFEG ARDS
CARE AND SAFETY INFORMATION
O ERATING CAUTIONS AND WARNINGS
• Never tie or tape Premium Pulse Ox Fit to your nger
• Explosion hazard: Do not use the product in an explosive
atmosphere
STORAGE CAUTIONS AND WARNINGS
• Never the Premium Pulse Ox Fit the unit in direct sunlight, high
temperature or humidity
• eep the unit out of reach of small children
CLEANING CAUTIONS AND WARNINGS
• Never immerse the Premium Pulse Ox Fit in water to clean as it
may be damaged
• Follow the included instructions for cleaning the unit after each
use; if the unit has not been used for an extended period, the
device should be cleaned prior to use

The Premium Pulse Ox Fit works
by shining two light beams into
the small vessels or capillaries
of the nger to determine the
user’s the blood oxygen
saturation percentage and
pulse rate that is then displayed
on the Premium Pulse Ox Fit’s screen. The unit uses the phrase
“SpO2” to identify the oxygen saturation level and displays it as a
percentage of full capacity (100%). Pulse rate is identied by the
phrase “PR bpm” and is displayed as beats per minute.
HOW THE P LSE OX FIT WORKS
ENGLISH • 7
Light beam sensors

8• ENGLISH
FEAT RES OF YO R DEVICE
Power Button
Battery Compartment
(underside)
Digital Display
uick-Release Lanyard
USB Connection Port

ENGLISH • 9
www.veridianhealthcare.com/pulseoxdownload
SYSTEM REQ IREMENTS:
• IBM Compatible
• Windows XP, VISTA, 7(32bits)
• Mini USB Communications Port
• 16MB Memory
• 10MB Free Space on Hard Drive
Monitoring software is included
on the enclosed mini-disc, or can
be downloaded at:
PC LINK SOFTWARE
The Premium Pulse Ox Fit features the capability of real-time PC
monitoring and the ability to download a recorded monitoring
session with the included USB cable and software.

10 • ENGLISH
DISPLAY SYMBOLS
%
Sp02
95 84
PR bpm
Oxygen
Saturation
Pulse Rate
Pulse Waveform
Low Battery
Symbol
Pulse
Sound
Indication
Alarm
Indication
The Premium Pulse Ox Fit features a rotating display; the below
is a representation of all of the symbols which may appear on
the display depending on the display orientation, mode and
status of the unit:

ENGLISH • 11
DISPLAY MODES
1. 2.
SCREEN DIS LAY ORIENTATION
The Premium Pulse Ox Fit display can be adjusted to allow for
easy viewing from any angle. To change the screen’s orientation,
turn the unit on by pressing and releasing the power button.
While the unit is ON, continue to press and release the power
button until the desired screen orientation is on the display.
%
Sp02
95 84
PR bpm
97 74
%
Sp02PR bpm
98 77
%
Sp02PR bpm
97 77
%
Sp02PR bpm
97
74
%
Sp02PR bpm
%
Sp02PR bpm
97
77
3. 4.
5. 6.

12 • ENGLISH
SING YO R DEVICE
MEAS REMENT
The Premium Pulse Oximeter may be used while the user is
seated, standing or lying down. The user should not be walking
or running during measurements and should take care not to
excessively move the arm or hand where the oximeter is
attached.
RIOR TO USE
eeping the sensors clean will help ensure accurate readings.
Before and after each use, carefully swab inside the unit with a
soft cloth or cotton swab with rubbing alcohol. Do not pour the
alcohol directly on or in the unit.
Dirty hands or nail polish (especially dark shades) can also affect
reading accuracy. Washing your hands and/or removing any nail
polish prior to use to help ensure accurate readings.
The remium ulse Ox Fit features the capability of
realtime C monitoring and the ability to download a
recorded monitoring session. The included software
instruction guide provides instruction for utilizing
these features.

ENGLISH • 13
SING YO R DEVICE
MEAS REMENT
Suitable for use on
any nger (excluding
the thumb). In our
experience, the
index or middle
nger work best.
USING YOUR ULSE OX FIT
1. Squeeze the hinged end
of the unit to open the
measurement side of the
unit.
2. Insert your nger nail
side up into the unit until
resistance is felt. The unit
should gently close
below the rst knuckle of
the nger, and the
sensors inside the unit
should align with the
nger nail and pad at the
tip of the nger.

14 • ENGLISH
SING YO R DEVICE
MEAS REMENT
3. Press the power button to turn the unit on. The screen will
briey ash a test display, and then begin the measurement.
4. Solid dashes (–––) will appear on the display for a few
seconds, then the display will begin to show the oxygen
saturation (SpO2) and pulse rate (PR bpm) measurements.
Take care to not move excessively during monitoring. These
are active readings and may uctuate slightly as you observe
the display, responding to your heart rate (bpm) and other
factors.
5. The Pulse Ox Fit should only be used for spot-checking blood
oxygen saturation and pulse rate and should not remain on
the nger for more than a few minutes at a time.
6. Remove the unit from the nger. The unit will automatically
turn off after 5 seconds.
7. Clean the unit as directed before storage.

The Premium Pulse Oximeter features several alarm functions—
when the nger is out of position, when the measurement data
is outside of the set limits and when the unit has low voltage
(low battery). Alarms are set through the device menu.
NOTE: When navigating through all features in the following set-
tings, pressing and HOLDING the POWER button will
enter/change the selected setting; pressing and RELEASING the
POWER button will toggle through the available options.
1. Press and hold the POWER button,
the display will show the ‘Settings’
menu, Fig 1. To toggle within the
‘Settings’ menu, press and release
the POWER button until the Alarm
setting is selected.
2. Press and hold the POWER button to
enter the Alarm settings menu; the
top choice will be Dir, Fig 2.
Dir — Direction; allows user to set
maximum and minimum settings for
SpO2 and Pulse Rate wherein the
alarm will sound if the results of the
ongoing measurement fall above or
below the set parameters.
ENGLISH • 15
SING YO R DEVICE
ALARM MODES
Settings
Alarm
Record o
Exit
Fig 1
Dir set
Psound o
Alarm o
Exit
Fig 2

16 • ENGLISH
SING YO R DEVICE
ALARM MODES
P ound — Pulse Sound/Tone; only set as ON or OFF, when
ON the oximeter will sound a tone with every heartbeat as it
reads the user’s pulse. i.e. beep-beep-beep-beep.
Alarm — Indicates whether the
alarm function is ON or OFF; all
functions–Finger Out, Reading
Thresholds, and Low Battery–are ON
when this setting is selected as ON,
Fig 3.
3. Toggle the triangle cursor to Dir, press and hold to enter the
reading thresholds options.
Dir set
Psound o
Alarm on
Exit
Fig 3
4. Press and hold the POWER button to enter the SPO2 setting.
Within this setting you may select a High and Low point for
the SPO2 measurement.
Dir down, numbers will go down as you set the digits; Dir
up, numbers will go up as you set the digits. Press and hold
the power button to select the desired setting. Press and
release the power button to address each option–High, Low.
Toggle to Exit, then press and hold to exit the SPO2 menu.
Dir set
Psound o
Alarm o
Exit
Direction
Sp02Alm
PR Alm
Exit

ENGLISH • 17
SING YO R DEVICE
ALARM MODES
Dir down
High 099
Low 085
Exit
Dir up
High 099
Low 085
Exit
5. Repeat the same steps to set the desired alarm threshold for
the Pulse Rate (PR) measurement.
When the ALARM function i ON, the unit will beep
continuou ly if the mea urement are out of the
pecied range.
Direction
Sp02Alm
PR Alm
Exit

18 • ENGLISH
SING YO R DEVICE
RECORDING
The Premium Pulse Oximeter allows for one recording session of
up to 24 hours. This recording session can be viewed and saved
with the included Pulse Oximeter Tracking Software.
1. Press and hold the POWER button,
the display will show the ‘Settings’
menu, Fig 1. To toggle within the
‘Settings’ menu, press and release
the POWER button until the
Record setting is selected, Fig 1.
2. Press and hold the POWER button
to toggle between OFF and ON,
Fig 2; selecting ON will
immediately start the
measurement recording.
3. When the device is recording, a
small circle will appear in the
upper corner of the display screen,
Fig 3.
Settings
Alarm
Record o
Exit
Fig 1
Settings
Alarm
Record on
Exit
Fig 2
%
Sp02
95 84
PR bpm
Fig 3

ENGLISH • 19
SING YO R DEVICE
RECORDING
4. When recording continuously for an extended period
without touching the POWER button or removing the nger
from the device, the unit will go into ‘sleep’ mode, and only
the small circle will blink on the display.
5. To turn off the Record option, enter the Settings and set the
Record function to off.
NOTE: This device will only record a single measurement
session; the next recording session will override the previous
session.

20 • ENGLISH
Q ICKRELEASE LANYARD
The lanyard features a quick-release clip for easy release while in
use.
CHOKING HAZARD-The included lanyard may present an
entanglement or choking hazard to small children. Adult
supervision required; never leave children unattended with unit
or lanyard.
Before and after each use,
carefully swab inside the unit
with a soft cloth or cotton swab
with rubbing alcohol. Do not pour
the alcohol directly on or into the
unit.
The unit should be stored in a dry
environment, within the ideal
temperature range of
-40°F–140°F(-40°C–60°C).
CARE AND MAINTENANCE
Other manuals for 11-50DP
1
Table of contents
Languages:
Other Veridian Healthcare Medical Equipment manuals

Veridian Healthcare
Veridian Healthcare 11-50DP User manual

Veridian Healthcare
Veridian Healthcare VH Complete User manual

Veridian Healthcare
Veridian Healthcare TENS 22-040 User manual

Veridian Healthcare
Veridian Healthcare ProKit Combo User manual

Veridian Healthcare
Veridian Healthcare 11-50D User manual

Veridian Healthcare
Veridian Healthcare ProKit 02-127 Series User manual

Veridian Healthcare
Veridian Healthcare 11-100 User manual

Veridian Healthcare
Veridian Healthcare VH SonicMist User manual

Veridian Healthcare
Veridian Healthcare 11-100 User manual