Veridian Healthcare 09-342 User manual

INSTRUCTION MANUAL • ENGLISH & ESPAÑOL
3-YEAR
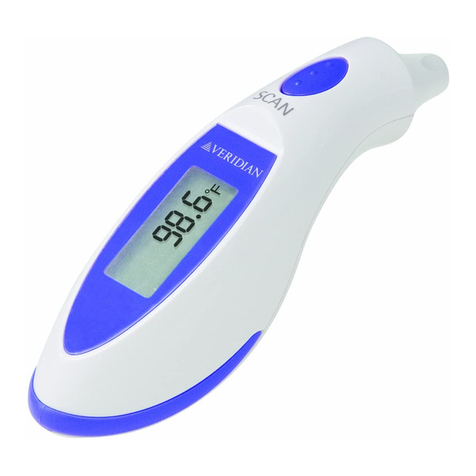
Ear & Forehead
Infrared Thermometer
Model 09-342
Please read this instruction manual
completely before operating this unit.

2 • English
STOP!
PLEASE ENSURE YOU HAVE ALL OF
THE FOLLOWING COMPONENTS
BEFORE USING YOUR EAR & FOREHEAD
INFRARED THERMOMETER
IF YOU ARE MISSING ANY PARTS,
INCLUDING INSERTS OR INSTRUCTION
MANUALS, DO NOT RETURN TO PLACE OF
PURCHASE. CONTACT CUSTOMER CARE AT
8663261313.
Thermometer 2 AAA Batteries
Instruction Manual
Quick Start Guide

English • 3
INDEX
Toll-Free Customer Care Help Line:
1-866-326-1313
Monday – Friday 8:30 a.m. – 4:30 p.m. CST
Distributed by:
Veridian Healthcare
1175 Lakeside Drive
Gurnee, IL 60031
www.veridianhealthcare.com
Made in China
#93-1442 04/19
©2019 Veridian Healthcare, LLC
Introduction............................................................................... 4
Body Temperature and Fever................................................ 5
Product Features ...................................................................... 6
Device & Display Symbols ...................................................... 7
Battery Installation................................................................... 8
Tips for Measuring Body Temperature................................ 9
Setting Language, Volume,
Measurement Mode, Date/Time...................................10-11
Measuring Temperature by Ear ....................................12-13
Measuring Temperature by Forehead ........................14-15
Measuring Object/Liquid Temperature............................16
Recalling & Clearing Readings.............................................17
Care & Safety Information....................................................18
Cleaning & Storage ................................................................19
Troubleshooting.....................................................................20
Device and Label Symbols ...................................................21
FCC Statement ........................................................................22
Electromagnetic Compatibility.....................................23-26
Product Specifications...........................................................27
Warranty...................................................................................28
Instrucionnes en Espanol ...............................................29-56

4 • English
INTRODUCTION
Thank you for purchasing this Thermometer. Please read this
instruction manual completely before using your unit to ensure safe
use, accurate results and long life of the thermometer.
This product is intended for household use; this product is not
intended to diagnose or treat any health problem or disease and
should not be used as a substitute for the consultation and advice of a
physician or other medical professional. Thermometers should only be
used under the supervision of an adult.
EAR THERMOMETERS (also known as tympanic or aural
thermometers), are a great alternative to oral, rectal and underarm
thermometers. The ear is an excellent site for measuring temperature,
as the part of the brain that regulates body temperature shares a
blood supply with the eardrum. This thermometer provides results
several times faster than the fastest oral thermometer, making it ideal
for infants and fidgety children. It can even be used while the patient
is sleeping. Unlike readings from oral thermometers, factors such as
smoking, drinking, or speaking do not affect the measurements taken
by ear thermometers.
FOREHEAD THERMOMETERS take the temperature of people and
objects with minimal contact with the patient, making it less invasive
and threatening than other thermometers, as well as potentially
more sanitary. It can even be used when the patient is sleeping. This
thermometer also measures the temperature of objects and liquids,
making it useful for determining if a baby’s milk or bathwater is ready.
All people and objects emit infrared energy. The forehead
thermometer measures that energy, taking multiple readings quickly
and converting those data to a single peak temperature, which
appears on the display.
With proper care, your new thermometer will provide your entire
family with many years of safe, accurate and comfortable temperature
readings.

English • 5
BODY TEMPERATURE AND FEVER
Body temperature can vary from 97°F(36.1°C) and 99°F(37.2°C) and
still be considered normal. The medically accepted ‘normal’ body
temperature is 98.6°F(37°C). Body temperature is commonly lower
upon waking than at any point during the rest of an individual’s active
hours.
A fever is defined as a body temperature that is elevated above the
normal for that person. It is important to determine what is normal
for an individual before determining if a fever is present. Tracking an
individual’s temperature on a consistent basis, at the same body site
and at the same time every day will help determine an individual’s
normal temperature.

6 • English
PRODUCT FEATURES
Memory
Button
Speaker
LCD
Display
SET Button
HEAD/EAR
Mode Buttons
LED Fever
Alert Signal
Probe Tip Cover/Cap
Infrared Lens
Battery
Cover

English • 7
Measurement in progress
Degrees Fahrenheit
Degrees Celsius
Forehead measurement mode
Ear Measurement Mode
Object Measurement Mode
Memory Symbol/Record Count
Low Battery
Sound On
(Note: no icon if sound is OFF)
DEVICE & DISPLAY SYMBOLS
DETAILS OF THE DIGITAL DISPLAY SCREEN
AND INTERPRETATION OF THE SYMBOLS ARE
INCLUDED THROUGHOUT THIS MANUAL.

8 • English
BATTERY INSTALLATION
This device requires 2 AAA batteries, included. A small Phillips head
screwdriver (not included) is necessary to remove the battery cover.
When the battery power becomes low, the low battery symbol
will appear on the display. The thermometer can still be used during
this time, but the batteries should be replaced as soon as possible.
If the batteries expire completely, “Lo” will be displayed along with
the low battery symbol. Batteries must be replaced before the
thermometer can be used.
To install or replace the batteries, follow these steps:
1. Use a Phillips head
screwdriver to carefully
remove the screw and
battery cover.
2. Slide the battery cover off.
3. Carefully remove the old
batteries.
4. Insert the new batteries,
ensuring that the positive
and negative ends are
aligned correctly.
5. Replace the battery cover
and secure with screw.
6. Dispose of the expired
batteries in accordance
with local environmental
policies.

English • 9
TIPS FOR MEASURING
BODY TEMPERATURE
• Wait at least one minute between consecutive readings, to ensure
accuracy.
• The patient should remain still while the reading is being taken.
• If “Lo,” “Hi,” “Err,” or another error message appears, see the
Troubleshooting section of this manual for instructions on how to
resolve the problem.
• Infrared forehead temperature readings are equivalent to oral
temperature readings.
• Readings taken while asleep should not be compared directly to
readings taken while awake, as body temperature while asleep is
typically lower.
• Do not take body temperature readings within 30 minutes of being
outdoors, exercising or bathing.
• Level of activity, time of day, and other factors may affect body
temperature. Keep records of your individual body temperature to
use as a reference when judging a fever.

10 • English
This device has a number of custom settings.
• Language —English or Spanish
• Volume —6 levels; level 1 being ‘off’ (no audio announcements)
• Measuring Unit— Fahrenheit, Celsius
• Date, Time, Year—real time measurement history
When batteries are initially installed or replaced, the features must be
set to your user preference as instructed below.
If you do not go through the setting operation, the device will still
operate but will default to English language, mid level volume,
Fahrenheit mode, and January 1 at midnight settings.
1. Press the POWER button to turn the thermometer on.
2. Press and hold the SET button for 3+ seconds to enter the
‘setting’ operation sequence; the unit will automatically move to
Setting the Language.
SETTING THE LANGUAGE
3. The current language will be announced; press
SET to alternate between English and Spanish.
L01 - English
L02 - Spanish
4. Press MEM to confirm and move to next setting.
SETTING THE VOLUME
5. The current volume will be demonstrated by
announcing ‘ENGLISH’ (or SPANISH) and the
volume level will flash.
V01 — OFF, no volume heard
V02 thru V06 — lowest to highest level
6. Press SET to scroll through the volume levels and MEM
to confirm and move to the next setting.
SETTING LANGUAGE, VOLUME,
MEASUREMENT MODE, DATE/TIME

English • 11
SETTING THE MEASUREMENT TEMPERATURE °F/°C
7. The current mode will be indicated by
announcing ‘FAHRENHEIT’ (or CELSIUS) and the
°F or °C will flash.
8. Press SET to alternate and select the desired
mode, then MEM to confirm and move to the
next setting.
SETTING THE DATE / TIME
9. The current year will flash on the display. Press SET to advance to
the desired year. Press MEM to confirm.
Repeat the same steps to set the Month, Date, Hour, and Minute:
SET to advance to desired month; MEM to confirm
SET to advance to desired date; MEM to confirm
SET to advance to desired hour; MEM to confirm
SET to advance to desired minute; MEM to confirm
NOTE: This device utilizes 24 hr Military Time.
After final MEM to confirm the minutes, the unit will beep once, the
display will show OFF and the unit will turn off. You may now proceed
to taking the desired measurement.
SETTING LANGUAGE, VOLUME,
MEASUREMENT MODE, DATE/TIME
Flashing
minutes
example
NOTE:
You may turn OFF the speaker volume at any time during
use, ideal for nighttime or sleeping patient readings.
While in-use, press and release the SET button. The speaker
icon (SHOW ICON HERE OR ABOVE BY NOTE) on the lower
right of the display indicates if the sound is on or off. If it is
shown, the sound is ON; if it is not shown, the sound is OFF.
Press SET again to toggle between ON and OFF.

12 • English
Fig. 2
MEASURING TEMPERATURE BY EAR
To measure body temperature at the EAR:
1. Remove the clear cap from the tip of the
thermometer, Fig 1.
2. Press and release the EAR / POWER
button to turn the thermometer on.
3. The display will illuminate and the unit
will briefly run a self test, Fig 2. Fig. 1
NOTE:
Proper placement and position of the probe is crucial for
eective and accurate measurement at the ear.
The ear canal should be ‘straight’ in
order for the sensor probe to work most
effectively. Gently pull the ear slighly up
and away from the head with the opposite
hand that is holding the thermometer
• For children under one year or who
cannot sit on their own, lay the child
flat and turn the head sideways,
then gently pull the ear and place
the probe.
• For older children and adults, stand at the shoulder
or elbow of the seated patient and pull back the ear
and place the probe.

English • 13
MEASURING TEMPERATURE BY EAR
4. The unit will beep twice, then show
the most recent results in memory,
Fig 3, and is now ready to take a new
measurement.
5. Gently insert the probe into the ear canal
until a slight resistance is felt.
6. Press the EAR button for a count of
one-second and release; you will hear an
audible beep.
Do not remove the thermometer nor
release the button until you hear the
beep.
7. The display will show the measurement
results, Fig. 4. If the audio is enabled, the
results will also be announced aloud.
8. The LED fever alert signal light will
illuminate, indicating where the results
fall in the fever alert range.
Fig. 4
FEVER ALERT SIGNAL LIGHT:
GREEN LIGHT— If the results below
99.5°F (37.5°C) indicating no fever is
present
AMBER (YELLOW) LIGHT —If the results
are between 99.5°F - 100.2°F (37.5°C -
37.9°C) a slight fever is present.
RED LIGHT —If the results are 100.3 °F
(38.0°C) and above, a fever is considered
present.
9. After 60-seconds of non-use, the
thermometer will automatically beep and
shut off.
Fig. 3

14 • English
Fig. 2
MEASURING TEMPERATURE BY
FOREHEAD
To measure body temperature at the FOREHEAD:
1. The clear cap should be in place during
forehead measurements, Fig 1. The hole
in the cap allows the sensor to work
effectively, while the rounded surface of the
cap helps with the ‘swipe’ action of taking a
measurement at the forehead.
2. Press and release the EAR / POWER
button to turn the thermometer on.
3. The display will illuminate and the unit will
briefly run a self test, Fig 2.
4. The unit will beep twice, then show the
most recent results in memory, Fig 3, and is
now ready to take a new measurement.
5. While looking at the patient, place the
probe tip on one temple. Press and hold
the HEAD button while slowly sliding the
thermometer across the forehead to the
opposite temple while keeping contact on
the skin.
Fig. 1
Fig. 3
NOTE:
Proper placement and position of
the probe is crucial for eective and
accurate measurement.
The forehead should be clean and
clear of excessive lotion or oil.
The temple aligns with the eyes on
each side.

English • 15
MEASURING TEMPERATURE BY
FOREHEAD
6. Release the button, the unit will beep,
and remove the thermometer from the
patient’s head. The display will show the
measurement results, Fig. 4. If the audio is
enabled, the results will also be announced
aloud.
7. The LED fever alert signal light will
illuminate, indicating where the results fall
in the fever alert range.
Fig. 4
FEVER ALERT SIGNAL LIGHT:
GREEN LIGHT— If the results below
99.5°F (37.5°C) indicating no fever is
present
AMBER (YELLOW) LIGHT —If the results
are between 99.5°F - 100.2°F (37.5°C -
37.9°C) a slight fever is present.
RED LIGHT —If the results are 100.3 °F
(38.0°C) and above, a fever is considered
present.
8. After 60-seconds of non-use, the thermometer will automatically
beep and shut off.

16 • English
MEASURING OBJECT/LIQUID
TEMPERATURE
This thermometer can measure objects and liq-
uids from 32°F to 212°F (0°C - 100°C). To measure
the temperature of an object or liquid, follow
these steps:
1. Press the EAR / POWER button to turn
the thermometer on. The unit will run a
self-test and all symbols on the display will
momentarily appear, Fig. 1.
2. The unit will beep twice, then show the
most recent results in memory.
3. Press MEM and SET simultaneously for
3-seconds to enter object measurement
mode. The object mode symbol will appear
on the display.
4. Aim the infrared lens at the object being
measured, holding the thermometer
approximately 1.0” away, Fig. 2.
5. Press the EAR/POWER button for a count
of one-second and release; you will hear an
audible beep
6. The display will show the measurement
results, Fig. 3. If the audio is enabled, the
results will also be announced aloud. The
fever light indicator does not activate
during object measurements.
Fig. 2
Fig. 1
Fig. 3
7. To revert to body measurement mode, press and hold the MEM
and SET buttons simultaneously again for 3-seconds until the
‘object’ symbol disappears. The thermometer is now ready for
body measurement at the Ear or Forehead.
8. After 60-seconds of non-use, the thermometer will automatically
beep and shut off.

English • 17
This thermometer automatically stores the last
30 readings taken. To view the readings stored in
memory, follow these steps:
1. Press the EAR / POWER button to turn
the thermometer on.
2. Press the MEM button to recall the most
recent measurement, Fig. 1.
3. The display will show the measurement
results, date/time and measurement
type – ear, forehead or object. If the audio
is enabled, the results will be announced
aloud.
4. Press and release the MEM button to
scroll through the readings from newest
to oldest. The index number in the bottom
left of the display indicates the sequential
number of the stored reading on the screen,
Fig. 2.
5. After 30 measurements have been stored
in the memory, the oldest reading will be
automatically deleted.
After review, press the EAR/POWER button to
enter measurement mode, or stop-using and the
thermometer will automatically shut off after
60-seconds of non-use.
RECALLING & CLEARING
READINGS
Fig. 1
Fig. 1

18 • English
CARE & SAFETY INFORMATION
Improper care or use of your thermometer may result in injury,
damage to the unit or inaccurate readings, which can lead to a
misdiagnosed fever. Following these instructions will ensure the
thermometer’s accuracy and long life.
• Never allow the thermometer to be used without adult supervision.
• The infrared technology used in this thermometer is safe and is not
harmful in any way. However, we recommend avoiding looking
into the lens during use.
• Clean the lens before and after each use.
• Do not touch the lens with fingers.
• Keep the protective clear cap in place when not in use.
• Dropping the thermometer or causing other heavy impact may
damage it.
• Do not store the thermometer in direct sunlight, dusty or humid
environments, or extreme temperatures.
• Do not disassemble the thermometer or attempt to repair it.
• If a reading cannot be taken, and the troubleshooting steps do not
fix the problem, the thermometer must be replaced.

English • 19
CLEANING & STORAGE
The lens should be cleaned before and after each use, to eliminate
dirt and fingerprints and ensure the accuracy of your readings. Proper
storage will prevent degradation and damage to the unit.
CLEANING:
• An alcohol swab, or a soft cotton cloth
moistened with 70% isopropyl alcohol, should
be used to gently cleanse the lens. Do not use
water to wash the thermometer.
• The body of the thermometer can be cleaned
with a soft, dry cloth.
• Never use a paper towel to clean the probe tip,
as it may scratch the lens.
• Do not immerse the thermometer or allow
liquid to enter the casing.
• Do not use cleaning agents other than alcohol
to clean the thermometer; abrasives, thinners
or gasoline will damage the unit.
STORAGE:
• Store the unit in an area away from sunlight,
dust and humidity.
• Protect the thermometer from mechanical
shock or heavy impact.
• Avoid extended exposure to extreme
temperatures. The thermometer should be stored in an
environment between -13°F and 131°F (-25°C—55°C), and with
relative humidity of 95% or lower.
• Remove the batteries during extended storage.

20 • English
TROUBLE SHOOTING
Performance may be degraded should one or more of the following
occur:
• Operation outside stated temperature and humidity range.
• Storage outside state temperature and humidity range.
• Mechanical shock.
• Patient temperature is below ambient temperature.
The following chart indicates error messages that may appear on your
display, why they appear, and how you may solve the problem.
Low battery.
Unit turned off or
battery problem.
Temperature
measurement is below
typical temperature
range.
Temperature
measurement is above
typical temperature
range.
Ambient air temperature
is outside of the
acceptable operating
range (59° F - 95° F
or 15° C - 35° C).
Replace batteries before
using thermometer again.
Press Power button to
activate unit. Check battery
type or polarity (position in
the unit).
Replace battery.
Reposition the
thermometer and try again.
Reposition the
thermometer and try again.
Use the thermometer in
an environment within the
permissible temperature
range.
Error Symbol Problem or Cause Solution
(blank display)
Table of contents
Languages:
Other Veridian Healthcare Thermometer manuals

Veridian Healthcare
Veridian Healthcare 09-349 User manual

Veridian Healthcare
Veridian Healthcare JXB-311 User manual

Veridian Healthcare
Veridian Healthcare 09-340 Instruction Manual

Veridian Healthcare
Veridian Healthcare JXB-311 User manual

Veridian Healthcare
Veridian Healthcare 09-348 User manual

Veridian Healthcare
Veridian Healthcare 09-333 User manual

Veridian Healthcare
Veridian Healthcare 08-359 User manual

Veridian Healthcare
Veridian Healthcare 08-370 User manual

Veridian Healthcare
Veridian Healthcare 09-349 User manual

Veridian Healthcare
Veridian Healthcare 09-340 User manual