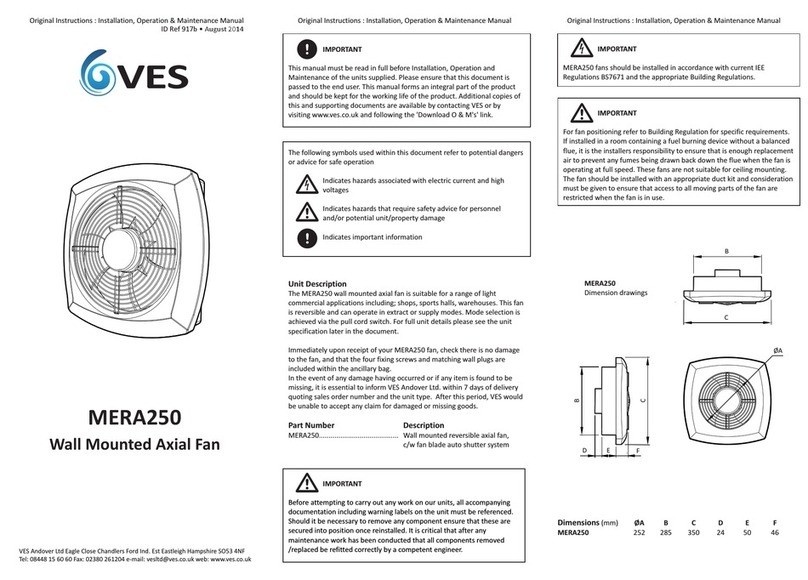
VES Ecovent EVHR User manual

1
ORIGINAL INSTRUCTIONS
VES Andover Ltd Eagle Close Chandlers Ford Ind. Est. Eastleigh Hampshire SO53 4NF
Tel: 023 8046 1150 Fax: 023 8026 1204 E-mail: vesltd@ves.co.uk Web: www.ves.co.uk
EVHR Hybrid Ventilation Unit
Installation, Operation and Maintenance Manual
VES Ref. ID.1500
Issue C
August 2019
This manual must be read in full before Installation, Operation and Maintenance of the units supplied
Please ensure that this document is passed to the end user. This manual forms an integral part of
the product and should be kept for the working life of the product. Additional copies of this and
supporting documents are available by contacting VES or by visiting www.ves.co.uk and visiting
the Information Centre.
The following symbols used within this document refer to potential dangers, advice for safe
operation or important points of reference
Indicates hazards associated with electric current and high voltages
Indicates hazards that require safety advice for personnel or potential unit/property damage
Indicates important information
page
Introduction ........................................................................................................................................ 1
Nomenclature ..................................................................................................................................... 2
Receipt of Goods and Handling ....................................................................................................... 3
Installation ......................................................................................................................................... 3
Standard Wiring and Fan Installation ............................................................................................11
Maintenance ....................................................................................................................................... 15
Ecovent®EVHR is a hybrid ventilation unit with an optimised duty of 0.50m³/s and a boost
capacity of 0.70m³/s. Units are available as a master/slave pair.
The EVHR unit is suitable for ceiling/roof mounting with vertical airflow, internal locations only.
A weatherproof roof terminal is also available.
As standard, each unit will have been supplied either pre-wired to a fitted control panel or
pre-wired termals, as specified at the time of order. The standard operating temperature of these
units is -20 to +35 °C.
For further technical details regarding dimensions and weights, contact VES on 023 8046 1150,
quoting the sales order (SO) number and the unit type as found on the unit nameplate, or
alternatively visit www.ves.co.uk.
Warning
Caution
Important
Important
Introduction
1
2
3
4
5
6
1
Contents

2
ORIGINAL INSTRUCTIONS
VES Andover Ltd Eagle Close Chandlers Ford Ind. Est. Eastleigh Hampshire SO53 4NF
Tel: 023 8046 1150 Fax: 023 8026 1204 E-mail: vesltd@ves.co.uk Web: www.ves.co.uk
EVHR Hybrid Ventilation Unit
Installation, Operation and Maintenance Manual
Nomenclature
Part Number Coding
Point Description Point Variants Details (as appropriate)
1Product EV Ecovent® Heat Recovery Units
2Heat Recovery type HR Hybrid Roof Ventilation Units
3Unit Size 4Sequential see unit outline for details
4Fan Type 7Centrifugal EC fan
5Fan Size 3, 4 Sequential
6Phase -1 230V 50Hz Single Phase
7Main Heating Null No Heating
/W LPHW Coil
/E Electric Heater Battery
8Main Filter Null No filter
9Control Panel Section Null No Controls
/CPSC/MS Fitted control panel (master)
/CPSC/SV Fitted isolator panel (slave)
10 Connection /GL Supply/Extract Grilles
/SP/GL Supply Spigot/Extract Grille
/GL/SP Supply Grille/Extract Spigot
/SP/SP Supply Spigot/Extract Spigot
11 Colour Null Galvanised finish
/R9010 RAL Colour as specified
12 Finish MT Matt
SG Semigloss
FG Full Gloss
LT Leatherette
13 Powder Coat Type Null As colour
14 Variation /0001 Sequential
EVHR474-1/CPSC/MS/GL/R9010SG/0253
EV HR 4 7 4 -1 /CPSC/MS /GL /R9010 SG /0253
1 2 3 4 5 6 7 8 9 10 11 12 13 14
Typical Example
2

3
ORIGINAL INSTRUCTIONS
VES Andover Ltd Eagle Close Chandlers Ford Ind. Est. Eastleigh Hampshire SO53 4NF
Tel: 023 8046 1150 Fax: 023 8026 1204 E-mail: vesltd@ves.co.uk Web: www.ves.co.uk
EVHR Hybrid Ventilation Unit
Installation, Operation and Maintenance Manual
Immediately upon receipt of goods, check for possible damage in transit paying particular
attention to fan impellers, coil connections and unit casing. Prior to installation please check to
ensure alignment and smooth rotation of the impeller after transit. Also check to ensure that
any ancillary items are included. These will normally be supplied fitted or, in the case of small
items, taped to the unit.
In the event of any damage having occurred or if any item is found to be missing, it is essential
to inform VES Andover Ltd. within 7 days of delivery quoting sales order number and the unit
type, as found on the unit nameplate. After this period, VES is unable to accept any claim for
damaged or missing goods.
The entire system must be considered for safety purposes. It is the responsibility of the
installer to ensure that all of the equipment is installed in compliance with the manufacturer’s
recommendations, with due regard to the current HEALTH AND SAFETY AT WORK ACT and
conforms to all relevant statutory regulations.
Where a unit is installed such that component failure could result in injury to personnel,
precautions should be taken to prevent such an injury. If the unit is installed where there is a
reasonable possibility of persons or objects coming into contact with the impeller whilst
operational, a guard should be fitted or steps taken to prevent this. It is the installer’s
responsibility to ensure that access panels are not obstructed in any way. Safe working access
for maintenance must be provided in accordance with Health and Safety and Building
Regulations. For confirmation of required access please see the appropriate unit outline
drawing.
For safe maintenance, consideration must also be given by the installer for adequate
illumination of the unit location. Further consideration should be given to the unit’s position
and secured into place as appropriate, this should include lightning/surge protection as
appropriate.
Mounting hangers, door furniture, isolators etc. extend beyond the casework, so are vulnerable
to accidental damage. Take necessary precautions so as not to cause damage whilst handling
the unit.
The weight of each unit/section is specified on the outline drawing and the total unit weight will
be displayed on the unit inspection label. When lifting the unit using a fork lift truck ensure the
whole unit is supported by the full length of the forks. It may be necessary to use fork extensions
to fully support the unit. The centre of gravity may be offset from the centre of the unit; this
needs to be taken into consideration when lifting the unit.
Handle with care. Failure to fully support the unit during lifting may result in damage to the
unit casework
Fan sections are to be rigged and lifted using spreaders, taking
into account the weight of the unit. Lifting gear should be arranged
so as not to bear on the casework, see right.
The turret is supplied with lifting lugs which can be removed after
installation. Ensure that all fixings removed are replaced correctly.
Caution
Receipt of Goods
and Handling
Installation
3
Lifting Detail
Fig.
2
4
Caution
Fork Lifting Detail
Fig.
1

4
ORIGINAL INSTRUCTIONS
VES Andover Ltd Eagle Close Chandlers Ford Ind. Est. Eastleigh Hampshire SO53 4NF
Tel: 023 8046 1150 Fax: 023 8026 1204 E-mail: vesltd@ves.co.uk Web: www.ves.co.uk
EVHR Hybrid Ventilation Unit
Installation, Operation and Maintenance Manual
Continued
Ecovent®EVHR units are designed to be mounted flush against the underside of the ceiling slab,
connected to a purpose-made terminal or turret. The connecting duct needs to be split so as to
differentiate between the supply and extract airflows. Clearance is required on all faces of the
fan section allowing access to both sides to the fans, the rear to the controls section and
clearance to the grilles.
Typical installation detail
Fig.
3
Installation 4

5
ORIGINAL INSTRUCTIONS
VES Andover Ltd Eagle Close Chandlers Ford Ind. Est. Eastleigh Hampshire SO53 4NF
Tel: 023 8046 1150 Fax: 023 8026 1204 E-mail: vesltd@ves.co.uk Web: www.ves.co.uk
EVHR Hybrid Ventilation Unit
Installation, Operation and Maintenance Manual
Continued
Installation 4
Key installation
components
(Fan Section)
Fig.
5
Key installation
components
(Roof Turret)
Fig.
4
Key installation
components
(Heating Coil Section)
Fig.
6

6
ORIGINAL INSTRUCTIONS
VES Andover Ltd Eagle Close Chandlers Ford Ind. Est. Eastleigh Hampshire SO53 4NF
Tel: 023 8046 1150 Fax: 023 8026 1204 E-mail: vesltd@ves.co.uk Web: www.ves.co.uk
EVHR Hybrid Ventilation Unit
Installation, Operation and Maintenance Manual
Continued
Ecovent®EVHR units fan sections are supplied with hangers suitable for drop-rod or
ceiling-void mounting, with supply and discharge airflow in the vertical plane.
For alternative mounting please consult your outline drawing as supplied with the unit, or
refer to VES Customer Services for further information.
Secure drop rods/unit with the appropriate fixings as shown below .
When hanging units from drop-rods, ensure that the load is evenly spread and that ALL
brackets are used within the support. Ensure that the drop rod/fixing used is selected
appropriately to accommodate the load of the unit.
Unit mounting detail
Fig.
7
Installation 4
Important
Caution
7
Separator channels are NOT structural and are included as part of the unit sealing only. When
moving assembled units ensure that ALL sections are fully supported.
Bracket Fixings
Finishing
Flange
Moun!ng Bracket
Ecovent®EVH units feature fresh air (supply) and exhaust ducts and as previously stated, are
intended to be mounted flush. In order to ensure that the two opposing airflows are separated, a
site-specific splitter (by others) MUST be incorporated into the installation. A 30mm wide
removable channel has been included on the top of the fan section and bottom of the turret to
assist with alignment.
The fresh air sensor is supplied loose inside the controls section to avoid damage during transit.
Install inside the fresh air duct using the gland position provided.
Refer to the unit outline for confirmation of the handing and ductwork arrangement as required.
Mounting Bracket
Bracket Fixings
Important
In order to allow sufficient separation between
the supply and exhaust airflows the turret is
handed , with the supply section open on three
faces and the exhaust open on only one face.
Ensure that the correct turret section aligns with
the corresponding part of the fan section
Supply Section
Exhaust Section
(Looking up)
8

7
ORIGINAL INSTRUCTIONS
VES Andover Ltd Eagle Close Chandlers Ford Ind. Est. Eastleigh Hampshire SO53 4NF
Tel: 023 8046 1150 Fax: 023 8026 1204 E-mail: vesltd@ves.co.uk Web: www.ves.co.uk
EVHR Hybrid Ventilation Unit
Installation, Operation and Maintenance Manual
Continued
The roof turret terminal is designed to sit on top of a prepared roof upstand, for further dimen-
sional details refer to the unit outline drawing. We recommend that each turret be fixed to the
upstand with coach screws or similar , through the side of the curb base into the timber
upstand see . This is especially important as strong winds could be encountered in exposed
locations.
Before cutting into the roof ensure that the correct profile basse has been purchased. All roof
apertures must be independently supported by structural trimmers in accordance with local
building regulations, in order to protect plant weight and support any service personnel. The
EVHR turret is designed to be mounted horizontally level only, not pitched.
This installation may require more than one engineer as access to both the roof and ventilated
area will be required
Curb mounting detail
Fig.
9
Installation 4
Turret with curb
base mounting
Soaker Sheet detail
Fig.
10
Caution
It is important that the height of the purlin box support be adjusted to ensure that the curb
base overlaps the soaker sheet correctly (see above). This can be achieved by adjusting the
position of the purlin trimmer. Failure to set this correctly will compromise the integrity of
the the roof and may lead to leakage
Duct Separator (by others)
Curb Base
Timber
Coach Screw
Upstand
Roof Covering
Curb Base
Lifting Lug
Fixing required
through curb base
and purlin box
Soaker Sheet
Purlin Box
Purlin Trimmer
9

8
ORIGINAL INSTRUCTIONS
VES Andover Ltd Eagle Close Chandlers Ford Ind. Est. Eastleigh Hampshire SO53 4NF
Tel: 023 8046 1150 Fax: 023 8026 1204 E-mail: vesltd@ves.co.uk Web: www.ves.co.uk
EVHR Hybrid Ventilation Unit
Installation, Operation and Maintenance Manual
Continued
Ecovent®EVHR units are offered in a LPHW heating varient. The Coil section is secured to the fan
section using self-locating joining brackets. The coil section is square in profile and can be
reconfigured to allow alternate coil connection positions relative to the fan section should that
be required.
Coils should be piped according to any relevant local codes of practice. As standard EVHR coils
are supplied with a 1” BSP connection. All external piping is to be supported independently from
the coil. The flow connection is nearest the bottom of the unit.
It is important the connecting pipework route does not obscure any of the fan section access.
It is important that coils are protected against damage from extreme weather conditions during
the winter season. If the water is allowed to freeze in the coil system,
damage may occur potentially bursting pipes and resulting in emergency problems.
EVHR LPHW units are fitted with a coil temperature sensor as standard, ensuring that boilers
run continuously in low ambient temperatures can help to prevent this.
On Ecovent® EVHR/ -W units, a Low Pressure Hot Water (LPHW) coil will be installed. The coils
are normally suitable for low pressure hot water with a range of between 80 ~ 60 °C flow and
between 70 ~ 40 °C return temperature. The coil should be regularly vented so as to avoid
potential air locks, resulting in a fall off of duty.
It is recommended that a check be made as to whether any treatment is required to the water
supply for prevention of corrosion and scaling of the equipment. Information regarding the
necessary action to be taken can be obtained from the relevant Local Water Supply Authority.
Repositioning the coil section is best done BEFORE installing the unit at roof/ceiling level.
When repositioning the coil section the casework for both sections MUST be fully supported.
A supply temperature sensor is positioned within the coil section and hardwired to the control
panel, separating the sections too far apart may result in damage to critical components.
A service loop has been provided to aid rework. Ensure the sensor cable is stowed within the
coil section when reassembling the sections so as not to trap the cable between the joints.
Installation 4
EVHR/W
LPHW Coil Units
Important
Caution
Important
Caution

9
ORIGINAL INSTRUCTIONS
VES Andover Ltd Eagle Close Chandlers Ford Ind. Est. Eastleigh Hampshire SO53 4NF
Tel: 023 8046 1150 Fax: 023 8026 1204 E-mail: vesltd@ves.co.uk Web: www.ves.co.uk
EVHR Hybrid Ventilation Unit
Installation, Operation and Maintenance Manual
Taking care with the supply sensor cable, separate the sections. If rotating the coil section
+/- 90° reposition the coil section joing bracket to the next face as shown in fig.
12
. This
bracket repositioning is not required for a 180° rotation.
Installation 4
Coil Section
Reorientation
Repositioning
Mounting Brackets
Fig.
12
Coil Section
reconfiguration
Fig.
11
Continued
With the unit fully supported, remove the 4 joining block fixings using a 6mm hex key as shown
in fig.
11
.

10
ORIGINAL INSTRUCTIONS
VES Andover Ltd Eagle Close Chandlers Ford Ind. Est. Eastleigh Hampshire SO53 4NF
Tel: 023 8046 1150 Fax: 023 8026 1204 E-mail: vesltd@ves.co.uk Web: www.ves.co.uk
EVHR Hybrid Ventilation Unit
Installation, Operation and Maintenance Manual
Continued
Rotate the sections to match the required configurationas shown in fig.
13
, again take care with
the sensor cable. If at floor level, this is eassiest to acheive by lifting and rotating the fan
section.
Installation 4
Coil section
Reassembly
Rejoining the sections
Fig.
14
Ensuring all joining brackets are securely fastened to the casework, reassemble the two
sections by retightening the four joining brackets and drawing the sections together as
shown in fig.
14
, Again take care with the sensor cable.

11
ORIGINAL INSTRUCTIONS
VES Andover Ltd Eagle Close Chandlers Ford Ind. Est. Eastleigh Hampshire SO53 4NF
Tel: 023 8046 1150 Fax: 023 8026 1204 E-mail: vesltd@ves.co.uk Web: www.ves.co.uk
EVHR Hybrid Ventilation Unit
Installation, Operation and Maintenance Manual
The electrical supply must be fully isolated before attempting to affect any work on this unit.
All electrical connections to any unit must be carried out in accordance with the current edition
of the I.E.T Regulations, only competent Electricians should be allowed to affect any electrical
work to our units.
A cable entry point is provided at the control section.
It is the responsibility of the installer to ensure that a suitable cable gland (giving adequate
protection and strain relief) is fitted, and in doing so also ensure that no internal components
are damaged during this installation. Make certain all swarf is removed before use.
It is the customer’s responsibility to supply earth fault protection through the building
installation device and a dedicated, isolated power supply with overload protection, to account
for motor start up currents.
Do not connect any unit to an electrical supply voltage outside of the specification.
The following wiring diagrams are a guide to installing the standard fan and actuator options
found on Ecovent®EVHR units. If in any doubt, for units with fitted VES controls or for special
versions of the units, consult the wiring diagram in your document pack or contact VES
Customer Services on 08448 15 60 60, quoting the sales order (SO) number and unit type as
found on the unit name plate.
For incorrect fan rotation, check with the VES Customer Services for advice, on 023 8046 1150.
Standard Wiring
and Fan Installation
5
Warning
Important
Warning
Standard Fan Details
Fig.
15
Units fitted with master controls feature an RJ45 socket at the cable entry point to enable
connection of the controls interface (HMI). This allows setup and commissioning of the unit to
be carried out via a handheld HMI, which can be left connected and mounted in a more
appropriate position or removed as required.
RJ45 Socket/HMI
connection point
Fig.
16
HMI examples

12
ORIGINAL INSTRUCTIONS
VES Andover Ltd Eagle Close Chandlers Ford Ind. Est. Eastleigh Hampshire SO53 4NF
Tel: 023 8046 1150 Fax: 023 8026 1204 E-mail: vesltd@ves.co.uk Web: www.ves.co.uk
EVHR Hybrid Ventilation Unit
Installation, Operation and Maintenance Manual
Standard Wiring
& Fan Installation
5Continued
Standard Controls
(Master)
arrangement
Fig.
17
15

13
ORIGINAL INSTRUCTIONS
VES Andover Ltd Eagle Close Chandlers Ford Ind. Est. Eastleigh Hampshire SO53 4NF
Tel: 023 8046 1150 Fax: 023 8026 1204 E-mail: vesltd@ves.co.uk Web: www.ves.co.uk
EVHR Hybrid Ventilation Unit
Installation, Operation and Maintenance Manual
Standard Wiring
& Fan Installation
5Continued
Standard Isolator
(Slave)
arrangement
Fig.
18
15

14
ORIGINAL INSTRUCTIONS
VES Andover Ltd Eagle Close Chandlers Ford Ind. Est. Eastleigh Hampshire SO53 4NF
Tel: 023 8046 1150 Fax: 023 8026 1204 E-mail: vesltd@ves.co.uk Web: www.ves.co.uk
EVHR Hybrid Ventilation Unit
Installation, Operation and Maintenance Manual
Standard Wiring
& Fan Installation
5Continued
For each room an information and override panel is provided to allow the user to
override the automatic controls.
The panel comprises:
•Boost/Pause switch (retractive)
•Boost/System Healthy active indication (orange)
•Open windows indication (green)
•+/- 2 °C Temperature trim switch (retractive) [EPEL2008 only]
Operation of the Boost switch will run the unit to maximum set speed and modulate the
dampers to allow maximum amount of fresh air possible without affecting room
temperature. If the unit is off, operation of the Boost switch will start the system in
boost mode. The system will revert to automatic operation after a preset period or if the
switch is operated again. A time delay will prevent rapid mode switching by
unauthorised operatives. The Boost/System Healthy indication will illuminate with an
asymmetric pulse.
Operation of the Pause switch will pause the system. The system will revert to automatic
operation after a preset period or if the switch is operated again. A time delay will
prevent rapid mode switching by unauthorised operatives. The Boost/System Healthy
indication will stop illuminating until the unit resumes normal operation.
The Open windows indication shall illuminate when the external temperature reaches a
suitable level to encourage manual window opening. The preset temperature for
indication shall be set through the BMS at 15° C such that should the windows be
opened, there will never be a temperature differential of more than 5° C between room
design temperature and incoming fresh air.
An optional secondary condition can be activated to enable the window open indication
if the CO2level in the classroom reaches 1500 ppm. In this case, the window open
indication will be illuminated.
EPEL2008 has the same functionality and characteristics as the above with the addition
of the +/-2°C Temperature trim switch, which provides user override of room design
temperature by +2°C or -2°C. This is limited to 2°C either side of the setpoint, the system
will revert to automatic operation after a preset period.
For details regarding older switchplate designs or special versions please contact VES
Customer Services on 08448 15 60 60 for further information
The system healthy indicator will illuminate when the unit is operational. In the event of
a system failure, the indicator will be off and the buttons will be unresponsive e.g
pressing the boost button results in no boost indication. Should this situation arise the
system should be checked for a possible fault.
Standard Controls
arrangement
Override Panel
Fig.
19
EPEL2008
Override Panel c/w temperature trim
EPEL2009
Override Panel (no trim)
Important

15
ORIGINAL INSTRUCTIONS
VES Andover Ltd Eagle Close Chandlers Ford Ind. Est. Eastleigh Hampshire SO53 4NF
Tel: 023 8046 1150 Fax: 023 8026 1204 E-mail: vesltd@ves.co.uk Web: www.ves.co.uk
EVHR Hybrid Ventilation Unit
Installation, Operation and Maintenance Manual
Maintenance 6
Before attempting to carry out any work on VES units, all accompanying documentation
including warning labels on the unit must be referenced.
Should it be necessary to remove any component, ensure they are secured into position once
reinstalled. It is critical that after any maintenance work has been conducted that all
components removed/replaced be refitted correctly by a competent engineer.
Before attempting to carry out any maintenance work, investigative or repair work on our
units, the unit MUST BE COMPLETELY ISOLATED from its electrical supply. Ensure a minimum
of two minutes after electrical disconnection before removing access panels. This will allow
any moving parts to come to a complete standstill.
Care should also be taken when accessing external units as the wind and elements may cause
moving parts to ‘windmill’.
In general, this series of units require little maintenance. In the unlikely event of component
failure, spares are available from stock at VES Andover Ltd.
When accessing the unit ensure the access panels are handled/opened in a controlled manner
so as to avoid damage to the unit or injury to personnel. This is particularly important with
bottom access units. Ensure the AHU has come to a complete stop before attempting any work
on the unit
Ecovent®EVH units feature plug & socket connections to allow easy removal/replacement of
key components. Depending on the plug type, separate the plug connection by hand (tools not
required) by either lifting the locking lever or pressing the top/bottom clasp mechanism to
open .
Plug & socket operation
Fig.
20
21
Important
Warning
Caution
20
Important
21
20
21
On reconnection, the assembly features a locating lug to ensure correct orientation. Once
rejoined, lock the connection together again using the corresponding system as shown.
Note the plugs are handed and forcing an incorrect connection may result in damage to the plug.
Caution To separate the assembly, hold the plugs to pull them apart. DO NOTpull the cables.
Plug & socket operation
Fig.
22

16
ORIGINAL INSTRUCTIONS
VES Andover Ltd Eagle Close Chandlers Ford Ind. Est. Eastleigh Hampshire SO53 4NF
Tel: 023 8046 1150 Fax: 023 8026 1204 E-mail: vesltd@ves.co.uk Web: www.ves.co.uk
EVHR Hybrid Ventilation Unit
Installation, Operation and Maintenance Manual
Maintenance 6
Supply Fan assembly
removal/installation
Fig.
24
Ecovent®EVHR roof units feature 4 double inlet centrifugal fans mounted on fan plates in
pairs. Each fan plate is secured into place using 4No. M6 fixings.
To remove the fans, ensure the unit is fully isolated and that any moving components have
come to a halt. Remove both side access panels. Separate the connecting fan plug and
socket at both sides, using the procedure as detailed on page 15. Remove and keep the 4 M6
fixings, 2 each side and carefully slide the fan plate assembly out through either side
access, taking care not to snag any adjacent components. Ensure when replacing any
components that all fixings are reinstated, that the plug and socket are correctly assembled
and that loose cables are safely stowed away from all moving parts.
EVH1
Key components
Fig.
23
Continued
2
3
1

17
ORIGINAL INSTRUCTIONS
VES Andover Ltd Eagle Close Chandlers Ford Ind. Est. Eastleigh Hampshire SO53 4NF
Tel: 023 8046 1150 Fax: 023 8026 1204 E-mail: vesltd@ves.co.uk Web: www.ves.co.uk
EVHR Hybrid Ventilation Unit
Installation, Operation and Maintenance Manual
Six Monthly Checks
Spares & Repairs
Recommended Checks
Continued
For units prior to March 2019,the fans are mounted directly onto the fan bulkhead.
To remove the fans, ensure the unit is fully isolated and that any moving components have come
to a halt. Remove the side access panels. Separate the connecting fan plug and socket, using the
procedure as detailed on page 10. Carefully remove the double deflection grille from the bottom
of the unit retaining the fixings, and remove the fixings holding the appropriate fan. Remove the
fan through the side access and replace as required. Again ensure all fixings are reinstated, that
the plug and socket are correctly assembled and that loose cables are safely stowed away from
all moving parts.
In order to keep the unit in good order the following maintenance routine is recommended:
The fan impeller should be cleaned every 6 months. Failure to clean the fan on a regular basis could
result in loss of fan performance, or cause it to fall out of balance. If a fan is stationary for long periods
in a humid atmosphere, it should be switched ON for minimum of two hours every month to remove
any moisture that may have condensed within the motor.
The fan motors are maintenance free due to the use of ball bearings with ‘life-long lubrication’.
At the end of the grease life it may be necessary to change the fan unit.
Failure to keep dampers clean could result in the damper becoming inoperative. Clean damper
blades and frames and lubricate with PTFE aerosol or equivalent.
For units with integrated heating, the heating coil should be inspected for debris, dust or dirt build
up. If found contaminated, foreign matter should be removed accordingly; superficial dust or debris
can be removed from the surface of the heat exchange by gently brushing. Loosened debris can then
be vacuumed from the surface of the coil.
When enquiring after or ordering spares contact VES Spares Department, quoting the sales order (SO)
number and unit type as found on the unit nameplate.
Tel: 023 8046 1150 • Fax: 023 8026 1204
At the end of their useful life the packaging and product should be disposed of via a suitable
recycling centre. Do not dispose of with normal household waste. Do not burn.
PLEASE ENSURE THAT THIS DOCUMENT IS PASSED ON TO THE END USER
We reserve the right to alter the specifcation without notice ©VES Andover Ltd. 2019.
No part of this publication may be photocopied or otherwise reproduced without the prior permission in writing
from VES Andover Ltd.
Maintenance 6
WEEE Directive
Fan Fixings
Supply Grille
(removed)
Supply Fan assembly
removal/installation
Fig.
25
Table of contents
Other VES Fan manuals

VES
VES POLO150 Instruction manual

VES
VES FALA100/12V/TR User manual

VES
VES ecovent EVH User manual

VES
VES Roundfan RM100/EC Manual

VES
VES Short Case Axial series Instruction manual

VES
VES Colourfan CLE Series User manual

VES
VES ECVD72 User manual

VES
VES Colourfan Series User manual

VES
VES Ecovent EVH Series Manual

VES
VES EURO100 User manual
Popular Fan manuals by other brands

Panasonic
Panasonic F-M15H2 Operating and installation instructions

Alpha Fan
Alpha Fan AX828-3B/56 instruction manual

Arlec
Arlec Breeze APF360 instruction manual

Greenheck
Greenheck RV Installation, operation and maintenance manual

Monte Carlo Fan Company
Monte Carlo Fan Company 5DS34 Series Owner's guide and installation manual

Hantech
Hantech RD-40B instruction manual