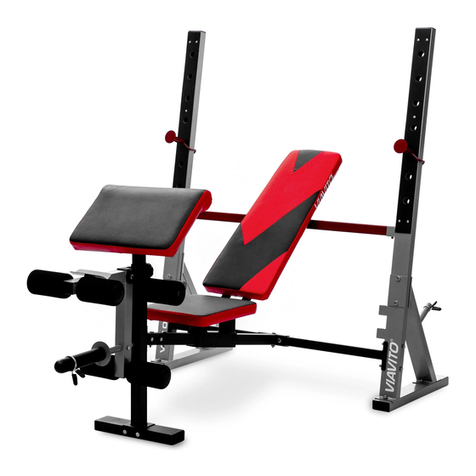
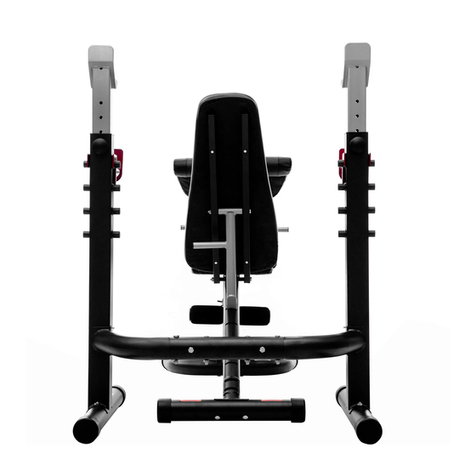
Viavito SX200 User manual

Owner’s Manual.
Manual version 1.1
R
Folding Barbell
Weight Bench
SX200
www.viavito.com

02 www.viavito.com
Manual Contents
R
Congratulations
on purchasing your
very own SX200
Folding Barbell
Weight Bench.
You have chosen a high-quality, safe and
innovative piece of exercise equipment as
your training partner and we are certain
it will keep you motivated on the way to
achieving your personal tness goals.
Please take the time to read this owner’s
manual as it will help you to get the most
out of your new piece of equipment.
For more information, or if you require
any assistance please email us at
support@viavito.com
Safety Standards:
The weight bench conforms
to the following standard:
EVS-EN ISO 20957-4:2016
Safety Information 03/05
Assembly 06/22
Product Overview 06
Par t Id en ti c at io n Ch ar t 0 7
Before You Begin 08
Assembly Instructions 09/19
Adjustment 20/22
Conditioning Guidelines 23/26
Beginner’s Guide to Exercise 24
Stretching Guide 25/26
Customer Support 27/28
Contact Information 27
Manufacturer’s Warranty 28
Technical Information 29/31
Exploded Diagram 29
Parts List 30
Space Required 31

03www.viavito.com
Safety Information
• Please read all the instructions carefully
before using this product.
• Retain this manual for future reference.
• The specications of this product may
vary slightly from the illustrations and
are subject to change without notice.
This exercise machine is built for optimum
safety. However, certain precautions apply
whenever you operate a piece of exercise
equipment. Be sure to read the entire
manual before you operate your machine.
In particular, note the following safety
precautions:
01 Check all the bolts, nuts and other con-
nections before using the bench for the
rst time and ensure that it has been
built correctly and is safe to be used.
02 This product is intended for indoor,
home use only. Do not use the weight
bench in any commercial, rental, or
institutional setting.
03 Set up the bench in a dry, level place
and keep it away from moisture and
water.
04 Choking hazard! Keep small parts and
polybags away from children.
05 Place the weight bench on a stable and
level surface with enough clearance
around the bench (at least 0.6m in all
directions).
06 Only use the bench for its intended
purpose. It is not suitable for
therapeutic or medical purposes.
07 The bench may only be used by one
person at a time.
08 Always wear appropriate workout
clothing when exercising. Sports
shoes are required when using this
equipment.
09 Periodically check all bolts, nuts and
other connections to make sure that
they are secure and in good working
condition.
10 Damaged or worn parts may be
dangerous for users and the integrity
of the weight bench. Replace worn or
damaged components immediately and
do not use the bench until any issues
have been resolved. Use only spare
parts supplied by Viavito.
11 Unauthorized repairs or altering the
bench’s design or functions may be
dangerous and will void the warranty.
12 WARNING! Inappropriate use of this
machine such as while under the
inuence of drugs or alcohol, not in line
with instructions or excessive usage,
may result in serious injury or death.
13 Disabled persons should not use this
equipment without a qualied person
or physician in attendance.
14 Children and pets should be kept away
from the weight bench at all times.
15 Always set both weight rests at the
same height.
R

04 www.viavito.com
R
16 Keep hands and feet away from moving
parts.
17 Always place an equal amount of
weight on each side of the barbell.
18 If you feel pain or dizziness at any time
while exercising, stop immediately and
begin cooling down.
19 The weight bench is designed to
support a maximum user weight of
100kg and a maximum total weight of
180kg. Do not place more than 80kg,
including a barbell, on the weight
rests. Do not place more than 30kg
on the leg lever. Note: The weight
bench is designed to be used with a
Standard barbell and 1” weight plates.
The weight bench does not include a
barbell or weights.
WARNING: Before beginning using this
equipment or doing any exercise program,
consult your doctor. This is especially
important for people over the age of 35 or
those with pre-existing health problems.
Viavito assumes no responsibility for
personal injury and/or property damage
sustained by or through the use of this
product.
SAVE THESE INSTRUCTIONS.

05www.viavito.com
R
l
l
l l
l
ll
ll
l l l l
ll
ll
ll
100 kg
80 kg
30 kg
Warning Decal Placement

ASSEMBLED DIMENSIONS:
157X76X119 CM
Backrest Support
Backrest
Seat
Leg Lever
Weight Tube
Lock Pin
Lock Knob
Upright
06 www.viavito.com
R
Product Overview
Thank you for selecting the Viavito SX200 folding barbell weight bench. This manual will
guide you through the assembly process.
Assembly

07
www.viavito.com
R
Part Identication Chart
M6 Washer (22)
M10 x 135mm Bolt (23)
M10 x 63mm Bolt (25) M10 x 66mm Bolt (28)
M6 x 16mm
Screw (24)
M6 x 40mm Screw (32) M10 x 19mm Screw (5)
M10 Washer (30)
M10 Locknut (31)
M10 x 35mm Carriage Bolt (37)
Refer to the drawings below to identify small parts used in assembly. The number in
brackets by each drawing is the key number of the part, from the Parts List on page 30.
Note: Some small parts may have been preattached. If a part is not in the hardware
kit, check if it has been preattached.

The following tools (not included) may be required
for assembly:
two adjustable wrenches
one rubber mallet
one standard screwdriver
one Phillips screwdriver
08 www.viavito.com
R
Before You Begin
To make assembly easier, carefully read the
following information and instructions:
• Assembly requires two persons.
• Because of its weight and size, the weight
bench should be assembled in the location
where it will be used. Make sure that there
is enough clearance to walk around the
weight bench as you assemble it.
• Place all parts in a cleared area and
remove the packing materials. Do not
dispose of the packing materials until
assembly is completed.
• The following tools (not included) may
be required for assembly:
- 2 adjustable wrenches
- 1 rubber mallet
- 1 standard screwdriver
- 1 Phillips screwdriver
Assembly may be easier if you have a set of
wrenches. To avoid damaging parts, do not
use power tools.

1
36
1
31
31
37 36
1
09
www.viavito.com
Assembly Instructions
Step One.
01 Attach a Base (36) to an Upright (1)
with two M10 x 35mm Carriage Bolts
(37) and two M10 Locknuts (31).
02 Attach the other Base (36) to the
other Upright (1) in the same way.
R
Please Note: Hand tighten bolts and locknuts until the machine is fully assembled.
Locknuts may require additional force to tighten completely.

28
11
11
11
1
10
31 1
11
10 www.viavito.com
R
Step Two.
01 Orient one of the Uprights (1) so that
the Upright Cover (10) is on the side
shown.
02 Attach two Joint Plates (11) to the
Upright (1) with two M10 x 66mm Bolts
(28) and two M10 Locknuts (31). Do
not tighten the Locknuts yet.
03 Repeat this step with the other
Upright (1).

28
11
11
2
31
11
www.viavito.com
Step Three.
01 Attach one end of the Crossbar (2)
to two Joint Plates (11) with two
M10 x 66mm Bolts (28) and two M10
Locknuts (31). Do not tighten the
Locknuts yet.
02 Attach the other end of the Crossbar
(2) in the same way.
R

28
5
30
31
3
4
12 www.viavito.com
R
Step Four.
01 Attach the Front Leg (4) to the Frame (3) with an M10 x 19mm Screw (5), an M10 x
66mm Bolt (28), an M10 Washer (30) and an M10 Locknut (31). Do not tighten the
Screw and the Locknut yet.

2
25
27
331
35
2
Grease
13
www.viavito.com
Step Five.
01 Apply some of the included grease to
an M10 x 63mm Bolt (25).
02 Attach the Frame (3) to the upper set
of holes in the bracket on the Crossbar
(2) with the M10 x 63mm Bolt (25)
and an M10 Locknut (31). Do not
overtighten the Locknut; the Frame
must pivot easily.
03 Next, tighten the Lock Knob (27) into
the bracket on the Crossbar (2) and into
the Frame (3).
04 See the inset drawing. Insert the Lock
Pin (35) into the lower set of holes in
the bracket on the Crossbar (2).
R

1
14
15
15
1
Locking
Pin
Locking
Pin
Locking
Pin
14 www.viavito.com
R
Step Six.
01 Insert the Backrest Support (14) into
a set of holes in the Uprights (1).
Rotate the Backrest Support so that
the locking pin is wrapped around the
Upright (see the inset drawing).
02 Next, insert a Weight Rest (15) into an
Upright (1). Rotate the Weight Rest so
that the locking pin is wrapped around
the Upright.
03 Attach the other Weight Rest (15)
in the same way. Make sure that the
Weight Rests are at the same height.
04 See steps 2–4. Tighten the M10 Locknuts
(31) and the M10 x 19mm Screw (5) used
in these steps.

25
31
6
4
Grease
15
www.viavito.com
Step Seven.
01 Apply grease to an M10 x 63mm Bolt
(25).
02 Attach the Leg Lever (6) to the Front
Leg (4) with the M10 x 63mm Bolt
(25) and an M10 Locknut (31). Do not
overtighten the Locknut; the Leg
Lever must pivot easily.
R

6
13
13
13
34
34
34
34
13
12
12
16 www.viavito.com
R
Step Eight.
01 Insert a Pad Tube (12) into the Leg
Lever (6). Slide two Foam Pads (13)
onto the Pad Tube (12), and then press
two Pad Caps (34) into the Pad Tube.
02 Attach the other Pad Tube (12) Foam
Pads (13) and Pad Caps (34) in the same
way.

8
722
32
22
32
Wide
End
Holes
17
www.viavito.com
Step Nine.
01 Orient the Backrest (8) and the Back-
rest Tubes (7) as shown.
02 Attach the Backrest Tubes (7) to the
Backrest (8) with four M6 x 40mm
Screws (32) and four M6 Washers (22).
Do not tighten the Screws yet.
R

31 30
7
3
23
30
Tube Grease
18 www.viavito.com
R
Step Ten.
01 Apply grease to an M10 x 135mm Bolt
(23).
02 Attach the Backrest Tubes (7) to the
welded tube on the Frame (3) with
the M10 x 135mm Bolt (23), two M10
Washers (30) and an M10 Locknut (31).
Do not overtighten the Locknut; the
Backrest Tubes must pivot easily.
03 See step 9. Tighten the M6 x 40mm
Screws (32).

9
3
24
19
www.viavito.com
Step Eleven.
01 Attach the Seat (9) to the Frame (3) with
four M6 x 16mm Screws (24).
02 Make sure that all parts are properly
tightened before you use the weight
bench.
R

1
8
2
14
1
Locking
Pin
20 www.viavito.com
R
Adjustment
Make sure that all parts are properly tightened each time the weight bench is used.
Replace any worn parts immediately. The weight bench can be cleaned with a damp cloth
and a mild, non-abrasive detergent; do not use solvents to clean the weight bench.
ADJUSTING THE BACKREST
The Backrest (8) can be used in a declined
position, a level position, or either of two
inclined positions.
To use the Backrest in the declined
position, remove the Backrest Support (14)
and lay the Backrest on the Crossbar (2).
To use the Backrest (8) in the level position
or an inclined position, lift the Backrest
and insert the Backrest Support (14) into
one of the sets of holes in the Uprights (1).
Rotate the Backrest Support so that the
locking pin is wrapped around the Upright.
WARNING: When using the Backrest (8)
in a level position or an inclined position,
make sure that the Backrest Support (14) is
inserted completely into both Uprights (1)
and that it is turned to the locked position.
Table of contents
Other Viavito Fitness Equipment manuals

Viavito
Viavito VX1000 User manual

Viavito
Viavito Flat to Incline Weight Bench User manual

Viavito
Viavito PT1000 GT VKR User manual

Viavito
Viavito SINA User manual

Viavito
Viavito TX1000 User manual

Viavito
Viavito ST1000 User manual

Viavito
Viavito Studio Pro 2000 User manual

Viavito
Viavito TG400 User manual

Viavito
Viavito GYM BALL User manual