manuals.online logo
Brands
  1. Home
  2. •
  3. Brands
  4. •
  5. VIBIA
  6. •
  7. Home Lighting
  8. •
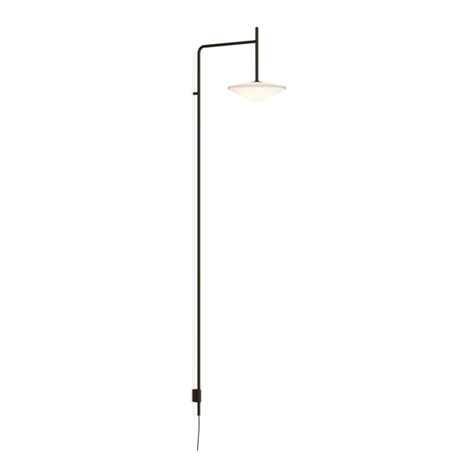
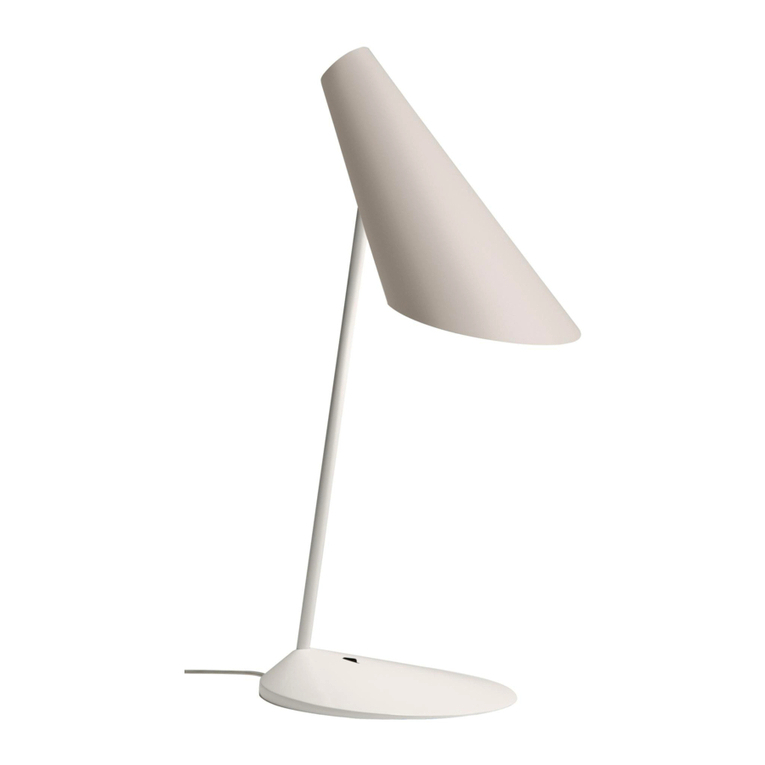
  9. VIBIA Port User manual

VIBIA Port User manual

SUPPLI
ED MATERIAL MATERIAL SUMINISTRADO
GELIEFERTES MATERIAL
2.
TECHNICAL SPECIFICATIONS ESPECIFICACIONES TÉCNICAS TECHNISCHE D
ATEN
Port
Des ign by J. L. Xuclà
ASSEMBLY INSTRUCTIONS
INSTRUCCIONES DE MONTAJE
MONTAGEANLEITUNG
4650 4655
1 Allen key / Llave allen / Inb sschlüssel 1 n. 1 n.
2 Lamp str ct re / Estr ct ra l minaria / Le chten-Str kt r 1 n. 1 n.
4650
4655
1.
4650.
Net Weight / Peso Neto / Netto-Gewicht 2,1 Kg
1 x CF G9 230V 9W Max.
50 Hz
4655.
Net Weight / Peso Neto / Netto-Gewicht 5,8 Kg
1 x CF E27 230V 20W Max.
50 Hz
Class I. Prod ct with an additional protection cable (gro nds).
Clase I. Aparato con n cable protector adicional (toma de tierra).
Klasse I. Apparat mit z sätzlichen Sch tzleiter (Erdkabel).
D st-tight prod ct. Protected against water spray.
Prod cto totalmente estanco al polvo. Protegido contra las
proyecciones de ag a.
Sta bdicht. Sch tz gegen das Eindringen von Spritzwasser.
Prod ct that CAN be in contact with normally-flammable materials
(wood or others).
Está permitido q e el prod cto marcado con este simbolo esté en
contacto con materiales normalmente inflamables (maderas otros).
Es ist erla bt Prod kte mit diesem Etikett a f normal entflammbaren
Oberflächen (Holz sw.) z montieren.
Alternating c rrent
Corriente alterna
Wechselstrom
Before assembling an installing this pro uct, carefully
rea the following:
Antes e proce er al montaje e instalación e esta
luminaria, leer eteni amente las siguientes
consi eraciones.
Bevor Sie mit er Montage ieser Leuchte beginnen,
sollten Sie ie folgen en Hinweise in aller Ruhe lesen un
berücksichtigen.
-Switch of the mains before installing the lamp. -Desconectar el s ministro eléctrico antes de proceder a la
instalación de la l minaria.
- Schalten Sie vor dem elektrischen Anschl ss den Strom ab.
-Never se a b lb with a wattage exceeeding the
recommended one. Always se a b lb with the recommended
wattage or lower.
-En ningún caso debe tilizarse na bombilla de potencia
s perior a la recomendada. Utilizar siempre la bombilla
recomendada o de potencia inferior.
-Niemals sollten Sie ein stärkeres als das empfohlene
Le chtmittel verwenden. Ben tzen Sie immer das empfohlene
Le chtmittel.
-If the steel cable or the power cord of this lamp is damaged, it
m st be replaced only by the man fact rer or their technical
service or by a person capacitated to this effect to avoid any
risk.
-Si el cable flexible o cordón de esta l minaria está dañado,
deberá s stit irse excl sivamente por el fabricante o s
servicio técnico, o por na persona con c alificación
eq ivalente con objeto de evitar c alq ier riesgo
- Wenn das Kabel dieser Le chte beschädigt werden sollte,
m ss es a sgeta scht werden. Dies darf a sschliesslich n r
d rch den Fabrikanten, seinem K ndendienst oder einer
hierfür q alifizierten Person geschehen, m jegliche Gefahr
a sschliessen z können.
-We recommend reading the man al before installaing the
lamp. Keep this instr ctions for f t re reference since thei
contain Information on b lb replacing and maintenance.
-Recomendamos leer el man al antes de iniciar la instalación
de la l minaria. G ardar estas instr cciones para f t ras
cons ltas, contienen información acerca del mantenimiento y o
s stit ción de las bombillas.
-Wir empfehlen vor Montagebeginn die Anleit ng z lesen.
Bewahren Sie die Anleit ng für etwaige z künftige Fragen a f,
da sie Informationen über Instandhalt ng nd
Le chtmittelta sch beinhaltet.
Caution / Precaución / Vorsicht
EN
D
ES
ES
D
ASSEMBLY INSTRU
CTIONS INSTRUCCIONES DE MONTAJE MONTAGEANLEITUNG
EN
1.
Remove the two screws (A) with the allen key (B)
s pplied.
2. Loosen and release the inner nit (C) from the
o ter piece (D) by following the steps shown.
3. Remove the fo r screws (E) to release the
diff ser (F).
4. Slide the diff ser (F) down in order to install the
b lb.
IMPORTANT NOTICE
:
Switch off the mains before installing the lamp.
IMPORTANTE:
Desconectar el suministro eléctrico antes e
realizar la instalación e la luminaria.
WICHTIG:
Schalten Sie en Strom ab. bevor Sie ie
Leuchtenmontage realisieren.
1.
Q itar los dos tornillos (A) con la llave allen
s ministrada (B).
2. Desencajar y extraer el conj nto interior (C) de la
pieza exterior (D) sig iendo los pasos indicados.
3. Extraer los c atro tornillos (E) para liberar el
dif sor (F).
4. Desplazar el dif sor (F) para proceder a la
instalación de la bombilla.
1.
Entfernen Sie die Schra ben (A) mit dem im
Liefer mfang enthaltenen Inb sschlüssel (B).
2. Lösen Sie das Innenteil (C) vom A ßenteil (D).
Folgen Sie hierz den angezeigten Schritten.
Sie das Innenteil (C) schließlich hera s.
3. Setzen Sie den Diff sor (F) frei, indem Sie die
vier Schra ben (E) hera sdrehen.
4. Bewegen Sie z m Einsetzen der Glühlampe den
Diff sor (F) nach nten.
B
A
2
st
3
st
F
E
F
F
C
1
st
D
Ref. 4650
Ref. 4655
1
2
4
3
-Use a slightly-wet cotton cloth for cleaning.
-Para limpiar la l minaria, sar n paño de algodón
ligeramente h medecido en ag a.
-Z r Reinig ng der Le chte n tzen Sie einen leicht
angefe chteten Ba mwoll-Lappen.
-In case of malf nction or damage, please contact
the retailer who sold the lamp.
-En caso de avería o incidente con la l minaria,
contactar directamente con el establecimiento en
q e se adq irio.
-Im Falle des A sfalls oder einer Fehlf nktion der
Le chte setzen Sie sich direkt mit dem Unternehmen in
Verbind ng bei dem Sie die Le chte bezogen haben.
Maintenance / Mantenimiento / Instan haltung
EN DES
ASSEMBLY INSTRUCTIONS INSTRUCCIONES DE MONTAJE MONTAGEANLEITUNG
5
.
After fitting the b lb, replace the diff ser (F) and
sec re it with the 4 screws (E).
6. Insert and fit into place the inner nit (C) inside
the o ter piece (D) by following the steps shown.
7. Finally, fit the two screws (A) sing the allen key
(B) s pplied to sec re the assembly.
GRUPO T DIFFUSION S.A. Barcelona, 72-74. 08820 El Prat de Llobregat (Barcelona - Spain)
Nacional Tel 934 796 970. Fax 934 796 973. Internacional Tel +34 934 796 971. Fax +34 934 782 026
www.vibia.com gr po-t@gr po-t.com
ES
D
EN
5
.
Posteriormente recolocar el dif sor (F) y fijarlo
con los 4 tornillos (E).
6. Introd cir y encajar el conj nto interior (C) en la
pieza exterior (D) sig iendo los pasos indicados.
7. Finalmente, montar los dos tornillos (A) con la
llave allen s ministrada (B), para aseg rar el
conj nto.
5
.
Bringen Sie anschließend den Diff sor (F) wieder
in seine Position nd befestigen Sie diesen mit den
4 Schra ben (E).
6. Passen Sie das Innenteil (C) wieder in das
A ßenteil (D) ein. Folgen Sie hierz den
angezeigten Schritten.
7. Bringen Sie abschließend z r Sicher ng des
Ganzen die zwei Schra ben (A) mit dem
mitgelieferten Inb sschlüssel (B) an.
F
E
1
st
C
D
2
st
3
st
B
A
6
7
5

This manual suits for next models

2

Other VIBIA Home Lighting manuals

VIBIA Tempo 5766 User manual

VIBIA

VIBIA Tempo 5766 User manual

VIBIA Jazz 1333 User manual

VIBIA

VIBIA Jazz 1333 User manual

VIBIA Flex User manual

VIBIA

VIBIA Flex User manual

VIBIA Knit User manual

VIBIA

VIBIA Knit User manual

VIBIA Suite 6007 User manual

VIBIA

VIBIA Suite 6007 User manual

VIBIA Flamingo User manual

VIBIA

VIBIA Flamingo User manual

VIBIA Flat User manual

VIBIA

VIBIA Flat User manual

VIBIA Suite 6007 User manual

VIBIA

VIBIA Suite 6007 User manual

VIBIA Mayfair 5500 User manual

VIBIA

VIBIA Mayfair 5500 User manual

VIBIA Sticks User manual

VIBIA

VIBIA Sticks User manual

VIBIA Brisa User manual

VIBIA

VIBIA Brisa User manual

VIBIA Swing User manual

VIBIA

VIBIA Swing User manual

VIBIA Arik Levy Sticks 7338 User manual

VIBIA

VIBIA Arik Levy Sticks 7338 User manual

VIBIA Swing User manual

VIBIA

VIBIA Swing User manual

VIBIA Musa User manual

VIBIA

VIBIA Musa User manual

VIBIA Suite 6006 User manual

VIBIA

VIBIA Suite 6006 User manual

VIBIA Wireflow User manual

VIBIA

VIBIA Wireflow User manual

VIBIA I.Cono 0700 User manual

VIBIA

VIBIA I.Cono 0700 User manual

VIBIA Origami User manual

VIBIA

VIBIA Origami User manual

VIBIA Knit User manual

VIBIA

VIBIA Knit User manual

VIBIA Suite 6007 User manual

VIBIA

VIBIA Suite 6007 User manual

VIBIA Swing User manual

VIBIA

VIBIA Swing User manual

VIBIA Swing 0516 User manual

VIBIA

VIBIA Swing 0516 User manual

VIBIA Flat 5950 User manual

VIBIA

VIBIA Flat 5950 User manual

Popular Home Lighting manuals by other brands

Philips myLiving 37910/17/16 brochure

Philips

Philips myLiving 37910/17/16 brochure

Safavieh Lighting VYNN TBL4507 manual

Safavieh Lighting

Safavieh Lighting VYNN TBL4507 manual

BROSA Lyra Floor Lamp Assembly guide

BROSA

BROSA Lyra Floor Lamp Assembly guide

Philips 322041716 Specifications

Philips

Philips 322041716 Specifications

Dale Tiffany TF100683 Assembly instructions

Dale Tiffany

Dale Tiffany TF100683 Assembly instructions

Anglepoise Original 1227 Mini manual

Anglepoise

Anglepoise Original 1227 Mini manual

slamp: Clizia Table Assembling instructions

slamp:

slamp: Clizia Table Assembling instructions

JONATHAN Y JYL3046 quick start guide

JONATHAN Y

JONATHAN Y JYL3046 quick start guide

UMAGE EOS Assembly guide

UMAGE

UMAGE EOS Assembly guide

Philips Ecomoods 402351716 brochure

Philips

Philips Ecomoods 402351716 brochure

wofi 17602 Series installation instructions

wofi

wofi 17602 Series installation instructions

Lightolier MFC Specifications

Lightolier

Lightolier MFC Specifications

Original BTC Hugo instruction manual

Original BTC

Original BTC Hugo instruction manual

modway EEI-5300 Assembly instructions

modway

modway EEI-5300 Assembly instructions

Mobi Technologies GloMate quick start guide

Mobi Technologies

Mobi Technologies GloMate quick start guide

Qazqa Nona WL 1 instruction manual

Qazqa

Qazqa Nona WL 1 instruction manual

Royal Sovereign RDL-50T-S owner's manual

Royal Sovereign

Royal Sovereign RDL-50T-S owner's manual

VARIN KL-1734WF-A user manual

VARIN

VARIN KL-1734WF-A user manual

manuals.online logo
manuals.online logoBrands
  • About & Mission
  • Contact us
  • Privacy Policy
  • Terms and Conditions

Copyright 2025 Manuals.Online. All Rights Reserved.