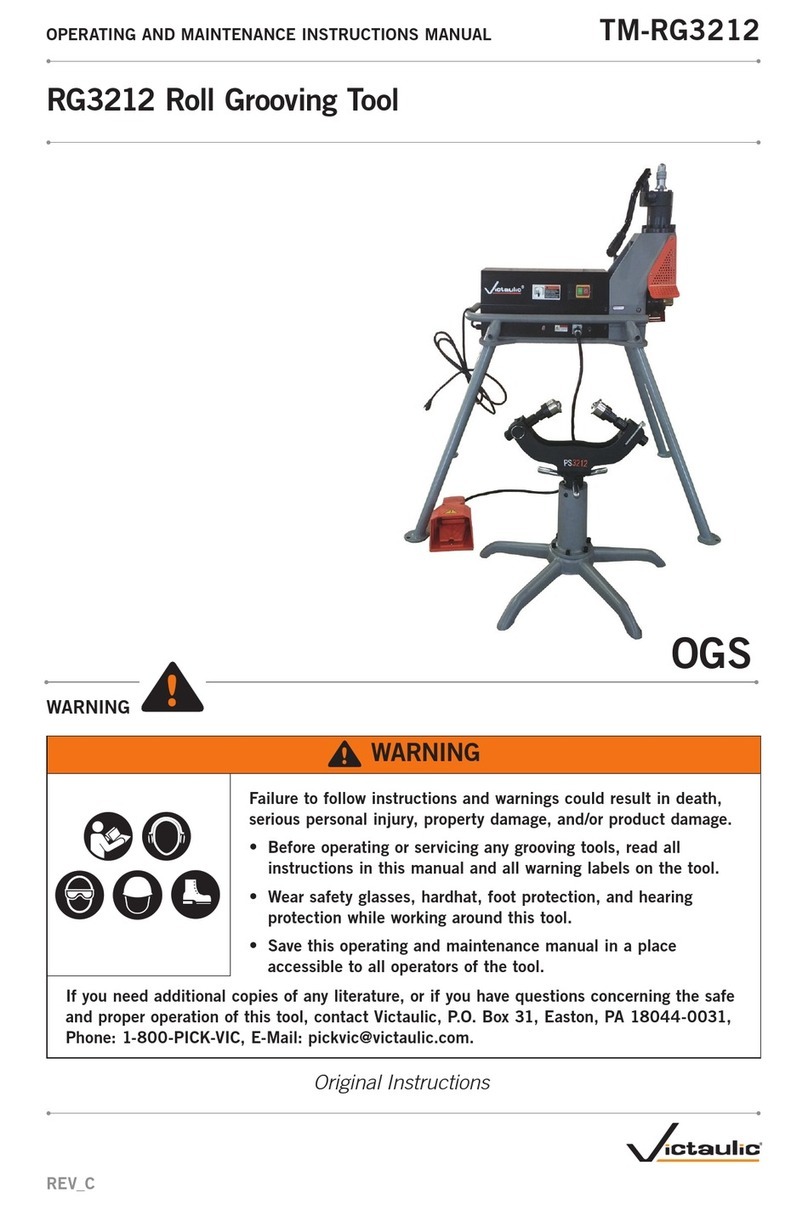
Victaulic VE12 Manual

Operating
and Maintenance
Instructions Manual
VE12
Manual
Grooving Tools
Failure to follow Instructions and warnings can result in serious injury.
• Before installing, operating, or servicing the VE12 Tool, read this Manual
and all warning labels on the tools.
• Always wear safety glasses and foot protection.
If you need additional copies of the manual or have any questions about the
safe operation of these tools, contact Victaulic Tool Company, P.O. Box 31,
Easton, PA 18044-0031, 610-559-3300.
TM-VE12.0743 Rev.A Page 0 Tuesday, May 29, 2001 6:04 PM

1
VE12
Read this first
Definitions for identifying the various hazard levels shown on warning labels or to indicate proper
safety procedures in this Manual are provided below.
This safety alert symbol indicates important safety messages on warning labels and in
this manual. When you see this symbol be alert to the possibility of personal injury and
carefully read and fully understand the message that follows.
The use of the word “WARNING” signifies the pres-
ence of hazards or unsafe practices which could
result in severe personal injury or death if instruc-
tions, including recommended precautions, are
not followed.
The use of the word “CAUTION” signifies possible
hazards or unsafe practices which could result in
minor injury, product or property damage if in-
structions, including precautions, are not fol-
lowed.
NOTICE
The use of the word “NOTICE” signifies special
instructions which are important but not related to
hazards.
INDEX
Index . . . . . . . . . . . . . . . . . . . . . . . . . . . . . . . . . . 1
Important Information . . . . . . . . . . . . . . . . . . . . 1
Operator Safety Instructions. . . . . . . . . . . . . . . 2
General . . . . . . . . . . . . . . . . . . . . . . . . . . . . . 2
Tool Set-Up . . . . . . . . . . . . . . . . . . . . . . . . . . 2
Operating Tool . . . . . . . . . . . . . . . . . . . . . . . 2
Tool Maintenance. . . . . . . . . . . . . . . . . . . . . 2
Introduction . . . . . . . . . . . . . . . . . . . . . . . . . . . . 3
Tool Nomenclature. . . . . . . . . . . . . . . . . . . . . . . 3
Receiving Tool . . . . . . . . . . . . . . . . . . . . . . . . . . 4
Pre-operation . . . . . . . . . . . . . . . . . . . . . . . . . . . 4
Pipe Preparation . . . . . . . . . . . . . . . . . . . . . . 4
Tool and Pipe Set Up . . . . . . . . . . . . . . . . . . . . . 4
Pipe Vise Set Up . . . . . . . . . . . . . . . . . . . . . . 4
Procedure . . . . . . . . . . . . . . . . . . . . . . . . . . . 4
Groove-In-Place Set Up . . . . . . . . . . . . . . . . 4
Grooving Operation . . . . . . . . . . . . . . . . . . . . . . 5
Mounting the Tool . . . . . . . . . . . . . . . . . . . .5
Adjusting the Groove Depth . . . . . . . . . . . . 5
Grooving Procedures . . . . . . . . . . . . . . . . . . 6
Dismounting the Tool. . . . . . . . . . . . . . . . . . 8
Maintenance . . . . . . . . . . . . . . . . . . . . . . . . . . . 8
Groove and Pipe Dimensions . . . . . . . . . . . . . . 9
Tool Rating Chart . . . . . . . . . . . . . . . . . . . . 10
Troubleshooting . . . . . . . . . . . . . . . . . . . . . . . .10
® Registered Trademark of Victaulic Company of America
© Copyright 1996 Victaulic Company of America Printed in U.S.A.
TM-VE12.0743 Rev.A Page 1 Tuesday, May 29, 2001 6:04 PM

2
OPERATOR SAFETY INSTRUCTIONS
This tool is designed only for manually roll grooving
³⁄₄
- 2" Schedule 5 and 10 steel as well as 1 - 2"
Schedule 40 steel, stainless steel, aluminum and PVC pipe.
Accomplishing this function requires some dexterity and mechanical skills, as well as sound safety
habits. Although these tools are manufactured for dependable operation, it is impossible to antici-
pate those combinations of circumstances which could result in an accident. The following instruc-
tions are recommended for proper tool operation. The operator is cautioned to always practice
“Safety First” during each phase of use, including setup and maintenance of this unit.
General
1. Read and understand this operating manual before operating or performing
maintenance on this tool.
Become familiar with the tool's operations, applications and
limitations. Be particularly aware of its specific hazards. Store the operatorm's manual in a clean
area and always at a readily available location. Additional copies at no charge can be obtained
through written requests to the Victaulic Tool Company.
2. This tool is designed ONLY for the roll grooving of IPS pipe sizes listed under “Tool
Rating Chart”
(page 10).
Tool Set-Up
1. Avoid dangerous environments.
Keep work area well lit. Allow sufficient space to operate
tool and accessories properly and for others to pass safely.
Operating Tool
1. Inspect the equipment.
Prior to using the tool, check the movable parts for any obstructions.
Be certain that all tool parts are properly installed and secured.
2. Secure pipe before working.
Make certain the pipe is secured or otherwise capable of
resisting the manual effort to operate the tool (torque) plus the weight of the tool.
3. Never reach inside pipe ends during operation.
4. Do not overreach.
Keep your proper footing and balance at all times. Do not reach across the
tool or pipe. Keep hands and loose tools away from moving elements.
5. Use safety glasses and proper footwear.
6. Keep work area clean.
Cluttered areas, benches and slippery surfaces invite accidents.
7. Wear ear protection if exposed to long periods of very noisy shop operations.
8. Keep visitors away.
All visitors should be kept a safe distance from the work area.
9. Keep alert.
Do not operate tool if ill or drowsy from medication or fatigue. Avoid horseplay
around equipment and keep bystanders a safe distance from equipment.
10. Do not operate tool at feed rates exceeding those specified in this manual.
11. Wear proper apparel.
Loose clothing (unbuttoned jackets or loose sleeve cuffs) and jewelry
can get caught in moving parts. Wear a hardhat when performing overhead grooving with this
tool.
12. Do not force tool.
It will do the job better and safer at the rate for which it was designed.
13. Do not misuse tool.
Perform only the functions for which the tool is designed. Do not overload
the tool.
Tool Maintenance
1. Do not attempt to repair the tool on your own.
Repairs should be made only by authorized
personnel.
2. Maintain tool in top condition.
Keep tool clean for best and safest performance. Follow
lubricating instructions.
VE12
TM-VE12.0743 Rev.A Page 2 Tuesday, May 29, 2001 6:04 PM

3
INTRODUCTION
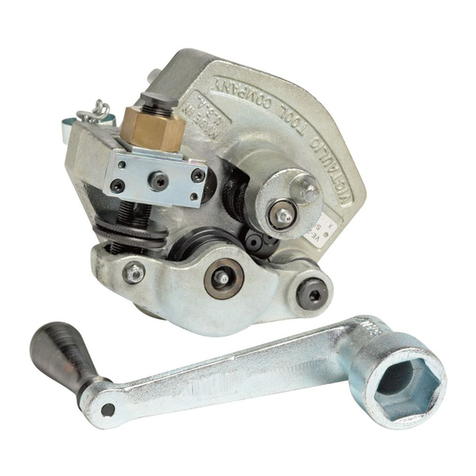
The VE12 is an orbital roll grooving tool which rotates around a stationary pipe. The pipe may be
held in a pipe vise during grooving. The VE12 also is able to groove piping in a depressurized and
drained, in-place piping system.
The Victaulic VE12 tool is a manually operated tool used for roll grooving pipe to prepare it to
receive Victaulic grooved couplings. This tool is not to be driven by any power drive device. The use
of power drive devices may present risk to the operator and cause damage to the tool.
These tools are designed to properly roll groove pipe of various types within the size range and wall
thickness shown in the dimension charts on the following pages. These tools should be used only for
roll grooving pipe (designated in the charts) clamped in a pipe vise or in place. Use of these tools for
purposes other than roll grooving, or exceeding the maximum pipe wall thickness, will overload the
tools, shorten tool life and possibly cause damage.
TOOL NOMENCLATURE
Use of a power drive with this tool may cause the tool to walk off the pipe or rotate at speeds that may be
uncontrollable by the operator, causing personal injury or property damage.
This tool should be used only for roll grooving pipe designated in the Tool Rating Chart. Use of this tool for
other purposes or exceeding the pipe thickness maximums will overload the tool, shorten tool life and may
cause tool damage.
1¹⁄₄'' Drive Nut
Depth Stop Collars
Trunnion
1¹⁄₄'' Feed Nut
Feed Screw
Upper Roll
Body
Roll Arm
Lower Roll
Pipe End Stop
VE12
TM-VE12.0743 Rev.A Page 3 Tuesday, May 29, 2001 6:04 PM

4
RECEIVING TOOL
The VE12 tool is individually packaged in a
heavy cardboard container. Upon receipt,
check to be certain all necessary parts are
included.
Included should be:
(1) Victaulic VE12 tool
(1) Set of feeler gauges (attached to tool)
(1) Crank
(2) Operating Instruction Manual
If incomplete, contact your Victaulic Distributor
or the Victaulic Tool Company.
PRE-OPERATION
Pipe Preparation
For proper tool operation, and production of
proper pipe grooves, carefully observe the fol-
lowing pipe preparation tips.
1.
Pipe ends must be square cut (see column 2
notation on “Standard Roll Groove Specifica-
tions - Steel and other IPS Pipe”, page 9).
2.
Internal or external weld bead or seams
must be ground flush with the pipe surface
extending 2" back from the pipe end.
3.
The end of the pipe, both inside and out,
must be cleaned of coarse scale, dirt and other
foreign material.
Foreign material such as coarse scale or dirt might
interfere with or damage the grooving rolls or dis-
tort the groove. Rust is an abrasive material and
will tend to wear out the surface of the grooving
rolls. For maximum grooving roll life, remove for-
eign material and loose rust.
TOOL AND PIPE SET UP
This tool can be used to groove pipe clamped
in a pipe vise or pipe that is in place.
Pipe Vise Set Up
The choice of grooving location in the shop or
field should take into account the following fac-
tors:
■
Pipe handling requirements
■
Working space requirements for the tool
and pipe
Procedure
1.
Securely mount pipe vise (chain type)
on a secure stand or workbench able to
support the tool (16 lbs.), the pipe, and
resist the torque (approx. 20 ft.-lb.)
required to operate the tool.
Pipe vise
should be mounted flush with or overhanging
the edge of the stand or workbench so that
when the tool is mounted on the pipe, the tool
will rotate freely around the pipe and not be
obstructed by the bench or stand.
2.
Secure pipe in pipe vise. Position the pipe to
overhang the pipe vise approximately 5 - 12" as
shown so that the tool can rotate in an unob-
structed manner.
Groove-In-Place Set Up
Previously installed piping may be grooved
with the VE12 providing the piping is securely
supported, depressurized and drained.
Pipe hangers must be able to accommodate the
weight of the 16-lb. VE12 plus the manual effort to
operate the tool (approximately 20 ft.-lb. torque)
during grooving.
VE12
TM-VE12.0743 Rev.A Page 4 Tuesday, May 29, 2001 6:04 PM

5
GROOVING OPERATION
Mounting The Tool
1.
Using the crank, retract the upper roll arm
fully by turning the feed nut counterclockwise.
2.
With the drive nut down, insert the lower
roll into the pipe end. Push the tool onto the
pipe until the pipe end stop rests against the
pipe end.
3.
Using the crank, advance rolls together by
turning the feed nut clockwise. Continue
advancing until the grooving rolls are in light,
but firm, contact with the pipe.
Adjusting the Groove Depth
The depth stop collars must be adjusted for
each pipe size or change in wall thickness.
Groove diameter, identified as the “C” dimen-
sion for each pipe size, is listed under “Stan-
dard Roll Groove Specifications – Steel and
Other IPS Pipe” (see page 9). For your conve-
nience, a “C” Diameter Chart for the most com-
mon pipe sizes is also on the tools.
1.
Unlock the depth stop collars by turning
them in opposite directions until they are sepa-
rated.
2.
Locate the groove depth gauge attached to
the tool which is identified with the pipe size to
be grooved.
3.
Turn the depth stop collar, closest to the
trunnion, until the distance between the collar
and the top of the trunnion is equal to the
groove depth gauge thickness. Use the groove
depth gauge like a feeler gauge. Turn the sec-
ond collar until both are locked firmly against
one another maintaining the gap set with the
feeler gauge.
4.
Prepare a trial groove as described under
“Grooving Operation”, page 5.
5.
After a trial groove is prepared and the tool
is removed from the pipe, carefully check the
groove diameter (“C” dimension), as charted
under “Standard Roll Groove Specifications
Steel and Other IPS Pipe” (see page 9). The “C”
dimension is best checked with a Pi-tape. It
also may be checked with a vernier caliper or
narrow land micrometer at two locations, 90°
apart, around the groove. The average reading
must equal the required groove diameter spec-
ification.
VE12
TM-VE12.0743 Rev.A Page 5 Tuesday, May 29, 2001 6:04 PM
6
6.
If groove diameter (“C” dimension) is not
within tolerance, the depth stop collar must be
adjusted to obtain the proper dimension. To
adjust for a
smaller groove diameter
, turn
the depth stop collars
counterclockwise
. To
adjust for a
larger groove diameter
, turn the
depth stop collars
clockwise
. A quarter turn
either way will change the groove diameter by
0.017" (0.068" per full turn).
7.
Prepare another trial groove and check the
groove diameter again. Repeat (Steps 4 and 5)
until groove diameter is within specification.
The “C” dimension (groove diameter) always
must conform to specifications under “Standard
Roll Groove Specifications – Steel and other IPS
Pipe”, page 9 to ensure proper joint performance.
Failure to do so could result in personal injury,
property damage, improper installation, joint
leakage or joint failure.
FEED RATES
Material Wall Thick.
Inches/mm
Turns of Feed
Nut to Advance
the Feed
Steel and
Stainless Steel
0.065 to 0.109
1.65 to 2.76
¹⁄₂
turn
0.110 to 0.154
2.77 to 3.91
¹⁄₄
turn
Aluminum
0.065 to 0.109
1.65 to 2.76
²⁄₃
turn
0.110 to 0.154
2.77 to 3.91
¹⁄₃
turn
PVC 0.113 to 0.154
2.87 to 3.91
³⁄₄
turn
GROOVING PROCEDURES
Before grooving, make sure you have followed
all instructions in:
■
“Pipe Preparation” (page 4).
■
“Tool and Pipe Set Up and Operation”
(page 4).
■
“Mounting The Tool” (page 5).
■
“Adjusting The Groove Depth” (page 5).
1.
Advance the feed by turning the feed nut
clockwise by the amount shown in “Feed
Rates”, page 6. Feed rates for the VE12 vary
depending on material and pipe wall thickness.
The Victaulic VE12 tool is designed only for roll
grooving pipe of the appropriate sizes as listed un-
der “Tool Rating Chart” (page 10). Grooving of
pipe other than that recommended will result in
improper pipe end configuration or improper
groove dimensions for applying Victaulic prod-
ucts.
Before operating tool, review all
safety instructions on page 2.
Failure to do so may result in
serious personal injury.
VE12
TM-VE12.0743 Rev.A Page 6 Tuesday, May 29, 2001 6:04 PM
7
2.
Place the crank onto the drive hex. Crank
the drive hex either clockwise or counterclock-
wise until the tool travels one full turn around
the pipe.
3.
A ratchet with 1
¹⁄₄
" socket (not supplied)
may be used in place of the crank to operate
the tool in low clearance conditions.
Over-tightening (over-feeding) will result in short-
ened bearing life and other tool damage. Over or
under-tightening may result in the tool “walking”
off the pipe and causing injury to the operator and
bystanders or causing damage to the tool.
4.
Advance the feed by cranking the feed nut
per “Feed Rates”, page 6. Crank the tool
another full turn around the pipe.
Continue grooving by advancing per “Feed
Rates”, page 6, and cranking the groover
around the pipe until the depth stop collar
comes in contact with the trunnion. At this
point, the feed nut can no longer be advanced.
Crank the tool at least one more full turn around
the pipe after full groove depth is achieved.
VE12
TM-VE12.0743 Rev.A Page 7 Tuesday, May 29, 2001 6:04 PM
8
DISMOUNTING THE TOOL
1.
Crank the tool until the drive hex is located
in the down position.
2.
Turn the feed nut counterclockwise to
retract the upper roll arm to the full open posi-
tion.
3.
Lift the tool and remove it from the pipe.
Retracting feed nut loosens tool from pipe. Tool
may fall off pipe while being loosened. Always
hold tool on pipe while retracting feed nut.
4.
After dismounting tool from pipe, check
groove diameter to ensure groove meets
groove diameter specification.
MAINTENANCE
This manual provides information on keeping
tools in top operating condition.
1.
Lubrication:
a. After approximately eight hours of opera-
tion, grease the bearings at the two grease
fittings on the tool. Use a No. 2 EP Lithium
base grease.
b. On a weekly basis, apply a light oil (SAE
10W-30 or equivalent) to the threads where
the feed screw passes through the feed
nut. Oil should be applied to the shoulder
bolts which hold the roll arm to the body,
the feed screw to the roll arm and at trun-
nion pivots.
NOTICE
Groove Diameter should be correct for the diame-
ter and wall thickness of pipe for which it was set
under “Adjusting The Groove Depth” (page 4).
Groove diameter should be checked periodically
and adjusted as necessary.
NOTICE
Remember that preventative maintenance will pay
for itself in fewer repairs and safer operations.
VE12
TM-VE12.0743 Rev.A Page 8 Tuesday, May 29, 2001 6:04 PM
9
GROOVE AND PIPE DIMENSIONS
* Except PVC. See “Tool Rating Chart” on page 10.
COLUMN 1 – Nominal IPS pipe size. Nominal metric (ISO) pipe size.
COLUMN 2 – IPS outside diameter. Metric (ISO) outside diameter. The outside diameter of roll grooved pipe shall not vary more
than the tolerance listed. For IPS pipe, the maximum allowable tolerance from square cut ends is 0.030" for
³⁄₄
- 2" ; measured
from true square line. For (ISO) metric pipe, the maximum allowable tolerance from square cut ends is 0.76 mm for sizes
20 - 50 mm.
COLUMN 3 – Gasket seat: the pipe surface shall be free from indentations, roll marks, and projections from the end of the pipe
to the groove, to provide a leak-tight seal for the gasket. All loose paint, scale, dirt, chips, grease and rust must be removed. It
continues to be Victaulic Tool Company’s first recommendation that pipe be square cut. When using beveled pipe, contact
Victaulic for details. Square cut pipe must be used with FlushSeal
®
and EndSeal
®
gaskets. Gasket seat “A” is measured from the
end of the pipe. IMPORTANT: roll grooving of beveled end pipe may result in unacceptable pipe end flare. See column 8.
COLUMN 4 – Groove width: bottom of groove to be free of loose dirt, chips, rust and scale that may interfere with proper coupling
assembly. Corners at bottom of groove must be radiused. For IPS pipe, .06R on
³⁄₄
- 2". For (ISO) metric pipe, 1.5R mm on 20 - 50
mm.
COLUMN 5 – Groove outside diameter: the groove must be uniform depth for the entire pipe circumference. Groove must be
maintained within the “C" diameter tolerance listed.
COLUMN 6 – Groove depth: for reference only. Groove must conform to the groove diameter “C” listed.
COLUMN 7 – Minimum allowable wall thickness: this is the minimum wall thickness which may be roll grooved.
COLUMN 8 – Maximum allowable pipe end flare diameter. Measured at the most extreme pipe end diameter square cut or
beveled.
STANDARD ROLL GROOVE SPECIFICATIONS – STEEL AND OTHER IPS PIPE
0743-1A
1 2 345678
Nom.
Size
Inches
mm
Dimensions – Inches/
millimeters
Pipe Outside Diameter Gasket
Seat
A
±0.03
±0.76
Groove
Width
B
±0.03
±0.76
Groove Diameter
C
Groove
Depth
(ref.)
D
Min.
Allow.
Wall
Thk.
T *
Roll
Groove
Max.
Allow.
Flare
Dia.Basic Tolerance Basic
Tol.
+0.000
+0,00
³⁄₄
1.050 +0.010 –0.010 0.625 0.281 0.938 –0.015 0.056 0.065 1.15
20 26.9 +0.25 –0.25 15.88 7.14 23.83 –0.38 1.42 1.65 29.2
1 1.315 +0.013 –0.013 0.625 0.281 1.190 –0.015 0.063 0.065 1.43
25 33.4 +0.33 –0.33 15.88 7.14 30.23 –0.38 1.60 1.65 36.3
1
¹⁄₄
1.660 +0.016 –0.016 0.625 0.281 1.535 –0.015 0.063 0.065 1.77
32 42.2 +0.41 –0.41 15.88 7.14 38.99 –0.38 1.60 1.65 45.0
1
¹⁄₂
1.900 +0.019 –0.019 0.625 0.281 1.775 –0.015 0.063 0.065 2.01
40 48.3 +0.48 –0.48 15.88 7.14 45.09 –0.38 1.60 1.65 51.1
2 2.375 +0.024 –0.024 0.625 0.344 2.250 –0.015 0.063 0.065 2.48
50 60.3 +0.61 –0.61 15.88 8.74 57.15 –0.38 1.60 1.65 63.0
AB
D
BT
COD
Exaggerated for Clarity
VE12
TM-VE12.0743 Rev.A Page 9 Tuesday, May 29, 2001 6:04 PM
10
TOOL RATING CHART
TROUBLESHOOTING
0743-2A
Nominal
Pipe Size
Inches/mm
Steel/Alum.
Inches/mm PVC
Inches/mm Stainless Steel
Inches/mm
Min. Max. Min. Max. Min. Max.
³⁄₄ 0.065 0.083 – – – –
20 1.65 2.10 – – – –
10.065 0.133 0.133 0.133 0.133 0.133
25 1.65 3.38 3.38 3.38 3.38 3.38
1¹⁄₄ 0.065 0.140 0.140 0.140 0.140 0.140
32 1.65 3.56 3.56 3.56 3.56 3.56
1¹⁄₂ 0.065 0.145 0.145 0.145 0.145 0.145
40 1.65 3.68 3.68 3.68 3.68 3.68
2 0.065 0.154 0.154 0.154 0.154 0.154
50 1.65 3.91 3.91 3.91 3.91 3.91
Pipe Dimensions Rating Chart is based on the following material grades:
Steel - Brinell Hardness of 180 or less
Stainless Steel - Type 304 and 316
Aluminum - ASTM B-210 in Grades 6061-T4 and 6063-T4
PVC:
Type I, Grade I - PVC 1120
Type I, Grade II - PVC 1220
Type II, Grade I - PVC 2116
Pro lem Possi le Cause Solution
Unable to close rolls onto
pipe. Improper adjustment of
depth stop collar. Turn depth stop collar
counterclockwise, away from
trunnion and reset depth stop
collar, as described in
“Adjusting The Groove
Depth.”
Groove too deep (groove
diameter too small). Improper adjustment of
depth stop collar. Reset depth stop collar as
described in “Adjusting The
Groove Depth.”
Groove too shallow (groove
diameter too large). Improper adjustment of
depth stop collar. Reset depth stop collar as
described in “Adjusting The
Groove Depth.”
Tool does not move when
cranked. Rust or dirt has built up on
lower roll. Remove accumulation from
lower roll with stiff wire brush.
Worn grooving rolls. Inspect lower roll for worn
knurls, replace if worn.
Tool wobbles during
cranking. Variation in pipe wall
thickness or inadequate feed
rate.
Advance the feed to the rates
described in “Feed Rate
Chart.”
VE12
TM-VE12.0743 Rev.A Page 10 Tuesday, May 29, 2001 6:04 PM

Victaulic® Factory Representatives and Distri utor Stocks Worldwide
Victaulic reserves the right to change product specifications, designs and standard
equipment without notice and without obligation.
TM-VE12 0743 Rev. A 8/96 ®Registered Trademark of Victaulic © Copyright 1996 Victaulic Printed in U.S.A.
TM-VE12.0743 Rev.A Page 11 Tuesday, May 29, 2001 6:04 PM
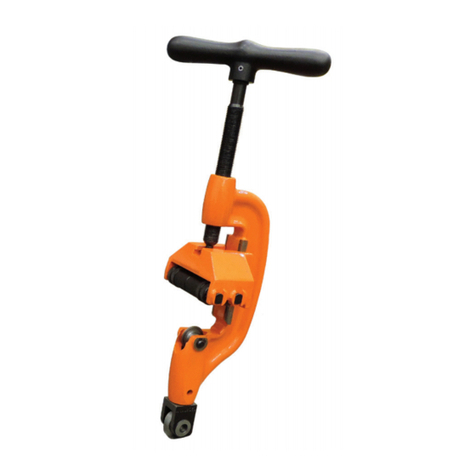
Table of contents
Other Victaulic Tools manuals

Victaulic
Victaulic VG412 Manual

Victaulic
Victaulic RG1210 Manual

Victaulic
Victaulic RG2910 Manual

Victaulic
Victaulic PC3110 Manual

Victaulic
Victaulic VE272SFS Manual

Victaulic
Victaulic EndSeal TM-VE414MC Manual

Victaulic
Victaulic RG2110 Manual

Victaulic
Victaulic VE460 Manual

Victaulic
Victaulic 746 Series User manual

Victaulic
Victaulic VE416FS Manual

Victaulic
Victaulic RG3400 Manual

Victaulic
Victaulic PC3110 Manual

Victaulic
Victaulic AGS TM-RG5200i Manual

Victaulic
Victaulic VE450FSD Manual

Victaulic
Victaulic VE416FS Manual

Victaulic
Victaulic RG1200 Manual

Victaulic
Victaulic EndSeal OGS-200 Manual

Victaulic
Victaulic VE46 Series Manual

Victaulic
Victaulic VE266FS Manual

Victaulic
Victaulic VE106 Groove-N-Go Manual