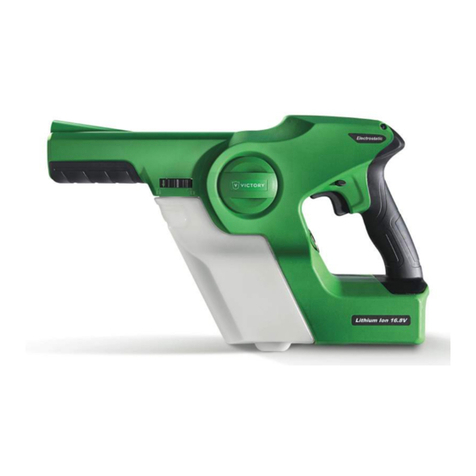
Victory 72001 User manual

Backpack Electrostatic Sprayer
Victory
Pulvérisateur à réservoir dorsal
Code: 72001
Parts & Operations Manual

3
Parts & Operations Manual Victory Series
Thank You For Purchasing Dustbane’s Victory Sprayer!
Please use this equipment carefully and observe all warnings and cautions. It is the operator’s responsibility to read and
understand the cautions and warnings in this manual before attempting to operate this machine.
The package should contain:
IMPORTANT: The Electrostatic Sprayer has been designed and engineered to be very safe during normal operation. As with
all cordless products certain safety precautions should be taken. Please read the following WARNINGS before operating the
machine. UNDERSTAND THESE SAFETY PRECAUTIONS BEFORE OPERATING MACHINE. FAILURE TO PROPERLY FOLLOW THESE
PRECAUTIONS MAY LEAD TO A FIRE, EXPLOSION, OR ELECTRICAL SHOCK HAZARD.
Important Safety Instructions:
WARNING – When using electric appliances, basic precautions should always be followed, including the following:
• READ all the instructions before using the appliance.
• To reduce the risk of injury, close supervision is necessary when an appliance is usednear children.
• DO NOT TOUCH moving parts.
• Only use attachments recommended or sold by the manufacturer.
• To reduce the risk of electrical shock, do not put electrode in water or other liquid. Do not place or store
appliance where it can fall or be pulled into a tub or sink.
• WEAR protective clothing and eyewear when dispensing chemicals or other materials or when working in the
vicinity of all chemicals, lling or emptying equipment, or changing metering tips.
• ALWAYS observe safety and handling instructions of the chemical manufacturer.
• ALWAYS direct discharge away from you or other persons or into approved containers.
• ALWAYS dispense cleaners and chemicals in accordance with manufacturer’s instructions. Exercise CAUTION
when maintaining your equipment.
• ALWAYS reassemble equipment according to instruction procedures. Be sure all components are rmly screwed
or latched into position.
• KEEP equipment clean to maintain proper operation. Always have the machine serviced by a professional,
qualied representative. Never attempt to service the machine or access its internal components.
• KEEP work area clean and well lit.
• KEEP bystanders, children, and visitors away while operating the sprayers.
• NEVER operate cordless sprayer in explosive atmospheres, such as in the presence of ammable liquids, gases,
or dust. Cordless Sprayers create sparks, which may ignite the dust or fumes.
• STAY ALERT, watch what you are doing and use common sense when operating a cordless sprayer. DO NOT
use cordless sprayer while tired or under the inuence of drugs, alcohol, or medication.
• A moment of inattention while operating cordless sprayer may result in serious personal injury,
• AVOID accidental starting. Be sure switch is in the locked or OFF position before inserting battery pack
• Carrying sprayer with your nger on the switch or inserting the battery pack into a tool with the switch ON
invites accidents.
• DO NOT overreach. Keep proper footing and balance at all times. Proper footing and balance enables better
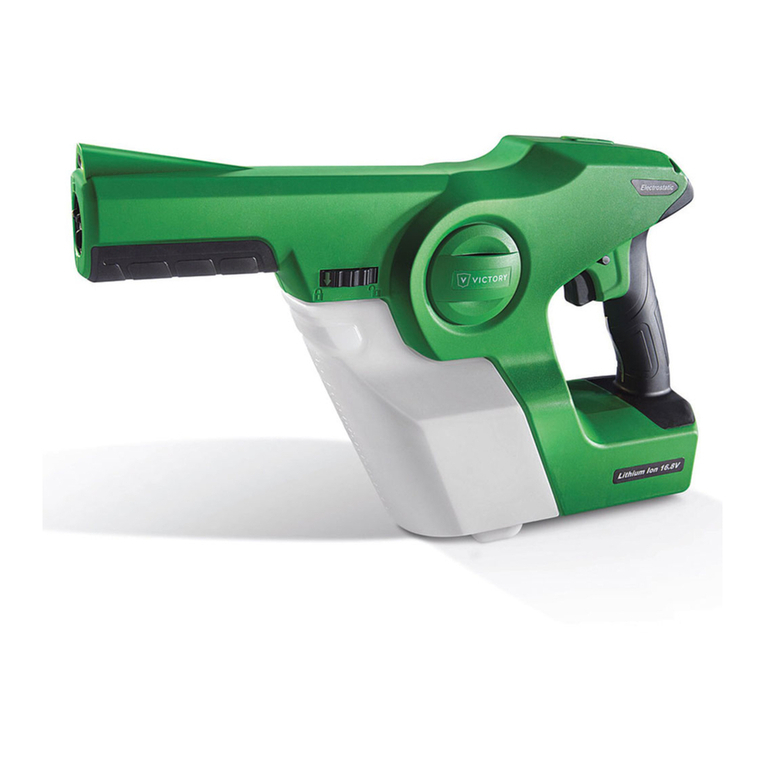
• Sprayer Unit
• Tank
• Hose
• 3 Setting Nozzle
• Nozzle Wrench
• Instruction Sheet
• Battery & Charger

4Parts & Operations Manual Victory Series Parts & Operations Manual Victory Series
control of the tool in unexpected situations.
• USE safety equipment. Always comply with any requirements for protective clothing, goggles, gloves, facial
masks, or respirator required by the formulation label.
• DO NOT use a machine that is broken or damaged in any way.
• DO NOT alter the machine by adding or removing parts.
• DO NOT restrict the motor air inlet area.
• DO NOT tamper with the output nozzle.
• DO NOT allow the machine to operate unattended.
• DO NOT stand in water or hold over water while operating machine.
• DO NOT use outdoors when it’s raining.
• DO NOT use cordless sprayer if switch does not turn it on or o. A cordless sprayer that cannot be controlled
with the switch is dangerous and must be repaired.
• Disconnect battery pack from cordless sprayer or place the switch in the locked or OFF position before making
any adjustments, relling the tank or storing the cordless sprayer. Such preventative safety measures reduce the
risk of starting the cordless sprayer accidentally.
• Cordless sprayers are dangerous in the hands of untrained users.
• When battery pack is not in use, keep it away from other metal objects like: paper clips, coins, keys, nails, screws,
or other small metal objects that can make a connection from one terminal to another. Shorting the battery
terminals together may cause sparks, burns, or a re.
• To clean the sprayer use soap, water and a damp cloth to wipe clean. To clean internal components run water
through the sprayer for 3 minutes.
CAUTION TO AVOID ELECTRICAL SHOCK DO NOT TOUCH
OR INSERT ANYTHING IN THE NOZZLE OF THE SPRAYER
Electrical Safety Instructions:
• CAUTION: To avoid electrical shock do not touch or insert any foreign objects into the nozzle.
• A cordless sprayer with integral batteries or a separate battery pack must be recharged only with the specied
charger for the battery. A charger that may be suitable for one type of battery may create a risk of re when
used with another battery.
• Use battery operated sprayer only with the specically designated battery pack. Use of any other batteries may
create a risk of re.
Chemical Compliance:
• ONLY use water-based formulations with this machine.
• NEVER use the sprayers to apply ammable liquids.
• NEVER use oil-based liquids.
• ALWAYS store formulation in it’s original container.
• ALWAYS ensure that formulation is applied only in strict compliance with the formulation label as well as local,
provincial, and federal regulations.
• ALWAYS review chemical SDS sheet how best to secure and store your chemical solution when not in use.
NOTE: These Victory sprayers are compatible with water-based disinfectants, degreasers, odour neutralizers and counteractants,
sanitizers, and all purpose cleaners. For hard surface products, (such as disinfectants, degreasers, sanitizers, all purpose cleaners)
avoid spraying in the air to prevent lung inhalation of harsh chemicals.

5
Parts & Operations Manual Victory Series
Important Safety Instructions for Battery Pack:
Your cordless sprayer uses a Victory Innovations, 16.8 volt Lithium Ion battery pack. The battery pack is not fully charged out
of the carton. Before using the battery pack and charger, read the safety instructions below. Then follow charging procedures
outlined.
CAUTION: The battery used in this device may present a risk of re or chemical burn if mistreated. Do not disassemble, store
in extreme heat or cold. Keep away from children. Do not disassemble. Do not dispose of in re.
• DO NOT attempt to disassemble the battery or remove any component projecting from the battery terminals.
The battery and charger have no user serviceable parts. Fire or injury may result from tampering prior to
disposal, protect exposed terminals with heavy insulating tape to prevent shorting.
• DANGER: Electrocution hazard. Never attempt to open the battery pack for any reason. If battery pack case is
cracked or damaged, do not insert into charger. Electric shock or electrocution may result.
• WARNING: Fire hazard. Do not store or carry battery so that metal objects can contact exposed battery
terminals. For example, do not place battery in aprons, pockets, toolboxes, product kit boxes, drawers, etc., with
loose nails, screws, keys, etc.
• CAUTION: Battery pack must be securely attached to the cordless sprayer. If battery pack is detached, personal
injury may result. Do not incinerate the battery pack even if it is severely damaged or is completely worn out.
The battery pack can explode in a re.
• Charge the battery packs only with a Victory charger. DO NOT splash or immerse in water or other liquids.
• DO NOT store or use the tool and battery pack in locations where the temperature may reach or exceed 105°F
(40oC) (such as outside sheds or metal buildings in summer).
• Damaged battery packs should be recycled.
• Transporting batteries can possibly cause res if the battery terminals inadvertently come in contact with
conductive materials such as keys, coins, hand tools and the like.
Important Safety Instructions for Battery Chargers
SAVE THESE INSTRUCTIONS: This manual contains important safety instructions for battery chargers. Before using charger,
read all instructions and cautionary markings on charger, battery pack, and product using battery pack.
• DANGER: Electrocution hazard. 120 volts are present at charging terminals. Do not probe with conductive
objects.
• WARNING: Shock hazard. Do not allow any liquid to get inside charger.
• CAUTION: Burn hazard. To reduce the risk of injury, charge only Victory Innovations rechargeable batteries.
Other types of batteries may burst causing personal injury and damage.
• CAUTION: Under certain conditions, with the charger plugged in to the power supply, the exposed charging
contacts inside the charger can be shorted by foreign material. Foreign materials of a conductive nature such
as, but not limited to, steel wool, aluminum foil, or any buildup of metallic particles should be kept away from
charger cavities. Always unplug the charger from the power supply when there is no battery pack in the cavity.
Unplug charger before attempting to clean.
• DO NOT attempt to charge the battery pack with any chargers other than the one noted in this manual. The
charger and battery pack are specically designed to work together. These chargers are not intended for any
uses other than charging Victory Innovations rechargeable batteries. Any other uses may result in risk of re,
electric shock or electrocution.
• Do not expose charger to rain or snow.
• Pull by plug rather than cord when disconnecting charger. This will reduce risk of damage to electric plug and
cord. Make sure that cord is located so that it will not be stepped on, tripped over, or otherwise subjected to
damage or stress.
• Do not use an extension cord unless it is absolutely necessary. Use of improper extension cord could result in
risk of re, electric shock, or electrocution.An extension cord must have adequate wire size (AWG or American
Wire Gauge) for safety. The smaller the gauge number of the wire, the greater the capacity of the cable, that is
16 gauge has more capacity than 18 gauge. When using more than one extension to make up the total length,
be sure each individual extension contains at least the minimum wire size.
6Parts & Operations Manual Victory Series Parts & Operations Manual Victory Series
• RECOMMENDED MINIMUM WIRE SIZE FOR EXTENSION CORDS:
Total Length of Cord 25 ft., 50 ft., 75 ft., 100 ft., 125 ft., 150 ft., 175 ft., 7.6 m, 15.2 m, 22.9 m, 30.5 m,
38.1 m, 45.7 m, 53.3 m,
Wire Size AWG 18, 18, 16, 16, 14, 14, 12
• DO NOT place any object on top of charger or place the charger on a soft surface that might block the
ventilation slots and result in excessive internal heat. Place the charger in a position away from any heat source.
The charger is ventilated through slots in the top and the bottom of the housing.
• DO NOT operate charger with damaged cord or plug — have them replaced immediately.
• DO NOT operate charger if it has received a sharp blow, been dropped, or otherwise damaged in any way.
• Disconnect the charger from the outlet before attempting any cleaning. This will reduce the risk of electric
shock. Removing the battery pack will not reduce this risk.
• NEVER attempt to connect 2 chargers together.
• The charger is designed to operate on standard household electrical power (120 V) or (240 V) with proper
country plug
How to Use:
Selecting the Nozzle
Rotate the nozzle clockwise to change the
size of the particules.
Align arrow to the
line on the nozzle.
The nozzle located
at the top is the one
activated.
Setting 3:
110 microns
Setting 1:
40 microns
Setting 2:
80 microns
This side is fully
illuminated when
charged.
This side is fully illuminated
when empty.
Charging the Battery
(2 hours charge time)

7
Parts & Operations Manual Victory Series
• RECOMMENDED MINIMUM WIRE SIZE FOR EXTENSION CORDS:
Total Length of Cord 25 ft., 50 ft., 75 ft., 100 ft., 125 ft., 150 ft., 175 ft., 7.6 m, 15.2 m, 22.9 m, 30.5 m,
38.1 m, 45.7 m, 53.3 m,
Wire Size AWG 18, 18, 16, 16, 14, 14, 12
• DO NOT place any object on top of charger or place the charger on a soft surface that might block the
ventilation slots and result in excessive internal heat. Place the charger in a position away from any heat source.
The charger is ventilated through slots in the top and the bottom of the housing.
• DO NOT operate charger with damaged cord or plug — have them replaced immediately.
• DO NOT operate charger if it has received a sharp blow, been dropped, or otherwise damaged in any way.
• Disconnect the charger from the outlet before attempting any cleaning. This will reduce the risk of electric
shock. Removing the battery pack will not reduce this risk.
• NEVER attempt to connect 2 chargers together.
• The charger is designed to operate on standard household electrical power (120 V) or (240 V) with proper
country plug
Parts List/Diagram
Ref. Part N. Description
172001 Cordless Electrostatic Backpack Sprayer
272010 16.8 V Rechargeable Lithium Battery (8 hour runtime)
272010A 16.8 V Rechargeable Lithium Battery (4 hour runtime)
372011 16.8 V Charger
472014 Nozzle Wrench
572015 3-in-1 Nozzle
672013 2.25 Gallon Tank
6
1
5
2
4
3

8Parts & Operations Manual Victory Series Parts & Operations Manual Victory Series
Filling the Tank
Unlatch tank lock from backpack by lifting upward and outward from backpack base.
Fill tank with solution before inserting tank back into backpack housing.
To Insert Nozzle
1. Remove the battery from the unit.
2. Insert the nozzle into the wrench, lining up the tabs on the nozzle and the slots on the wrench.
3. Insert the wrench with nozzle into the front end of the unit.
4. Push in and rotate the wrench ¼ turn counter clockwise. When you hear a click the nozzle is in position..
5. Remove the wrench when complete.
To Remove the Nozzle
1. Remove the battery from the unit.
2. Insert the nozzle wrench into the front of the unit.
3. Rotate wrench until the tabs on the nozzle line up with the slots in the wrench.
4. When the tabs and slots are lined up the wrench will be completely inserted into the front end.
5. To remove, rotate the wrench in the counter clockwise direction until the nozzle comes loose (1/4 rotation).
6. Remove the wrench when complete.
7. Slide tool over groove.
8. Turn the tool counter- clockwise to lock the nozzle in place with a click feeling.
9. Take out the tool and you will nd the nozzle is already at top position. You can select anyone of the three nozzles
by turning the nozzle clockwise by means of the assembly tool.
10. The nozzles to be installed should be at the rightmost upon inserting into the nozzle holder

9
Parts & Operations Manual Victory Series
Power To Backpack: Led Light Indicator
11. When fully charged there will be four led lights illuminated
12. Each light indicates 20% of the battery power remaining
13. When the lowest LED turns red, only 20% of the battery power is remaining.
14. Backpack comes with 3400mAh battery
15. Victory oers a larger capacity battery 6400mAh
Runtime: 3400 mAh (4 hous)
6400 mAh (8 hours)
Removing Electrostatic Hose and Handle
1. Turn power supply switch o (located on backpack base).
2. Remove the battery from the battery compartment (IMPORTANT).
3. To remove the water line from electrostatic gun handle, pull back
on quick release coupler to remove.
4. To remove electrical connection push metal spring-loaded tab
inward until electric line is released.
Cleaning Procedure
1. Turn backpack switch o.
2. Remove battery from inside battery door.
3. Remove tank from backpack base.
4. Add clean water to tank by removing tank cap.
5. Re-install tank into backpack base.
6. Turn power ON on the Backpack base.
7. Spray (1 minute) per each nozzle setting until free of containments.
8. 3-in-1 nozzle has three dierent nozzle selections (100 microns) (80 microns) (40 microns).
9. Rotate nozzle three times for (1 minute) until clear water is present.
NOTE: It is recommended by the manufacturer that clean water is used to clean the sprayer.

If your nozzles become plugged, soak in hot soapy water and blow out with pressurized air to remove blockage. If your
nozzles become plugged, soak in hot soapy water and blow out with pressurized air to remove blockage.
Example above dirty nozzle #1 and clean nozzle #2. Nozzle #1 have not been properly cleaned after being use. When not
properly cleaned, the sprayer nozzles residual chemical deposits build up. Deposit build up results in decreased bar pressure
and decreased spray patterns.
To reduce the chance of blockage we recommend that after every few days of use spray a tank of water through the unit to
rinse out any residual chemical build up that may have occurred.
Warranty
ONE YEAR LIMITED WARRANTY
DUSTBANE/VICTORY INNOVATIONS will repair or replace, without charge, any defects due to faulty materials or workmanship
for one year from the date of purchase. This warranty does not cover part failure due to normal wear or tool abuse. For further
detail of warranty coverage and warranty repair information, call 1-800-741-7788.. This warranty does not apply to damage
caused where repairs have been made or attempted by others. This warranty gives you specic legal rights and you may
have other rights, which vary in certain provinces.
FREE WARNING LABEL REPLACEMENT: If your warning labels become illegible or are missing, email us at info@dustbane.ca
for a free replacement.
VP200ESK SAFETY INSTRUCTIONS
9
VICTORY INNOVATIONS – 4021 VERNON AVE S. SUITE 304 – ST. LOUIS PARK MN 55416
www.victorycomplete.com
Charge Battery Remove Tank / Fill Connect Tank
Adjust Nozzle Spray Clean Up
This side is fully
illuminated when
charged. This side is fully
illuminated
when empty.
2. Pull locking ring
to remove.
1. Rotate collar to
unlock icon
position.
1. Align tank
grooves into slide
rail, lower machine
onto tank.
2. Listen for a
“click”.
3. Rotate collar to
lock icon position.
Rotate the nozzle
clockwise to
change the size of
the particles.
Large
Medium
Small
After use, spray a tank of
water to rinse.
Optimum Sprayer
Distance is 24 inches.
2 hour charge time
3. Lift unit off the
tank.
How To Use.
The Largest Nozzle has a “line” Through it
One Year Limited Warranty
VICTORY will repair or replace, without charge, any defects due to faulty materials or
workmanship for one year from the date of purchase. This warranty does not cover part failure
due to normal wear or tool abuse. For further detail of warranty coverage and warranty repair
information, email us at customerservice@victorycomplete.com. This warranty does not apply
to damage caused where repairs have been made or attempted by others. This warranty gives
you specific legal rights and you may have other rights, which vary in certain states or
provinces.
FREE WARNING LABEL REPLACEMENT: If your warning labels become illegible or are missing,
email us at customerservice@victorycomplete.com for a free replacement.
Certifications
Read about our certifications at victorycomplete.com/certifications
Nozzle 1: Dirty Nozzle 2: Clean
Table of contents
Other Victory Paint Sprayer manuals

Victory
Victory VP200ESK Installation instructions

Victory
Victory VP200ESK User manual

Victory
Victory Whynter Sterymax Professional 360 Installation instructions

Victory
Victory VP300ES User manual

Victory
Victory Vivotec VP200ES User manual

Victory
Victory Sanitizers Plus VP200ESK Firmware update

Victory
Victory VP300ES User manual

Victory
Victory VP200ESK User manual