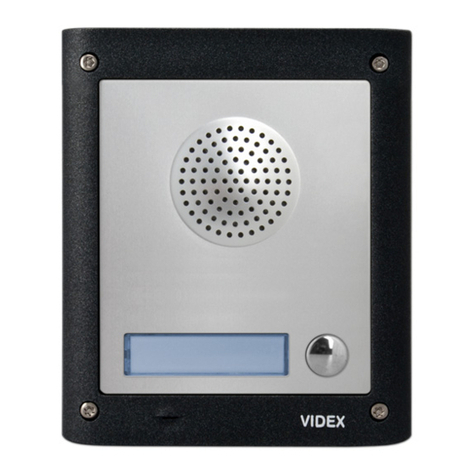
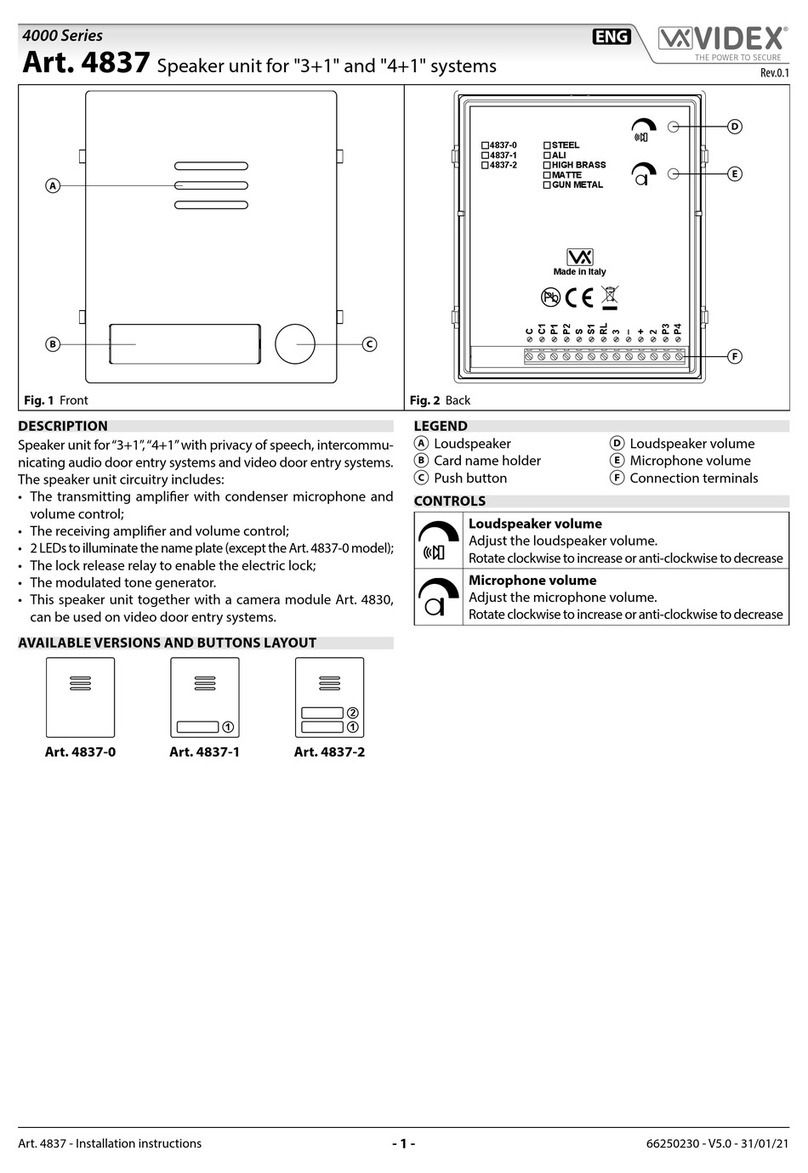
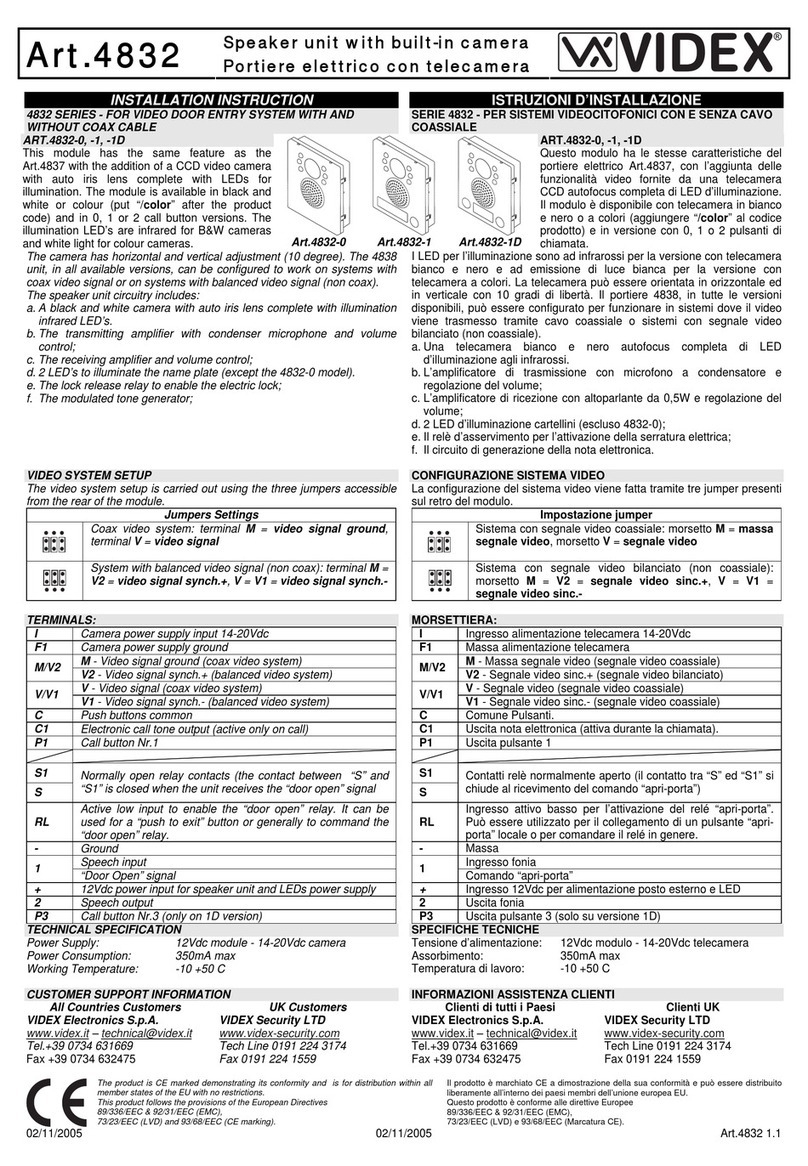
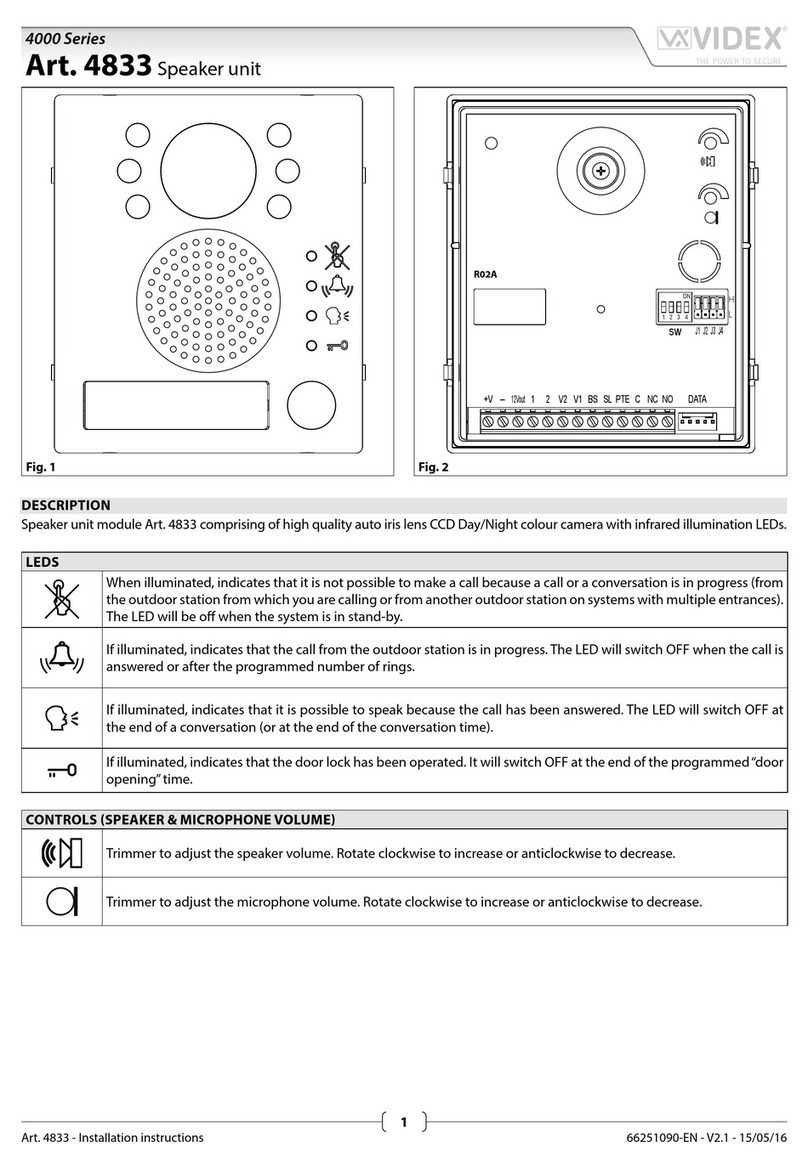
Videx 4000 Series User manual

66251360 - V4.0 - 15/09/19
- 1 -
4000 Series
Art.4303N - Installation instructions
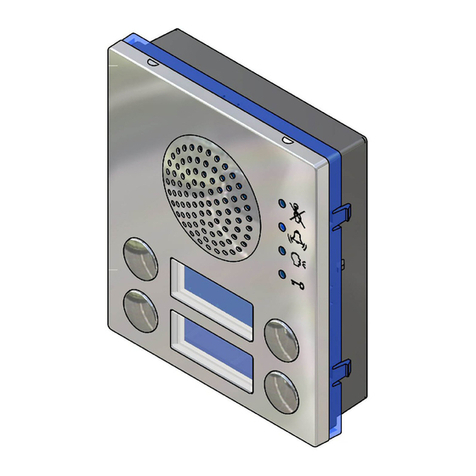
Art.4303NSpeaker unit module with built-in functional to digital interface
White
Red
Blue
D
A
B
C
Fig. 1 Front
White
Red
Blue
L
M
J I
K
G
H
F
E
Fig. 2 Back
DESCRIPTION
Functional speaker module for up to 64 traditional call buttons.
The unit circuitry incorporates :
• The transmitting amplier with condenser microphone and
volume control;
• The receiving amplier with volume control;
• The audio balance circuit with the“BALANCE” control;
• The enslavement relay to enable the electric lock (3 contacts:
common, normally open and normally closed). It can also oper-
ate as capacitor discharge to power directly the electric lock;
• The call buttons from 0 to a maximum of 2 depending on the
module version;
• The illumination LEDs for the card name holder.
The module is available in 3 versions according to the number of
built-in push buttons.
AVAILABLE VERSIONS
As factory preset, built-in buttons are congured to call address
1 or 1 & 2 but the setup may be changed by altering the position
of the 3 wires shown in Fig. 2 with reference M.
Art.4303N-0
1
Art.4303N-1
1
2
Art.4303N-2
LEGEND
ALoudspeaker;
BCall push button (0 up to 2 according to the model);
CCard name holder;
DMicrophone;
EBalance control;
FLoudspeaker volume Control;
GMicrophone volume control;
HDoor relay operating mode jumper:
• Lower position for capacitor discharge;
• Upper position for dry contacts;
IConnector to supply button expansion modules:
• 3 modules can be connected between LD1 and GND;
• 3 modules can be connected between LD2 and GND;
• +V is 30V output with no current regulation to supply 3
button expansion modules connected in series;
JDip-switch to carry out the following programming:
• Door station ID (switches 1 to 3);
• Door opening time (switch 4);
• Conversation time (switch 5);
• Oset (switch 6);
• Camera selection order (switch 7);
• Art.2306 block mode (switch 8);
KSystem connection terminals;
LCNV connector to link to Art.4330N camera module;
MWires to congure built-in buttons:
• White = Common;
• Red = P1;
• Blue = P2

66251360 - V4.0 - 15/09/19
- 2 -
4000 Series
Art.4303N - Installation instructions
Art.4303N Speaker unit module with built-in functional to digital interface
LEDS
When illuminated, indicates that it is not possible to make
a call because a call or a conversation is in progress (from
the outdoor station from which you are calling or from an-
other outdoor station on systems with multiple entranc-
es). The LED will be o when the system is in stand-by
If illuminated, indicates that the call from the outdoor sta-
tion is in progress. The LED will switch OFF when the call is
answered or after the programmed number of rings.
If illuminated, indicates that it is possible to speak be-
cause the call has been answered. The LED will switch
OFF at the end of a conversation (or at the end of the
conversation time).
If illuminated, indicates that the door lock has been
released. It will switch OFF at the end of the pro-
grammed “door opening” time.
CONTROLS
Balance
Prevent Larsen eect on bidirectional audio conversation.
Loudspeaker volume
Adjust the loudspeaker volume.
Rotate clockwise to increase or anti-clockwise to decrease
Microphone volume
Adjust the microphone volume.
Rotate clockwise to increase or anti-clockwise to decrease
PROGRAMMING
The programming consists of the following settings:
• Unit ID (1..8);
• Door Opening Time (2 or 6 seconds);
• Conversation Time (1 or 2 minutes);
• Buttons Matrix start address (1 or 65);
• Default Camera (Art.4330N or External);
• Door Open Relay operating mode (capacitor discharge or dry
contacts).
These settings are carried out through the rst 7 switches of the
8 way dip-switch (reference Jon Fig. 2) while the 6th setting
is carried out through the jumper (reference Hon Fig. 2) both
accessible from the rear side of the module.
UNIT ID
ON
1 3 5 724 6 8
Switches
Position
ON
1 3 5 72 4 6 8
8=OFF
ON
1 3 5 72 4 6 8
8=ON
1 2 3 ID ID
OFF OFF OFF 1 9
ON OFF OFF 2 10
OFF ON OFF 3 11
ON ON OFF 4 12
OFF OFF ON 5 13
ON OFF ON 6 14
OFF ON ON 7 15
ON ON ON 8 16
DOOR OPENING TIME
ON
1 3 5 72 46 8
Switches Seconds
4
OFF 2
ON 6
CONVERSATION TIME
ON
13572 4 6 8
Switches Minutes
5
OFF 1
ON 2
MATRIX BUTTON START ADDRESS
ON
1 3 5 72 4 68
Switches Start address
6
OFF 1
ON 65
MAINCAMERA*
ON
13572 4 6 8
Switches Main camera
7
OFF Art.4330N
ON External
* This setting, when the door station includes the camera module Art.4330N and a second external camera, establishes which camera is the main camera from which the video signal will come from
at the beginning of the call.The video signal can be switched to the secondary camera at any time by pressing the specic button on the videophone or videomonitor.

66251360 - V4.0 - 15/09/19
- 3 -
4000 Series
Art.4303N - Installation instructions
BUTTON MATRIX
The button, when pressed, will generate a call to a specic address according to the terminals to which the button is connected: i.e.
a button connected between terminals 2and B, when pressed will generate a call to the address 10 if the dip-switch 6= OFF or a
call to the address 74 if the switch 6=ON.
ON
1 3 5 72 4 68
SW6
OFF 12345678
A1 9 17 25 33 41 49 57
B2 10182634425058
C3 11192735435159
D4 12202836445260
E5 13212937455361
F6 14223038465462
G7 15233139475563
H8 16243240485664
ON
1 3 5 72 4 68
SW6
ON 12345678
A65 73 81 89 97 105 113 121
B66 74 82 90 98 106 114 122
C67 75 83 91 99 107 115 123
D68 76 84 92 100 108 116 124
E69 77 85 93 101 109 117 125
F70 78 86 94 102 110 118 126
G71 79 87 95 103 111 119 127
H72 80 88 96 104 112 120 128
HOW TO CONNECT AN ELECTRIC LOCK
The “door-open” relay can operate either as “dry contact” or “capacitive discharge” mode.
• In“dry contact”operation mode the relay works in a traditional way, a power supply or a power source is needed
to operate the lock (12-24Vac/dc 2A max), and activation lasts according to the door opening time programmed.
• In “capacitive discharge” operation mode the relay’s contacts, when active, supply directly the lock
(12Vac/dc 1A max) for a moment. You don’t need a power supply for the lock and the door opening
time programmed do not aect the activation time.
A possibile deterioration of the mechanical performance of the electric lock, might cause the“capacitive
discharge” to malfunction in time. In case the electric lock is used in very dusty environments or in an
abnormal climate condition, we suggest to use the “open door” relay in “dry contacts” mode.
** When set as capacitor discharge, connect the electric lock between terminals GND and NO.
12Vac/dc 1A Max
Fig. 3 Using capacitive discharge
12Vac 1.6A Max using Art.321
24Vac/dc 2A Max using other power supplies
Fig. 4 Using separate P.S.U.
Jumper
position Operating
mode
Upper Dry
contacts
Lower Discharge
Capacitor **
Art.4303N Speaker unit module with built-in functional to digital interface

66251360 - V4.0 - 15/09/19
- 4 -
4000 Series
Art.4303N - Installation instructions
CONNECTION TERMINALS SIGNALS
1Common terminal for addresses 1..8 (switch 6 = OFF) or
65..72 (switch 6 = ON) EAddresses 5,13,21,29,37,45,53, 61 (switch 6 = OFF)
Addresses 69,77,85,93,101,109,117, 125 (switch 6 = ON)
2Common terminal for addresses 9..16 (switch 6 = OFF) or
73..80 (switch 6 = ON) FAddresses 6,14,22,30,38,46,54, 62 (switch 6 = OFF)
Addresses 70,78,86,94,102,110,118, 126 (switch 6 = ON)
3Common terminal for addresses 17..24 (switch 6 = OFF)
or 81..88 (switch 6 = ON) GAddresses 7,15,23,31,39,47,55, 63 (switch 6 = OFF)
Addresses 71,79,87,95,103,111,119, 127 (switch 6 = ON)
4Common terminal for addresses 25..32 (switch 6 = OFF)
or 89..96 (switch 6 = ON) HAddresses 8,16,24,32,40,48,56, 64 (switch 6 = OFF)
Addresses 72,80,88,96,104,112,120, 128 (switch 6 = ON)
5Common terminal for addresses 33..40 (switch 6 = OFF) or 97..104 (switch 6 = ON) BUS BUS Connection terminals
6Common terminal for addresses 41..48 (switch 6 = OFF) or 105..112 (switch 6 = ON) BUS
7Common terminal for addresses 49..56 (switch 6 = OFF) or 113..120 (switch 6 = ON) PTE Active low input push to exit signal
8Common terminal for addresses 57..64 (switch 6 = OFF) or 121..128 (switch 6 = ON) GND Ground
AAddresses 1,9,17,25,33,41,49, 57 (switch 6 = OFF) CDoor open relay common contact
Max 12-24
Vac/dc 3A
Addresses 65,73,81,89,97,105,113, 121 (switch 6 = ON)
BAddresses 2,10,18,26,34,42,50, 58 (switch 6 = OFF) NC Door open relay normally closed contact
Addresses 66,74,82,90,98,106,114, 122 (switch 6 = ON)
CAddresses 3,11,19,27,35,43,51, 59 (switch 6 = OFF) NO Door open relay normally open contact
Addresses 67,75,83,91,99,107,115, 123 (switch 6 = ON)
DAddresses 4,12,20,28,36,44,52, 60 (switch 6 = OFF) VAUX 35Vdc power supply input (if used, the module is pow-
ered locally and not from the BUS)
Addresses 68,76,84,92,100,108,116, 124 (switch 6 = ON)
HOW TO REMOVE/INSERT THE CARD NAME HOLDER
• To avoid damage to the module front plate, mask the side that
will be in contact with the screwdriver blade;
• Insert the screwdriver (at side) into the card-holder hole as
shown in “Fig. 5”;
• Move the screwdriver to the left as shown in “Fig. 6” to ex-
tract the card name holder;
• Edit the card name then replace it inside the holder and ret:
insert the holder inside its housing from the left or right side
then push the other side until it clips into place. Fig. 5 Fig. 6
ADHESIVE GASKET PLACEMENT
Apply the Yseal as shown in Fig. 7.
ANTITAMPERING LOCKS FIXING
Fit the anti-tampering locks Was shown in Fig. 8.
Y
G
Fig. 7
W
Fig. 8
TECHNICAL SPECIFICATION
Housing/Mounting: One 4000 Series Module / 4000 Series
Modular System
Push Buttons: Yes, from 0 to 2 call buttons according
to the model
Programming: Yes, carried out by the 8 way dip-
switch located on the rear of the
module
Controls: Microphone and Loudspeaker volume
trimmers plus balance trimmer
Power Supply: Supplied by the BUS line
Power consumption: Stand-by: 28mA
Operating: 38mA
Working Temperature: -10 +50 °C
CLEANING OF THE PLATE
Use a clean and soft cloth. Use moderate warm water or non-ag-
gressive cleansers.
Do not use:
• abrasive liquids;
• chlorine-based liquids;
• metal cleaning products.
Art.4303N Speaker unit module with built-in functional to digital interface

66251360 - V4.0 - 15/09/19
- 5 -
Serie 4000
Art.4303N - Istruzioni di installazione
Art.4303NModulo portiere elettrico con interfaccia pulsanti tradizionali incorporata
Bianco
Rosso
Blu
D
A
B
C
Fig. 1 Fronte
Bianco
Rosso
Blu
L
M
J I
K
G
H
F
E
Fig. 2 Retro
DESCRIZIONE
Questo modulo combina le funzioni precedentemente svolte
dai moduli Art.4303 + Art.4313: l’Art.4303N comprende il por-
tiere elettrico ed incorpora l’interfaccia che permette di collega-
re al sistema digitale no a 64 pulsanti tradizionali. L’elettronica
del modulo comprende:
• L’amplicatore di trasmissione con microfono a condensatore
e controllo del volume;
• L’amplicatore di ricezione con controllo del volume;
• Il circuito di bilanciamento dell’audio“BALANCE”;
• Il relè di asservimento per l’attivazione della serratura elettri-
ca (3 contatti puliti: comune, normalmente aperto e normal-
mente chiuso). Il relè può operare anche nel modo “scarica
capacitiva” alimentando direttamente la serratura;
• I pulsanti di chiamata da 0 ad un massimo di 2 in base alla
versione;
• I LED di illuminazione del porta cartellino;
Il modulo è disponibile in 3 versioni in corrispondenza al nume-
ro di pulsanti incorporati: 0, 1 e 2.
VERSIONI DISPONIBILI
Come impostazione di fabbrica i pulsanti incorporati sono con-
gurati come 1 o 1 e 2, ma gli indirizzi possono essere modicati
agendo sui 3 li mostrati in Fig. 2 riferimento M.
Art.4303N-0
1
Art.4303N-1
1
2
Art.4303N-2
LEGEND
AAltoparlante;
BPulsante di chiamata (0, 1 o 2 in base al modello);
CPorta cartellino;
DMicrofono;
EControllo “BALANCE”;
FVolume altoparlante;
GVolume microfono;
HJumper di congurazione del modo operative del relè
“apri-porta”:
• In basso = scarica capacitiva;
• In alto = contatti puliti;
IConnettore per l’alimentazione dei moduli pulsantiera addi-
zionali (Art.4842.. Art.4845):
• Tra LD1(positivo) e GND (massa) possono essere alimenta-
ti in parallelo no a 3 moduli pulsantiera;
• Tra LD2(positivo) e GND (massa) possono essere alimenta-
ti in parallelo no a 3 moduli pulsantiera;
• +V uscita 30V non regolata in corrente per alimentare con-
temporaneamente 3 moduli pulsantiera collegati in serie.
JDip-switch dedicato alle seguenti programmazioni:
• ID (identicativo) posto esterno (switches from 1 to 3);
• Tempo d’apertura porta (switch 4);
• Tempo di conversazione (switch 5);
• Oset pulsanti (switch 6);
• Ordine di selezione telecamera (switch 7);
• Modo blocco Art.2306 (switch 8);
KMorsetti di connessione;
LConnettore CNV per il collegamento verso il modulo teleca-
mera Art.4330N;
MFili per congurare i pulsanti incorporati:
• Bianco = Comune;
• Rosso = P1;
• Blu = P2

66251360 - V4.0 - 15/09/19
- 6 -
Serie 4000
Art.4303N - Istruzioni di installazione
Art.4303N Modulo portiere elettrico con interfaccia pulsanti tradizionali incorporata
LED
Quando illuminato indica che non è possibile eet-
tuare la chiamata perché è in corso una chiamata o
una conversazione (dal posto esterno dal quale si sta
eettuando la chiamata o da uno dei posti esterni in
caso di sistemi a più ingressi). Il LED è spento quando
il sistema è a riposo.
Quando illuminato indica che la chiamata da posto es-
terno è in corso. Il LED si spegnerà alla risposta o comun-
que ad esaurimento del numero di squilli programmati.
Quando illuminato indica che è possibile avviare la
conversazione perché l’utente chiamato ha risposto.
Il LED si spegnerà a chiusura della conversazione o in
ogni caso allo scadere del tempo di conversazione.
Quando illuminato indica che il relè apri-porta è sta-
to attivato. Il LED si spegnerà allo scadere del tempo
d’apertura porta programmato.
REGOLAZIONI
Bilanciamento
Previene l’eetto Larsen su conversazione audio bidirezionale.
Volume altoparlante
Regolazione del volume dell’altopalralte.
Ruotare in senso antiorario per diminuire o orario per aumentare
Volume microfono
Regolazione del volume del microfono.
Ruotare in senso antiorario per diminuire o orario per aumentare
PROGRAMMAZIONE
La programmazione permette di eettuare le seguenti im-
postazioni:
• Unit ID – Identicativo unità (1..8);
• Tempo d’apertura porta (2 o 6 secondi);
• Tempo di conversazione (1 o 2 minuti);
• Indirizzo iniziale matrice pulsanti (1 o 65);
• Telecamera standard (Art.4330N o esterna);
• Modalità operativa del relè apri-porta (scarica capacitiva o
contatti puliti).
Le prime sei impostazioni sono eettuate tramite il dip switch
ad 8 vie mentre la sesta tramite jumper (Fig. 2 riferimento J):
dip-switch e jumper (Fig. 2 riferimento H) sono accessibili nella
parte posteriore del modulo.
UNIT ID
ON
1 3 5 724 6 8
Posizione
switch
ON
1 3 5 72 4 6 8
8=OFF
ON
1 3 5 72 4 6 8
8=ON
1 2 3 ID ID
OFF OFF OFF 1 9
ON OFF OFF 2 10
OFF ON OFF 3 11
ON ON OFF 4 12
OFF OFF ON 5 13
ON OFF ON 6 14
OFF ON ON 7 15
ON ON ON 8 16
TEMPO APERTURA
PORTA
ON
1 3 5 72 46 8
Switch Secondi
4
OFF 2
ON 6
TEMPO DI
CONVERSAZIONE
ON
1 3 572 4 6 8
Switch Minuti
5
OFF 1
ON 2
MATRICE PULSANTI
INDIRIZZO DI INIZIO
ON
1 3 5 72 4 68
Switch Indirizzo
6
OFF 1
ON 65
TELECAMERA
PRINCIPALE*
ON
1 3 5 72 4 6 8
Switch
Telecamera
principale
7
OFF Art.4330N
ON Esterna
* Questa impostazione, quando il posto esterno comprende il modulo telecamera Art.4330N con telecamera esterna collegata a quest’ultimo, denisce la telecamera principale il cui video sarà
mostrato all’arrivo della chiamata. Sarà comunque possibile commutare verso la telecamera impostata come secondaria agendo sull’apposito pulsante dei videocitofono o del monitor vivavoce.

66251360 - V4.0 - 15/09/19
- 7 -
Serie 4000
Art.4303N - Istruzioni di installazione
MATRICE PULSANTI
Il pulsante, quando premuto, genererà un indirizzo specico corrispondente ai morsetti al quale è collegato: ad esempio un pul-
sante collegato tra i morsetti “2” e “B”, quando premuto genererà una chiamata all’indirizzo 10 se lo switch 6 è in posizione OFF o
all’indirizzo 74 se lo switch 6 è in posizione ON.
SW6
OFF 12345678
A1 9 17 25 33 41 49 57
B2 10182634425058
C3 11192735435159
D4 12202836445260
E5 13212937455361
F6 14223038465462
G7 15233139475563
H8 16243240485664
SW6
ON 12345678
A65 73 81 89 97 105 113 121
B66 74 82 90 98 106 114 122
C67 75 83 91 99 107 115 123
D68 76 84 92 100 108 116 124
E69 77 85 93 101 109 117 125
F70 78 86 94 102 110 118 126
G71 79 87 95 103 111 119 127
H72 80 88 96 104 112 120 128
COME COLLEGARE LA SERRATURA ELETTRICA
Il relé “apri-porta”può operare nel modo“contatti puliti” o nel modo “scarica capacitiva”:
• Nel modo“contatti puliti”il relé funziona nella maniera classica, è necessario un alimentatore o una fonte di alimentazio-
ne per la serratura (12-24Vac/dc 2A max) e la durata di attivazione dipende dal tempo d’apertura porta programmato.
• Nel modo “scarica capacitiva” i contatti del relè, al momento dell’attivazione, alimentano direttamente
la serratura (12Vac/dc 1A max) per un istante. Non è richiesto un alimentatore per la serratura e il tem-
po d’apertura porta programmato non inuisce sul tempo di attivazione.
A causa del possibile deterioramento delle prestazioni meccaniche della serratura elettrica, la “scarica capacitiva”,
col tempo, può incorrere in malfunzionamenti dovuti appunto alla serratura. Nel caso in cui la serratura venga
impiegata in ambienti particolarmente polverosi o comunque particolarmente esposti agli agenti atmosferici, si
consiglia di utilizzare il relè“apri-porta”nel modo“contatti puliti”.
** Nel modo scarica capacitive la serratura elettrica va collegata tra i morsetti GND e NO.
12Vac/dc 1A Max
Fig. 3 Utilizzo con scarica capacitiva
12Vac 1.6A Max utilizzando Art.321
24Vac/dc 2A Max utilizzando altri alimentatori
Fig. 4 Utilizzo con alimentatore separato
Posizione
jumper
Modo
operativo
Superiore
Contatti
puliti
Inferiore
Scarica
capacitiva**
Art.4303N Modulo portiere elettrico con interfaccia pulsanti tradizionali incorporata

66251360 - V4.0 - 15/09/19
- 8 -
Serie 4000
Art.4303N - Istruzioni di installazione
SEGNALI DELLA MORSETTERIA
1Morsetto comune per gli indirizzi 1..8 (switch 6 = OFF)
oppure 65..72 (switch 6 = ON) EIndirizzi 5,13,21,29,37,45,53, 61 (switch 6 = OFF)
Indirizzi 69,77,85,93,101,109,117, 125 (switch 6 = ON)
2Morsetto comune per gli indirizzi 9..16 (switch 6 = OFF)
oppure 73..80 (switch 6 = ON) FIndirizzi 6,14,22,30,38,46,54, 62 (switch 6 = OFF)
Indirizzi 70,78,86,94,102,110,118, 126 (switch 6 = ON)
3Morsetto comune per gli indirizzi 17..24 (switch 6 = OFF)
oppure 81..88 (switch 6 = ON) GIndirizzi 7,15,23,31,39,47,55, 63 (switch 6 = OFF)
Indirizzi 71,79,87,95,103,111,119, 127 (switch 6 = ON)
4Morsetto comune per gli indirizzi 25..32 (switch 6 = OFF)
oppure 89..96 (switch 6 = ON) HIndirizzi 8,16,24,32,40,48,56, 64 (switch 6 = OFF)
Indirizzi 72,80,88,96,104,112,120, 128 (switch 6 = ON)
5
Morsetto comune per gli indirizzi 33..40 (switch 6 = OFF) oppure 97..104 (switch 6 = ON)
BUS Morsetti di connessione al bus
6
Morsetto comune per gli indirizzi 41..48 (switch 6 = OFF) oppure 105..112 (switch 6 = ON)
BUS
7
Morsetto comune per gli indirizzi 49..56 (switch 6 = OFF) oppure 113..120 (switch 6 = ON)
PTE Ingresso attivo basso per segnale“push to exit”
8
Morsetto comune per gli indirizzi 57..64 (switch 6 = OFF) oppure 121..128 (switch 6 = ON)
GND Massa
AIndirizzi 1,9,17,25,33,41,49, 57 (switch 6 = OFF) CRelè apri-porta contatto comune
Max 12-24
Vac/dc 3A
Indirizzi 65,73,81,89,97,105,113, 121 (switch 6 = ON)
BIndirizzi 2,10,18,26,34,42,50, 58 (switch 6 = OFF) NC Relè apri-porta contatto normalmente
chiuso
Indirizzi 66,74,82,90,98,106,114, 122 (switch 6 = ON)
CIndirizzi 3,11,19,27,35,43,51, 59 (switch 6 = OFF) NO Relè apri-porta contatto normalmente
aperto
Indirizzi 67,75,83,91,99,107,115, 123 (switch 6 = ON)
DIndirizzi 4,12,20,28,36,44,52, 60 (switch 6 = OFF) VAUX Ingresso di alimentazione 35Vdc (se utilizzato il modulo
non viene più alimentato dal BUS)
Indirizzi 68,76,84,92,100,108,116, 124 (switch 6 = ON)
RIMOZIONE/INSERIMENTO DEL PORTACARTELLINO
• Per evitare ammaccature della placca frontale, proteggere il lato che verrà in
contatto con la lama del cacciavite utilizzando una striscia di nastro isolante;
• Inserire il cacciavite (lato piatto della lama) nell’apposita fessura del por-
ta cartellino come mostrato in Fig. 5;
• Fare leva con il cacciavite come mostrato in Fig. 6 per rimuovere il por-
ta-cartellino (fare attenzione a non ammaccare la placca);
• Modicare il cartellino e riporlo all’interno del porta-cartellino quindi
riposizionare lo stesso al suo posto inserendolo nel suo alloggiamento
dal lato destro o sinistro e premendo il lato rimasto libero no all’aggan-
cio (compiendo un movimento contrario a quello fatto per estrarlo).
Fig. 5 Fig. 6
APPLICAZIONE GUARNIZIONE ADESIVA
Applicare la guarnizione adesiva Ycome mostrato in Fig. 7.
INSERIMENTO FERMI ANTIEFFRAZIONE
Inserire i fermi anti-erazione Wcome mostrato in Fig. 8.
Y
G
Fig. 7
W
Fig. 8
SPECIFICHE TECNICHE
Formato/Montaggio: Un modulo Serie 4000 / Sistema mo-
dulare Serie 4000
Pulsanti: Si, da 0 a 2 in base alla versione di
portiere elettrico
Programmazione:
Si, eseguita tramite il dip-switch a 8 vie ed
il jumper presenti sul retro del modulo
Controlli: Trimmer di regolazione volume microfo-
no e altoparlante più trimmer“Balance”
Alimentazione: Fornita dal BUS
Assorbimenti: A riposo: 28mA
In funzione: 38mA
Temperatura di lavoro:-10 +50 °C
PULIZIA DELLA PLACCA
Usare un panno morbido e pulito. Usare acqua tiepida o un de-
tergente non aggressivo.
Non usare:
• prodotti abrasivi;
• prodotti contenenti cloro;
• prodotti per la pulizia dei metalli.
Art.4303N Modulo portiere elettrico con interfaccia pulsanti tradizionali incorporata

66251360 - V4.0 - 15/09/19
- 9 -

66251360 - V4.0 - 15/09/19
- 10 -

66251360 - V4.0 - 15/09/19
- 11 -

66251360 - V4.0 - 15/09/19
- 12 -

66251360 - V4.0 - 15/09/19
- 13 -
DISPOSAL
In accordance with the Legislative Decree no. 49 of 14 March 2014 “Implementation of the Directive 2012/19/EU on
waste electrical and electronic equipment (WEEE)”.
The crossed-out bin symbol on the equipment or on the packaging indicates that when the product reaches the end
of its lifetime, it must be collected separately from mixed municipal waste. The user must, therefore, dispose of the
equipment at the end of its lifetime in the suitable waste collection centres or bring it to the retailer during the pur-
chase of a new equipment of equivalent type at the ratio of one-to-one. Furthermore, the user is allowed to dispose
of the WEEEs of very small size (domestic appliances without any external dimension exceeding 25 cm (9.84 inches)
for free to the retailers, without any purchase obligation. The correct waste disposal of the WEEEs contributes to their
reuse, recycling and recovery and avoids potential negative eects on the environment and human health due to the
possible presence of dangerous substances within them.
SMALTIMENTO
Ai sensi del Decreto Legislativo 14 marzo 2014, n° 49 “Attuazione della direttiva 2012/19/UE sui riuti di apparecchia-
ture elettriche ed elettroniche (RAEE)”.
Il simbolo del cassonetto barrato riportato sull’apparecchiatura o sulla sua confezione indica che il prodotto alla ne
della propria vita utile deve essere raccolto separatamente dagli altri riuti urbani misti. L’utente dovrà, pertanto, con-
ferire l’apparecchiatura giunta a ne vita presso gli idonei centri di raccolta dierenziata oppure riconsegnarla al riven-
ditore al momento dell’acquisto di una nuova apparecchiatura di tipo equivalente, in ragione di uno a uno. L’utente ha,
inoltre, la possibilità di conferire gratuitamente presso i distributori, senza alcun obbligo di acquisto, per i RAEE di pic-
colissime dimensioni (per le apparecchiature di tipo domestico con nessuna dimensione esterna superiore a 25 cm).
L’adeguata raccolta dierenziata dei RAEE contribuisce al loro riutilizzo, riciclaggio e recupero ed evita potenziali ef-
fetti negativi sull’ambiente e sulla salute umana dovuti alla eventuale presenza di sostanze pericolose al loro interno.
ÉLIMINATION
Conformément au décret législatif n ° 49 du 14 mars 2014 relatif à l’«Application de la directive 2012/19 / UE relative
aux déchets d’équipements électriques et électroniques (DEEE)».
Lesymbole dela poubelle barréesur l’équipementousur sonemballageindique que leproduitennde vie utiledoit être
collecté séparément des autres déchets municipaux en mélange. L’utilisateur doit donc remettre l’équipement en n de
vieauxcentresdecollecteappropriésoulerestitueraurevendeurlorsdel’achatd’unnouveautyped’équipementéquiva-
lent,danslerapportdeunàun.Deplus,l’utilisateuralapossibilitédeconférergratuitementauxdistributeurs,sansaucune
obligation d’achat, de très petits DEEE (pour les appareils ménagers sans dimensions extérieures supérieures à 25 cm).
La collecte séparée adéquate des DEEE contribue à leur réutilisation, leur recyclage et leur valorisation et évite les
éventuels eets négatifs sur l’environnement et la santé humaine en raison de la présence possible de substances
dangereuses dans ceux-ci.
ELIMINACIÓN
De conformidad con el Decreto legislativo n. 49 de 14 de marzo 2014“Aplicación de la Directiva 2012/19/UE relativa a
residuos de aparatos eléctricos y electrónicos (RAEE)”.
El símbolo del contenedor tachado indicado sobre los aparatos o sobre los embalajes señala que el producto al -
nal de su vida útil debe ser recogido separadamente de otros residuos municipales mezclados. Por tanto, el usuario
deberà conferir los aparatos al nal de su vida útil en los apropriados centros de recogida selectiva o devolverlos al
revendedor al momento de la compra de nuevos aparatos equivalentes, en una relación de uno a uno. Además, el
usuario tiene la posibilidad de entregar sin cargo a los distribuidores, sin ninguna obligación de compra, los RAEEs
muy pequeños (para electrodomésticos sin dimensiones externas superiores a 25 cm).
La recogida selectiva apropriada de los RAEEs contribuye a su reutilización, reciclaje y valorización y evita potenciales
impactos negativos sobre el medio ambiente y la salud humana debidos a la possible presencia de substancias peli-
grosas dentro de ellos.
VERWIJDERING
In overeenstemming met het Wetsbesluit nr. 49 van 14 maart 2015“Implementatie van de Richtlijn 2012/19/EU inzake
afgedankte elektrische en elektronische apparaten (AEEA)”.
Het doorgekruiste vuilnisbaksymbool op het apparaat of de verpakking geeft aan dat het product aan het einde van
zijn levensduur niet samen met het gewone huisvuil weggegooid mag worden. De gebruiker moet het apparaat aan
het einde van zijn levensduur inleveren bij een gepast inzamelpunt of de winkel waar hij een nieuw apparaat van een
gelijksoortig type zal kopen. De gebruiker kan tevens AEEA’s van een zeer klein formaat (huishoudapparaten met een
buitenafmeting kleiner dan 25 cm (9,84 inch)) gratis en zonder enige aankoopverplichting bij handelaars inleveren.
Een juiste verwijdering van AEEA’s draagt bij tot hergebruik, recycling en terugwinning, en voorkomt potentiële ne-
gatieve eecten op het milieu en de menselijke gezondheid door de mogelijke aanwezigheid van gevaarlijke stoen.

66251360 - V4.0 - 15/09/19
- 14 -

66251360 - V4.0 - 15/09/19
- 15 -

MANUFACTURER
FABBRICANTE
FABRICANT
FABRICANTE
FABRIKANT
ΔόϧλϣϟΔϛέηϟ
VIDEX ELECTRONICS S.P.A.
Via del Lavoro, 1
63846 Monte Giberto (FM) Italy
Tel (+39) 0734 631669
Fax (+39) 0734 632475
CUSTOMER SUPPORT
SUPPORTO CLIENTI
SUPPORTS CLIENTS
ATENCIÓN AL CLIENTE
KLANTENDIENST
˯ϼϣόϟΔϣΩΧ
VIDEX ELECTRONICS S.P.A.
Tel: +39 0734-631669
Fax: +39 0734-632475
UK Customers only:
VIDEX SECURITY LTD
www.videxuk.com
Tech Line: 0191 224 3174
Fax: 0191 224 1559
Main UK oce:
VIDEX SECURITY LTD
1 Osprey Trinity Park
Trinity Way
LONDON E4 8TD
Phone: (+44) 0870 300 1240
Fax: (+44) 020 8523 5825
www.videxuk.com
Northern UK oce:
VIDEX SECURITY LTD
Unit 4-7
Chillingham Industrial Estate
Chapman Street
NEWCASTLE UPON TYNE - NE6 2XX
Tech Line: (+44) 0191 224 3174
Phone: (+44) 0870 300 1240
Fax: (+44) 0191 224 1559
Greece oce:
VIDEX HELLAS Electronics
48 Filolaou Str.
11633 ATHENS
Phone: (+30) 210 7521028
(+30) 210 7521998
Fax: (+30) 210 7560712
www.videx.gr
Danish oce:
VIDEX DANMARK
Hammershusgade 15
DK-2100 COPENHAGEN
Phone: (+45) 39 29 80 00
Fax: (+45) 39 27 77 75
www.videx.dk
Benelux oce:
NESTOR COMPANY NV
E3 laan, 93
B-9800 Deinze
Phone: (+32) 9 380 40 20
Fax: (+32) 9 380 40 25
www.videx.be
Dutch oce:
NESTOR COMPANY BV
Business Center Twente (BCT)
Grotestraat, 64
NL-7622 GM Borne
www.videxintercom.nl
info@videxintercom.nl
El producto lleva la marca CE que demuestra su conformidad y puede ser
distribuido en todos los estados miembros de la unión europea UE.
Este producto cumple con las Directivas Europeas 2014/30/EU (EMC);
2014/35/EU (LVD); 2011/65/EU (RoHS): marca CE 93/68/EEC.
Het product heeft de CE-markering om de conformiteit ervan aan te tonen en
is bestemd voor distributie binnen de lidstaten van de EU zonder beperkin-
gen. Dit product volgt de bepalingen van de Europese Richtlijnen 2014/30/EU
(EMC); 2014/35/EU (LVD); 2011/65/EU (RoHS): CE-markering 93/68/EEG.
Le produit est marqué CE à preuve de sa conformité et peut être distribué
librement à l’intérieur des pays membres de l’union européenne EU.
Ce produit est conforme aux directives européennes 2014/30/EU (EMC) ;
2014/35/EU (LVD) ; 2011/65/EU (RoHS): marquage CE 93/68/EEC.
The product is CE marked demonstrating its conformity and is for distribution
within all member states of the EU with no restrictions. This product follows
the provisions of the European Directives 2014/30/EU (EMC); 2014/35/EU
(LVD); 2011/65/EU (RoHS): CE marking 93/68/EEC.
Il prodotto è marchiato CE a dimostrazione della sua conformità e può essere
distribuito liberamente all’interno dei paesi membri dell’Unione Europea UE.
Questo prodotto è conforme alle direttive Europee: 2014/30/UE (EMC);
2014/35/UE (LVD); 2011/65/UE (RoHS): marcatura CE 93/68/EEC.
ΕΎϔλϭϣϟϊϣϪϘϓϭΗέΎϬυϹCEϲΑϭέϭϷϕϓϭΗϟΔϣϼϋΞ˴ΗϧϣϟϝϣΣϳ
ΩϭϳϗΔϳϥϭΩΑϲΑϭέϭϷΩΎΣΗϻϝϭΩΔϓΎϛϲϓϪόϳίϭΗΔϳϧΎϛϣ·ϭΔϠ ˶
λϟΕΫ
EU/2014/30ΔϳΑϭέϭϷΕΎϬϳΟϭΗϟΕΎΑϠρΗϣϊϳϣΟΞ˴ΗϧϣϟΫϫϲΑϠϳ
:(RoHS˰˰(EMC); 2014/35/EU (LVD); 2011/65/EU
.CE 93/68/EECΔϳΑϭέϭϷΕΎϔλϭϣϠϟΔϘΑΎρϣϟΔϣϼϋ
Other manuals for 4000 Series
31
This manual suits for next models
4
Table of contents
Languages:
Other Videx Speakers manuals

Videx
Videx 4000 Series User manual

Videx
Videx 4000 Series User manual

Videx
Videx 4832 User manual

Videx
Videx 4000 Series User manual

Videx
Videx 4000 Series User manual

Videx
Videx 4837 Series User manual

Videx
Videx 136 User manual

Videx
Videx 4000 Series User manual

Videx
Videx 4000 Series User manual

Videx
Videx 4832 User manual