manuals.online logo
Brands
  1. Home
  2. •
  3. Brands
  4. •
  5. Viessmann
  6. •
  7. Toy
  8. •
  9. Viessmann 4162 User manual

Viessmann 4162 User manual

Viessmann
Modellspielwaren GmbH
Am Bahnhof 1
D - 35116 Hatzfeld
www.viessmann-modell.de
4
Sachnummer 98891
Stand 02
01/04
Wir wünschen Ihnen viel Spaß mit Ihrer Modellbahnanlage!
We wish you lots of fun with your model railway!
Die -Quertragwerke sind sehr universell einsetzbar. Die komplette Einheit des
Halteelementes ist in der Längsrichtung verschiebbar. Sollte der Mastabstand von 235 mm bzw.
312,5 mm zu groß sein, können Sie diesen mit wenigen Handgriffen verringern und auch die
Anordnung der Halteelemente (wie in Abb. 4 dargestellt) ändern. Die Höhe des Tragseiles
ändert sich mit Verschieben der Halteelemente (Abb. 3). Durch Verschieben der Kunststoff-
aufnahme auf dem senkrechten Draht (Abb.2) kann der Verlauf neu eingestellt werden. Die
endgültige Position kann durch einen Tropfen Sekundenkleber fixiert werden.
Viessmann
ViessmannThe cross span bridges are usable very universal. The complete holding unit can be
longways removed. If the spacing of 235 mm resp. 312.5 mm is too big, you can shorten it with
some movement of the band and change the arrangement of the holding elements (as shown on
figure 4), too. The height of the messenger-cable changes with removing of the holding units (fig.
3). The course can be adjusted anew by removing the vertical wire in the plastic clamp. The final
length can be fixed with a bit of adhesive.
Das Quertragwerk ist für einen Gleisabstand von 77,5 mm vorgesehen. Möchten Sie den
Gleisabstand bzw. Mastmittenabstand verringern, gehen Sie wie folgt vor:
1. Schieben Sie die beiden Masten etwas zusammen (so dass die Richtseile auf einer Seite
ausreichend lang aus dem Mast herausragen).
2. Kürzen Sie die beiden Richtseile auf die gewünschte Länge + einer Zugabe von 5 mm für
das Umbiegen.
3. Kanten Sie die gekürzten Richtseile mit Hilfe der Biegezange 4198 bzw. einer Flachzange, auf
einer Länge von ca. 5 mm um 90 Grad, ab. (Abb. 1.)
4. Schieben Sie die Masten auf die montierten Grundträger auf (sieheAufbau Punkt 5), und
ziehen Sie diese auf den gewünschtenAbstand auseinander. Bei diesem Vorgang wird
gleichzeitig die notwendige Spannung in den Richtseilen erzeugt.
5. Schieben Sie die Halteelemente auf die gewünschte Position.
6. Anschließend kürzen Sie die Tragseile, indem Sie das verknotete Ende aus der Turmmast-
spitze herausziehen und um das entsprechende Maß gekürzt neu verknoten. Die
überschüssige Länge können Sie abschneiden.
The cross span bridge is intended for a track spacing of 77.5 mm. If you would like to reduce the
track distance resp. the middle mast distance you just do the following:
1. Move both masts to a degree together (so that the stays jit out from the masts on the one side).
2. Shorten both stays till you reach the intended length + an extra length of 5 mm for bending.
3. Bend the shortened stays to approx. 5 mm and 90 degree by the help of an eyehook
bending pliers resp. a pliers. (fig. 1)
4. Remove the masts to the mounted groundsockets (see point 5) and pull them to the wished
spacing away. At this process the necessary voltage is produced in the stays at the same time.
5. Remove the holding elements to the intended position.
6. Afterwards shorten the holding stays by pulling the knotty end out of the tower mast top.Then
shorten it to the intended degree and knot again. The unnecessary parts can be cut off.
1
Quertragwerk H0
4163 ( )
Cross Span Bridge H0
4162 ( )über 3 Gleise
über 4 Gleise
Betriebsanleitung
Operating Instructions
Viessmann
Modellspielwaren GmbH
Anpassen
Fitting
61,6 mm
63,5 mm
58,0 mm
Gleisabstand a
Track distance
77,5 mm
77,4 mm
64,6 mm
Gleissystem
Track system
Märklin K-Gleis
Märklin M-Gleis
Märklin C-Gleis
Gleissystem
Track system
Roco mit und ohne Bettung
Fleischmann Modell-Gleis
Fleischmann Profi-Gleis
Gleisabstand a
Track distance
D Dieses Produkt ist kein Spielzeug.
Nicht geeignet für Kinder unter 14
Jahren! Anleitung aufbewahren!
GB This product is not a toy.
Not suitable for children under 14
years!
F Ce produit n'est pas un jouet. Ne
convient pas aux enfants de moins
de 14 ans! Conservez cette notice
d’instructions!
Keep these instructions!
I Questo prodotto non è un giocattolo.
Non adatto a bambini al di sotto dei 14
anni!
E Esto no es un juguete. No
recomendado para menores de 14
años!
NL Dit produkt is geen speelgoed. Niet
geschikt voor kinderen onder 14 jaar!
Gebruiksaanwijzing bewaren!
Conservare instruzioni per l’uso!
Conserva las instrucciones de
servicio!
2
Einleitung
Indroduction
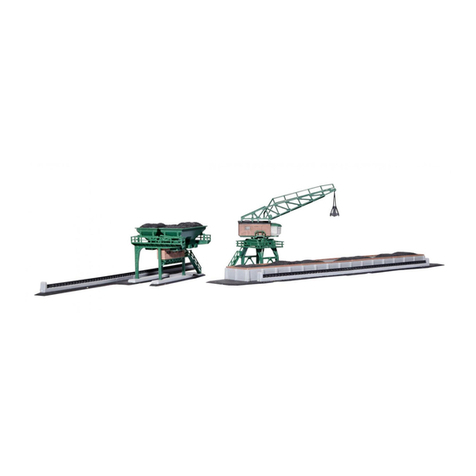
Die fertig montierten und lackierten Quertragwerke 4162 und 4163 zeichnen sich besonders
durch ihre universellen Einsatzmöglichkeiten aus. Durch die elektrische Trennung der
Halteelemente können drei bzw. vier Gleise unabhängig voneinander betrieben werden.
The cross span bridges 4162 and 4163 convince by their universal use. By the electrical
insulation of the holding units three resp. four tracks can be used independent of each other.
Aufbau
Building
Die Turmmasten der Quertragwerke sind über eine T-Nuten-Führung mit einem Grundträger
verbunden. Dadurch wird eine Montage von der Oberseite derAnlage aus ermöglicht.
The tower masts of the cross span bridges are connected to the groundsocket by a t-groove.
So a mounting from the upper side of your model railway layout is possible.
1. Schieben Sie die Turmmasten vorsichtig
von den Grundträgern herunter. Fassen
Sie sie dazu nicht am Mast, sondern am
Kunststoffsockel an.
1. Pull down the tower mast from the
groundsocket carefully. Please touch only
the plastic-plate, not the mast.
2. Positionieren Sie die Grundträger an den
gewünschten Stellen auf Ihrer Anlage.
Der richtige Abstand zur Gleismitte kann
mit Hilfe der Mastpositionslehre 4197
bestimmt werden.
2. Set the groundsocket on its place on your
model railway. You can find the correct
distance to the middle of the track by
using the mastposition gauge 4197.
3. Markieren Sie mit Hilfe eines Stiftes oder einer Spitze die Schraubenpositionen.
Anschließend entfernen Sie die Grundträger und stechen bzw. bohren mit einem 1,2 mm
Bohrer die ermittelten Positionen vor.
Æ
3. Mark the position of the screw with a pencil or something else. Then remove the ground-
plate and prick or drill the position you have found with a 1,2 mm drill.Æ
4. Positionieren Sie nun die Grundträger erneut und befestigen diese mit den beiliegenden
Senkkopfschrauben und einem Kreuzschlitzschraubendreher ( 4199) auf Ihrer
Anlage.
).
Viessmann
Viessmann
4. Set the groundplate on your model railway again and fix it with the enclosed screws and a
screwdriver ( 4199
Positionierungs-
bohrung
position-drill
Befestigungs-
bohrungen
fixing-drills
5. Schieben Sie die Turmmasten mit der
T-Nut wieder auf den Grundträger auf.
Fassen Sie sie bitte auch hierbei nicht
am Mast, sondern lediglich am Kunststoff-
sockel an.
5. Put the tower mast with the t-groove
back on the groundsocket. Please touch
only the plastic-plate, not the mast.
Einstellung
Adjustment
Durch die freie Verschiebbarkeit jedes Halteelementes auf dem Richtseil läßt sich das
Quertragwerk universell für jedes Gleissystem bzw. für jeden Gleisabstand einstellen.
You can adjust the cross span bridge by free moving of each holding unit on the stays, for each
track system resp. for every track distance.
3
Abb. 4
Fig. 4
Abb. 2
Fig. 2
Abb. 1
Fig. 1
Abb. 1
Fig. 1
Abb. 2
Fig. 2
Abb. 3
Fig. 3
40
Richtseile
stays
Quertragseil
messenger-cable
40 aa
aaa
max. 235
max. 312,5
150
170

This manual suits for next models

1

Other Viessmann Toy manuals

Viessmann 2110 User manual

Viessmann

Viessmann 2110 User manual

Viessmann VOLLMER 45147 User guide

Viessmann

Viessmann VOLLMER 45147 User guide

Viessmann 4511 User manual

Viessmann

Viessmann 4511 User manual

Viessmann 4518 User manual

Viessmann

Viessmann 4518 User manual

Viessmann Vollmer 47503 User guide

Viessmann

Viessmann Vollmer 47503 User guide

Viessmann 9500 User manual

Viessmann

Viessmann 9500 User manual

Viessmann 6338 User manual

Viessmann

Viessmann 6338 User manual

Viessmann kibri 38144 User manual

Viessmann

Viessmann kibri 38144 User manual

Viessmann 6730 User manual

Viessmann

Viessmann 6730 User manual

Viessmann 4500 User manual

Viessmann

Viessmann 4500 User manual

Viessmann 5023 User manual

Viessmann

Viessmann 5023 User manual

Viessmann 4610 User manual

Viessmann

Viessmann 4610 User manual

Viessmann 4709 H0 User manual

Viessmann

Viessmann 4709 H0 User manual

Viessmann 1500 User manual

Viessmann

Viessmann 1500 User manual

Viessmann 5242 User manual

Viessmann

Viessmann 5242 User manual

Viessmann 4555 User manual

Viessmann

Viessmann 4555 User manual

Viessmann Sh0 User manual

Viessmann

Viessmann Sh0 User manual

Viessmann 2310 User manual

Viessmann

Viessmann 2310 User manual

Viessmann 4165 User manual

Viessmann

Viessmann 4165 User manual

Viessmann kibri 36829 User guide

Viessmann

Viessmann kibri 36829 User guide

Viessmann 4600 User manual

Viessmann

Viessmann 4600 User manual

Viessmann 6170 User manual

Viessmann

Viessmann 6170 User manual

Viessmann 26254 User manual

Viessmann

Viessmann 26254 User manual

Viessmann kibri 36606 User guide

Viessmann

Viessmann kibri 36606 User guide

Popular Toy manuals by other brands

Faller 232543 manual

Faller

Faller 232543 manual

Beyblade B-12 instructions

Beyblade

Beyblade B-12 instructions

GWS GWS-T6 instruction manual

GWS

GWS GWS-T6 instruction manual

Carf-Models CL-41 Tutor manual

Carf-Models

Carf-Models CL-41 Tutor manual

Mikado LOGO 800 manual

Mikado

Mikado LOGO 800 manual

Faller MODERN BUS SHELTER WITH PLATFORM Assembly instructions

Faller

Faller MODERN BUS SHELTER WITH PLATFORM Assembly instructions

REVELL 03967 manual

REVELL

REVELL 03967 manual

Startright Puppet Laptop User instruction guide

Startright

Startright Puppet Laptop User instruction guide

Mega Bloks Thomas & Friends Thomas Visits the Castle Instruction

Mega Bloks

Mega Bloks Thomas & Friends Thomas Visits the Castle Instruction

Avigo MINI Cooper Paceman 5F6262F owner's manual

Avigo

Avigo MINI Cooper Paceman 5F6262F owner's manual

arf AeroPet 50 instruction manual

arf

arf AeroPet 50 instruction manual

Tail Company MiTail instructions

Tail Company

Tail Company MiTail instructions

Vollmer H0 Mounting instruction

Vollmer

Vollmer H0 Mounting instruction

SIG 3D MAYHEM ARF Assembly manual

SIG

SIG 3D MAYHEM ARF Assembly manual

Top Gun Park Flite CESSNA EP instruction manual

Top Gun Park Flite

Top Gun Park Flite CESSNA EP instruction manual

Beyblade Wolborg 2 instructions

Beyblade

Beyblade Wolborg 2 instructions

Mattel Mojang GNM44 quick start guide

Mattel

Mattel Mojang GNM44 quick start guide

Enabling Devices 1363 user guide

Enabling Devices

Enabling Devices 1363 user guide

manuals.online logo
manuals.online logoBrands
  • About & Mission
  • Contact us
  • Privacy Policy
  • Terms and Conditions

Copyright 2025 Manuals.Online. All Rights Reserved.