manuals.online logo
Brands
  1. Home
  2. •
  3. Brands
  4. •
  5. viparspectra
  6. •
  7. Lighting Equipment
  8. •
  9. viparspectra Timer Control Series User manual

viparspectra Timer Control Series User manual

Step 6. Press , then press to setup start-working time for channel 1, the hour
will flash. Using and , select the desired hour. Press or to save the
hour and activate the minutes.Using and , select the desired minutes. Press
to save settings.
Step 7. Press , repeat step 6 to setup off-working time for channel 1.
Step 8. Press , repeat step 6 to setup start-working time for channel 2.
Step 9. Press , repeat step 6 to setup off-working time for channel 2.
Step 10. Press to confirm that the system has saved the desired start-working
and off-working time for channel 1 and channel 2.
Step 1. Remove the plastic separator from the battery.
Step 2. Press to turn on the light.
Step 3. Press , then press or to select "CH 1". Using and , select
the desired brightness for channel 1. Press to save settings.
Step 4. Press , repeat step 3 to setup brightness for channel 2 ("CH 2").
Step 5. Press , then press to setup current time of day, the hour will flash. Using
and , select the desired hour. Press or to save the hour and activate
the minutes.Using and , select the desired minutes. Press to save settings.
02
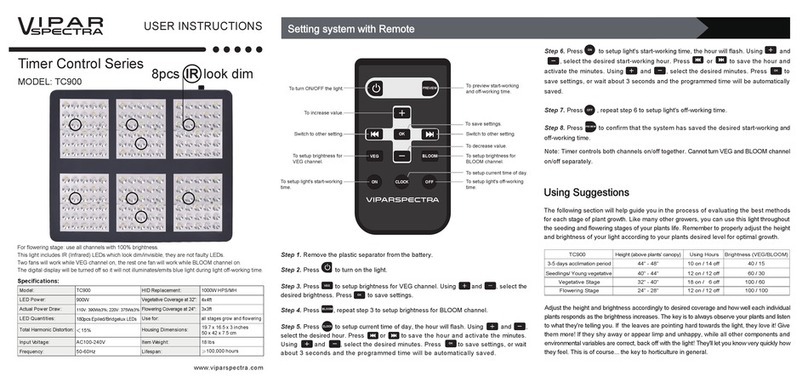
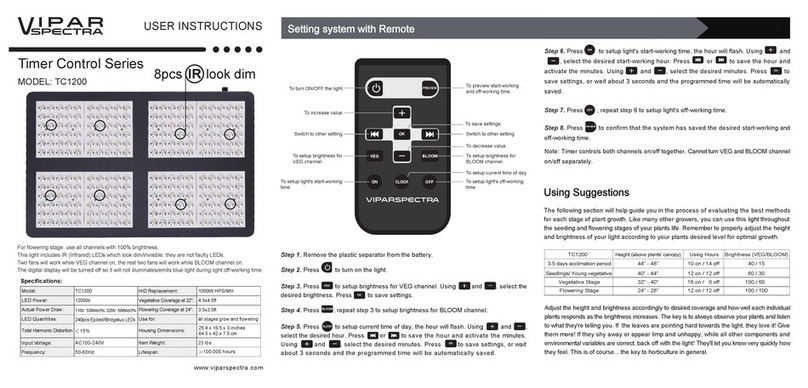
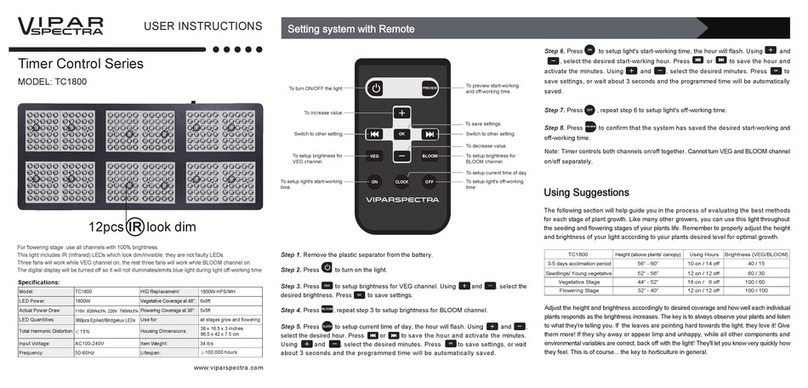
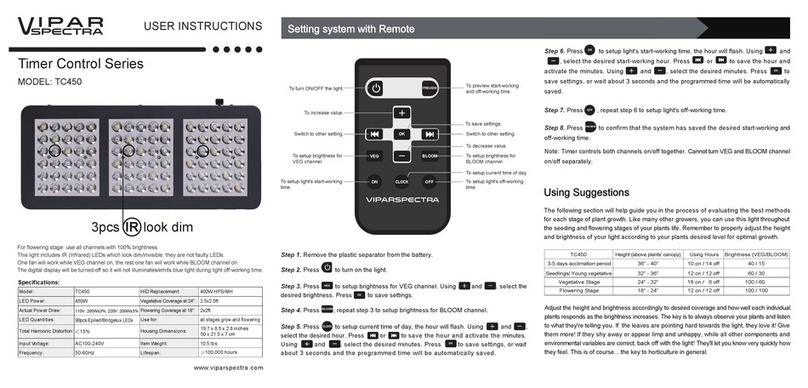
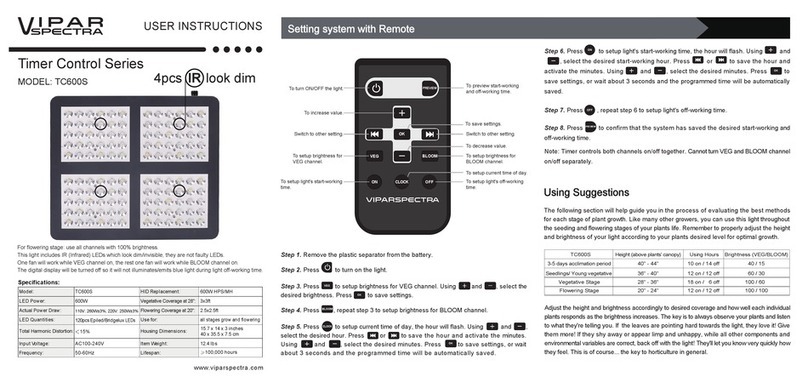
Setting system with Remote
To turn ON/OFF the light.
To save settings for brightness.
Switch to hours/minutes setting.
To setup start-working time for
channel 1.
To setup start-working time for
channel 2.
To setup off-working time for
channel 2.
To setup off-working time for
channel 1.
Switch to hours/minutes
setting.
To increase value.
To decrease value.
To preview start-working
and off-working time for
channel 1 and channel 2.
To setup current time of day.
To enter main menus.
30" ~ 32" long
12" wide
32" ~ 36" long
12" ~ 18" wide
36" ~ 40" long
18" ~ 24" wide
8" ~ 12"Height (Above water) 6" ~ 8" 6" ~ 10"
Tank Size/ L x W
Acclimation period
(3~5 days)
Stage First week Next 2 weeks Afterwards
Read ☆
20~30 / 10~20
Brightness
(Blue / White) 5 / 5 10 / 10
Using Suggestions
How high should I mount the light off of the water?
How should I program my light?
We do not recommend a single light for more than 24" of width front to back. Please adjust
height according to desired coverage and how well the individual strain of corals takes the
increased brightness.
☆The brightness of light is determined by the time of day. Pre dawn and dusk would be
low. Mid-day would be higher. And please kindly also gradually increase or decrease the
brightness depending on different kinds of corals and the response from your corals. Most
users don't increase the brightness beyond 80% power.
Specifications:
Model:
LED Power:
Actual Power Draw:
LED Quantities:
Total Harmonic:
Input Voltage:
Frequency:
T300
100x3W
212W Max
100pcs Epiled/Bridgelux
LEDs
AC100-240V
50-60Hz
Replacement:
Max Coverage at 12" Height:
Core Coverage at 12" Height:
Suit for:
Housing Dimensions:
Item Weight:
Lifespan:
300W MH
32" x 24"
40" x 24"
all types of aqua tank
31.5 x 8.5 x 2.4 inches
15.5 lbs
≥100,000 hours
15%
<
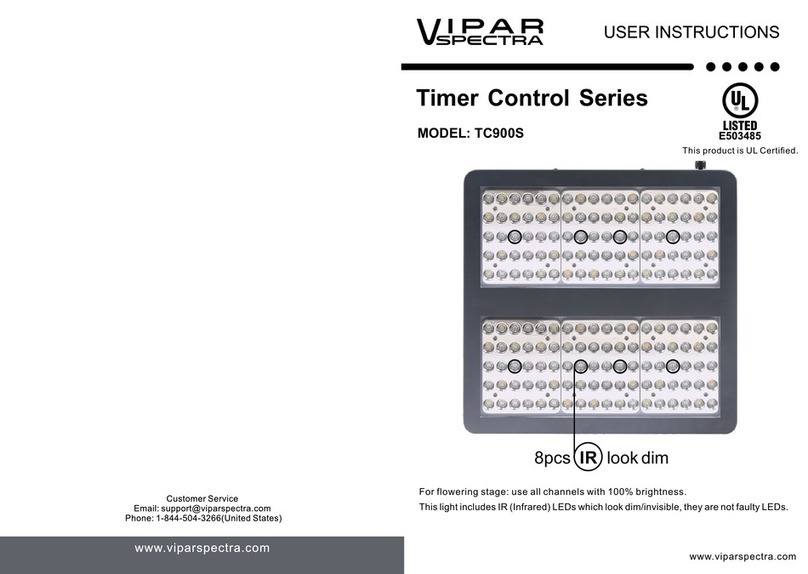
MODEL: T300
USER INSTRUCTIONS
Timer Control Series
www.viparspectra.com
Setting system with Remote
Setting system with Control Knob
flashing select desired hour
brightness
same method as setting
clockwise
clockwise
to increase value select desired brightness
counterclockwise
counterclockwise
press the knob
press the knob
press the knob
press the knob
press the knob
press the knob
rotate
the knob
rotate
the knob
rotate
the knob
rotate
the knob
select desired minuteflashing
to decrease value
wait about 3-5 seconds to save
desired start-working time for
channel 1 and go to next step
press the knob to save
desired brightness
and go to next step
rotate
the knob
press
the knob
to increase value
clockwise
counterclockwise
to decrease value
to increase value
rotate
the knob
same method as setting
Sub-menus of “H-SE”:Main menus:
: Channel 1
: Channel 2
: Timer setting
: Channel 2 off-working time: Channel 1 start-working time
: Channel 1 off-working time
: Channel 2 start-working time
: Current time
Digital Display OVERVIEW
Setting Process
Press the knob to start
same method as setting
to decrease value
Action Function
Press the knob
Rotate clockwise
Rotate counterclockwise
NOTE:
1. Keep pressing the knob around 3 seconds can turn off the light.
2. System will save settings and back to superior menu if no action within 3-5 seconds.
1. power on/off 2. change mode 3. save settings
1. enter mode 2. increase value (+1)
1. enter mode 2. decrease value (-1)
Actions OVERVIEW
WARRANTY TERMS
1. We offer one year warranty for our LED aquarium light purchased against manufacturing
defects, from the date of purchase. If you need warranty assistance, please contact us as
soon as possible.
2. The warranty does not cover damage due to high moisture levels, water, power surges,
improper hanging/mounting, improper use, dust build-up or user modifications.
3. For USA buyers, if any lights stop working within 30 days, you can choose:
(A) Exchange. We will email you a prepaid return label, please ship the light back to our
USA warranty center. A replacement will be sent to you for free as soon as we receive the
defective light.
(B) Money back. We will email you a prepaid return label, please ship the light back to
our USA warranty center. You will get your money back as soon as we receive the defective
light.
(C) Repairing. We can send parts free of charge immediately if you’d like to repair simple
defect. Or we will email you a prepaid return label to bring light back, then ship back to you
after we repair it. All for free.
4. For buyers outside of the USA, if any lights stop working within 30 days, you can choose:
(A) Exchange. Please ship the light back to our warehouse, buyer pays return shipping.
A replacement will be sent to you for free as soon as we receive the defective light.
(B) Money back. Please ship the light back to our warehouse, buyer pays return shipping.
You will get your money back as soon as we receive the defective light.
(C) Repairing. We can send parts free of charge immediately if you’d like to repair simple
defect.
5. To all customers: if any lights stop working over 30 days after delivery, please contact us
to get a satisfactory solution.
6. If a light is sent in with damage that is not covered under warranty, we may still be able to
offer warranty service, however that is at our discretion and repairs may bear a cost which
will be assessed prior to repairing the light.
7. Our company reserves the interpretation right of this warranty terms. If you have any
questions about our warranty policy, please contact us.
Customer Service
Email: [email protected]
Phone: 1-844-504-3266(United States)
This manual suits for next models

1

Other viparspectra Lighting Equipment manuals

viparspectra Timer Control TC450 User manual

viparspectra

viparspectra Timer Control TC450 User manual

viparspectra Dimmable Series User manual

viparspectra

viparspectra Dimmable Series User manual

viparspectra Timer Control TC600S User manual

viparspectra

viparspectra Timer Control TC600S User manual

viparspectra Dimmable Series User manual

viparspectra

viparspectra Dimmable Series User manual

viparspectra Reflector Series User manual

viparspectra

viparspectra Reflector Series User manual

viparspectra KS5000 User manual

viparspectra

viparspectra KS5000 User manual

viparspectra PAR III Series User manual

viparspectra

viparspectra PAR III Series User manual

viparspectra Reflector Series User manual

viparspectra

viparspectra Reflector Series User manual

viparspectra Timer Control Series User manual

viparspectra

viparspectra Timer Control Series User manual

viparspectra Timer Control TC1200 User manual

viparspectra

viparspectra Timer Control TC1200 User manual

viparspectra XS Series User manual

viparspectra

viparspectra XS Series User manual

viparspectra Timer Control TC1800 User manual

viparspectra

viparspectra Timer Control TC1800 User manual

viparspectra Timer Control VT300 User manual

viparspectra

viparspectra Timer Control VT300 User manual

viparspectra KS3000 User manual

viparspectra

viparspectra KS3000 User manual

viparspectra Timer Control TC600 User manual

viparspectra

viparspectra Timer Control TC600 User manual

viparspectra Timer Control TC900 User manual

viparspectra

viparspectra Timer Control TC900 User manual

Popular Lighting Equipment manuals by other brands

Home Decorators Collection HD7838E Use and care guide

Home Decorators Collection

Home Decorators Collection HD7838E Use and care guide

Brizo 8SP-MU-4 manual

Brizo

Brizo 8SP-MU-4 manual

Qazqa Suplux SL 3 Black 103062 instruction manual

Qazqa

Qazqa Suplux SL 3 Black 103062 instruction manual

Aqua Creek Products F-004AB instructions

Aqua Creek Products

Aqua Creek Products F-004AB instructions

ADJUST-A-WINGS HELLION DE Setup instructions

ADJUST-A-WINGS

ADJUST-A-WINGS HELLION DE Setup instructions

DTS DELTA 12 HEAD user manual

DTS

DTS DELTA 12 HEAD user manual

Starline Roldeck user manual

Starline

Starline Roldeck user manual

Govee H618A user manual

Govee

Govee H618A user manual

Setolite ALDEBARAN HERO Instructions for use

Setolite

Setolite ALDEBARAN HERO Instructions for use

Emos CHERRY COLORS manual

Emos

Emos CHERRY COLORS manual

Odyssey FREEDOM Series Assembly and operation instructions

Odyssey

Odyssey FREEDOM Series Assembly and operation instructions

ShowLed CONBOX manual

ShowLed

ShowLed CONBOX manual

Gradus Group Impact FF-OSB60 instructions

Gradus Group

Gradus Group Impact FF-OSB60 instructions

Abex Exhibits LUMIWALL LW-38 manual

Abex Exhibits

Abex Exhibits LUMIWALL LW-38 manual

modway EEI-5298 Assembly instructions

modway

modway EEI-5298 Assembly instructions

Philips bodine LP400 installation instructions

Philips

Philips bodine LP400 installation instructions

Laserworld GREEN-300 user manual

Laserworld

Laserworld GREEN-300 user manual

Jandy Levolor K-1100 installation instructions

Jandy

Jandy Levolor K-1100 installation instructions

manuals.online logo
manuals.online logoBrands
  • About & Mission
  • Contact us
  • Privacy Policy
  • Terms and Conditions

Copyright 2025 Manuals.Online. All Rights Reserved.