Virax VISIOVAL 294020 User manual

Caméra d’inspection numérique couleur
EN : Colour digital inspection
camera User guide
IT : Telecamera d'ispezione
digitale a colori
ES : Cámara de inspección
digital a color
Manual de instrucciones
PT : Câmara de inspecção digital
a cores
Manual de instruções
NL : Digitale
inspectiekleurencamera
Gebruikershandleiding
PL : Numeryczna kolorowa
kamera inspekcyjna
CZ :
kamera
RU :
HE :
VISIOVAL
ref. 294020 / 294030/ 294040
Manuel d’instructions

FRANCAIS
FRANCAIS - MANUEL D’UTILISATION
Génie climatique vous accompagne da
Cette documentation a été réalisée avec soin pour que vous puissiez utiliser la machine
immédiate de la machine.
Consignes de sécurité
Des instructions et avertissements importants sont présentés par symboles.
Attention: Règles de sécurité
Pour votre protection quelques mesures de sécurité doivent être prises:
; Grâce aux techniques
pièce soit manquante. Si toutefois vous trouvez u
avant que les pièces aient été remplacées ou le défaut corrigé. Ne pas observer
cette règle pourrait causer des blessures graves
Le terme «outil» dans les avertissements fait référence à votre outil électrique alimenté par le secteur (avec
cordon d’alimentation) ou votre outil fonctionnant sur batterie (sans cordon d’alimentation).
La machine Virax Visioval ref. 294020/294030/294040 est seulement pour un usage professionnel et ne
peut être utilisée que par des personnes compétentes. Les règles de l'art en usage dans le bâtiment et les
travaux publics doivent toujours être respectées
-
Consignes de sécurité générales
utilisation de la machine autre que celle pour laquelle elle a été conçue.
1. Sécurité de la zone de travail
a) Conserver la zone de travail propre et bien éclairée. Les zones en désordre ou sombres sont propices
aux accidents.
b) Ne pas faire fonctionner les outils électriques en atmosphère explosive, par exemple en présence de
liquides inflammables, de gaz ou de poussières. Les outils électriques produisent des étincelles qui peuvent
enflammer les poussières ou les fumées
c) Maintenir les enfants et les personnes pr
2. Sécurité électrique
a)
fa chement de terre. Des fiches non
modifiées et des prises adaptés réduiront le risque de choc électrique.
b) Eviter tout contact du corps avec des surfaces reliées à la terre telles que les tuyaux, les radiateurs, les
cuisinières et les réfrigérateurs. Il existe un risque accru de choc électrique si votre corps est relié à la terre.
c) Ne pas exposer les outils à la pluie ou à des conditions humides.
outil augmentera le risque de choc électrique.
d)
endommagés ou emmêlés augmentent le risque de choc électrique.
e) térieure.
ctrique.
f) tation protégée par un
dispositif à courant différentiel résiduel (RCD).
3. Sécurité des personnes
a) Rester vigilant, regarder ce que vous êtes en train de faire et faire preuve de bon sens dans votre

FRANCAIS
ou de médicaments.
graves des personnes.
b) Utiliser un équipement de sécurité. Toujours porter une protection pour les yeux. Les équipements de
sécurité (masques contre les poussières, chaussures de sécurité antidérapantes, casques ou protections
acoustiques utilisés pour les conditions appropriées réduiront les blessures de personnes.
c)
bloc de batteries, de le ramasser ou de le porter. Porter les outils en ayant le doigt
d) R he. Une clé laissée fixée sur une partie
e) Ne pas se précipiter. Garder une position et un équilibre adaptés à tout moment. Cela permet un meilleur
nattendues.
f)
vêtements et les gants à distance des parties en mouvement. Des vêtements amples, des bijoux ou les
cheveux longs peuvent être pris dans des parties en mouvement.
g)
Utiliser des collecteurs de
poussière peut réduire les risques dus aux poussières.
4.
a)
manière plus sûre au régime pour lequel il a été construit.
b) Ne pas u
c)
De telles mesures de sécurité préventives
d) rtée des enfants et ne pas permettre à des personnes ne
Les outils sont dangereux entre
e) y a pas de mauvais alignement ou de blocage des
EDe nombreux accidents sont dus à des outils
mal entretenus.
f)
conditions de travail et du travail à réaliser.
prévues pourrait donner lieu à des situations dangereuses.
-
Consignes de sécurité spécifiques
a)
accus dans le feu, ne pas les exposer à des températures élevées :
b)
irritations de la peau ; éviter tout contact avec ce liquide. Si la peau entre en contact avec ce liquide, rincer
e liquide atteint les yeux, rincer les ye
immédiatement un médecin.
c) Ne pas utiliser la camera aux alentours des tours de télévisions et autres sources des champs
magnétiques et électriques : elles pourraient provoquer des brouillages.
d) Les influences extérieures, p.ex. les décharges statiques peuvent provoquer des défauts. Dans ce cas
e) a valise
prévue à cet effet.
f) Tirer et pousser le câble régulièrement sans à coup ; ne pas forcer en cas de blocage. Eviter de frotter le
câble sur des arêtes vives. Ne pas plier ou tordre le câble.
g)
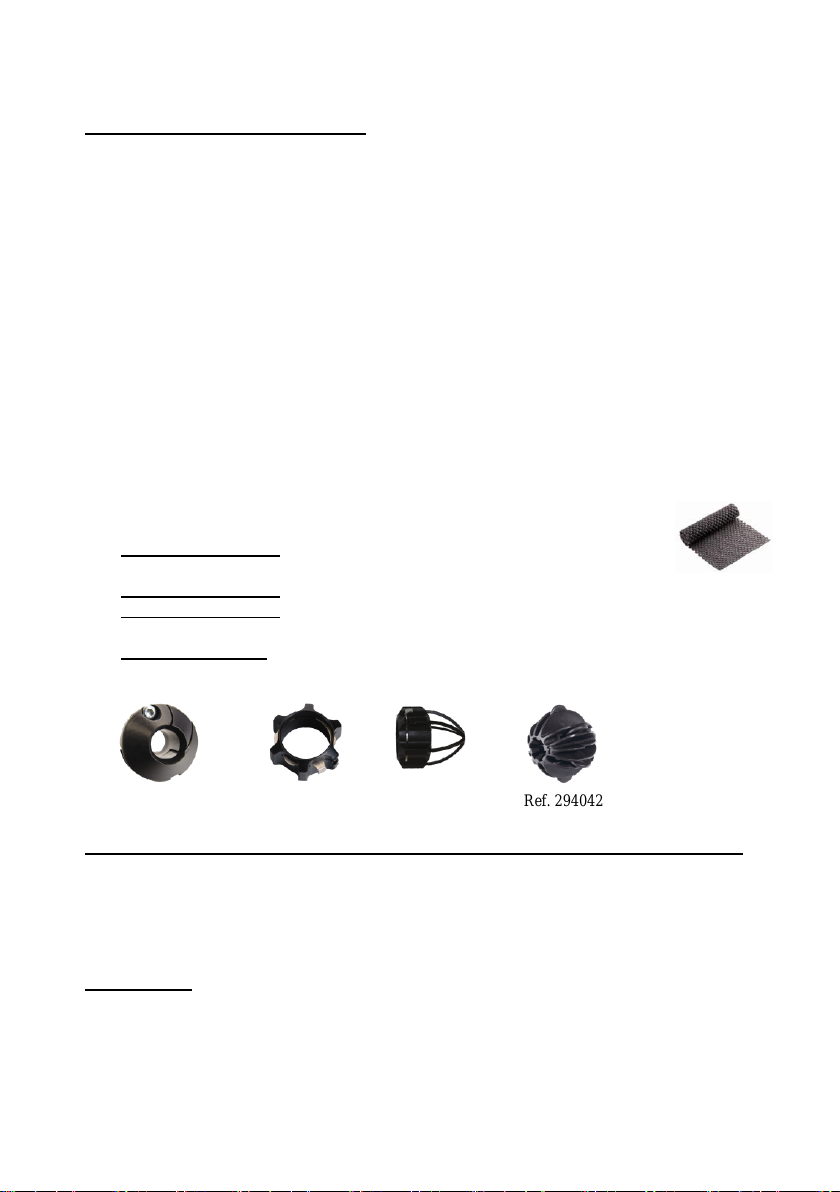
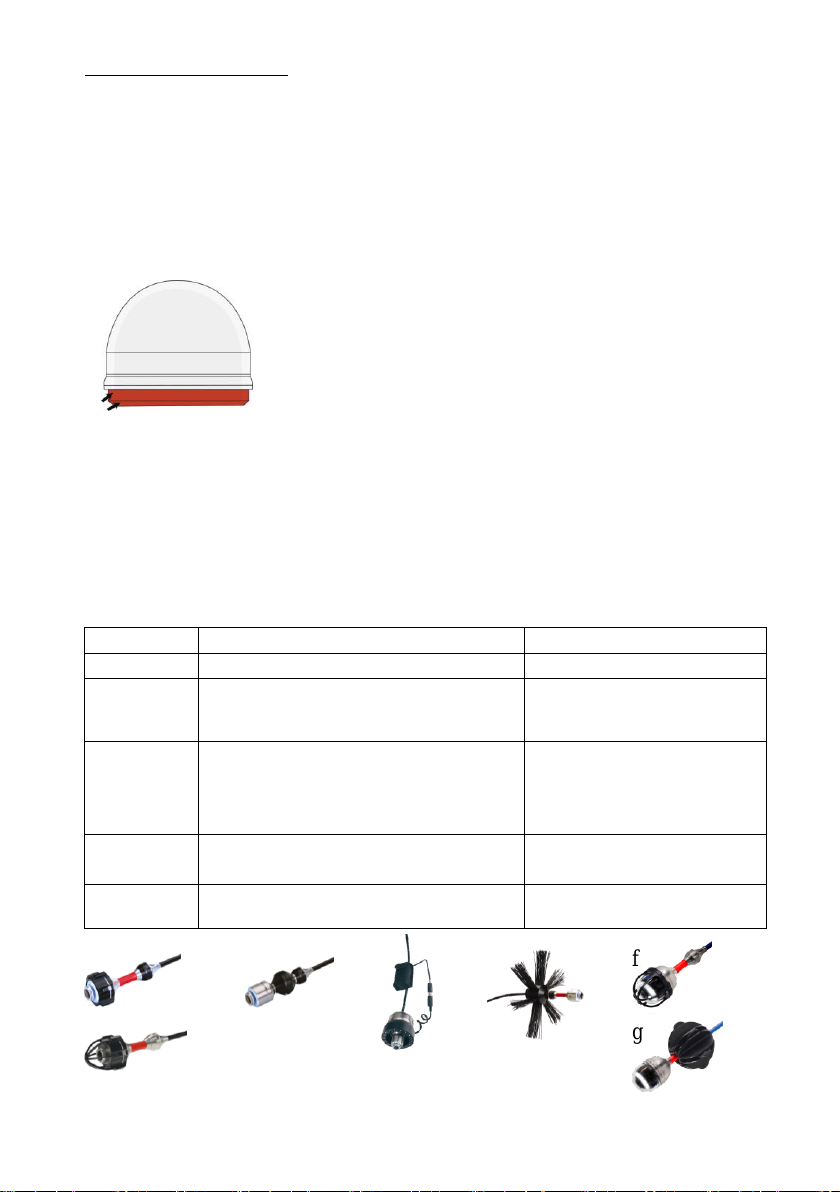
h) Ref. 294040 : Changement du dôme : ne pas mouiller ou toucher la tête de caméra ; Avant revissage,
disposant des connaissances suffisantes en la matière.Toute autre utilisation doit être considérée comme
non c

FRANCAIS
Ref. 294023
Ref. 294024
Ref. 294031
Ref. 294042
I - Données techniques
1 - La machine est livrée avec
- une valise de transport
- une tête de caméra couleur
o12 leds blanches
o294020/294030 : fixe Ø 26 mm 294040 : orientable Ø 40 mm
osensibilité 0,5 lux, angle de vision 120°, f = 2,31 mm / F = 2,4
o294020/294030 : IP 68 / 3 bars 294040 : IP 67 / 1 bar
- un câble 30 mètres renforcé en fibre de verre :
o294020/294030 : Ø 6 mm 294040 : Ø 6,5 mm
o294020 uniquement : gradué
o294030/294040: comptage électronique de la distance avec affichage
(résolution 0,04 m tolérance +/-10%)
- 2 accus Ni-Mh (autonomie : +/- 45 min minimum chacune)
- Un écran TFT :9 orientable et déportable (max.1,80 m)
-
- 1 sortie vidéo out (pour relier directement à un magnétoscope, un enregistreur
numérique, un PC (convertisseur requis pour PC, ref. 294026))
- 1 tapis anti-dérapant (photo ci-contre)
- 294020 uniquement : 1 passe-coudes (ref. 294023) + 1 anneau de
guidage Ø 50 mm (ref. 294024)
- 294030 uniquement : 1 anneau de guidage avec protection (ref. 294031)
- 294040 uniquement : 1 centreur à roulettes Ø 80 mm (ref. 294042) + 5 dômes
plastiques de rechange
- 294030 et 294040 : 1 carte SD 2 GB et 1 mini-câble USB + 1 CD contenant le
ciel VLC-Viewer
2 - Fonction enregistrement : Pour le 294030 et le 294040 uniquement
- Cartes mémoire acceptées : au maximum 32 GB (la carte devra être formatée
- : environ 1h / GB, format ASF (MPEG 4)
- Résolution : 640 x 480 (VGA) 30 fps maximum
3 Divers :
- Température de stockage : -10°C - + 40°C
- Température de fonctionnement : 0°C - + 40°C

FRANCAIS
II Panneaux de commandes
Une pression de 2 à 3 secondes sur le bo
;
environ.
Bouton MARCHE/ARRET :
- Appui prolongé (2 à 3 sec) : mise en marche/arrêt du visioval
- Appui bref : remise à 0 du compteur métrique (294030/294040)
- Appui bref : Arrêt de la lecture
Mode LECTURE (Visioval 294030/294040)
Touche Play : - Lecture du film video enregistré
- Fonction pause (en cours de lecture)
Touches fléchées centrales : Sélection du film vidéo enregistré.
Touches fléchées extérieures: naviguation dans le menu.
Touche REC : 2 sec
Mode ENREGISTREMENT (Visioval 294030/294040)
Touche REC : 1 sec éo
ORIENTATION DE LA TETE (Visioval 294040 uniquement)
Touches fléchées centrales
Touches fléchées extérieures: mouvements de rotation sur 360°
III Mise en service et utilisation
a) Fonctionnement avec les batteries
de faire fonctionner le Visioval. Le 2nd emplacement fait office de rangement. Si la
tteries.
Le Visioval peut également fonctionner sur le secteur ().
Visioval 294020
Visioval 294030/294040
Visioval 294030/40

FRANCAIS
Lorsque la caméra est en marche et que les accus sont complètement chargées, le
bouton de mise en marche est vert.
Pendant le chargement des accus (3h maxi), la
bouton est rouge clignotant.
Après le chargement, le bouton est rouge fixe.
Quand il signale une charge faible, les accus doivent être rechargés :
1 -
2 -
En cas de mise en charge, seule la batterie située dans le coin en haut sera
chargée. Il faudra intervertir les 2 batteries pour charger la 2ème.
Un chargeur externe rapide est disponible en accessoire (ref . 294032) pour
charger séparément chaque batterie (temps de charge : +/- 1h30)
b) Réglage d)
1 Caméra arrêtée, appuyer sur la touche
la maintenir dans cette position tout en mettant la
caméra en marche.
2 : Date / heure /
unité de mesure (mètres ou pieds (feet) ) / format
DD.MM.YY ou DD/MM/YY) / i
sur 12 ou sur 24 heures.
3 La navigation dans le menu se fait à partir
des touches fléchées, et la modification des
valeurs à partir des touches de montée et de
descente.
4 - Appuyer sur la touche de MARCHE / ARRÊT
pour quitter le menu
c) Utilisation
Une fois le Visioval mis en marche, il suffit de tirer sur le câble puis de le pousser
- Tirer et pousser le câble sans à-coup ; ne pas forcer en cas de blocage.
Ne pas frotter le câble sur des arêtes vives. Ne pas plier / tordre le câble.
-
flexible avec un chiffon humide et doux (sans solvants).
ne(sans solvants)

FRANCAIS
Pour le 294030 / 294040 :
- Il est préférable que la carte mémoire soit déjà inséré dans le Visioval
AVANT la mise en marche
- Urtie II-
Panneaux de commande
d)Remplacement du dôme de la tête de caméra (294040)
Après plusieurs utilisations, des éraflures sur le dôme peuvent perturber le champ
de vision. 5 dômes de remplacement et un tube de silicone sont livrés en standard.
Avant de placer le nouveau dôme, il est nécessaire de
lubrifier le filetage avec du silicone. Lors du remplacement
du dôme, veiller à ce que le dôme soit vissé fermement
Dans le cas contraire,
st pas garantie et
le fonctionnement peut être perturbé par la pénétration
Un set de 10 dômes supplémentaires est proposé en accessoire (ref. 294043).
Une cage de protection du dôme est également disponible (ref. 294041).
e)Recommandations concernant les accessoires de guidage
Avant toute utilisation -
configuration, il faut tenir compte de ce que le dispositif de guidage risque de se
Ø sans coude
294020/294030 : Accessoires utilisables
294040 : Accessoires utilisables
40-50mm
Passage impossible
50-70mm
- Anneau de guidage (a)
- Anneau de guidage avec protection (b)
70-100mm
- Idem Ø 50 70 mm.
- Passe-coudes (c)
- Inspection verticale : Poids de guidage et
jeu de leds supplémentaire (non étanche) (d)
Cage de protection (f)
100-150mm
- Centreur à brosses interchangeables (e)
- Anneau de guidage avec protection (b)
- Cage de protection (f)
- Centreur à roulettes (g)
150-200mm
Ø trop important pour une vision correcte
Centreur à brosses
interchangeables (e)
a
c
d
e
b
f
g

FRANCAIS
f) Entretien
- Objectif sale:
- Câble : Retirer régulièrement la tige flexible complètement de la valise et
- Ecran : Nett
g) /294040)
La carte SD permet de récupérer sur un ordinateur les vidéos enregistrées.
necter la
caméra à un PC en le branchant sur le port USB (cordon USB fourni) (uniquement
sous Windows 2000/Xp/Vista/7 et sous MacOs). La carte SD devient alors
sans aucune installation de logiciel .
Les vidéos sont au format ASF (mpeg 4). Ce format est lisible sur PC via les
logiciels standards (Windows Media player). Cependant, Virax apporte via la
fourniture du logiciel VLC une solution gratuite pour .
Le logiciel VLC-Viewer fourni sur CD est un logiciel libre de droit. Pour
ou sa mise à jour, merci de vous connecter sur www.videolan.org.
responsabilité en cas de mauvaise installation / utilisation du logiciel et
les conséquences de celle- port
technique sur ce programme ; Virax ne peut garantir que le logiciel soit
disponible dans toutes les langues, ou que ce soit la dernière version.
1 Installation de VLC-viewer
- Introduire le CD dans le lecteur de CD.
- -1.0.2--Viewer sur PC.
2
- Une fois la lecture lancée, cliquer sur pause, puis sur Vidéos / Snapshot
- Cliquer sur Tools > Preferences pour enregistrer.
- Dans la nouvelle fenê
-
-
!

FRANCAIS
VI Résolution de problèmes / Environnement / Garantie
Problème rencontré
Cause(s) possible(s)
Résolution
tête de la caméra est
allumée
enfoncée correctement
dans la prise
Image en noir et blanc
L
est sur le minimum
Augmenter le réglage de
ne réagissent pas
Le recharger ou le
connecter au secteur
SAV Virax
Ecran bleu avec
Le câble est rompu
SAV Virax
correctement
Connecter la fiche
correctement.
Les câbles placés dans la
fiche sont défectueux.
SAV Virax
Recyclage des matières premières plutôt que Traitement des déchets
Pour les pays européens uniquement
Ne pas jeter les appareils électriques dans les ordures
ménagères ! Conformément à la directive européenne
électroniques (DEEE), et à sa transposition dans la législation
nationale, les appareils électriques doivent être collectés à part
GARANTIE :
Conformément à nos conditions générales de vente, le délai de garantie des
machines est de 2 ans (justification par facture ou bon de livraison). Les dommages
conforme sont exclus. Le produit ne doit pas avoir été désassemblé.
Les batteries et les composants soumis à une usure normale ne sont pas couverts
par cette garantie.
Les réparations ne peuvent être effectuées que par du personnel qualifié VIRAX.
294040 7 le
vissage fait en usine du dôme plastique sur la tête ; Les changements de
dôme mal effectués entraîneront , en cas de panne
due au contact du capteur de la tête de caméra avec un corps étranger ou un
liquide.

-EN-
USER GUIDE
Thank you for buying this Virax product and for the confidence you have shown in our products. Virax is a
major producer and seller of tools for the plumbing and air-conditioning trades, to assist you in your daily
work: Virax: express your talent
This documentation has been produced with care so that you can make the best use
of the machine and in complete safety. We insist on the importance of reading this
instruction manual carefully before using the machine and keeping it next to the
machine. Your new power tool will more than satisfy your expectations. It has been
manufactured under stringent Quality Standards to meet superior performance
criteria. You will find your new tool easy and safe to operate, and, with proper care, it
will give you many years of dependable service.
Save all warnings and instructions for future reference.
Important instructions and warnings are presented by symbols.
Caution: Safety rules
A few safety measures must be taken to ensure your protection:
Disconnect the tool before carrying out any work on the appliance.
Due to modern mass production techniques, it is unlikely that your power
tool is faulty or that a part is missing. If you find anything wrong, do not
operate the tool until the parts have been replaced or the fault has been
rectified. Failure to do so could result in serious personal injury.
WARNING: Read all safety warnings and all instructions. Failure to follow the warnings and instructions
may result in electric shock, fire and/or serious injury.
The term “power tool” in the warnings refers to your mains-operated (corded) power tool or battery-operated
(cordless) power tool.
Safety instructions
The Virax machine Visioval ref. 294020/294030/294040 is designed for professional use only and may only
be used by competent people. The rules of the art in the building and public works industry must always be
respected.
-
General safety instructions
Important: Virax cannot be held responsible for any accidents that occur if the machine is used in any way
other than that for which it was designed.
1) Work area safety
a) Keep work area clean and well lit. Cluttered or dark areas invite accidents.
b) Do not operate power tools in explosive atmospheres, such as in the presence of flammable liquids,
gases or dust. Power tools create sparks which may ignite the dust or fumes.
c) Keep children and bystanders away while operating a power tool. Distractions can cause you to lose
control.
2) Electrical safety
a) Power tool plugs must match the outlet. Never modify the plug in any way. Do not use any adapter plugs
with earthed power tools. Unmodified plugs and matching outlets will reduce risk of electric shock.
b) Avoid body contact with earthed or grounded surfaces, such as pipes, radiators, ranges and refrigerators.
There is an increased risk of electric shock if your body is earthed or grounded.
c) Do not expose power tools to rain or wet conditions. Water entering a power tool will increase the risk of
electric shock.
d) Do not abuse the cord. Never use the cord for carrying, pulling, or unplugging the tool. Keep cord away
from heat, oil, sharp edges, moving parts. Damaged or entangled cords increase the risk of electric shock.
e) When operating a power tool outdoors, use an extension cord suitable for outdoor use. Use of a cord
suitable for outdoor use reduces the risk of electric shock.
f) If operating a power tool in a damp location is unavoidable, use a residual current device (RCD) protected
supply. Use of an RCD reduces the risk of electric shock.

-EN-
3) Personal safety
a) Stay alert, watch what you are doing and use common sense when operating a power tool. Do not use a
power tool while you are tired or under the influence of drugs, alcohol or medication. A moment of
inattention while operating power tools may result in serious personal injury.
b) Use personal protective equipment. Always wear eye protection. Protective equipment (dust mask, non-
skid safety shoes, hard hat, hearing protection) used for appropriate conditions will reduce personal injuries.
c) Prevent unintentional starting. Ensure the switch is in the off-position before connecting to power source
and/or battery pack, picking up or carrying the tool. Carrying power tools with your finger on the switch or
energising power tools that have the switch on invites accidents.
d) Remove any adjusting key or wrench before turning the power tool on. A wrench or a key left attached to
a rotating part of the power tool may result in personal injury.
e) Do not overreach. Keep proper footing and balance at all times. This enables better control of the power
tool in unexpected situations.
f) Dress properly. Do not wear loose clothing or jewellery. Keep your hair, clothing and gloves away from
moving parts. Loose clothes, jewellery or long hair can be caught in moving parts.
4) Power tool use and care
a) Do not force the power tool. Use the correct power tool for your application. The correct power tool will do
the job better and safer at the rate for which it was designed.
b) Do not use the power tool if the switch does not turn it on and off. Any power tool that cannot be
controlled with the switch is dangerous and must be repaired.
c) Disconnect the plug from the power source and/or the battery pack from the power tool before making
any adjustments, changing accessories, or storing power tools. Such preventive safety measures reduce
the risk of starting the power tool accidentally.
d) Store idle power tools out of the reach of children and do not allow persons unfamiliar with the power tool
or these instructions to operate the power tool. Power tools are dangerous in the hands of untrained users.
e) Maintain power tools. Check for misalignment or binding of moving parts, breakage of parts and any
use. Many accidents are caused by poorly maintained power tools.
f) Keep cutting tools sharp and clean. Properly maintained cutting tools with sharp cutting edges are less
likely to bind and are easier to control.
g) Use the power tool, accessories and tool bits etc. in accordance with these instructions, taking into
account the working conditions and the work to be performed. Use of the power tool for operations different
from those intended could result in a hazardous situation.
-
Specific safety instructions
a) There is a danger of injury if the batteries are used or handled incorrectly. Do not throw the batteries onto
a fire or expose them to high temperatures: there is a danger of explosion.
b) If the batteries are used incorrectly, a liquid may leak out and irritate the skin; avoid all contact with this
liquid. If the skin does come into contact with this liquid, rinse with a large quantity of water. If the liquid
enters the eyes, rinse the eyes with water for 10 minutes and consult a doctor immediately.
c) Do not use the camera around television towers and other sources of magnetic and electrical fields: they
may cause interference.
d) External influences, such as static discharges, may cause faults. In this case, switch the camera off and
switch it back on again.
e) To avoid any damage during transport, the camera must always be transported in the case provided for
the purpose.
f) Protect the content of the case from water. Do not throw the case.
g) Pull and push the cable in a regular and even manner; do not force the cable if it becomes jammed.
Avoid rubbing the cable on sharp edges. Do not fold or twist the cable.
h) Wipe the cable with a dry cloth before putting it in the case to avoid the internal roller becoming dirty.
i) Ref. 294040: Change of plastic dome: do not wet nor touch the camera head; Before screwing back on,
slightly grease to maintain sealing (silicon grease)
The video inspection camera may only be used for optical inspection and to carry out recordings in tubes
and wells, gas evacuation installations, air vents, waste water pipes, sewers and so on.
The camera may only be used by personnel with the required level of skill. Any other used must be
considered as non compliant with the planned use and is not authorised.

-EN-
Ref. 294023
Ref. 294024
Ref. 294031
Ref. 294042
I Technical data
1 The machine is delivered with
- A transport case
- A colour camera head
o12 white LEDs
o294020/294030 : Fixed Ø 26 mm 294040 : orientable Ø 40 mm
oSensitivity 0.5 lux, viewing angle 120°, f = 2.31 mm / F = 2.4
o294020/294030 : IP 68 / 3 bars 294040 : IP 67 / 1 bar
- A strengthened 30-metre fibre glass cable:
o294020/294030 : Ø 6 mm 294040 : Ø 6,5 mm
o294020 only: graduation
o294030/294040 : electronic distance measurement with on-screen
display (resolution 0.04 m tolerance +/-10%)
- 2 Ni-Mh batteries (autonomy: +/- 45 min minimum each)
- :9 adjustable screen, movable up to a distance of 1.80 m
- 1 power unit
- 1 video out socket (to connect the camera directly to a video recorder, digital
recorder or PC (converter required for PC, ref. 294026))
- 1 non-slip mat (photo opposite)
- 294020 only: a bend attachment (ref. 294023) + a 50 mm Ø
guidance ring (ref. 294024)
- 294030 only: a guidance ring with protection (ref. 294031)
- 294040 only : a 80 mm Ø roller guide (ref. 294042) + 5 spare plastic domes
- 294030 and 294040 : a 2 GB SD card and 1 USB mini-cable + a CD containing
the user manual and the VLC-Viewer application
2 Recording function: for ref. 294030 and 294040 only
- Memory cards accepted: maximum 32 GB (the card must be suitable formatted
from a computer in FAT 32)
- Recording capacity: around 1h / GB, ASF format (MPEG 4)
- Resolution: 640 x 480 (VGA) 30 fps maximum
3 Other:
- Storage temperature: -10°C - + 40°C
- Operating temperature: 0°C - + 40°C

-EN-
II Control panels
Hold down the ON / OFF button for 2 to 3 seconds to switch on both the camera
and the screen. The screen switches on alone after around 5 seconds.
ON/OFF button:
- Press and hold (2 to 3 sec): switches the Visioval on/off
- Short press: resets the metric counter to zero (294030/294040)
- Brief press while playing a film: Stop playback
PLAY MODE (Visioval 294030/294040)
Play key: - Play the recorded video film
- Pause function (during playback)
Central arrow buttons: Select the recorded video film.
External arrow buttons: browse the menu.
REC button: 2 sec: erase the video recording
RECORD MODE (Visioval 294030/294040)
REC button: 1 sec: start / stop video recording
ORIENTATION OF THE HEAD (Visioval 294040 only)
Central arrow keys: oscillation movements on 180°
Outside arrow keys: rotation movements on 360°
III Commissioning and use
a) Operation with the batteries / electricity supply
The Visioval is delivered with 2 batteries. Only the slot in the top left enables the
Visioval to operate. The 2nd slot is for storage. If the 1st battery is flat, swap the 2
batteries around.
The Visioval may also be powered by the mains (power unit provided).
Visioval 294020
Visioval 294030/294040

-EN-
When the camera is running and the batteries are completely charged the start-up
button is green.
While the batteries are loading (3h max), the button
flashes red.
After the batteries are charged the button glows
steady red.
The battery charge indicator is in the top right of the screen.
The batteries must be recharged when the indicator shows a low charge level:
1 - ovided on the
2 - Connect the power unit to the mains.
When placed to charge, only the battery in the top corner will be charged. You must
swap the batteries round to charge the 2nd one.
An external quick charger is available as an accessory (ref. 294032) to charge each
battery separately (charge time: +/- 1h30)
b) Setting the date and time (294030/294040)
1 With the camera off, pre
down while switching the camera on.
2 A menu appears on the screen: Date / time /
measurement unit (metres or feet) / date indication
format
DD.MM.YY or DD/MM/YY) / 12 or 24-hour clock.
3 The arrow keys are used to browse the menus
and the values can be modified using the up and
down keys.
4 Press the ON / OFF button to exit the menu
c) Use
Once the Visioval has been switched on, simply pull the cable and push it into the
pipe or place to be inspected.
- Pull and push the cable in a regular and even manner; do not force the
cable if it becomes jammed. Do not rub the cable on sharp edges. Do not
fold or twist the cable.
- Always remember to protect the content of the case from water.
Before you roll the cable up inside the case, ALWAYS wipe the flexible cable with a
soft, damp cloth (no solvents). If the lens is dirty, wipe it with a soft, damp cloth (no
solvents).

-EN-
For the 294030 and 294040:
- It is best to insert the memory card into the Visioval before you switch it on
- Use the play / record function as indicated in section II Control panels
d) Changing the dome of the camera head (294040)
After several uses, scratches on the dome may disturb the field of view. 5 spare
domes and a tube of silicon are supplied in standard.
Before fitting the new dome, lubricate the threading with
silicon.When changing the dome, ensure it is screwed firmly
up to the last thread pitch. Otherwise, sealing of the
camera head is not guaranteed and operation can be
disturbed by the penetration of water or dirt.
A set of 10 additional domes is proposed in the accessories (ref. 294043).
A dome protection cage is also available (ref. 294041).
d)Recommendations concerning the guidance accessories
Before use any accessories, you must make sure that the accessory enables the
camera head to be inserted and removed easily. In fact, depending on the
configuration, you must remember that the guidance mechanism may become
jammed or stuck in the tube, pipe or other system inspected.
Ø without
elbow
294020/294030: Accessories
294040: Accessories
40-50mm
No accessories required
Passage impossible
50-70mm
- Guiding ring (a)
- Guiding ring with protection (b)
No accessories required
70-100mm
- Ditto Ø 50 70 mm.
- Elbow grommet (c)
- Vertical inspection: Guide weight and
additional set of LEDs (non sealed) (d)
Cage protection (f)
100-150mm
- Centring piece with interchangeable
brushes (e)
- Guide ring with protection (b)
- Cage protection (f)
- Roller centring device (g)
150-200mm
Ø too large for correct vision
Centring piece with
interchangeable brushes (e)
a
c
d
e
b
f
g

-EN-
e) Maintenance
- Lens: If the lens is dirty, wipe it with a soft, damp cloth (no solvents).
- Cable: Regularly remove the flexible stem from the case completely and
clean it with a soft, damp cloth (no solvents).
- Screen: Clean the screen with a soft, damp cloth.
f) Playing a film on PC thanks to VLC (294030/294040)
The SD card enables you to watch the videos you have recorded on a computer.
If the user does not have an SD card reader, simply connect the camera to a PC by
connecting it to the USB port (USB cable provided) (only under Windows
2000/Xp/Vista/7 and under MacOs). The SD card then becomes accessible via the
Windows Explorer, with no software needing to be installed.
The videos are in ASF (mpeg 4) format. This format can be played on PCs via
standard applications (Windows Media Player). However, by providing VLC
application, Virax gives you a free solution to make screen captures.
The VLC-Viewer application provided on CD is freeware. For more
information about the free licence, using the software, its compatibility or
updating it, please go to www.videolan.org.
The user must decide whether or not to install this application on their
computer as software solutions other than those offered by Virax exist.
This is why Virax declines all responsibility if the software is installed or
used incorrectly and declines all responsibility for any consequences
caused. In addition, Virax does not offer any technical support for this
program; Virax can only guarantee that the application is available in all
languages, or that the latest version is provided.
1 Installing VLC-viewer
- Insert the CD into the CD player.
- Click on -1.0.2--Viewer on PC.
2 Making image captures
- Once you have launched playback, click on pause, then Videos / Snapshot
- Click on Tools > Preferences to save.
- In the new window, select the Video icon.
-
-
!

-EN-
VI Troubleshooting / Environment / Warranty
Problem encountered
Possible cause(s)
Resolution
The screen is off but the
camera head is on
The screen plug is not
fully in the socket
Push in the screen plug
Image in black and white
The colour contrast is
set to minimum
Increase the colour contrast
setting
The camera and/or the
screen do not react
The camera is defective
Recharge it or connect it to
the mains
The camera is defective
Virax After Sales
Blue screen with NO
SIGNAL marked on the
screen
The cable is broken
Virax After Sales
The plug at the back of
the screen is not
connected correctly
Connect the plug correctly
The cables in the plug
are defective
Virax After Sales
Raw material recycling rather than Waste processing
For European countries only
Do not throw electrical appliances out with household waste! In
accordance with European directive 2002/96/EG related to
Waste electrical or electronic equipment (WEEE) and its
transposition into national legislation, the electrical appliances
must be collected separately and recycled in a way that respect
the environment.
WARRANTY :
In accordance with our general conditions of sale, the machines are provided with a
2-year warranty period (as shown by the invoice or delivery note). Damage resulting
from incorrect use, overload or improper handling is excluded from the warranty.
The product must not have been disassembled. The batteries and components
subject to normal wear are not covered by this warranty.
Ref. 294040 : IP 67 sealing is guaranteed only on the model delivered with the
plastic dome screwed on the head in the factory ; Dome changes performed
improperly will cancel the warranty, in case of failure due to contact of the
sensor of the camera head with a foreign body or a liquid.

-IT-
Vi ringraziamo per aver acquistato un prodotto Virax e per la fiducia accordataci. Virax, leader nella
produzione e commercializzazione delle apparecchiature per le attività nei settori Sanitario e Genio
climatico vi accompagna nel lavoro quotidiano: Virax, fa esprimere il vostro talento.
La presente documentazione è stata realizzata con cura affinché voi possiate utilizzare la macchina al
meglio e in tutta sicurezza. Ribadiamo l'importanza di leggere il presente manuale di istruzioni con
attenzione prima di utilizzare la macchina e di conservarlo nelle immediate vicinanze della macchina.
Direttive di sicurezza : Istruzioni e avvertimenti importanti vengono indicati per mezzo di simboli .
Attenzione: Regole di sicurezza
Si devono adottare le seguenti misure di sicurezza per la protezione individuale:
Disinserire l'attrezzatura prima di qualsiasi lavoro sull'apparecchio. In
conformità delle tecnologie generalmente adottate nella produzione a grandi lotti, è poco probabile
che il Vostro apparecchio elettrico sia difettoso, o chemanchi alcuna delle sue parti. Se si nota
non sarà sostituita, oppure il malfunzionamento non sarà rettificato. Il mancato rispetto di tale
consiglio potrebbe portare ad un grave infortunio sul lavoro.
Il termine «elettroutensile» utilizzato nelle avvertenze di pericolo, si riferisce ad utensili elettrici alimentati dalla rete
(con linea di allacciamento) e ad utensili elettrici alimentati a batteria (senza linea di allacciamento).
La macchina Virax Visioval rif. 294020/294030/294040 è destinata unicamente ad uso professionale e può
essere utilizzata unicamente da persone competenti. Le regole dell'arte in uso nel campo dell'edilizia e dei
lavori pubblici devono sempre essere rispettate.
-Direttive di sicurezza generali
Importante: La società Virax non verrà ritenuta responsabile di incidenti verificatisi a seguito di un utilizzo
del prodotto diverso da quello per cui è stato progettato.
1) Sicurezza della postazione di lavoro
a) Tenere la postazione di lavoro sempre pulita e ben illuminata. Il disordine oppure zone della postazione
di lavoro non illuminate, possono essere causa di incidenti.
di liquidi, gas o polveri infiammabili. Gli elettroutensili producono scintille che possono far infiammare la
polvere o i gas.
2) Sicurezza elettrica
a) La spina di allaccia essere adatta alla presa. Evitare
assolutamente di apportare modifiche alla spina. Non impiegare spine adattatrici assieme ad elettroutensili
dotati di collegamento a terra. Le spine non modificate e le prese adatte allo scopo riducono il rischio di
scosse elettriche.
b) Evitare il contatto fisico con superfici collegate a terra, come tubi, riscaldamenti, cucine elettriche e
frigoriferi. Sussiste un maggior rischio di scosse elettriche nel momento in cui il corpo è messo a massa.
elettroutensile aumenta il rischio di scossa elettrica.
d) Non usare il cavo per scopi diversi da quelli previsti ed, in particolare, non usarlo per trasportare o per
fonti di calore, olio, spigoli taglienti, e neppure a parti della macchina che siano in movimento. I cavi
danneggia
lizzare un
zza riduce il rischio di una scossa elettrica.
3) Sicurezza delle persone
troutensile durante le
stanchezza oppure quando ci si trovi sotto
può essere causa di gravi incidenti.
b) Indossare sempre equipaggiamento protettivo individuale, nonché guanti protettivi. Indossando
abbigliamento di protezione personale come la maschera per polveri, scarpe di sicurezza che non scivolino,
si riduce il rischio di incidenti.

-IT-
e/o alla batteria ricaricabile, prima di prenderlo oppure prima di iniziare a trasportarlo, assicurarsi che
pericolose in cui possono verificarsi seri incidenti.
se. Un utensile
accessorio, oppure una chiave che capiti in una parte rotante della macchina, può provocare seri incidenti.
e) Evitare una posizione anomala del corpo. Avere cura di mettersi in posizione sicura e di mantenere
situazioni inaspettate.
f) Indossare vestiti adeguati. Non indossare vestiti larghi, né portare bracciali e catenine. Tenere i capelli, i
vestiti ed i guanti lontani da pezzi in movimento. Vestiti lenti, gioielli, o capelli lunghi, potranno impigliarsi in
pezzi in movimento.
4) Trattamento accurato ed uso corretto degli elettroutensili
a) Non sottoporre la macchina a sovraccarico. Per il proprio lavoro, utilizzare esclusivamente
ito della sua potenza di prestazione.
tore rotto è
pericoloso e deve essere aggiustato.
c) Prima di procedere ad operazioni di regolazione sulla macchina, prima di sostituire parti accessorie
oppure prima di posare la macchina al termine di un lavoro, estrarre sempre la spina dalla presa della
messo in funzione involontariamente.
d) Quando gli elettroutensili non vengono utilizzati, conservarli al di fuori del raggio di accesso di bambini.
presenti istruzioni. Gli elettroutensili sono macchine pericolose quando vengono utilizzati da persone non
dotate di sufficiente esperienza.
tarsi che le parti
mobili della ma
riparare le parti danneggiate. Numerosi incidenti vengono causati da elettroutensili la cui manutenzione è
stata effettuata poco accuratamente.
f) Mantenere gli utensili da taglio sempre affilati e puliti. Gli utensili da taglio curati con particolare attenzione
mente e sono più facili da condurre.
che, ecc., sempre
attenendosi alle presenti istruzioni. Così facendo, tenere sempre presente le condizioni di lavoro e le
situazioni di pericolo
-Direttive di sicurezza specifiche
a) Pericolo di lesioni nel caso di un errore di uso o di manipolazione delle batterie. Non gettare le batterie
nel fuoco, non esporle a temperature elevate: pericolo di esplosione.
b) Nel caso di un uso errato delle batterie, un liquido può fuoriuscire e provocare irritazioni della pelle;
evitare il contatto con questo liquido. Se la pelle viene in contatto con questo liquido, risciacquare con molta
acqua. Se il liquido colpisce gli occhi, risciacquare gli occhi con acqua per 10 minuti e consultare
immediatamente un medico.
c) Non utilizzare la telecamera vicino a ricettori di televisione o altre fonti di campi magnetici ed elettrici:
potrebbero provocare interferenze.
d) Le influenze esterne, per es. le scariche statiche possono provocare dei difetti. In tal caso, spegnere e
quindi riaccendere l'apparecchio.
e) Per evitare ogni danno durante il trasporto, l'apparecchio deve sempre essere trasportato nell'apposita
valigetta. Proteggere dall'acqua il contenuto della valigetta. Non gettare la valigetta.
f) Tirare e spingere il cavo regolarmente senza contraccolpi; non forzare in caso di bloccaggio. Evitare di
sfregare il cavo su spigoli vivi. Non piegare o torcere il cavo.
g) Pulire il cavo flessibile con un panno asciutto prima di inserirlo all'interno della valigetta affinchè
l'avvolgitore interno non venga sporcato!
h) Rif. 294040 : Cambio della cupola di plastica : non bagnare né toccare la testa della telecamera ; Prima
di ravvitare, lubrificare leggermente per conservare la tenuta stagna (grasso silicone)
La telecamera per la videoispezione può essere utilizzata solo per realizzare il controllo ottico ed effettuare
registrazioni nei tubi e nei pozzi, negli impianti di evacuazione di gas, nelle condotte di ventilazione, nelle
canalizzazioni dell'acqua di scarico, nelle fogne, ecc...
personale che disponga delle conoscenze necessarie in materia. Ogni altro uso deve essere considerato
non conforme all'uso previsto e non è autorizzato.

-IT-
Ref. 294023
Ref. 294024
Ref. 294031
Ref. 294042
I - Dati tecnici
1 - La macchina è consegnata con
- una valigetta per il trasporto
- una testa telecamera a colori
o12 led bianchi
o294020/294030 : fissa Ø 26 mm 294040 : orientabile Ø 40 mm
osensibilità 0,5 lux, angolo di visione 120°, f = 2,31 mm / F = 2,4
o294020/294030 : IP 68 / 3 bars 294040 : IP 67 / 1 bar
- un cavo di 30 metri rinforzato in fibra di vetro:
o294020/294030 : Ø 6 mm 294040 : Ø 6,5 mm
o294020 unicamente: graduato
o294030/294040 : misura elettronica della distanza con visualizzazione
sullo schermo (risoluzione 0,04 m - tolleranza+/-10%)
- 2 batterie Ni-Mh (autonomia: +/- 45 min minimo ciascuna)
- le e spostabile (max.1,80 m)
- 1 blocco alimentazione
- 1 uscita video out (per collegare direttamente a un videoregistratore, un
registratore digitale, un PC (convertitore richiesto per PC, rif. 294026))
- 1 tappeto antisdrucciolevole (foto a lato)
- 294020 unicamente: 1 passagomiti (rif. 294023) +1 anello guida
Ø 50 mm (rif. 294024)
- 294030 unicamente : 1 anello guida con protezione (rif. 294031)
- 294040 unicamente : 1 centratore a rotelle Ø 80 mm (rif. 294042) + 5 cupole in
plastica di ricambio
- 294030/294040 : 1 scheda SD 2 GB e 1 minicavo USB + 1 CD contenente il
modo d'uso e il software VLC-Viewer
2 - Funzione registrazione: Per il 294030 e il 294040 unicamente
- Schede memoria accettate: al massimo 32 GB (la scheda deve essere
formattata in modo adeguato a partire da un computer in FAT 32)
- Capacità di registrazione: circa 1h / GB, formato ASF (MPEG 4)
- Risoluzione: 640 x 480 (VGA) 30 fps massimo
3 Vari:
- Temperatura di stoccaggio: - 10°C - + 40°C
- Temperatura di funzionamento: 0°C - + 40°C
This manual suits for next models
2
Table of contents
Languages:
Other Virax Analytical Instrument manuals
Popular Analytical Instrument manuals by other brands

Prostat
Prostat PGA-710B Getting Started Operations Guide

Aircare
Aircare APOLLO FG0270 user manual

Drieaz
Drieaz HydroSensor I owner's manual

Phase Technologies
Phase Technologies 70Xi Quick installation and start-up guide

Kyocera
Kyocera LDM-410 Owner's operating manual

Hach
Hach ORBISPHERE 32301 Basic user manual

Dickey-John
Dickey-John GAC 2500 Operator's manual

cam
cam SenseLife user manual

FISCHER
FISCHER FISCHERSCOPE X-RAY 4000 Series Operator's manual

RIDGID
RIDGID SeeSnake NanoReel Operator's manual

Agilent Technologies
Agilent Technologies J-BERT N4903B manual

Vivax Metrotech
Vivax Metrotech vLocCam quick start guide