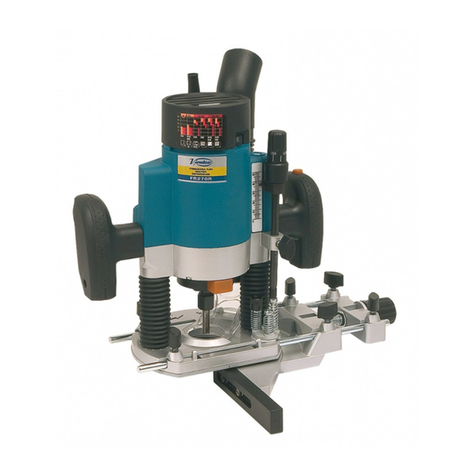
Virutex FR66P User manual

MANUAL DE INSTRUCCIONES
OPERATING INSTRUCTIONS
MODE D’ EMPLOI
GEBRAUCHSANWEISUNG
MANUALE D’ISTRUZIONI
MANUAL DE INSTRUÇÕES
ИНСТРУКЦИЯ ПО ЭКСПЛУАТАЦИИ
INSTRUKCJE OBSŁUGI
Fresadora tupí
Router
Défonceuse
Tischfräsmaschine
Fresatrice toupie
Fresadora tupia
Ручной Фрезер
Frezarka górnowrzecionowa
FR66P

5
y puede ser utilizado como valor de partida para la
evaluación de la exposición al riesgo de las vibraciones.
Sin embargo, el nivel de vibraciones puede llegar a ser
muy diferente al valor declarado en otras condiciones
de aplicación, con otros útiles de trabajo o con un
mantenimiento insuficiente de la herramienta eléctrica
y sus útiles, pudiendo llegar a resultar un valor mucho
más elevado debido a su ciclo de trabajo y modo de uso
de la herramienta eléctrica.
Por tanto, es necesario fijar medidas de seguridad de
protección al usuario contra el efecto de las vibraciones,
como pueden ser mantener la herramienta y útiles de
trabajo en perfecto estado y la organización de los
tiempos de los ciclos de trabajo (tales como tiempos
de marcha con la herramienta bajo carga, y tiempos de
marcha de la herramienta en vacío y sin ser utilizada
realmente ya que la reducción de estos últimos puede
disminuirdeformasustancialelvalortotaldeexposición).
18. GARANTÍA
Todas las máquinas electroportátiles VIRUTEX, tienen
una garantía válida de 12 meses a partir del día de su
suministro, quedando excluidas todaslas manipulaciones
o daños ocasionados por manejos inadecuados o por
desgaste natural de la máquina.
Para cualquier reparación dirigirse al servicio oficial de
asistencia VIRUTEX S.A.
VIRUTEX se reserva el derecho de modificar sus productos
sin previo aviso.
ENGLISH
FR66P ROUTER
(Ilustrations in page 29)
Important
Read these OPERATING INSTRUCTIONS
and the attached GENERAL SAFETY
INSTRUCTIONS LEAFLET carefully before
using the machine. Make sure you have
understood them before operating the
machine for the first time.
Keep both sets of instructions for any
future queries.
1. TECHNICAL DATA
Universal motor.........................................50/60 Hz
Input power................................................1,300 W
No-load speed.......................................26,000/min
Standard chuck diameter................................8 mm
Routing depth............................................0-60 mm
Las escobillas deben ser sustituidas cuando tengan una
longitud mínima de 5 mm. Para ello desmontar la caja del
interruptor A (Fig. 8) retirando los tornillos que la sujetan.
Quitar los tapones D1 (Fig. 8) que sujetan las escobillas
E1 (Fig. 8) y sustituirlas por otras originales VIRUTEX,
asegurándose de que deslicen suavemente en el interior
de las guías. Es aconsejable dejar la máquina en mar-
cha en vacío durante algunos minutos después de un
cambio de escobillas. Aproveche el cambio de escobillas
para verificar el estado del colector. Si éste presentase
quemaduras o resaltes es aconsejable llevarlo a reparar
a un servicio técnico VIRUTEX. Asegúrese al montar de
nuevo la caja interruptor A que los cables quedan bien
situados en su interior.
15. LUBRICACIÓN Y LIMPIEZA
La máquina se entrega totalmente lubricada de fábrica
no precisando cuidados especiales a lo largo de su vida
útil. Es importante limpiar siempre cuidadosamente la
máquina después de su utilización mediante un chorro
de aire seco. Mantener el cable de alimentación en
perfectas condiciones de uso.
16. ACCESORIOS OPCIONALES
Opcionalmente pueden suministrarse los siguientes
accesorios:
5000000 Plantilla lazos PL11
6027020 Pinza Ø 6
6727020 Pinza Ø 1/4"
6446073 Acoplamiento aspiración estandar 2,25 m
Guías plantillas:
7722168 Ø ext. 10 mm para fresas de 6 mm
7722120 Ø ext. 12 mm para fresas de 8 mm
7722121 Ø ext. 14 mm para fresas de 10 mm
7722122 Ø ext. 16 mm para fresas de 12 mm
7722169 Ø ext. 18 mm para fresas de 14 mm
7722118 Ø ext. 20 mm para fresas de 16 mm
7722119 Ø ext. 27 mm para fresas de 23 mm
7722114 Ø ext. 30 mm para fresas de 26 mm
Guías plantilla cola de milano:
7722161 Para fresa de D.9,5 y lazos de paso 16
7722123 Para fresa de D.15 y lazos de paso 26
7722162 Para fresa de D.20 y lazos de paso 34
7722160 Guía para plantilla AGB de herrajes oscilo-
batientes
7722342 Guía para plantilla AGB aire 11-12
6640125 Fresa para plantilla AGB.
17. NIVEL DE RUIDO Y VIBRACIONES
Los niveles de ruido y vibraciones de esta herramienta
eléctrica han sido medidos de acuerdo con la Norma
Europea EN 60745-2-17 y EN60745-1 y sirven como base
de comparación con máquinas de semejante aplicación.
El nivel de vibraciones indicado ha sido determinado
para las aplicaciones principales de la herramienta,

6
Revolving depth
gauge.......................6-position depth adjustment
Weight...........................................................3.8 Kg
Weighted equivalent continuous
acoustic pressure level A............................................87 dBA
Acoustic power level A.............................................98 dBA
Uncertainty............................................................K = 3 dBA
Wear ear protection!
Vibration total values......................................ah: <2.5 m/s2
Uncertainty...........................................................K: 1.5 m/s2
2. OPERATION RANGE
The router is an electric appliance used for routing wood
and plastics. It is also very convenient for trimming ed-
ges, cutting out of knots, copy cutting, rebate cutting,
making of frames and engraving.
Together with parallel guide, template followers, com-
passes and profile cutters, it is an exceedingly useful
appliance.
3. SAFETY INSTRUCTIONS FOR
MACHINE OPERATION
Before using the machine carefully read
the GENERAL SAFETY INSTRUCTIONS
LEAFLET, which is included inthe machine
documentation.
- When changing the tools or performing any other
operation close to the cutting head, remove hand from
the switch lever and disconnect from the mains.
- Use safety goggles when working with the router.
- Always guide the router with both hands using the two
knobs J (Fig. 1), with stop lever B (Fig. 1) within easy reach.
- Following completion of a job, disconnect the motor
and release the base before leaving the router.
- Always place the router on the base, on a flat, clean
surface.
- Always use the lever of the main switch to turn the
router on.
- Ensure that the router cannot accidentally fall over.
- Use only bits of diameter suitable for the chuck to be
used, and adapted to the router speed.
- The specifications of the bits of the VIRUTEX range are
especially adapted to the performance of this router.
Use preferably bits from the extensive VIRUTEX range,
or only bits whose characteristics conform to the said
specifications.
4. STANDARD EQUIPMENT
You will find the following items inside the box:
- Surface router FR66P
- Size 26 service key
- Template guide diameter 19 for 26 mm dovetailing
- Lateral fence unit
- Aspiration connector
- Instruction manual and other documentation
5. STARTING UP THE MACHINE
Cut-out box A (Fig. 1) is equipped with lever B (Fig. 1),
which can be pressed with a finger. This enables the
user to start it up or stop it with no need to move his
hand from knob. To do this, activate the switch's lateral
stop C (Fig. 1) and, without releasing it, push forward
lever B. Stop C prevents the machine from starting up
accidentally.
6. ASSEMBLY OF THE CUTTING TOOLS
Assemble cutting tool D (Fig. 2, 3) in chuck E (Fig. 2),
block the axis by pressing brace F (Fig. 3) and insert
wedge G (Fig. 3) to lock the fastening in place. Tighten
nut H (Fig. 2, 3) with the service key I (Fig. 3).
Avoid leaving the machine with no tools
installed, since the chuck could be over-
tightened and damage the shaft.
7. BLOCKING OF THE BASE
The base can be locked in any position using knob J (Fig.
1). When knob is loosened, the base will automatically
return to its highest position due to the action of the
springs incorporated in the columns.
Following completion of any job, flick the
switch to OFF and release the base using
knob before leaving the router, which
must be on a flat surface.
8. ADJUSTING THE DEPTH
ADJUSTING THE DEPTH. The depth is adjusted using
the incorporated rack and pinion depth-adjustment
mechanism. With the cutter bit face flat against the
wood surface, the penetration depth may be adjusted
to up to 60 mm.
To unlock the depth rod K (Fig. 4) press down firmly on
adjustment knob L (Fig. 4) and turn it to raise or lower
the depth rod, if a greater or lesser cutting depth is
required. The gauged adjustment indicator M (Fig. 4) can
be moved separately from the knob, so that it may be
set to zero from any position using the reference mark.
When turning the knob after adjusting the indicator,
both elements will turn together, thereby indicating the
degree to which the rod has been moved. A full turn
of the knob moves the rod by 34 mm, with a maximum

7
distance of 55 mm.
To hold the depth rod in the required position, release
the pressure from the adjustment knob. Next, to ensure
that the knob is firmly held in place, it should be locked
using fastening knob N (Fig. 4). PRECISION ADJUSTMENT.
If you wish to make precision adjustments to the pre-
viously set depth, simply turn adjustment knob O (Fig. 4).
A full turn of the knob moves the rod by 1 mm, with
a maximum distance of 5 mm. Each division in the
gauged fine-adjustment indicator P (Fig. 4) represents
a movement of 0.1 mm.
MAKING DEEP CUTS. To perform cuts that are too deep
to carry out with a single cut, we recommend making
several successive cuts using the six 3-mm steps in the
revolving depth turret Q (Fig. 4).
Lower the machine until the cutting bit is level with the
surface on which the router is resting. Use locking knob
J (Fig. 1) to hold the machine in this position. Loosen
fastening knob N (Fig. 4), then press down and turn
adjustment knob L (Fig. 4) until the depth rod presses
against the lower step of the revolving depth turret,
using fine adjustment if required. In this position, turn
depth indicator M (Fig. 4) until position zero matches
the reference mark. This will be the starting position
indicating the point at which the bit comes into contact
with the material. Hold the rod in place with knob N
(Fig. 4), release the locking knob and leave the machine
in the off position.
Loosen fastening knob N, then press down and turn
adjustment knob L, moving the adjustment rod K (Fig.
4) upwards to the required cut depth. Then use knob
N once again to turn turret Q (Fig. 4) until the highest
step is below rod K (Fig. 4). Make the first cut on the
material. Turn the turret Q to the next step and then
make another cut, and so on until the required depth is
obtained when the bottom step is reached.
9. LOCKING THE ROUTING DEPTH
To carry out several repetitive jobs in which the same
router depth is required, it may be useful to prevent the
head being released by accidentally moving the locking
knob J (Fig. 1). This may be done by inserting two M8
nuts R (Fig. 4) in the threaded shaft, one above and one
below the head body. This locks the head at any point
along its depth setting.
When working with the depth locked,
the tool is permanently held outside the
surface of the base, so it is important to:
- Wait for the machine to stop completely before leaving
it on the base, on a flat surface which leaves the tool free.
- Cancel the locked depth and return to the normal
conditions of locking by the knob J (Fig. 1) as soon as
the task has been completed.
10. USE OF PARALLEL GUIDE
Parallel guide is used for edge trimming and cutting
differently shaped grooves in accordance with various
profile shapes.
Parallel guide S (Fig. 6) is placed in base grooves T (Fig.
6) and secured in place using the two knobs U (Fig. 6).
NORMAL SQUARE ADJUSTMENT – Loosen the base
knobs, move the square to the required position and
then tighten the knobs in this position.
PRECISION ADJUSTMENT – Once the square has been
approximately positioned and held in place, a further
fine adjustment may be made. To do this, loosen square
fastening knob V (Fig. 6), turn the fine-adjustment knob
on guide W (Fig. 6) to the required measurement, then
tighten the square fastening knob V (Fig. 6) again in this
position. A full turn of the knob moves the square by 1
mm, with a maximum distance of 10 mm. The gauged
fine-adjustment indicator X (Fig. 6) can be moved sepa-
rately from the knob, so that it may be set to zero from
any position using the reference mark. When turning the
knob W (Fig. 6) after adjusting the indicator X (Fig. 6),
both elements will turn together, thereby indicating the
degree to which the square has been moved, with each
division representing an advance of 0.1 mm.
11. USE OF TEMPLATE GUIDES
Template guides are used for copy cutting of richly
shaped patterns. Selected template guide Y (Fig. 7) is
fixed to base T (Fig. 7) using the two screws Z (Fig. 7).
When copying, a diffrence in size between the template
and the routed item becomes apparent. The difference
between the radius of the template guide and the radius
of the tool must always be taken into account when
preparing the template.
12. DUST COLLECTOR ATTACHMENT
To attach the dust collector connector A1 (Fig. 6), place
it in the central recess in base T (Fig. 6), with the con-
nection facing the back, and hold it in place with screws
B1 (Fig. 6). If trimming dovetails with the Virutex PL11
model dovetailing attachment, guide and position the
dust collector connector as desired so that the trimmer
moves over the dovetailing attachment better.
The dust collector connector A1 may be attached either
directly to the suction tubes of dust collectors AS182K,
AS282K or by using the smaller diameter and lighter
6446073 standard dust collector attachment, C1 (Fig.
6), which can then be attached to AS182K, AS282K or
any other industrial dust collector.
13. DUST COLLECTION NOZZLE SUPPLEMENT
To ensure that the suction of the machine is sufficient
when working with trimmer bits of less than 30 mm in
diameter, use the dust collection nozzle A1 (Fig. 6) with
8
the included supplement F1 (Fig. 6).
If you are using trimmer bits with a diameter of more
than 30 mm and up to 40 mm, remove the supplement
F1 (Fig. 6) from the dust collection nozzle A1 (Fig. 6) and
work with only the nozzle. To re-attach the supplement,
simply press it firmly into the nozzle slot.
14. CHANGING THE BRUSHES
Disconnect the machine from the mains
before performing any maintenance
operations.
The brushes must be replaced when they reach the
minimum length of 5 mm. For this purpose, remove the
switch box A (Fig. 6) by removing the screws which hold
it in place. Remove plugs D1 (Fig. 8) which hold brushes
E1 (Fig. 8) and replace them with new original VIRUTEX
brushes, ensuring that they slide smoothly through the
guides. We recommend running the unloaded machine
for several minutes after changing the brushes. Take the
opportunity to check the condition of the collector. If
it shows signs of burning or wear and tear, we recom-
mend bringing it to a VIRUTEX technical service centre
for repair. When reassembling switch box A, take care
to ensure that the cables are properly located inside it.
15. LUBRITATION AND CLEANING
The machine is delivered fully lubricated from the factory
and does not require any special care during its working
life. It is important to clean the machine carefully after
use, using a dry air jet.
Maintainthesupplycableinperfectoperatingconditions.
16. OPTIONAL ACCESSORIES
The following optional accessories may be supplied:
5000000 Dovetailing template PL11
6027020 Chuck Ø 6
6727020 Chuck Ø 1/4"
6446073 2.25 m Standard dust collector attachment.
Template guides:
7722168 External Ø 10 mm for 6 mm bits.
7722120 External Ø 12 mm for 8 mm bits.
7722121 External Ø 14 mm for 10 mm bits.
7722122 External Ø 16 mm for 12 mm bits.
7722169 External Ø 18 mm for 14 mm bits.
7722118 External Ø 20 mm for 16 mm bits.
7722119 External Ø 27 mm for 23 mm bits.
7722114 External Ø 30 mm for 26 mm bits.
Dovetailing template guides:
7722161 For bit Ø 9.5 and dovetail pitch 16
7722123 For bit of Ø 15 and dovetail pitch 26
7722162 For bit of Ø 20 and dovetail pitch 34
7722160 AGB template guide for bottom-hung fittings.
7722342 Guide for air template AGB 11-12
6640125 Bit for AGB template.
17. NOISE AND VIBRATION LEVEL
The noise and vibration levels of this device have been
measured in accordance with European standard EN
60745-2-17 and EN 60745-1 and serve as a basis for
comparison with other machines with similar applications.
The indicated vibration level has been determined for the
device’s main applications and may be used as an initial
value for evaluating the risk presented by exposure to
vibrations. However, vibrations may reach levels that
are quite different from the declared value under other
application conditions,with other toolsor with insufficient
maintenance of the electrical device or its accessories,
reaching a much higher value as a result of the work
cycle or the manner in which the electrical device is used.
Therefore, it is necessary to establish safety measures
to protect the user from the effects of vibrations, such
as maintaining both the device and its tools in perfect
condition and organising the duration of work cycles
(such as operating times when the machine is subjected
to loads, and operatingtimes when working withno-load,
in effect, not in use, as reducing the latter may have a
considerable effect upon the overall exposure value).
18. WARRANTY
All VIRUTEX power tools are guaranteed for 12 months
from the date of purchase, exlcuding any domage which
is a result of incorrect use or of natural wear and tear
on the machine. All repairs should be carried out by the
official VIRUTEX technical assistance service.
VIRUTEX reserves the right to modify its products
without prior notice.
FRANÇAIS
DÉFONCEUSE FR66P
(Figures en page 29)
Important
Avant d'utiliser la machine, lisez attenti-
vement ce MANUELD'INSTRUCTIONS et la
BROCHURE D'INSTRUCTIONS GÉNÉRALES
DE SÉCURITÉ qui vous sont fournis avec
cette machine. Assurez-vous de bien
avoir tout compris avant de commencer
à travailler sur la machine.
Gardez toujours ces deux manuels
d'instructions à portée de la main pour
pouvoir les consulter, en cas de besoin

29
Fig. 1
Fig. 3
Fig. 2
Fig. 4
Fig. 5
Fig. 6

30
Fig. 7 Fig. 8

Virutex, S.A.
Antoni Capmany, 1
08028 Barcelona (Spain)
www.virutex.es
6696466 122016
http://www.virutex.es/registre
Acceda a toda la información técnica.
Access to all technical information.
Accès à toute l’information technique.
Zugang zu allen technischen Daten.
Accedere a tutte le informazioni tecniche.
Aceso a todas as informações técnicas.
Dostęp do wszystkich informacji technicznych.
Доступ ко всей технической информации.
Other manuals for FR66P
1
Table of contents
Other Virutex Power Tools manuals

Virutex
Virutex TWOO AB200 User manual

Virutex
Virutex FR129 VB User manual

Virutex
Virutex ASU317S User manual

Virutex
Virutex SC134L User manual

Virutex
Virutex FR817T User manual

Virutex
Virutex FR292R User manual

Virutex
Virutex CE35E User manual

Virutex
Virutex WEGOMA CF217S User manual

Virutex
Virutex TWOO User manual

Virutex
Virutex U78 User manual

Virutex
Virutex RC321S DOBLE User manual

Virutex
Virutex RT188N User manual

Virutex
Virutex AB181 User manual

Virutex
Virutex FC16S User manual

Virutex
Virutex AG98R User manual

Virutex
Virutex AB111N User manual

Virutex
Virutex AG98E User manual

Virutex
Virutex FR129N User manual

Virutex
Virutex PD52X User manual

Virutex
Virutex RV70VL User manual