Vision Drive VD-3000 User manual

VD-3000 User Guide
Ver 1.1

INDEX
1. Before use/Caution
Warranty and scope of responsibility
Caution to use
2. Product structure
3. Product specications
4. Part names
5. Major features
6. Installation sequence and procedure
Caution before installation
Installation sequence
Installation procedure
7. Usage
Startup
Features and operation
Video recording
How to eject a memory card
Error message guidance
8. Analysis software usage
PC analysis software preparation
VD Analyzer usage
User conguration
9. Warranty service and Cost free service
Warranty service
Cost free service

1. Before use/caution
We are grateful for your choice for this product.
The following contents describe the responsibility scope of warranty service covered by us and
cautions to use this product.
Before you use, full knowledge of the product is recommended before using.
1-1) Warranty service and responsibility scope
We shall not be responsible for the damages caused by errors or data loss of this product, plus
the damages while this product is being operated by a user.
VD-3000 is designed to record, store, play and analyze the videos incurred by impacts and car
accidents. Videos can be also recorded even at user’s discretion. However, it is not assured to
record all videos in a specic environment or operation situation.
Furthermore, under circumstances that the impact on a car is weak or a slight accident happens,
the vibration sensor can not detect the impact, which can induce that the equipment is unable
to automatically start recording to the event folder. In this situation, the urgent save button
(SHOT) on the Vision Drive should be pressed to start recording a video to the [Event] folder all
other les will be saved in the [Normal] folder.
1-2) Caution to use.
- SD cards of this product shall be used solely for Vision Drive. In case of loss and damage of the
SD cards, the user shall consult the purchased shop or retailer.
- If videos are recorded with inferior and defective SD cards or other brand’s SD cards, the quality
of videos can be damaged or the videos can not be recorded or played.
- Do not disassemble or remodel this product. It can cause an electric shock. Warranty service
shall not be provided if responsibility for the accident is agreed to return to the user because of
wrong operation. Consult the purchased shop and retailers for the cases that product
maintenance and repairs are necessary.
- Do not use other power adapters except the appropriate one for the specications. It can cause
defects and re.
- Under the circumstances that the user selects other types of cables except the enclosed one or
the cables are connected to other power supply, defects or re can easily be provoked. Note
that wiring should be carefully implemented not to damage the current cables.
- The power cable shall be unplugged under the circumstances that this product is connected to
an ordinary auto power supply or used for a car that has several cigar jacks as an ordinary
power supply. If an improper power supply is used there can be electrical discharge.

1. Before use/caution
- This product shall be installed strictly inside a car following the informed procedure during
installation. Impurities on the car windshield can weaken the adhesive strength and can
damage the product if the product drops because of weak adhesion.
- This product is not water-proof. Be careful to avoid liquids or impurities entering the product.
- In case of cleaning the interior side of a car, do not use chemicals or detergents. These can
cause quality deterioration or errors to the vision drive.
- In case that there are impurities at the surface of a car window or at the surface of this
product camera, a distorted image can be obtained because of diused reection and
abnormal refraction. Windows and camera lens where camera is placed should be always
maintained to be clean.
- Be careful to prevent images of this product from being blurry or recorded images from being
distorted because of excessive window tinting on the windshield.
- Note that because this product uses a camera, recording can be distorted under the condition
that brightness suddenly changes e.g. passing through a tunnel or reverse light is too strong
during the day or there is no light at night.
- In case there is not enough lighting better images can be recorded if the user turns on the
lamps in the car.
- Note that data can not be stored in this product in case of accidents that the acceleration
impact is under a certain level. Manual recording to the [Event] folder can be done by pressing
the SHOT button in this case.
- Image data can be damaged if the user ejects the SD card in ON status of main power. Eject
the SD card after the main power is completely o.
- If you operate the product while driving, then it is risky, it can cause a car accident. Therefore,
the user should manipulate the product after fully stopping the car to a safe area.
- Dropping or giving an impact on the product during operation can cause errors or re.
- Do not keep the product under the environment conditions of too hot, too cold or too humid.
Distortion or errors can occur if the product is exposed to sunlight for long periods of time in
summer or left in a too cold area. Do not place the product close to re or expose to water.
Fire or serious errors can be caused.
- In case of disassembly of the product, the user shall disassemble it after complete power-o.
Disassembly with power-on status can cause errors of the product.

1. Before use/caution
- Keep or carry SD cards in a safe keep box because static electricity or other environmental
elements can damage the data of the product.
- SD cards are expendable supplies. After a certain usage period, normal recording can not be
implemented because partial memory sectors can be already damaged. This product supports
an in system automatic SD memory checking. Purchase a new card for stable recording. In case
that the replacement of the SD card is needed the automatic product system check will
recommend it systematically.
- Stored data can be destroyed (lost) in case that the memory card is ejected or power is o while
image data is being read to play or even while recording, copying or deleting process is being
implemented.
- The company shall not be responsible for data destroy (loss) of stored data.
- Copy and store important data to other storage (e.g. hard disk, CD, portable ash memory)
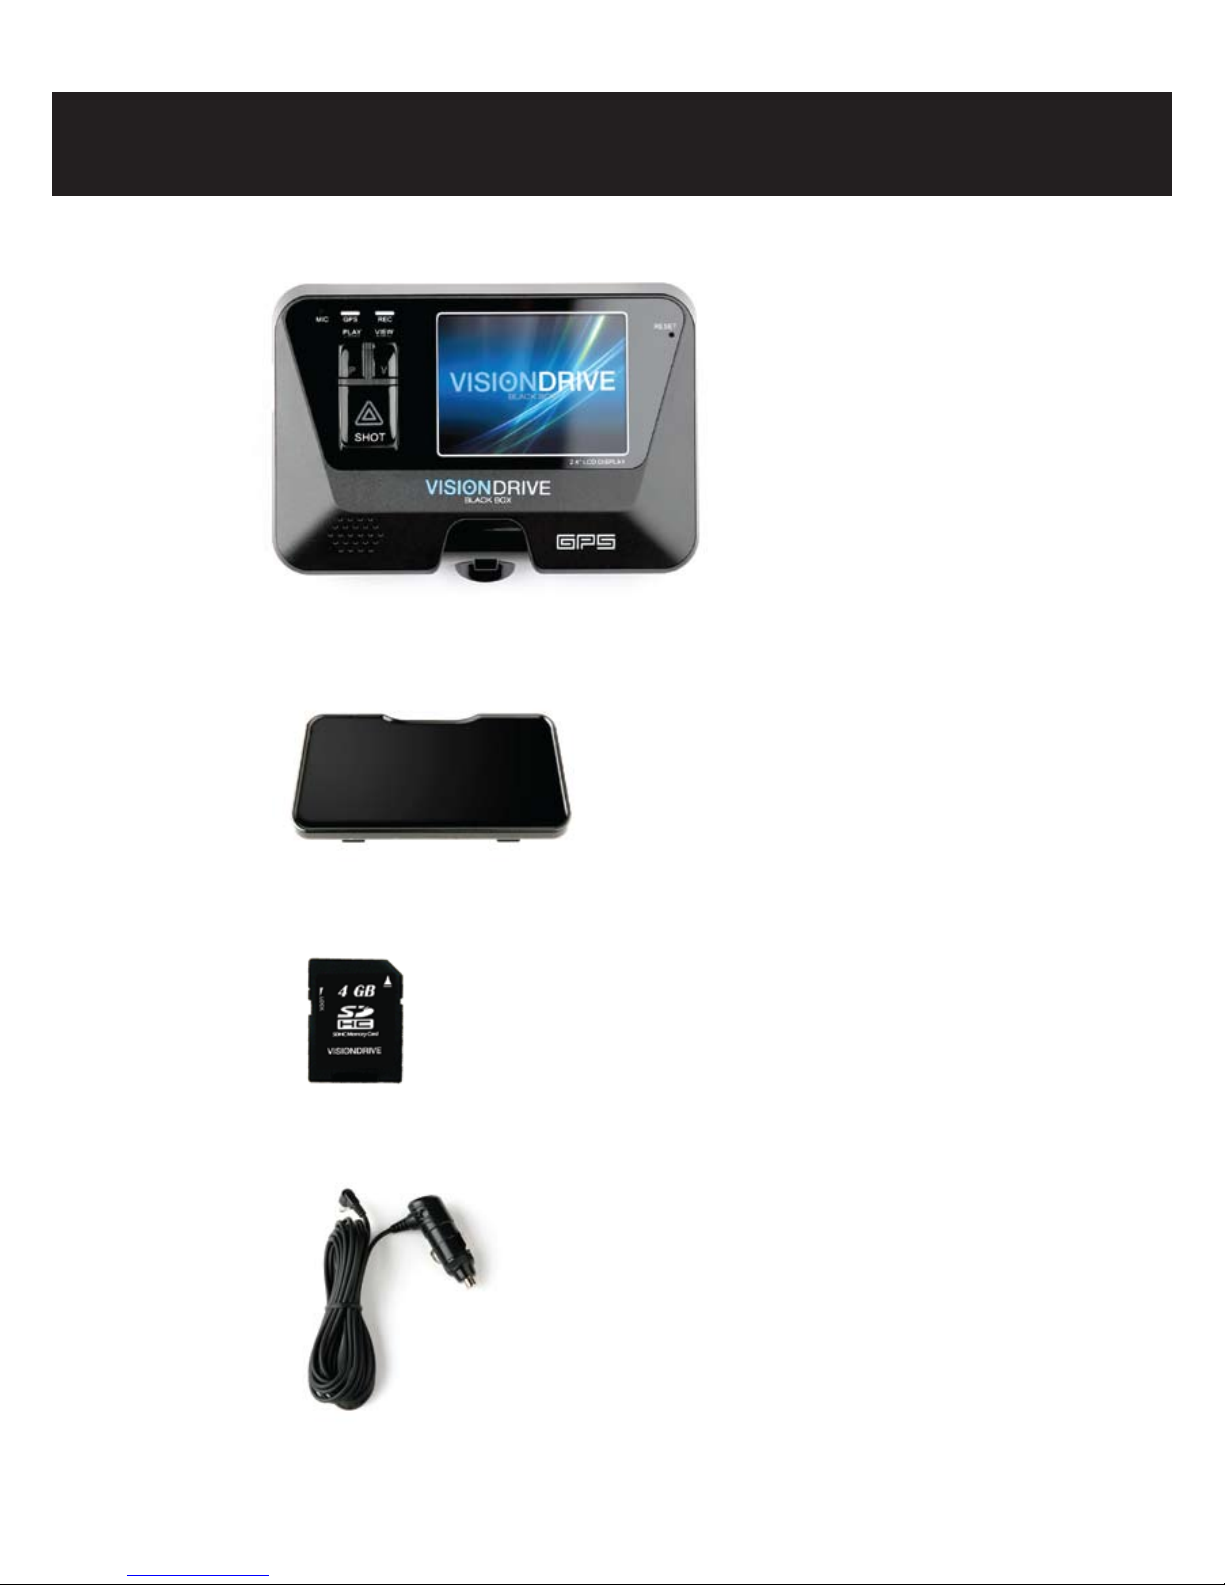
2. Product Structure
-Vision Drive
-Attach Bracket Holder
-SD Card (VD Analyzer Software and User Manual PDF)
-Power cable

-Cable holder
-SD Card reader (optional)
-Multi cigar jack (optional)
-Quick Install Guide
2. Product Structure

3. Product specications
-Camera: 1 Camera (1.3M pixel CMOS digital camera)
-Record resolution:, 1280×960 (HD) 15fps Max. / 640×480 (VGA) up to 30fps Max.
-LCD: 2.4” Full color TFT LCD
-GPT: built-in GPS module
-Impact sensor: built-in 3-axis acceleration sensor
(x-y-z, impact/sudden stop/sudden acceleration/sudden spin
-Storage: SD memory card (SDHC : 4G ~ 16GB)
-Audio recording: Microphone included (setting to record on/o)
-Sound: built in speaker.
-Power adapter/Power consumption: 12V ~ 24V (Cigar Plug)/2.4W-
-Recording time:
Event le is 25 sec or more (10 sec before a impact / 15~60 after a impact)
Normal le is 5 minutes.
-Function key: VIEW/PLAY/SHOT
Contents in this manual can be modied without notice for more convenience and performance
upgrade. The user can refer to the web site (www.visiondrive.co.kr)

4. Part names
Microphone
REC LED
GPS LED
VIEW button
PLAY button
SHOT button
RESET
LCD Screen:
it turns on while installing,
car start-up,
View/Play pressed.
Built in GPS
Camera
Attached Bracket
Power port
External GPS port
(if Ext GPS used)
SD Card slot

5. Major features
* Ordinary video record
Recording automatically starts when the user starts up the car engine, booting the main system
of the product. Recording and storing continue until the car engine stops. (Record time is
dierent up to capacity of the storage media)
* Recording accident videos
Images shall immediately begin recording and stored from a certain time before the accident to
a certain time after the accident since an impact sensor automatically senses the impact, if a car
accident occurs while driving.
* Storing images manually
Images instantly can be recorded and stored to the event folder if the driver presses the urgent
(SHOT) button despite no accidents.
* Storing location information
It records and stores GPS information such as location, time, speed, direction and so on at the
time of the accident.
* Storing car acceleration information
It stores records of the vibration status of front and back, right and left and top and bottom of
sudden acceleration, sudden stop and sudden spin while driving.
* Accident data play – LCD screen
The recorded scenes of the accident at the stopped status of the car is played and checked
on the Vision Drive’s LCD screen.
* Voice guidance
Voice guidance is provided according to the steps that the user is operating the Vision Drive.
* Audio recording
Recording voice and sound can be on or o by the user’s request, by holding down the Shot
button for over 3 seconds.
* Accident data analysis – PC Analysis software
Video of the accident can be played with the GPS info, map location and car acceleration.
Easy software is supplied to set and implement multiple features such as forward play,
frame based play and image format conversion (AVI).
* Video playback brightness control feature
In the case during video playback on your PC and the recording is too dark, the brightness
control feature can be used to review and analyze more accurately.
* File encryption feature
Encryption feature is included for user’s privacy. Video in the Vision Drive only can be played
on VD Analyzer Software after the user inputs the correct passkey/lock.

6. Installation sequence and procedure
6-1) Caution before installation
Check the cautions as follows before installation for safe installation and use.
- Install the product in a bright and safe area.
- Installation should be started after the car engine fully stops and car keys are ejected.
- The power cable of the Vision Drive should be connected at the end of installation.
- The product’s power shall be connected only to the cigar jack whose power ranges
from DC12V ~ DC 24V. The user shall consult or refer to the service center in case that
cable covering needs to be uncovered and connected to the car.
6-2) Installation sequence
1) Bracket and Vision Drive connection
2) Memory – Insert an SD memory card in Vision Drive
3) Vision Drive – Remove the double stick tape of the bracket and attach the bracket to the
front window
4) Cable – Connect the cables to the Vision Drive and arrange the cables
5) Power – Connect the cable between cigar jack and the product
6) Camera – Adjust the Vision Drive’s camera angle
7) Test – Test buttons (View/Shot/Play)
8) Operation – car operation and system operation

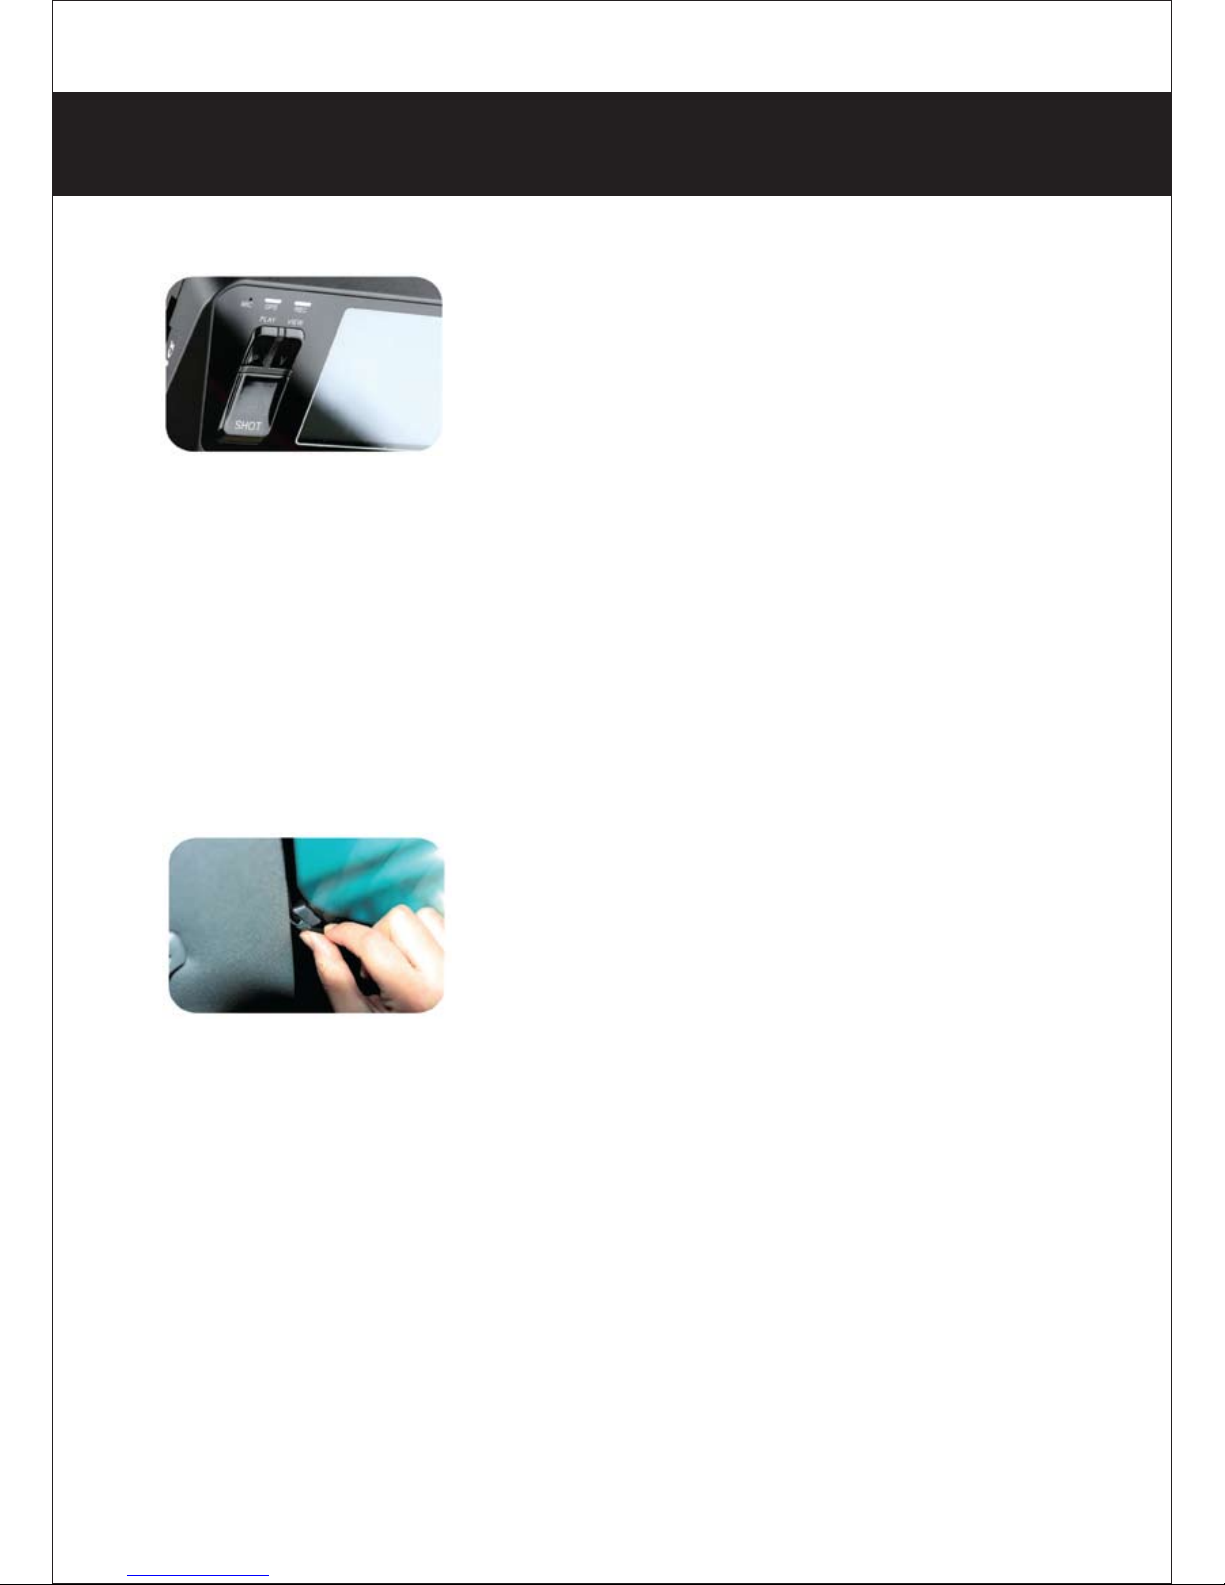
6-3) Installation
6. Installation sequence and procedure
- Fix the bracket to the Vision Drive groove and push it left to x
(push the Vision Drive left to detach the Vision Drive only)
- Insert an SD memory card as shown in the left photo after the
connection of the Vision Drive to the bracket.
(To eject the SD memory card from the Vision Drive, the SD memory
card can be automatically ejected if the SD memory card is pressed
in / during power-o status of the car. Note that the product can be
damaged if the SD memory card is ejected with the force of tweezers
or nger nails)
- Clean the impurities on the window to attach the Vision Drive after
selection of the suitable place (The center of the car is recommended
to attach the Vision Drive and enough space on both sides is
recommendable to prepare detachment of the Vision Drive)
- For the rst installation, the tape shall be partially stripped and
temporarily attached to the car window because the adhesion of
the bracket tape is very strong. (The Vision Drive shall be fully xed
after checking the correct position through the LCD screen while on.)
- Power cable shall be connected to the Vision Drive and the user
arranges the cables by using cable holders as shown in the photo.
-Insert the power jack of the product in the car cigar jack.
- The Vision Drive boots up if the car key is turned to ACC Power,
voice guidance starts through the speaker and LCD screen shall be
activated.
(Do not power o before voice guidance and LCD screen are fully
deactivated in case of the rst operation after power cable
connection. Power-o during operation time can cause errors to
the product)
- Adjust the shot angle by moving the camera up and down.
(Vision Drive’s LCD lights can be on for several minutes in case of
power-on for safe driving. If the user needs longer checking time
for LCD, turn on the LCD by pressing the VIEW button of the
Vision Drive.
The user shall return it to recording status by pressing the VIEW
button after the checking activity nishes.)
- The radio antenna should be placed a distance from the GPS
module or optional external GPS module can be used because
the GPS sensor’s reception ratio can be aected by the antenna
position or metallic coating on the window in case of in glass types
of radio antenna, usually imported cars.
- Note that video recording can be disturbed by reective and
bright materials on the dashboard which can be reected on the
window.
- When LCD is o and REC LED is on, an ordinary recording status
starts.
- GPS LED is on when a normal signal is being received, it turns blue.
(Operation times of GPS reception are adjustable due to car’s location)
- Use the cable holders to neatly place the cables in the car.
6. Installation sequence and procedure

7. Usage
7-1) Startup
- Check if the car engine is turned o and keys are removed.
- Check if an SD memory card is inserted in the Vision Drive.
- Start up the car
- Normal recording starts when LCD is on, voice guidance is released and record preview is
temporarily shown through the LCD screen after startup. (REC Lamp on)
- GPS lamp-on can take from several seconds to minutes depending on the reception location.
7-2) Features and operation
- Vision Drive doesn’t record for safety reasons when voice guidance is being given or the LCD
screen is on (START/VIEW/PLAY).
- The stored event les (Impact/Shot) are played if the PLAY button is pressed.
To see another (previous) impact le stored, press VIEW button while playing an impact le.
(The audio play only works in the VD Analyzer software on your PC in the case that audio
record was set to [on].)
- LED and Audio of this product indicate the following details.
LED Sound Details
Red - GPS data is not being received
Blue - GPS data is being received well
Blue - Ordinary record is normally running
Red Tone Event record is running
GPS
REC

7. Usage
7-3) Video recording
- This product’s system records video continuously after normal startup. Ordinary recorded les
are stored as “Normal” les, saving the recent 5 minutes.
- In case that a certain level of impact is given to the car while driving or stopping the impact
sensor is triggered and video les are stored as “Impact” les for over 25 seconds (10 seconds
before the impact, 15-60 seconds after the impact) to a separate folder.
- The les are stored as [Impact] les if the user presses the “SHOT” button of the Vision Drive
even if there is no impact given to the car of if the impact is slight or there is no impact.
- In the case additional [Impact] les are triggered and stored, the le will be saved in a series
in the according folder and the recording time will be extended.
7-4) How to eject memory card
- Eject the SD memory card by following the steps after powering o Vision Drive.
①Car keys should be removed from the car after the car engine stopped is stopped.
②When the car engine stops the Vision Drive will power o after a few seconds and
the LED will shut o. (Vision Drive will completely shut o after the nal video scenes
are safely stored for an additional several seconds using the high capacity backup
battery)
③Eject the SD memory card by clicking it in.
- The ejected memory card used for video playback on the PC should be inserted back in the
Vision Drive the next time it is used. Video record is not possible without a SD memory card.
7-5) Error message guidance
- Insert the SD card, when the voice of “Insert SD card” is announced in the case no SD card is
inserted or SD card defect.
- Purchase and use a new card in case that the same voice guidance repeats although an
SD card has been already inserted because it is regarded that the SD card has defects
- Consult us or the warranty service center if there is a system error (e.g. no booting) excluding
SD card errors.
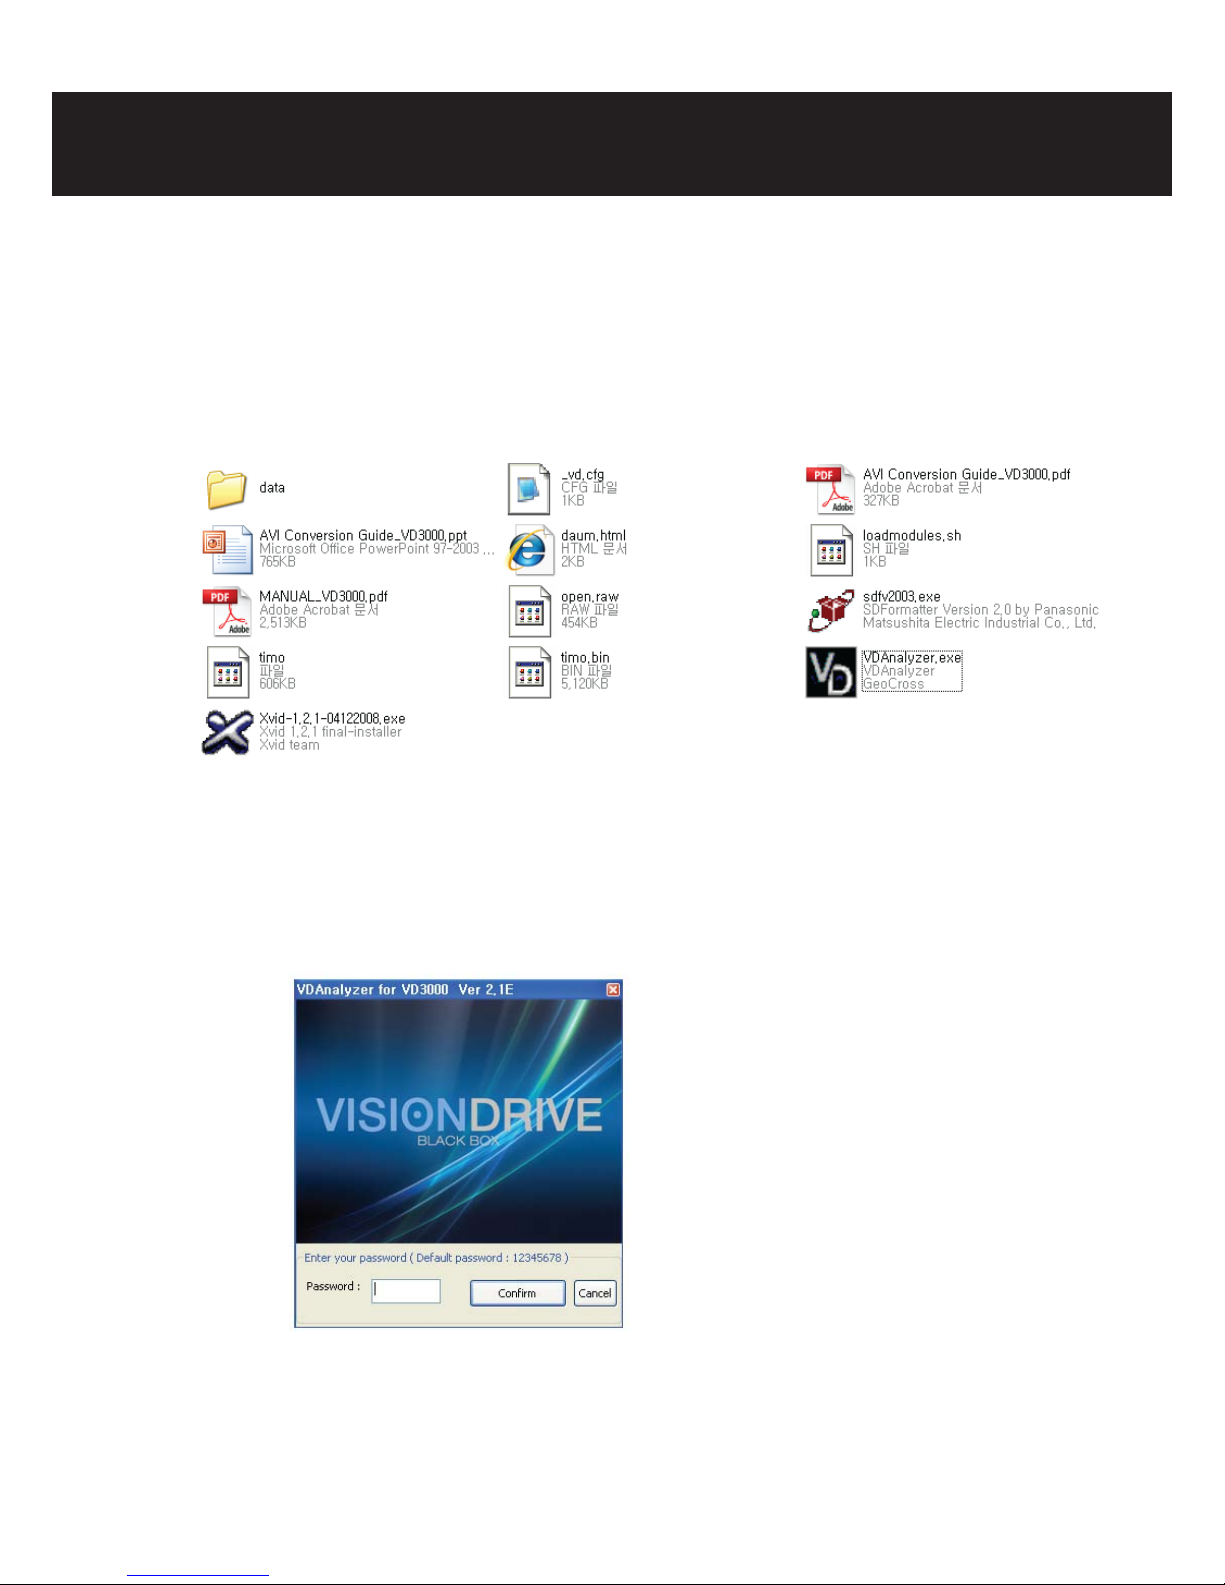
8. PC analysis program usage
8-1) PC analysis program preparation
-Execute“VDAnalyer.exe” program copied in the SD card after the SD memory card is connected
to PC.
* An optional SD card reader (USB adaptor, SDHC compatible) shall be necessary in case there is no
slot for SD cards (SD or SDHC) or PC does not support SD cards. (Additional cost)
8-2) VD Analyzer Program usage
- Startup: The following screen is shown if VDAnalyer.exe in the SD card is executed after a SD
memory card is connected to a PC. A correct password needs to be entered.
(The default password is “12345678”, new password selection will be prompted at the
conguration page)
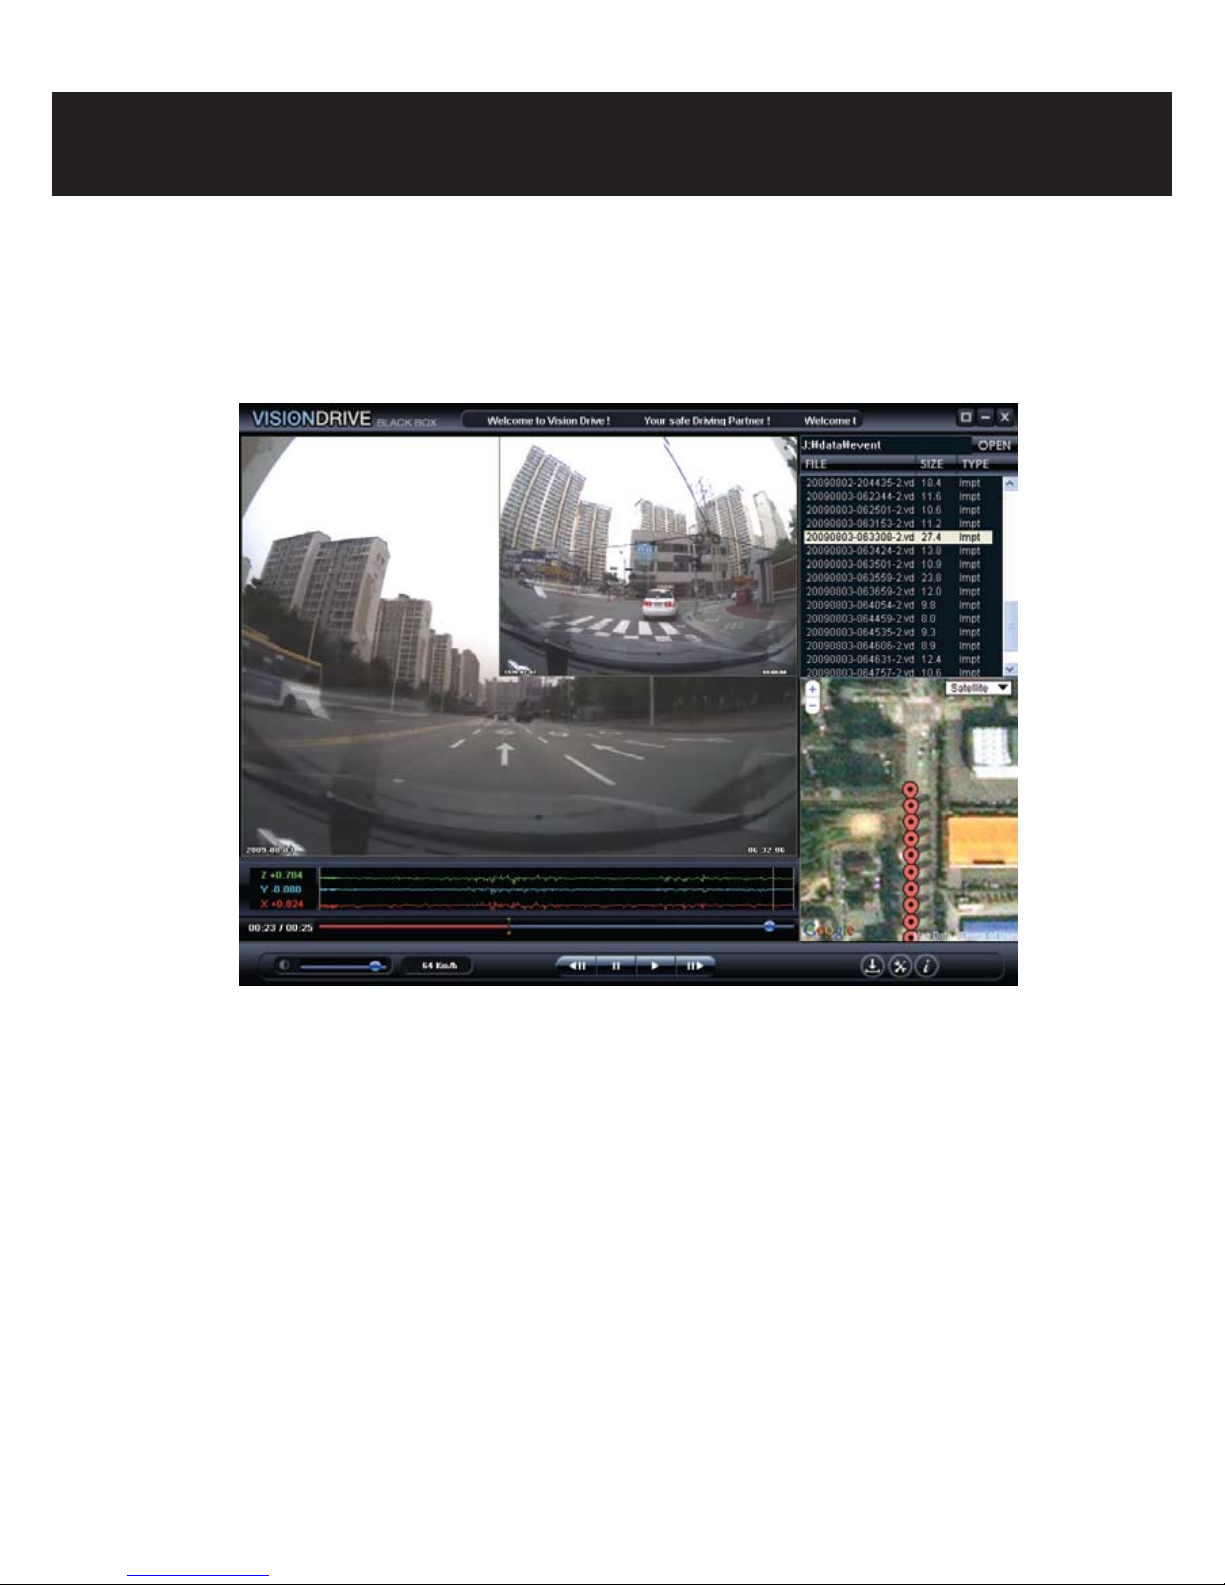
- File reading: Stored folders (Normal/Event) in the SD card are displayed if (OPEN) icon is clicked.
If one of folders is chosen, a video le list appears on the top right corner. File names are
displayed based on the time when videos were stored.
(e.g.: 20090213-130534-1.vd: Feb 13th, 2009. 13:05 hour 3 seconds, 1 means normal)
8. PC analysis program usage
- A le name is displayed as NoGPS-XXXXXX-X if there is no date or time data because of bad
GPS reception.
- File selection: If a desired le on the list is clicked, the screen shot shall be shown in the center
of window. (Preview feature)
- Video check: The date is displayed on the left bottom corner, the time is displayed on the right
bottom and the speed is displayed at the bottom center. (The speed can not be displayed in
case of bad GPS data. Reset of date and time can take several minutes if GPS data was not
updated for a long term of underground parking. e.g. 1 week.
- PLAY: A video plays forward if icon is pressed.
*Note
Audio of a sound recorded le can only be played in basic play speed mode.
- Frame PLAY: if “Frame PLAY” icon is clicked during operation or preview status, a frame based
shot of the le will be shown. This is useful for detailed shot analysis.
- Progress bar: a blue range of the progress bar means a recorded video before the event and
a red range means the one after the event. Easy search is supported by moving the progress bar
left and right by clicking a switch icon on the progress bar with the mouse.

- Map Linked: A map to display the driven position is shown on the right bottom corner in case
that PC is connected to the Internet. (A map can not be shown if GPS data reception was not
good at the accident scene even if the PC is connected to Internet)
- Screen size edit: Full screen size of display for 1280 * 960 videos is supported if “full screen” icon
on the right bottom corner of the program is clicked. The original size is restored if an additional
double click is executed or “Original size” icon is clicked.
- Impact graph analysis: a graph on the right bottom corner displays the impact information of
front and back/left and right/top and bottom at the moment of event record
Impact intensity of front and back, the driver centered: x axe (0.000G~+-3.000G)
Impact intensity of left and right, the driver centered: x axe (0.000G~+-3.000G)
Impact intensity of top and bottom, the driver centered: x axe (0.000G~+-3.000G)
- AVI convert ( ): A folder location to store the le is prompted if ( ) icon is clicked
during preview/pause status of a certain video le in the list. “xxxx.avi” le is created as the same name
displaying a message of “AVI le recording”when the folder location is conrmed and
the “play” button is pressed.
- Program information: Program information such as program version of analyzer is shown if
information icon ( ) is clicked.
- Conguration: conguration such as password can be set if conguration ( ) icon is clicked.
8-3) User conguration
-The user can edit the system conguration values to their preference.
①Set recording quality.
Recording video (640 * 480 is the default record resolution after shipment, the le
size should be higher if better recording quality is desired)
Low High
VGA HD
(640×480, Max 30fps) (1280×960, Max 15fps)
②Set the impact detection sensor.
A default value is set after shipment and moderate values can be set considering
the car type and pavement status. The sensor can not detect an event if the
sensitivity value is set too high, it will not sense slight impacts. On the contrary,
the sensor can detect too many events if the sensitivity value is set too low,
becoming very sensitive to impacts.
8. PC analysis program usage

③Set the time length stored after impact.
④Set the size of event les (and thus the size of normal le’s) partition to be stored.
⑤Set to use audio recording or not (the default value is o)
⑥Set the volume of the alert tone.
⑦Set the time zone and Daylight Saving Time of the user.
⑧ Set the vehicle and speed type of the vehicle.
⑨ Set the password. Repeated input for verication is required (6~8 of numbers and
alphabet, non case-sensitive)
8. PC analysis program usage
①
②
③
④
⑤
⑥
⑦⑧
⑨

9. Warranty service & Free after service (A/S)
9-1) Warranty service
- Geo Cross Co., LTD., guarantees warranty service for our manufactured products according to
consumer compensation regulations
(the 2006-36 item, Ministry of strategy and nance declared)
- Warranty service shall be provided by Geo Cross or designated partners on user’s request for
warranty service for this product.
- Compensation notice shall be made within 7 oce days after the registration of the request
and the compensation process will nish within 14 oce days.
- Warranty period for this product is 1 year after the purchase date.
9-2) Free after service (A/S)
Free A/S is provided in case of defects in the product itself within 1 year after purchase date
(warranty period). In the case of an unknown purchase date on the warranty service document,
warranty period will be 1 month in addition to the production date according to the serial
number or the manufactured date on the box of the product.
1) Warranty period is dened as 1 year after the purchase date. Defects and errors while using
in normal conditions, shall be xed for free.
2) In case of repairs within the warranty period, repairs shall be processed at headquarters or
designated warranty service centers after serial number and personal information are
registered at the home page. (Online registration is recommended)
3) In case of expired warranty period, paid After / Service can be provided on client’s request.
4) Note that paid & additional cost services can be provided in the following cases even during
the warranty period.
- Vision Drive disassembly or revision, usage faults and damages caused by user’s carelessness.
- Defects and damage by natural disaster.
- Defects and errors by using other brand of cables, not using company provided or designated
power cables.
- Product damage by dropping or shock.
5) Warranty service shall be provided solely in the purchased country.
Table of contents
Other Vision Drive Dashcam manuals

Vision Drive
Vision Drive VD-3000 User manual

Vision Drive
Vision Drive VD-8500WHG User manual

Vision Drive
Vision Drive VD-1500MG/1500MB User manual

Vision Drive
Vision Drive VD-1600HD User manual

Vision Drive
Vision Drive Black Box VD-9000FHD User manual

Vision Drive
Vision Drive VD-7000W User manual

Vision Drive
Vision Drive VD-7000W User manual

Vision Drive
Vision Drive VD- 8500WHG User manual

Vision Drive
Vision Drive VD-9500H User manual

Vision Drive
Vision Drive VD-9000FHD User manual


