•Аккуратно удалите пищу из емкости. Пользуйтесь щипцами с длинными рукоятками.
•По окон ании эксплуатации прибора, отклю ите его от электросети и подождите, пока он полностью
остынет. Только затем приступайте к истке.
•Внимание: ванно ку для сбора жидкости следует вынимать о ень осторожно. Вода в ванно ке и в корпусе
пароварки может быть все еще горя ей даже после того, как остынут все кастрюльки прибора.
ЧИСТКА
•Внимание: прежде, ем приступить к истке, убедитесь в том, то прибор выклю ен, отсоединен от
электросети и остыл. По окон ании о истки всегда протирайте асти прибора насухо. Не погружайте корпус
пароварки, шнур питания или штепсельную вилку в воду или в другую жидкость.
•Для истки кастрюлек и про их астей пароварки не следует использовать жесткие или абразивные
материалы (металли еские мо алки, истящие порошки или отбеливающие средства).
•Промойте крышку, емкости, емкости для риса и рыбы, ванно ку и разделительное кольцо в горя ей
мыльной воде. Тщательно ополосните и вытрите насухо. Указанные асти можно мыть только на верхней
поло ке посудомое ного шкафа.
•Наполните съемную емкость для воды теплой мыльной водой и ополосните. Вытрите насухо мягкой
тряпкой. Не помещайте ее в посудомое ный шкаф, т.к. это может повредить данную емкость.
•Корпус пароварки следует обирать истой влажной тряпкой. Не погружайте корпус пароварки, шнур
питания или штепсельную вилку в воду или в другую жидкость.
У АЛЕНИЕ НАКИПИ
•Время от времени из паровой системы нужно удалять минеральные отложения ("накипь"). Образование
накипи ! это нормальное явление, которое зависит от степени жесткости воды в Вашей местности. Как
только Вы заметите, то для образования пара или приготовления пищи требуется больше времени, Вам
следует о истить систему от накипи.
•Наполните емкость для воды наполовину истым (белым) уксусом. Установите ванно ку, нижнюю емкость и
крышку в корпус пароварки. Затем установите емкость с уксусом.
•Установите таймер на 25 минут. Дайте пароварке поработать до тех пор, пока не раздастся звуковой сигнал
(звонок).
•Дайте пароварке полностью остыть. Вылейте уксус из корпуса пароварки и ванно ки. Слейте остатки уксуса
из емкости для воды.
•Несколько раз ополосните емкость холодной водой. Промойте остальные асти пароварки горя ей
мыльной водой и тщательно ополосните. Перед укладкой на хранение все асти должны просохнуть.
ПОЛЕЗНЫЕ СОВЕТЫ
•Внимание: При работе с горя ими астями всегда пользуйтесь рукавицами!прихватками. Для добавки,
вынимания или помешивания пищи в пароварке пользуйтесь приборами с длинными ру ками.
•В таблице на следующих страницах указано лишь рекомендуемое время приготовления пищи в пароварке.
Оно может изменяться в зависимости от размера приготавливаемых продуктов, их расположения в
емкости, свежести, и даже от Ваших ли ных предпо тений.
•Для более быстрого приготовления пищу следует располагать одним слоем. Большее коли ество пищи,
которое невозможно разместить одним слоем, будет готовиться немного дольше.
•Для равномерного приготовления на пару кусо ки пищи должны быть примерно одинакового размера. Если
в Вашем блюде используются кусо ки разного размера, самые маленькие кусо ки следует размещать в
верхнем слое.
•Пищу следует располагать в емкости так, тобы обеспе ивался равномерный поток пара. Не набивайте
емкость продуктами до отказа. Если понадобится дополнительная емкость, воспользуйтесь верхней
емкостью. Если места все равно не хватит, готовьте пищу в несколько заходов.
•Во время приготовления большого коли ества пищи пользуйтесь рукавицами!прихватками, когда
понадобится открыть крышку и перемешать пищу. Пользуйтесь приборами с длинными ру ками.
•Ни в коем слу ае не добавляйте соль, перец и про ие приправы в емкость для воды. Это может привести к
поломке пароварки.
•В резервуар для воды заливайте только холодную воду. Не добавляйте горя ую или кипящую воду в
указанную емкость.
РУССКИЙ
IMPORTANT SAFEGUARDS
When using electrical appliances, basic safety precautions must always be followed, including the following:
•Read all the instructions carefully.
•Do not touch hot surfaces. Use handles or knobs. Always use oven mitts when handling hot materials. Avoid hot
steam rising from top of appliance at all times when in use. Do not reach over the appliance while it is generating
steam. Remove lid by lifting slowly away from you. When checking food, use long!handled utensils.
•To protect against risk of electric shock, do not immerse the appliance, the cord or plug, or other non!removable
parts in water or other liquids.
•Close 5upervision is always necessary when this or any other appliance is used near children.
•Unplug from outlet when not in use and before cleaning.
•Allow to cool before putting on or taking off parts and before cleaning.
•Do net operate any appliance with a damaged cord or plug or after the appliance malfunctions or is dropped or
damaged in any manner. Return the appliance to an authorized service facility for examination, repair, or adjust!
ment.
•Do net use attachments not recommended by the manufacturer. They may cause fire, electric shock or injury.
•Do not use outdoors, or for commercial purposes.
•Do nut let the cord hang over the edge of a table or counter, or touch hot surfaces, such as the stove. Do not allow
anything to rest on the power cord. Do not plug in cord where it may be walked on or accidentally tripped over.
•Do not place the appliance near a hot gas or electric burner, or in a heated oven.
•Extreme caution must be used when moving an appliance containing hot oil or other hot liquids.
•Turn the unit OFF before inserting or removing plug from wall outlet.
•To prevent damage from steam, do not operate the appliance near walls or cabinets.
•To disconnect, grasp plug and remove from the outlet. Do not pull by the cord.
•Do not use this appliance for other than the intended use.
•Always use the appliance on a flat level and stable work surface, away from water.
•Allow the appliance to cool completely before washing or storing.
•Always use sufficient water for the steaming time.
•Caution: To reduce the risk of electric shock, cook only in removable container.
•This product is intended for household use only, not commercial or industrial use.
SAVE THESE INSTRUCTIONS
This appliance has a polarized plug (one blade is wider than the other). To reduce the risk of electric shock, as a safety
feature, this plug will fit in a polarized outlet only one way. If the plug does not insert fully in the outlet, reverse the plug.
If it still fails to fit. contact a qualified electrician to replace the obsolete outlet. Do not attempt to defeat this safety fea!
ture.
The cord length of this appliance was selected to reduce the possibility of tangling in or tripping over a longer cord. If
more length is needed, use an Underwriters Laboratories (UL) ! Listed extension cord rated no less than 15!amperes
and 120 volts. When using an extension cord, do rot let it drape over the working area or dangle where someone could
accidentally trip over it.
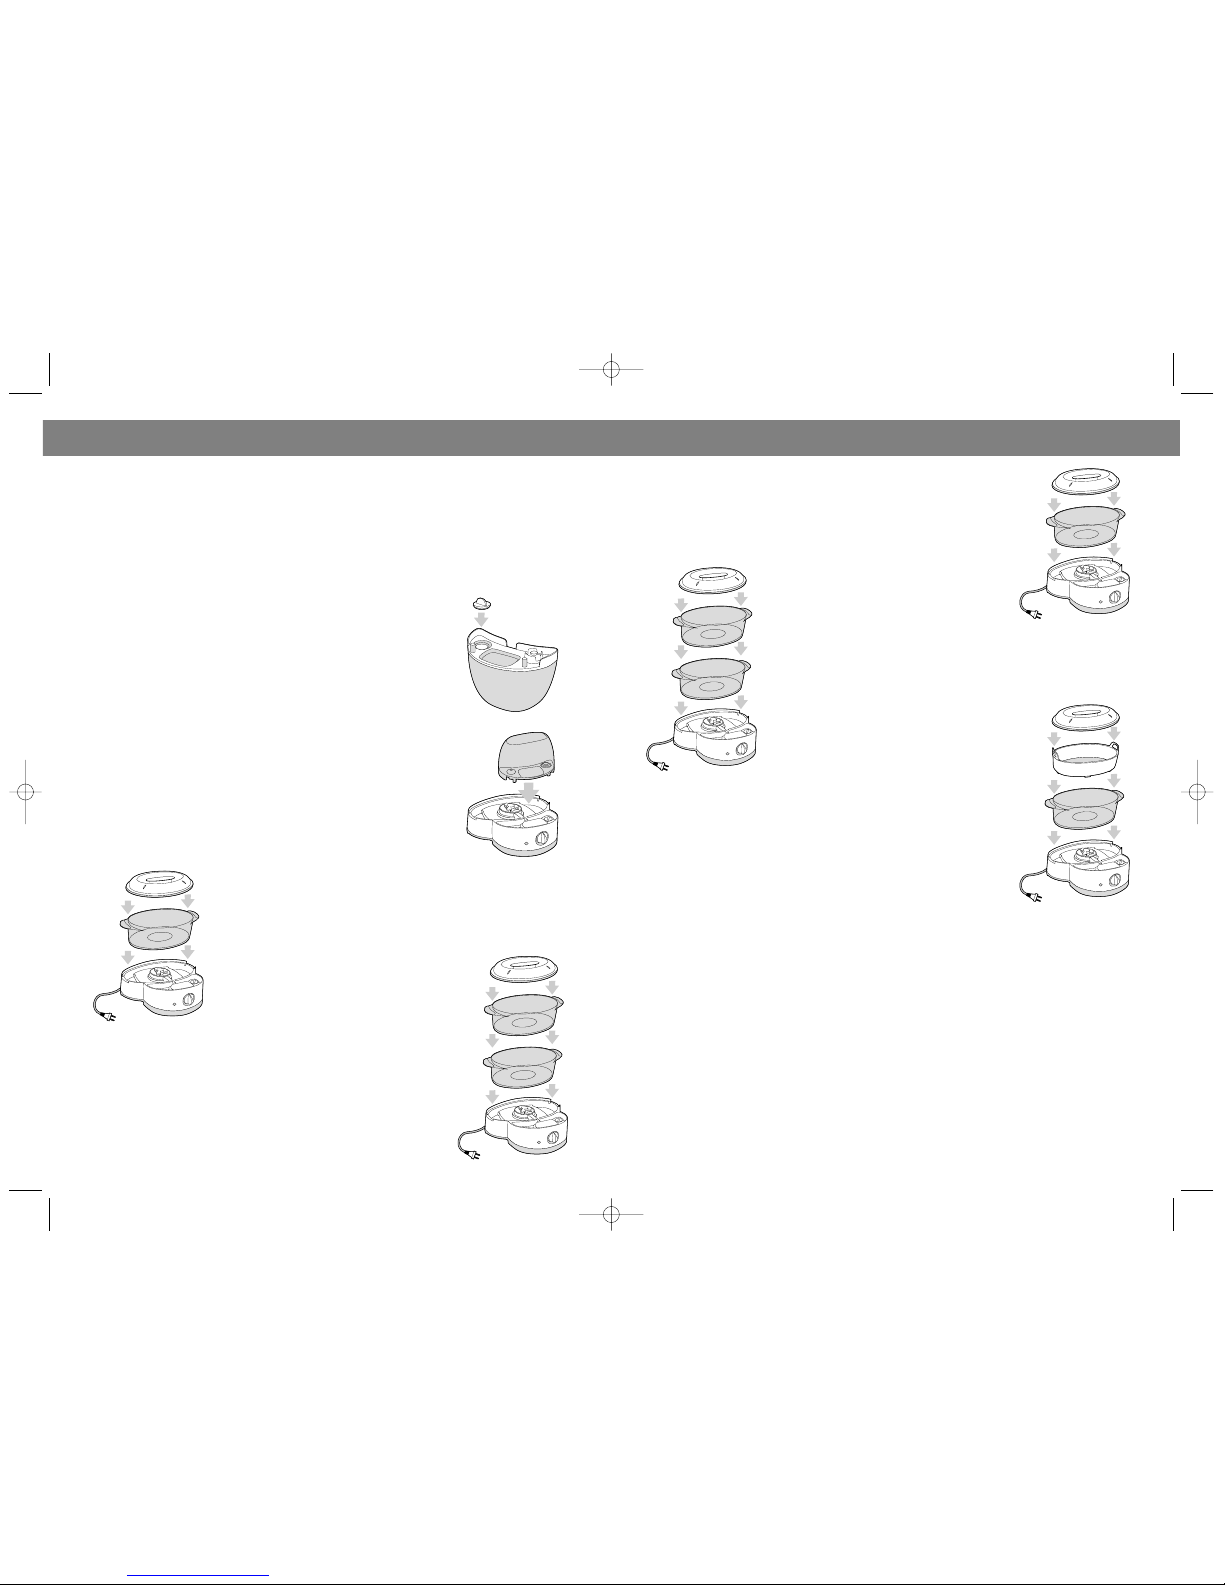
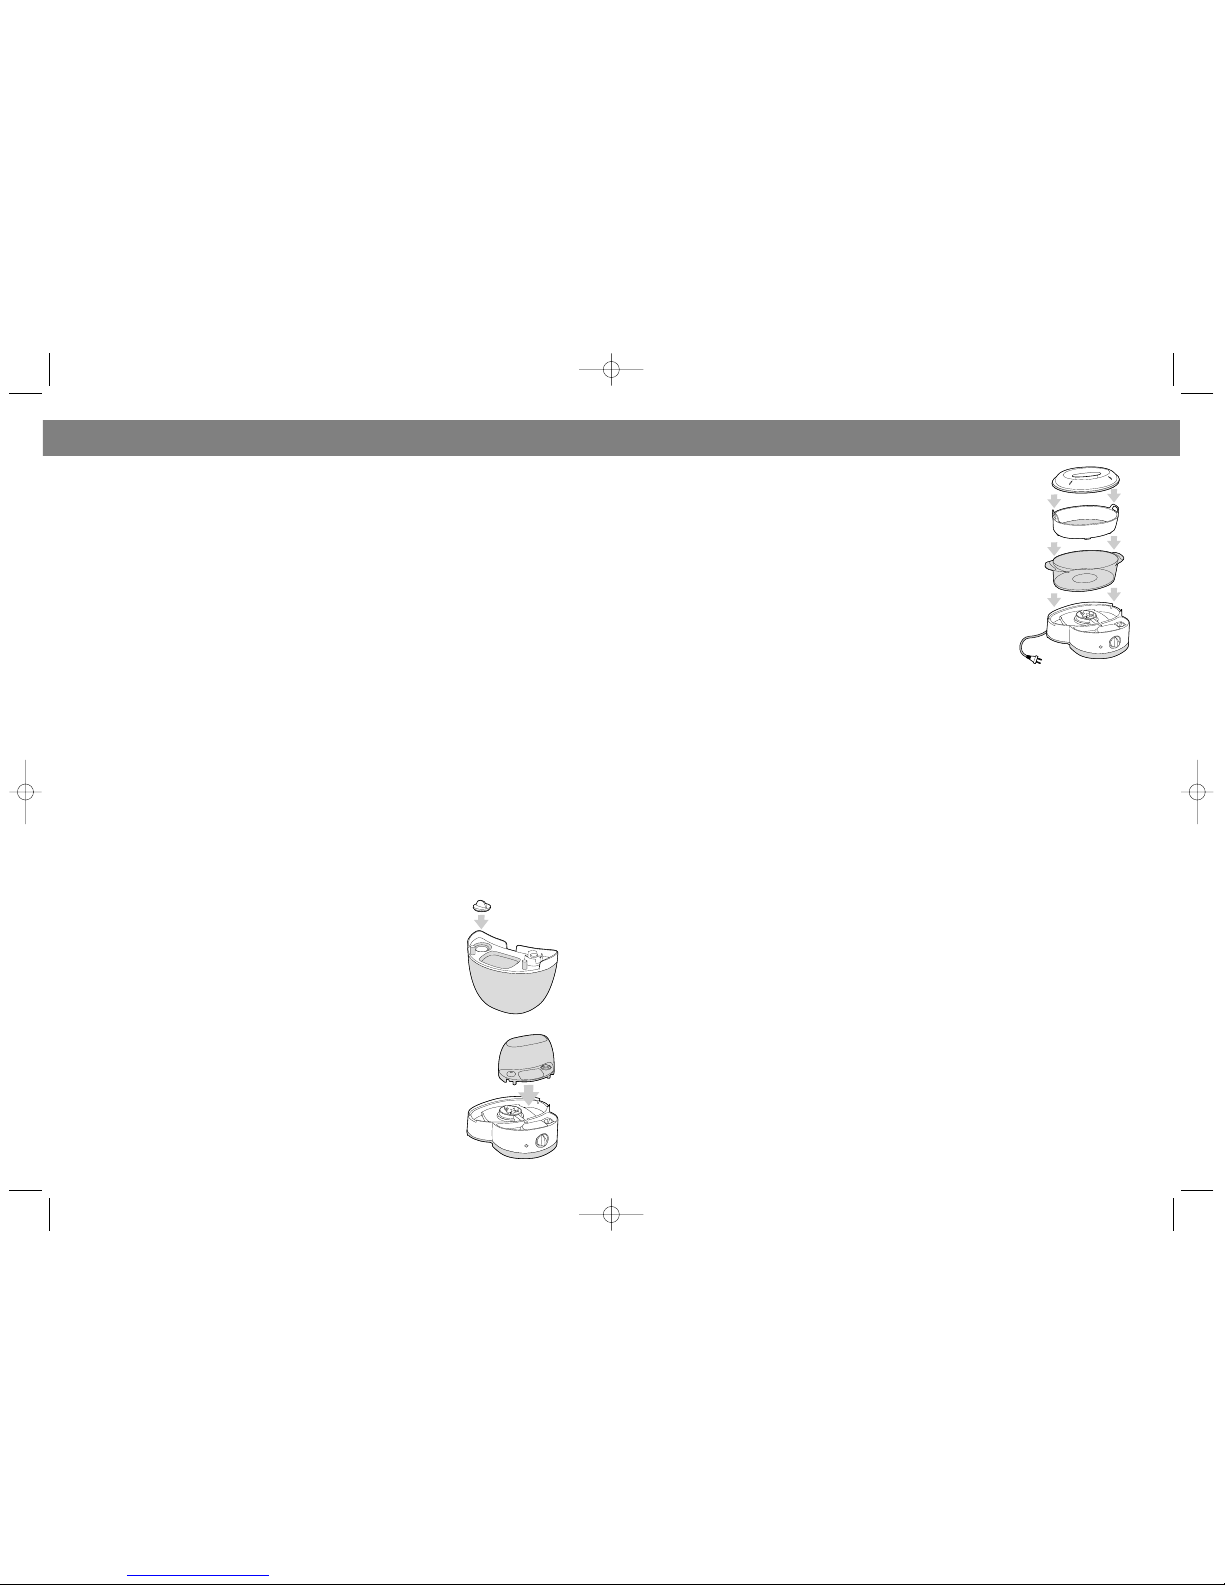
KNOW YOUR FOOD STEAMER
A. Steamer Lid ! includes a convenient handle on top to avoid burning fingers as it is removed. Always use caution when
removing the lid, because the steam vents in the lid will continuously emit steam during use. Care should also be taken
to avoid a surge of steam that may result when the lid is removed ! always lift the lid away from you. Always use oven
mitts when handling hot steamer pans.
B. Upper Steamer Bowl ! a 3!quart capacity steamer bowl, to be used on top of the lower Steamer Bowl, to double your
steaming capacity.
C. Rice & Fish Bowls ! made of white plastic, can cook up to 8 cups of rice, or several fish fillets or whole fish, and is
placed inside the Upper Steamer Bowl when in use. Note that tomato!based foods may stain these bowls.
D. Lower Steamer Bowl ! a 2.4!quart capacity steamer bowl, sits directly on the Steamer Base.
E. Drip Tray ! conveniently located at the bottom of the steamer, this tray will collect the used steaming water and pre!
vent it from recirculating, ensuring that the steam is always clean and fresh.
F. Removable Water Reservoir ! holds enough water to steam for 40 minutes. For additional steaming time, simply refill
the tank. Do not use any other type of liquid in tie water tank. Twist open the Water FBI Knob located on the underside
of the reservoir to fill and empty the reservoir.
G. Steamer Base ! holds the Drip tray. Steamer Bowls and water Reservoir.
H. Time ! 60!minute timer, with indicator light.
3
ENGLISH
10