ENGLISH
Wipe the outer surface and the bottom of the
bowl (11) dry before use.
In the middle of the heating element (9) there is
a temperature sensor (10). Make sure that the
movement of the sensor is not limited.
Make sure ha he level of ingredien s and liq
uids does no exceed he maximal mark «10»
and is no lower han he minimal mark «2». The
maximal level mark for porridges (excep rice)
is «8».
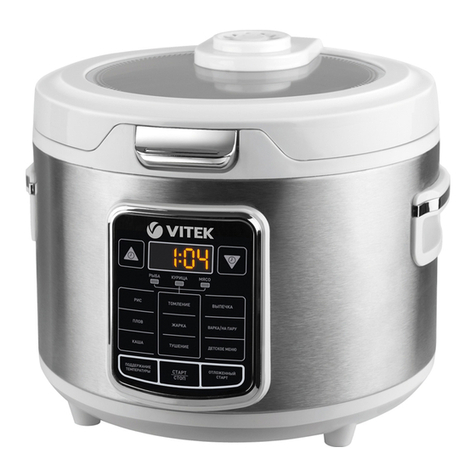
General example of rice loading
Measure rice with the measuring cup (24), wash
it and place in the casserole.
The water level required for a certain amount of
rice is given on the scale inside the bowl (11):
rice - «RICE», water level in cups - «CUP». Pour
water up to the corresponding mark.
Example: After putting four measuring cups of
cereal, pour water till the mark «4 CUP» (4 cups).
For liquid porridges it is recommended to use
rice and water in the proportion 1:3.
1. Pu he food in o he bowl (11) following he
recipe (see he recipe book).
2. Place he bowl (11) in he process chamber.
Make sure ha he ou er surface of he bowl
is clean and dry, and he bowl i self is placed
evenly and is in secure con ac wi h he sur
face of he hea ing elemen (9).
3. If you s eam produc s, pour wa er in o he
bowl (11) so ha boiling wa er doesn’ reach
he bo om of he baske (21). Pu he food
in o he baske (21) and place i on he bowl
(11).
4. Close he lid (4) un il clicking. If you are cook
ing in he «Fondue» or «Roas ing» program,
leave he lid open.
5. Inser he power cord connec or in o he con
nec ion socke (8) and he power cord plug
in o he mains socke .
6. Unlock he con rol panel (see above).
7. The display (3) will be glowing blue and he
symbol ^ will be flashing.
Selec ing he program from he upper
par of he menu
8. Selec he ype of produc using he «+/-» bu
ons (17): beef (jj>, lamb (Ji, pork poul
ry ^ , seafood Q> or vege ables . The
selec ed produc icon will be flashing 9
9. Press he «MENU» bu on (15) and hen use he
«-/+»bu ons (17) o selec a cooking program:
«Slow cooking» w , «Boiling» -jjp-, «S eam
cooking» § , «Roas ing» A — or «S ewing»
The symbol of he selec ed program will
flash, and he display will show he dura ion of
he program as se by defaul .
10. Go o he chap er «Se ing he cooking dura-
ion».
Selec ing a program from he lower par
of he menu
11. Consequen ly press he «MENU» bu on (15)
o swi ch o he lower par of he menu ( he
name of he «Cereal» program is flashing).
12. Selec a cooking program by ouching he
«-/+» bu ons (17). The corresponding pro
gram name and he defaul cooking dura ion
will be flashing on he display.
Se ing he cooking dura ion
13. Touch he «TIME» bu on (18), he hour digi s
will be flashing. Use he «-/+» bu ons (17) o
se he cooking ime in hours.
14. Touch he « TIME» bu on (18), he minu es
digi s will be flashing. Use he «-/+» bu ons
(17) o se he cooking ime in minu es.
Se ing he delayed s ar func ion
Notes:
If you want to start cooking immediately, go to
the step « witching the cooking mode on».
ee the list of programs with available delayed
start function in the table «Cooking programs».
15. Touch he «DELAYED START» bu on (16), he
indica or Q will appear on he display (3)
and he hour digi s will be flashing. Use he
«+/-» bu ons (17) o se he cooking end ime
in hours.
16. Touch he «DELAYED START» bu on (16), he
minu es digi s will be flashing. Use he «-/+»
bu ons (17) o se he cooking end ime in
minu es.
Swi ching he cooking mode on
17. Touch he «START» bu on (14). If you have
se he delayed s ar func ion and swi ched
he uni on, he symbol Q and he cooking
end ime will be shown on he display. Once
he delay ime is over, he uni will be swi ched
o hea ing, you’ll hear a sound signal and he
VT-4220.indd 9 16.06.2014 11:40:08
