manuals.online logo
Brands
  1. Home
  2. •
  3. Brands
  4. •
  5. VS Sassoon
  6. •
  7. Styling Iron
  8. •
  9. VS Sassoon Goddess VSP95CA User manual

VS Sassoon Goddess VSP95CA User manual

instruction booklet
Goddess™
Conditioning Ionic Steam Straightener
With BONUS Goddess miniPRO™
VSP95CA
©2010 Conair Australia Pty Ltd
Suites 20 and 21,
7 Narabang Way, Belrose NSW 2085
Customer Service Hotline (Australia): 1800 650 263
Customer Service e-mail: [email protected]
Conair New Zealand Ltd.,
PO Box 251159, Pakuranga, Auckland, 1706, New Zealand
Customer Service Hotline (New Zealand): 0800 266 247
VSP95CA
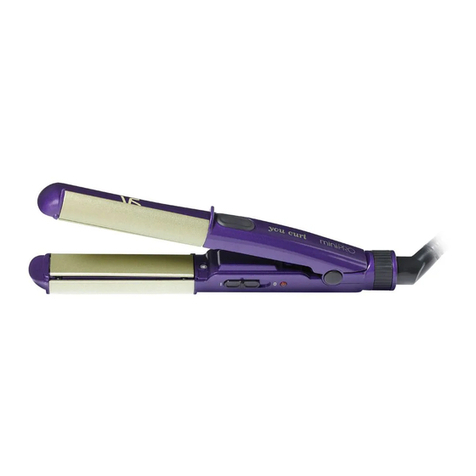
MiniPRO Goddess™
The VS Sassoon miniPRO™ collection takes your favourite styling essentials & turns them
into compact, travel size styling tools on the go. They include the same great quality &
features you have grown to love. The miniPRO™ Goddess is a straightener with steam
that adds moisture & shine to hair with ultra straight results.
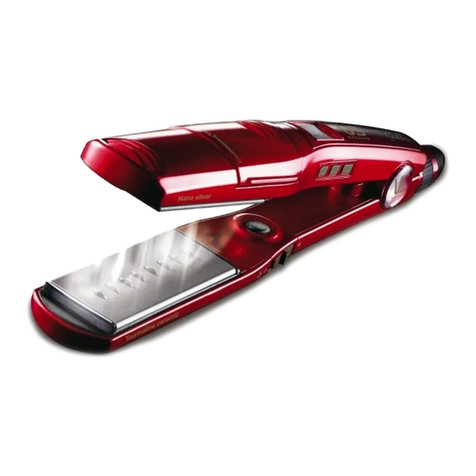
FEATURES:
1. Ceramic-coated plates
2. 200ºC
3. Ultra fast heat up in 30 seconds
4. Automatic temperature control
5. Dual voltage for worldwide use
6. LED on indicator light
7. On/off switch
8. Power cord
9. Removable detangling comb
10. Release button
IMPORTANT : Always preheat your straightener before use for approx. 4-5 minutes for
best results.
Failure to preheat the straightener may result in water leaking onto the plates during
use.
How to use your miniPRO Goddess™ Straightener
1. Remove all packaging and point of sale labels before use.
2. A plastic cover has been placed over the plug to protect it from damage during
transportation.
Remove the plastic cover from the plug before use.
3. Ensure hair is clean and completely dry before using the appliance.
4. Comb through hair to prevent knots and tangles and then divide hair into equal
sections.
5. Remove the water reservoir by pushing the “Release” button located at the top of the
unit.
6. On the underside of reservoir, gently pull up black rubber plugs to expose 2 access
holes. Immerse reservoir in water to fill (filtered water is preferred). Replace the
rubber plugs and press firmly to seal.
7. Replace the reservoir back into the straightener ensuring the protruding clip is
inserted into the top notch first , then press down to lock in position.
8. Check that the outside of the reservoir and your hands are dried well.
9. If the reservoir is full, you can use the steam function. If you have to fill the reservoir
a second time, unplug the unit and replace the reservoir immediately after filling it,
making sure you don’t touch the hot plates.
10. Plug appliance into a 100-240V~ power outlet
11. Turn the unit on by sliding the on/off button to the “I” position.
12. Always allow the straightener to preheat for approx. 4-5 minutes before using.
13. Avoid any contact between the hot surfaces and your face and neck. Make sure you
do not direct the steam at your face and neck.
How to use your miniPRO with Steam
1. Always preheat your straightener for approx. 4-5 minutes before use. Water may leak
onto plates if the straightener has not been preheated.
2. On first use with the steam, or if the unit has not been used for a while,
start up the steam function by closing and opening the unit 3 times
( a pumping action).
3. The detangling comb will allow hair to spread evenly between the teeth of the comb
to untangle your hair with ease.
(NB. To remove the detangling comb, simply slide it off the unit)
4. Straighten your hair from root to tip.
How to use your miniPRO without Steam
1. Use the straightener with an empty water reservoir.
2. Next follow points 10 and 11. under Instructions for Use.
IMPORTANT:
1. This is a high heat appliance at 200°C. If your hair has been heavily bleached or
is chemically treated or you are concerned with the condition of your hair, please
consult your hairdresser before using this appliance.
2. Always preheat your straightener for approx. 4-5 minutes before use. Water may
leak onto plates if the straightener has not been preheated.
What is Ceramic Technology™?
Ceramic Technology™helps to tame and reduce frizzes and flyways by preventing heat
damage and spreading heat evenly and consistently. Hair damage is minimised as heat is
distributed evenly from the styling appliance avoiding harmful hot spots.
Dual Voltage
This straightener has a dual voltage feature for worldwide use. The voltage automatically
converts for ease of use from 100-240V~.
NOTE: This straightener has an internal automatic converter which will automatically
convert the voltage without the need of a switch. A suitable plug adaptor will be
required, please refer to the chart below.
User Maintenance
Your styler is designed for household use and is virtually maintenance free. If cleaning becomes
necessary, disconnect the appliance from the power outlet. Make sure you empty the water reservior
after every use. It is preferable to use filtered water to fill the reservoir. Otherwise take care to descale
the reservoir from time to time. Keep all vents and openings clear of lint and other debris. Allow the
appliance to cool and wipe exterior with a cloth. If any abnormal conditions occur, allow to cool and
return to your place of purchase. Store the straightener with plates pressed together to protect them.
Limited Three Year Warranty (Goddess™ Conditioning Ionic Steam Straightene)
Conair Australia Pty Ltd. will repair or replace (at our option) your appliance free of charge for thirty-
six months from the date of purchase if the appliance is defective in workmanship or materials.This
warranty is an additional benefit and does not affect your legal rights.To obtain service under this
warranty, please fill in and return the Warranty Registration as instructed.
Limited Two Year Warranty (MiniPRO Goddess™)
Conair Australia Pty Ltd. will repair or replace (at our option) your appliance free of charge for twenty-
four months from the date of purchase if the appliance is defective in workmanship or materials.This
warranty is an additional benefit and does not affect your legal rights.To obtain service under this
warranty, please fill in and return the Warranty Registration as instructed.
Plug adaptor
required
Voltage and
plug adaptors
Country
British plug:
230V
Ireland, Great Britain, Singapore,
South America, Hong Kong (parts
only), Africa (parts only)
European plug:
230V
Asia, Europe, Middle East
Noumea, Scandinavia, South
America, Hong Kong (parts only)
Australian and
New Zealand
plug: 240V
Australia, New Zealand
American/
Japan plugs:
110V- 120V
North America, Japan, Canada
(parts of)
10 5 4
12 39 76 8
IB-10/369B
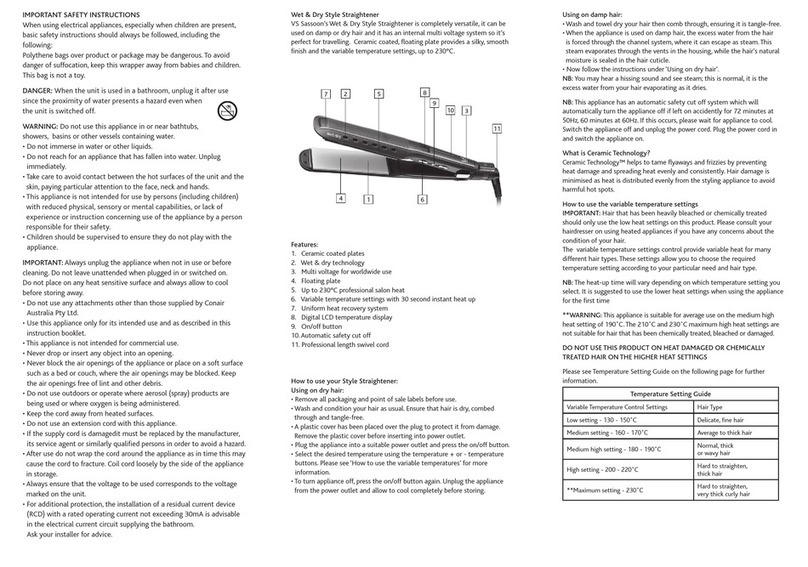
IMPORTANT SAFETY INSTRUCTIONS
When using electrical appliances, especially when children are present,basic safety instructions should
always be followed, including the following:
Polythene bags over product or package may be dangerous.To avoid danger of suffocation, keep this
wrapper away from babies and children.This bag is not a toy.
DANGER: When the unit is used in a bathroom, unplug it after use since the proximity of water
presents a hazard even when the unit is switched off.
WARNING: Do not use this appliance in or near bathtubs, showers, basins or other
vessels containing water.
•Donotimmerseinwaterorotherliquids.
•Donotreachforanappliancethathasfallenintowater.Unplugimmediately.
•Takecaretoavoidcontactbetweenthehotsurfacesoftheunitandtheskin,paying
particular attention to the face, neck and hands.
•Thisapplianceisnotintendedforusebyper sons(includingchildren)withreducedphysical,
sensory or mental capabilities, or lack of experience or ins truction concerning use of the appliance
by a person responsible for their safety.
•Childrenshouldb esupervisedtoensuretheydonotplaywiththeappliance.
IMPORTANT: Always unplug the appliance when not in use or before cleaning. Do not leave
unattended when plugged in or switched on.
Do not place on any heat sensitive surface and always allow to cool before storing away.
•DonotuseanyattachmentsotherthanthosesuppliedbyConairAustraliaPtyLtd.
•Usethisapplianceonlyforitsintendeduseandasdescribedinthisinstructionbooklet.
•Thisapplianceisnotintendedforcommercialuse.
•Neverdroporinsertanyobjectintoanopening.
•Neverblocktheairopeningsoftheapplianceorplaceonasoftsurfacesuchasabedorcouch,
where the air openings may be blocked. Keep the air openings free of lint and other debris.
•Donotuseoutdoorsoroperatewhereaerosol(spray)productsarebeingusedorwhereoxygenis
being administered.
•Keepthecordawayfromheatedsurfaces.
•Donotuseanextensioncordwiththisappliance.
•Ifthesupplycordisdamageditmustbereplacedbythemanufacturer,itsserviceagentorsimilarly
qualifiedpersonsinordertoavoidahazard.
•Afterusedonotwrapthecordaroundtheapplianceasintimethismaycausethecordtofracture.
Coil cord loosely by the side of the appliance in storage.
•Alwaysensurethatthevoltagetobeusedcorrespondstothevoltagemarkedontheunit.
•Foradditionalprotection,theinstallationofaresidualcurrentdevice(RCD)witharatedoperating
current not exceeding 30mA is advisable in the electrical current circuit supplying the bathroom.
Ask your installer for advice.
How to use your Goddess™ Conditioning Ionic Steam Straightener
1. Remove all packaging and point of sale labels before use.
2. A plastic cover has been placed over the plug to protect it from damage during transportation.
Remove the plastic cover from the plug before use.
3. Ensure hair is clean and completely dry before using the appliance.
4.Combthroughhairtopreventknots andtanglesandthendivide hairintoequalsections.
5. Remove the water reservior (4) located at the top of the unit and lift the black rubber button.
Fillitwithwater,preferablyfilteredwater,andreplaceblackbutton.
Then put the reservior back on the straightener.
6. Check that the reservior is properly positioned and closed.
7. Check that the outside of the reservior and your hands are dried well.
8. If the reservior is full, you can use the steam function. If you have to fill the reservior a second
time, unplug the unit and replace the reservoir immediately after filling it, making sure you don’t
touch the hot plates.
9. Let the unit heat up for at least 2 - 3 minutes before using the steam function.
10. Avoid any contact between the hot surfaces and your face or neck. Make sure you do not direct
the steam at your face or neck.
11. Plug the appliance into a 240v power outlet.
12. Place the appliance on a heat protective, flat level surface.
13. Press the on/off button (11) to switch the appliance on.The LED display:
will instantly illuminate. At this point the straightener will instantly start heating up. The green
lightindicatesthatthestraighteneris onthelowestheatsetting- 170°C.Selectyourrequired
temperature setting – please see ‘How to use the variable temperature settings’ for more
information. The blue light indicates that the internal ionic generator is switched on. As you move
through the heat settings, the blue light will always stay illuminated, until the straightener is
switched off.
How to use your Goddess™ Conditioning Ionic Steam Straightener with Steam
On first use with the steam, or if the unit has not been used for a while, start up the steam function
by closing and opening the unit 7 - 8 times ( a pumping action)
1. Switch the steam function on (5).
2. Select the desired steam output no steam, normal or high.
3. Select the desired position of the rectractable detangling comb.The detangling comb will allow hair
to spread evenly between the teeth of the comb to untangle your hair with ease.
4. Straighten your hair from root to tip.
How to use your Goddess™ Conditioning Ionic Steam Straightener without Steam
1. Slide the steam function switch into the ‘no steam’ position or use the straightener with an empty
reservoir.
2. Next follow points 11. to 13. under Instructions for Use.
Additionally, you can perfect and set your hair using one stroke with steam and then a second stroke
without steam.
NB: This appliance has a safety automatic shut-off system, which will automatically turn the appliance
off if left switched on accidentally for 72 minutes. If this occurs, please wait for appliance to cool.
Switch the appliance off and unplug the power cord.
Goddess™ Conditioning Ionic Steam Straightener
The VS Sassoon Goddess™ Straightener is a professional straightener with steam that adds moisture
and shine to hair with ultra straight results. It provides more shine, faster straightening and longer
lasting results. It features CeramicTEC™ advanced ceramic heating technology for ultra fast heat-up and
heat recovery and reaches a maximum heat of 230˚C for seriously straight results.
10
4
5
6
9 1411 8
12
13
FEATURES:
1. Up to 230˚C professional salon heat
2. 30 second instant heat
3. Total conditioning system adds
moisture and shine
4. Water reservoir for optional gentle
conditioning steam
5. Steam function switch: 3 positions - no
steam/normal/high
6. Ceramic tourmaline nano silver plates
7. Internal ionic generator with blue ion
indicator light
8. CeramicTEC™ advanced ceramic
heating technology
9. Digital temperature control with 5 LED
variable settings: + and - buttons (from
170˚C to 230˚C)
10. LED variable temperature display
11. On/off switch
12. Switch for retractable detangling
combs : 3 positions - no comb/medium
comb for fine hair/long comb for thick
hair
13. Cool tips
14. Professional swivel power cord
15. Automatic cut-off system
Additional features:
• CeramicTEC™advancedceramic
heating technology
• Puregentleconditioningsteam
• Ceramictourmalinenanosilver
technology
• IonicConditioningTechnology™
WARNING: This is a high heat appliance. Care must be taken to avoid the hot surfaces of the
appliance coming into direct contact with the skin, in particular the eyes, ears, face and neck.
IMPORTANT: Hair that has been heavily bleached or chemically treated should only use the low heat
settings on this product. Please consult your hairdresser on using heated appliances if you have any
concerns about the condition of your hair.
How to use the variable temperature settings
The 5 variable temperature settings/digital heat control provide variable heat for many different
hairtypes.Thesesettingsallowyoutochoosetherequiredtemperaturesettingaccordingtoyour
particular need and hair type.
NB: The heat-up time will vary depending on which temperature setting you select. It is suggested to
use the lower heat settings when using the appliance for the first time.
WARNING:This straightener gets extremely hot. It is recommended to always start with the lowest
temperaturesettingandadjustitaccordinglyafterthefirstuse,dependingontheresultsand yourhair
type. DO NOT USE THIS PRODUCT ON HEAT DAMAGED OR CHEMICALLY TREATED HAIR ON THE
HIGHER HEAT SETTINGS.
TEMPERATURES HAIR TYPES
STEAM OUTPUT
170°C green LED
185°C yellow LED
Fragilehair:fine,dry,bleached,
damaged and/or frizzy
Wavy hair
High
High
185°C yellow LED
200°C orange LED
Normal or coloured hair
Wavy to loosely curly hair
High
Medium
200°C orange LED
215°C red LED
230°C red LED
Thick hair
Curly to very curly hair
Medium
Medium
How does the ionic feature work?
Many aspects of modern living, including air conditioning, contact with man-made fibres and air
pollution add to the build-up of static electricity in the hair. Even brushing and towel-drying the hair
can increase these levels. This static charge causes the scales, or cuticles of the hair, to push hair strands
apart,resultinginaroughhairsurface.Consequently,hairmayhaveadullappearance.
High levels of static charge cause hair to become ‘flyaway’ and difficult to style. The advanced internal
ionic generator conditions hair by emitting negative ions to reduce static, by leaving hair silky and shiny
with reduced frizz.
What is the CeramicTEC™ advanced ceramic heating technology?
This straightener features a microprocessor controlled professional ceramic heater for perfect results by
intelligently maintaining a high heat level.The internal ceramic heater allows for ultra fast heat up and
consistent heat delivery.This system provides consistent styling power so that every strand of hair is set
with the same level of heat and comes out the same way,for a perfect, flawless finish.
What is Ceramic tourmaline nano silver technology?
Ceramic tourmaline nano silver technology unites micro particles of nano silver, tourmaline and ceramic
forauniquecombinationthatreducesstaticandwhencombinedwithheat,andquicklysealsthehair
cuticle layer, to leave hair with reduced frizz and increased shine.

Other VS Sassoon Styling Iron manuals

VS Sassoon EVOKE STYLE BAR User manual

VS Sassoon

VS Sassoon EVOKE STYLE BAR User manual

VS Sassoon ELEGANCE SALON CURLS User manual

VS Sassoon

VS Sassoon ELEGANCE SALON CURLS User manual

VS Sassoon VSLE253A User manual

VS Sassoon

VS Sassoon VSLE253A User manual

VS Sassoon VSCD16HA User manual

VS Sassoon

VS Sassoon VSCD16HA User manual

VS Sassoon miniPRO Curl Magic VS64A User manual

VS Sassoon

VS Sassoon miniPRO Curl Magic VS64A User manual

VS Sassoon LUMINOUS STRAIGHT STYLES VSS221HA User manual

VS Sassoon

VS Sassoon LUMINOUS STRAIGHT STYLES VSS221HA User manual

VS Sassoon Curl Secret VSC1040A User manual

VS Sassoon

VS Sassoon Curl Secret VSC1040A User manual

VS Sassoon VSC2112A User manual

VS Sassoon

VS Sassoon VSC2112A User manual

VS Sassoon VS2447A User manual

VS Sassoon

VS Sassoon VS2447A User manual

VS Sassoon VSC2021WA User manual

VS Sassoon

VS Sassoon VSC2021WA User manual

VS Sassoon VS11PCA User manual

VS Sassoon

VS Sassoon VS11PCA User manual

VS Sassoon Total Curl User manual

VS Sassoon

VS Sassoon Total Curl User manual

VS Sassoon ELEGANCE STRAIGHTEN & SMOOTH VSLE2598A User manual

VS Sassoon

VS Sassoon ELEGANCE STRAIGHTEN & SMOOTH VSLE2598A User manual

VS Sassoon VS2011A User manual

VS Sassoon

VS Sassoon VS2011A User manual

VS Sassoon CURL SECRET Series User manual

VS Sassoon

VS Sassoon CURL SECRET Series User manual

VS Sassoon Summer Essence User manual

VS Sassoon

VS Sassoon Summer Essence User manual

VS Sassoon Luminous VSCD16HMA User manual

VS Sassoon

VS Sassoon Luminous VSCD16HMA User manual

VS Sassoon ELEGANCE STRAIGHT & SHINE VSS221TA User manual

VS Sassoon

VS Sassoon ELEGANCE STRAIGHT & SHINE VSS221TA User manual

VS Sassoon CURL SECRET MULTI CURL VSP1300A User manual

VS Sassoon

VS Sassoon CURL SECRET MULTI CURL VSP1300A User manual

VS Sassoon TOTAL CRIMP User manual

VS Sassoon

VS Sassoon TOTAL CRIMP User manual

VS Sassoon Digital Sensor VSS500A User manual

VS Sassoon

VS Sassoon Digital Sensor VSS500A User manual

VS Sassoon FRIZZ DEFENSE VSS2440A User manual

VS Sassoon

VS Sassoon FRIZZ DEFENSE VSS2440A User manual

VS Sassoon TOTAL STYLE User manual

VS Sassoon

VS Sassoon TOTAL STYLE User manual

VS Sassoon CURL SECRET OPTIMUM VSC1600A User manual

VS Sassoon

VS Sassoon CURL SECRET OPTIMUM VSC1600A User manual

Popular Styling Iron manuals by other brands

Melissa Foldable Hair Straightener 635-088 Specifications

Melissa

Melissa Foldable Hair Straightener 635-088 Specifications

CHI Air Spin n Curl How-to

CHI

CHI Air Spin n Curl How-to

Conair CB890QCS Instruction & styling guide

Conair

Conair CB890QCS Instruction & styling guide

Premier ADC-5538C instruction manual

Premier

Premier ADC-5538C instruction manual

FIRST AUSTRIA FA-5668-3 instruction manual

FIRST AUSTRIA

FIRST AUSTRIA FA-5668-3 instruction manual

PALSON BLUES - brochure

PALSON

PALSON BLUES - brochure

OBH Nordica ARTIST pro airstyler 3595 Instructions for use

OBH Nordica

OBH Nordica ARTIST pro airstyler 3595 Instructions for use

Philips HP8383 manual

Philips

Philips HP8383 manual

Carmen COCO CURLER CT5015 manual

Carmen

Carmen COCO CURLER CT5015 manual

OBH Nordica ARTIST instruction manual

OBH Nordica

OBH Nordica ARTIST instruction manual

Saturn ST-HC7370 User instructions

Saturn

Saturn ST-HC7370 User instructions

SOLAC S90103600 User instructions

SOLAC

SOLAC S90103600 User instructions

Saturn ST-HC0302 manual

Saturn

Saturn ST-HC0302 manual

Rowenta CF7102 instructions

Rowenta

Rowenta CF7102 instructions

Myria MY4822 manual

Myria

Myria MY4822 manual

point RADIANT STRAIGHT user manual

point

point RADIANT STRAIGHT user manual

Vivax HS-40T2 user manual

Vivax

Vivax HS-40T2 user manual

Panasonic EH-HV11 operating instructions

Panasonic

Panasonic EH-HV11 operating instructions

manuals.online logo
manuals.online logoBrands
  • About & Mission
  • Contact us
  • Privacy Policy
  • Terms and Conditions

Copyright 2025 Manuals.Online. All Rights Reserved.