Warn 83680 User manual

WARN INDUSTRIES PAGE 1 83688A0
©2009 Warn Industries, Inc.
WARN® and the WARN logo are trademarks of Warn Industries Inc.
INJURYHAZARD
Failure to observe these instructions could lead to severe injury or death.
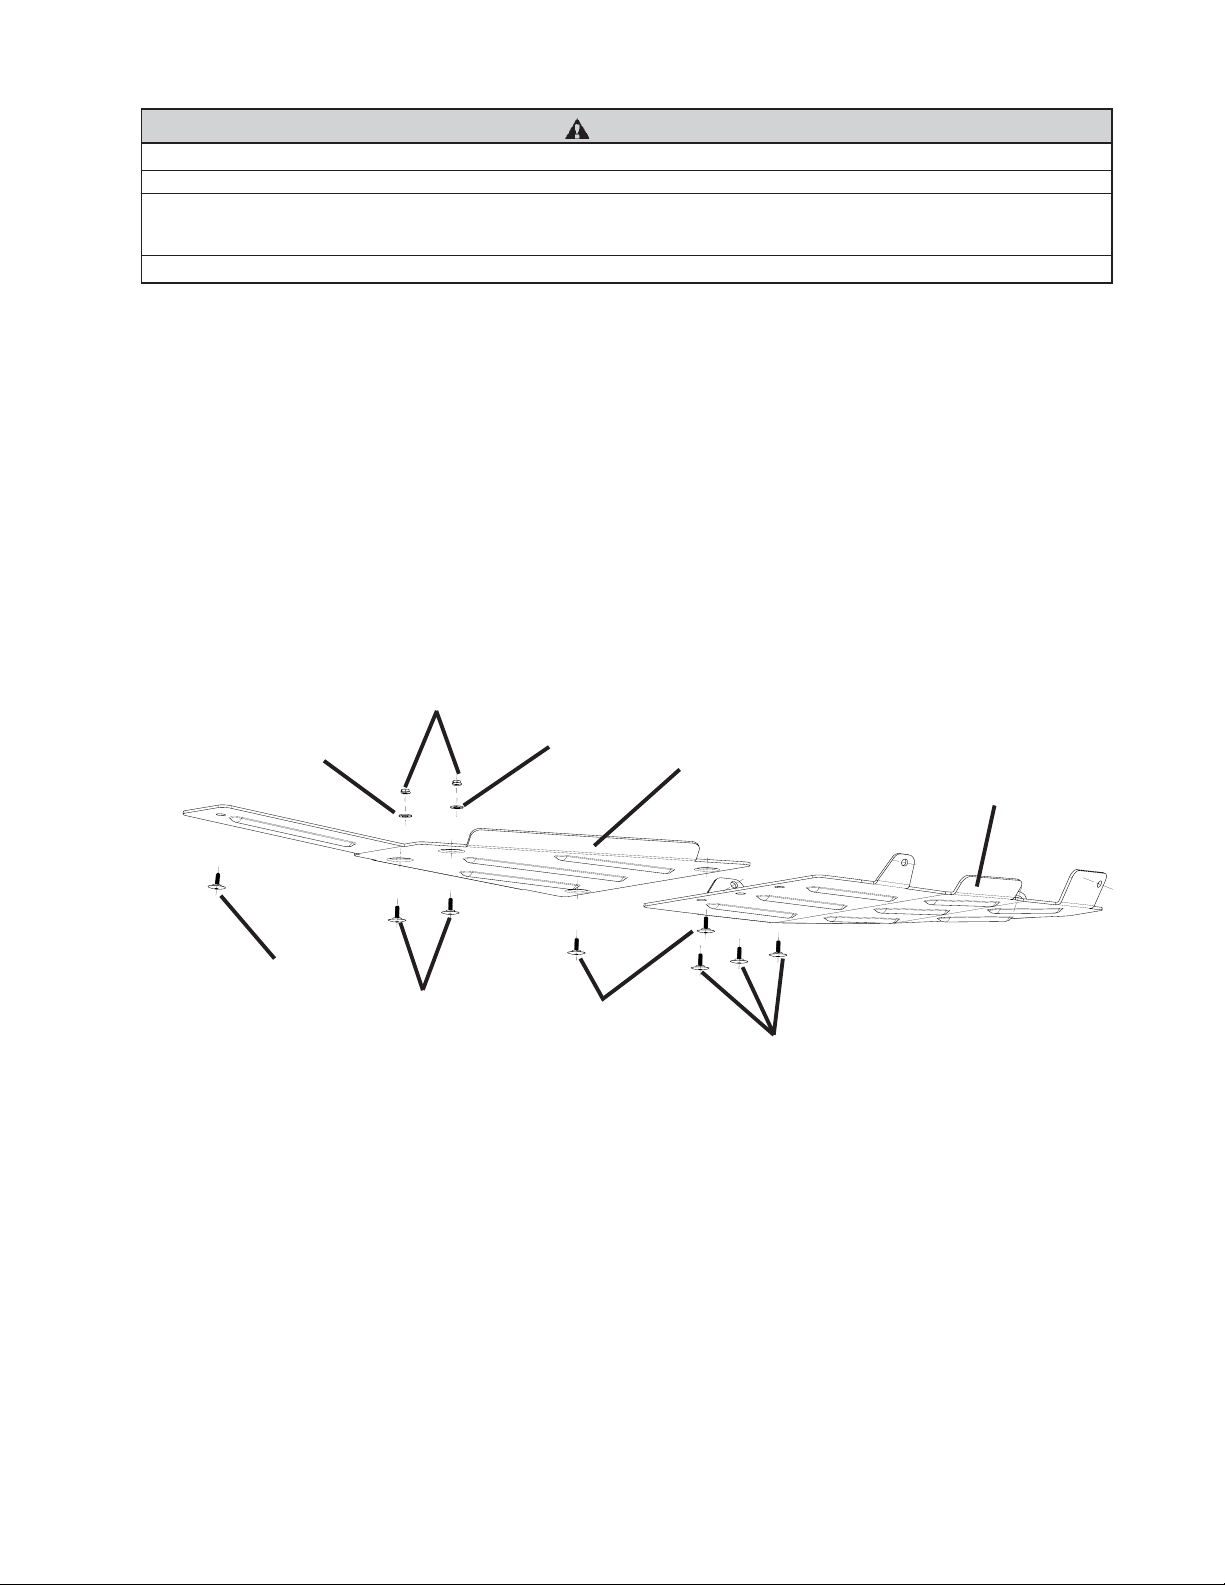
INSTALLATION INSTRUCTIONS
SKID PLATE BODYARMOR
Part Number: 83680
Application: 2009 POLARIS SPORTSMAN XP 550/850
WARNING
AlwAlw
AlwAlw
Alwaa
aa
aysys
ysys
ys Read all warning labels before operating.
AlwAlw
AlwAlw
Alwaa
aa
aysys
ysys
ys use extreme caution when drilling on any vehicle. Make sure that all fuel lines, brake lines,
electrical wires, and other objects are not punctured or damaged when/if drilling on the vehicle.
Thoroughly inspect the area to be drilled (on both sides of material) prior to drilling, and relocate any
objects that may be damaged. Failure to inspect the area to be drilled may result in vehicle damage,
electrical shock, fire or personal injury.
AlwAlw
AlwAlw
Alwaa
aa
aysys
ysys
ys wear safety glasses when installing this kit. A drilling operation will cause flying metal
debris.
AlwAlw
AlwAlw
Alwaa
aa
aysys
ysys
ys use extreme caution when cutting and trimming during fitting.
AlwAlw
AlwAlw
Alwaa
aa
aysys
ysys
ys remove jewelry and wear eye protection.
NeNe
NeNe
Nevv
vv
verer
erer
er lean over battery while making connections.
AlwAlw
AlwAlw
Alwaa
aa
aysys
ysys
ys insure components will remain secure during installation and operation.
AlwAlw
AlwAlw
Alwaa
aa
aysys
ysys
ys tighten all nuts and bolts securely, per the installation instructions.
AlwAlw
AlwAlw
Alwaa
aa
aysys
ysys
ys inspect, tighten, and replace damaged hardware before use.
AlwAlw
AlwAlw
Alwaa
aa
aysys
ysys
ys replace all worn or damaged parts before operating.
NeNe
NeNe
Nevv
vv
verer
erer
er operate this WARN product with damaged or missing parts.
NeNe
NeNe
Nevv
vv
verer
erer
er work under vehicle before properly securing vehicle.
Your safety, and the safety of others, is very important. To help you make informed decisions about
safety, we have provided installation and operating instructions and other information on labels and in
this guide. This information alerts you to potential hazards that could hurt you or others. It is not
possible to warn you about all potential hazards associated with this product, you must use your own
good judgment.
CARELESS INSTALLATION AND OPERATION CAN RESULT IN SERIOUS INJURY OR EQUIPMENT
DAMAGE. READ AND UNDERSTAND ALL SAFETY PRECAUTIONS AND OPERATING
INSTRUCTIONS BEFORE INSTALLING AND OPERATING THIS PRODUCT.
This guide identifies potential hazards and has important safety messages that help you and others avoid
personal injury or death. WARNING and CAUTION are signal words that identify the level of hazard.
These signal words mean:
WARNING signals a hazard that could cause serious injury or death, if you do not follow
recommendations. CAUTION signals a hazard that may cause minor to moderate injury, if you
do not follow recommendations.
This guide uses NOTICE to call attention to important mechanical information, and Note: to emphasize
general information worthy of special attention.
NOTICE
•Product may affect airflow to vehicle engine and drivetrain components.
•Installation of this accessory may affect vehicle warranty.
•This product will NOT protect vehicle from all impacts and terrain conditions.

WARN INDUSTRIES PAGE 2 83688A0
©2009 Warn Industries, Inc.
WARN® and the WARN logo are trademarks of Warn Industries Inc.
I. TABLE OF CONTENTS
Before You Begin............................................ page 3
Parts List ........................................................ page 3
Tools Required ............................................... page 3
Torque Specifications ..................................... page 3
Installation .................................................page 4 - 6
Maintenance/Care .........................................page 7
Caution
MoMo
MoMo
Moving Pving P
ving Pving P
ving Parar
arar
arts Entanglement Hazardts Entanglement Hazard
ts Entanglement Hazardts Entanglement Hazard
ts Entanglement Hazard
FF
FF
Failure tailure t
ailure tailure t
ailure to obsero obser
o obsero obser
o observv
vv
ve these instructions could lead te these instructions could lead t
e these instructions could lead te these instructions could lead t
e these instructions could lead to minor or moderato minor or moderat
o minor or moderato minor or moderat
o minor or moderate injure injur
e injure injur
e injuryy
yy
y..
..
.
Always take time to fully read and understand the installation and Operations Guide included with this product.
Never operate this product if you are under 16 years of age.
Never operate this product when under the influence of drugs, alcohol or medications.
Read installation and operating instructions thoroughly.
A1
A2
B2
B2
B2
B1
B4
B3
B4

WARN INDUSTRIES PAGE 3 83688A0
©2009 Warn Industries, Inc.
WARN® and the WARN logo are trademarks of Warn Industries Inc.
II. BEFORE YOU BEGIN
Caution
InjurInjur
InjurInjur
Injury Hazardy Hazard
y Hazardy Hazard
y Hazard
FF
FF
Failure tailure t
ailure tailure t
ailure to obsero obser
o obsero obser
o observv
vv
ve these instructions could lead te these instructions could lead t
e these instructions could lead te these instructions could lead t
e these instructions could lead to injuro injur
o injuro injur
o injuryy
yy
y..
..
.
Part edges may be sharp!
Installation tip:
•Apply electrical tape to clean dry vehicle components that will be in direct contact with aluminum
skid plates. Tape will help protect painted finish against abrasion and can reduce tendency of
squeaks.
•Raising the vehicle on a hoist or ramps may ease installation of this product.
III. PARTS LIST
IV. TOOLS REQUIRED
V. TORQUE SPECIFICATIONS
Reference Part Number Qty Description
A1 82914 1 Front Skid Plate
A2 82915 1 Rear Skid Plate
B1 74713 1 Screw Thread Cutting M6-1.0 flange head torx
B2 75170 7 Screw M6-1.0 flange head torx
B3 37533 2 Hex Flange Nut M6-1.0
B4 1324 2 Flat washer
- 10mm, hex wrench and or socket
- #30, #40 Torx socket and driver
- center punch
- 3/16 or 4.5mm drill bit
- drill motor
Fastener Size Torque lb.ft. (n-m)
M6 8 lb. ft. (10.8 N-m)

WARN INDUSTRIES PAGE 4 83688A0
©2009 Warn Industries, Inc.
WARN® and the WARN logo are trademarks of Warn Industries Inc.
Figure 1
VI. INSTALLATION:
1. Remove the 3 fasteners securing the rear skid
plate to the bottom of the vehicle. Remove the
2 fasteners securing the front skid plate to the
bottom of the vehicle. The rear skid plate will
continue being removed, the front skid plate
will not need to be removed for this installtion,
figure 1.
2. Remove the 1 fastener securing the rear skid
plate on the left side of vehicle just in front of the
rear wheel. Retain this fastener it will be used
when installing the new skid plate, figure 2.
3. Remove the 1 fastener securing the rear skid
plate on the right side of vehicle just in front of the
rear wheel. Retain this fastener it will be used
when installing the new skid plate, figure 3.
Figure 2
Figure 3
REAR
FRONT
REMOVE FASTENER
REMOVE FASTENER

WARN INDUSTRIES PAGE 5 83688A0
©2009 Warn Industries, Inc.
WARN® and the WARN logo are trademarks of Warn Industries Inc.
Figure 4
4. Remove the 2 fasteners securing the rear skid
plate at the rear of vehicle. Retain these
fasteners they will be used when installing the
new skid plate. Remove the rear skid plate at
this point, figure 4.
5. Place the front skid plate into position as
shown in figure 5. Place the new skid plate on
directly over the factory skid plate. Use 2 M6-
1.0 flange head torx screws (B2) to secure the
rear two holes of the skid plate.
6. Use 2 M6-1.0 flange head torx screws (B2), 2
M6-1.0 hex head flange nuts (B3) and to flat
washers (B4) to secure the two center holes
holes of the skid plate.
7. The forward mounting hole will need to be
marked and drilled out with a 3/16 or 4.5mm
drill bit. Then use the M6-1.0 thread cutting
flange head torx screw (B1) to secure the front
of the skid plate.
NOTE: Applying a small amount of thread
lock will help insure M6 bolts will
stay secure.
Figure 5
Figure 6
REAR FASTENERS
M6-1.0 FASTENER
M6-1.0 FASTENER
WASHERAND
NUT
DRILL, 3/16, 4.5mm

WARN INDUSTRIES PAGE 6 83688A0
©2009 Warn Industries, Inc.
WARN® and the WARN logo are trademarks of Warn Industries Inc.
Figure 7
8. Place the rear skid plate into position and
attach the bottom of the skid plate with 3, M6-
1.0 flange head torx screws (B2), figure 7
9. Fasten the tabs located just in front of the rear
tires with the 2 fasteners removed in steps 2
and 3, figure 8
10. Fasten the tabs located at the back of the rear
skid plate with the 2 fasteners removed in step
4, figure 9
Figure 8
Figure 9
M6 FASTENER
FACTORY FASTENER
FACTORYFASTENER

WARN INDUSTRIES PAGE 7 83688A0
©2009 Warn Industries, Inc.
WARN® and the WARN logo are trademarks of Warn Industries Inc.
Contact Warn customer service with installation issues, comments, concerns, and
questions.
WARN INDUSTRIES, INC
Customer Service Department
12900 SE Capps Road
Clackamas, OR 97015
1-800-543-WARN (1-800-543-9276)
1-503-722-3005 International Fax
www.warn.com
VII. MAINTENANCE/CARE
•Inspect all metal parts and related hardware. Replace all parts that appear corroded, cracked or
deformed prior to use.
•Inspect all nuts and bolts and related hardware prior to each use. Tighten all nuts and bolts that appear to
be loose. Stripped, fractured, or bent bolts or nuts need to be replaced immediately.
•Check skid plates protecting moving or rotating parts of the vehicle . Remove debris that may inhibit the
part from moving freely. Removal of aluminum armor may be necessary to thoroughly clean and inspect
both the vehicle and the aluminum underbody components. Frequency of removal will depend on the type
of terrain conditions experienced. Regular cleaning will help keep product looking good and will help avoid
damage to related components.
VIII. SERVICE PARTS
PN 75496 Kit Includes (10) PN 75170.

Table of contents
Other Warn Automobile Accessories manuals
Popular Automobile Accessories manuals by other brands

Westfalia
Westfalia 303 155 600 001 Installation and operating instructions

Thule
Thule RAPID Fixpoint XT Fitting instructions

Yakima
Yakima KayakStackers quick start guide

Axxess
Axxess AXPIO-JT1 installation instructions

Kargo Master
Kargo Master 40816 Instruction guide

Prorack
Prorack K112 Fitting instructions