manuals.online logo
Brands
  1. Home
  2. •
  3. Brands
  4. •
  5. Waterpik
  6. •
  7. Accessories
  8. •
  9. Waterpik WF-10 Series User manual

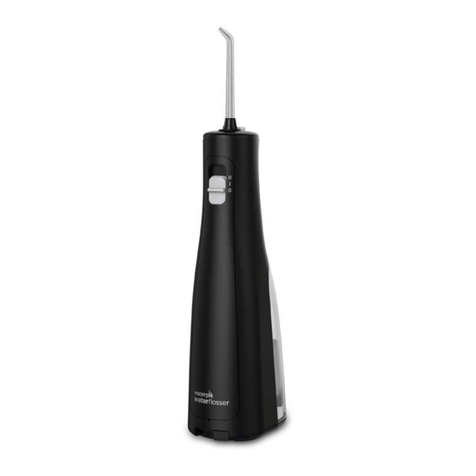
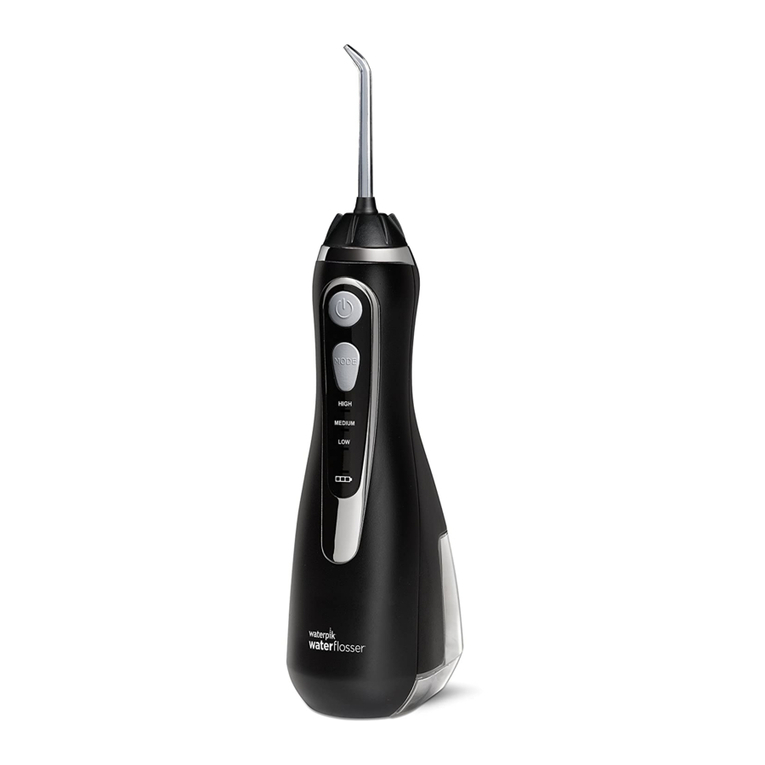
Waterpik WF-10 Series User manual

Waterpik®Water Flosser
WF-10 Series
www.waterpik.co.uk
2
IMPORTANT SAFEGUARDS
IMPORTANT
SAFEGUARDS
READ ALL INSTRUCTIONS BEFORE USING.
• This product is for household use.
When using electrical products, especially when children are
present, basic safety precautions should always be followed, including
the following:
DANGER:
To reduce the risk of electrocution:
• Do not handle charger with wet hands.
• Do not place charger in or drop into water or any other liquid.
• Check the charger for damage before the rst use and during the
life of the product.
WARNING:
To reduce the risk of burns, electrocution, ire,
or injury to persons:
• Do not charge this unit with any charging devices other than the
one provided.
• If product is opened/disassembled for ANY reason,
warranty is VOID.
• Do not use this product if it has a damaged cord or plug, if it is not
working properly, if it has been dropped or damaged, or dropped
into any liquid. Contact Water Pik, Inc. UK Service Centre at
+44 (0) 333 123 5677 or visit www.waterpik.co.uk.
• Do not direct water under the tongue, into the ear, nose or other
delicate areas. This product is capable of producing pressures that
may cause serious damage in these areas.
• Use this product only as indicated in these instructions or as
recommended by your dental professional.
• Only use tips and accessories recommended by Water Pik, Inc.
ENGLISH
3
• Do not drop or insert any foreign object into any opening or hose.
• Keep charging unit and cord away from heated surfaces.
• Magnetic eld: Pacemakers and similar implanted medical devices
may be aected by magnet.
• Do not use outdoors or operate where aerosol (spray) products are
being used or where oxygen is being administered.
• Do not use iodine, saline (salt solution), or water insoluble
concentrated essential oils in this product. Use of these can reduce
productperformance and will shorten the life of the product. Use of
theseproducts may void warranty.
• Remove any oral jewelry prior to use of this product.
• Do not use if you have an open wound on your tongue
or in your mouth.
• If your physician or cardiologist has advised you to receive antibiotic
premedication before dental procedures, you should consult your
dentist before using this instrument or any other oral hygiene aid.
• Closely instruct and supervise children 8 years
and above and individuals with special needs
in the proper use of this product.
• Children should be supervised to ensure that
they do not play with the appliance.
• There are no consumer serviceable
parts in this appliance and it does not
require maintenance.
• Fill reservoir with warm water or other dental
professional recommended solution only.
SAVE THESE
INSTRUCTIONS
4
TABLE OF CONTENTS
Product Description 5
Getting Started 6
Cleaning and Troubleshooting Your Waterpik® Water Flosser 9
Limited Two-Year Warranty 10
ENGLISH
5
PRODUCT DESCRIPTION
1. Tip rotator
2. Power button
3. Mode/pressure button
4. Battery charge indicator
5. Charging contacts
6. Tip
7. Tip eject button
8. Reservoir ll door
9. Reservoir
1
9
5
8
6
4
3
2
7
Charger
20024431-5, WF-10UK Charger (White)
20024431-6, WF-10UK Charger (Black)
NOT ALL TIPS INCLUDED IN ALL MODELS
TIPS
A. Orthodontic Tip*
- Braces/General use
B. Pik Pocket™Tip*
- Periodontal pockets/Furcations
C. Plaque Seeker™Tip*
- Implants/Crowns/Bridges/
Retainers/General use
A
E
B
F
C
D
*Replace Every 3 months **Replace Every 6 months
Replacement tips can be found at www.waterpik.co.uk.
D. Toothbrush Tip*
- General use
E. Classic Jet Tip**
- General use
F. Tongue Cleaner**
- Fresher breath
6
Charging Unit Prior to First Use
Plug the power cord into the wall and place the magnetic charger on the front of the unit for approximately 4 hours (see image). Ensure
contacts on BOTH the cord and unit are clean and dry before connecting the charger. The LED light will display a single, rapid
blink every 3 seconds when unit is fully charged and the charger is connected. A full charge will last for approximately 1 week of typical
use. When the batteries are in need of charging (approximately 30% charge le) the charge indicator light will blink 8 times quickly aer
use to indicate that you should recharge the unit. A complete recharge will take 3-4 hours. If you use your Water Flosser once a day or
less, it is recommended you charge it once a week. If you use it twice a day or more, charge the unit more frequently.
Filling the Reservoir
Remove the magnetic charger from the unit prior to lling reservoir and product use. Li ip top on reservoir and ll the reservoir with
lukewarm water.
Inserting and Removing Tips
Insert tip into the center of the knob at the top of the Water Flosser handle. Press rmly until the tip clicks into place. To remove the tip
from the handle, press the tip eject button and pull tip from the handle.
CAUTION: Do not press tip eject button while unit is running.
GETTING STARTED
Eject
Insert
Fill
7
ENGLISH
Adjusting the Pressure Setting
· First press (from OFF) starts unit on “LOW”.
· Second press turns unit to “HIGH”.
· Third press turns unit “OFF”.
The single LED exhibits the following behavior:
· Solid - If motor is running and battery is greater than half full.
· Slow glowing blink- battery is charging
· Single blink every 3 seconds - When charger is connected and battery is fully charged.
Recommended Technique
Lean low over sink and place tip in mouth. Aim the tip toward gumline, and turn the unit ON (I).
For best results, start with the back teeth and work toward the front teeth. Glide tip along gumline and pause briey between teeth.
Continue until you have cleaned the inside and outside of both the upper and lower teeth.
Direct the jet stream at a 90-degree angle to your gumline. Slightly close lips to avoid splashing but allow water to ow freely from
mouth into the sink. Keep unit upright during use for best results.
When Finished
Turn the unit OFF. Empty any liquid le in the reservoir.
If desired, the reservoir may be removed from the power handle by sliding the reservoir down toward the base of the unit.
Pressure
Setting
Remove
8
NOTE: NOT ALL TIPS INCLUDED WITH ALL MODELS.
TIP USAGE
Pik Pocket™ Tip
The Pik Pocket™ tip is specically designed to deliver water or anti-bacterial solutions deep into periodontal pockets.
To use the Pik Pocket™ tip, set the unit to the lowest pressure setting. Place the so tip against a tooth at a 45-degree angle and
gently place the tip under the gumline, into the pocket.
Tongue Cleaner Tip
Set to lowest pressure setting, place tip in the center/middle of your tongue about half way back. Pull forward with light pressure.
Increase pressure as you prefer.
Orthodontic Tip
To use the orthodontic tip, gently glide tip along gumline, pausing briey to lightly brush area between teeth and all around orthodontic
bracket, before proceeding to the next tooth.
Toothbrush Tip
Place the toothbrush tip in mouth with the brush head on the tooth at the gumline. The toothbrush tip can be used with or without
toothpaste. Using a light pressure (bristles should not bend) massage the brush back and forth with very short strokes – much like you
would with a manual toothbrush.
Plaque Seeker™ Tip
To use the Plaque Seeker™ tip, place the tip close to the teeth so that the bristles are gently touching the teeth. Gently glide tip along
gumline, pausing briey between teeth to gently brush and allow the water to ow between the teeth.
9
ENGLISH
CLEANING AND TROUBLESHOOTING YOUR WATERPIK® WATER FLOSSER
Using Mouthwash and Other Solutions
Your Waterpik® Water Flosser can be used to deliver mouthwash and antibacterial solutions. For ease of adding other solutions remove
the reservoir (see “When Finished” section) and add from top opening on reservoir. If you are adding additional water you may replace
the reservoir and ll reservoir fully with the ll door. Aer using any special solution, rinse unit to prevent clogging by partially lling
reservoir with warm water and running unit with tip pointed into sink until unit is empty.
Cleaning
Never immerse unit in water. Before cleaning, unplug from the electrical outlet. Clean the product when necessary by using a so cloth
and mild non-abrasive cleanser to wipe exterior.
The water reservoir is removable for easy cleaning and is top rack dishwasher safe.
It is recommended that the reservoir is removed and cleaned weekly.
Removing Hard Water Deposits / General Cleaning
Hard water deposits may build up in your unit, depending on the mineral content of your water. If le unattended, it can hinder
performance. Cleaning internal parts: add 1 tablespoon of white vinegar to a full reservoir of warm water. Point the handle and tip into
sink. Turn unit ON and run until reservoir is empty. Rinse by repeating with a full reservoir of clean warm water.
This process should be done every 1 to 3 months to ensure optimal performance.
Battery Care and Disposal
If the Water Flosser is to be stored for an extended period of time (six months or more), be sure to fully charge it prior to storage. The
unit contains a Nickel Metal Hydride battery. At the end of the battery life, please recycle the unit at your nearest recycle center per local
or state requirements. The battery is not replaceable.
10
Service Maintenance
Waterpik® Water Flossers have no consumer-serviceable electrical items and do
not require routine service maintenance. For all your service needs please call
the Water Pik, Inc. UK Customer Service Centre at +44 (0) 333 123 5677. Some
replacement parts and accessories for the Water Flosser are also available at
www.waterpik.co.uk. For questions or problems please call the customer service
centre before returning the product. Please do not send your unit to the Waterpik, Inc.
address as this can cause lengthy delays. Refer to the serial and model numbers in all
correspondence. These numbers are located on the bottom
of your unit.
LIMITED TWOYEAR WARRANTY
Warranty
Water Pik, Inc. warrants to the original consumer of this product that it is free from
defects in materials and workmanship for 2 years from the date of purchase. Save your
receipt as your proof of purchase date. Water Pik, Inc. reserves the right to
request the product to be returned for analysis to conrm the claim falls within
our warranty policy. Water Pik, Inc. will replace, at its discretion, the product provided
the product has not been abused, misused, altered or damaged aer purchase, was
used according to instructions, and was used only with accessories or consumable parts
approved by Water Pik, Inc. This limited warranty excludes accessories or consumable
parts such as tips and brush heads.
This warranty gives you specic legal rights. You may also have other rights that vary
depending on the law in your place of residence. Contact Water Pik, Inc. UK Service Centre
at +44 (0) 333 123 5677 or visit www.waterpik.co.uk.
ENGLISH
11
WATER PIK DISCLAIMS ALL OTHER EXPRESS OR IMPLIED WARRANTIES TO
THE EXTENT PERMITTED BY LAW INCLUDING, BUT NOT LIMITED TO, ALL
WARRANTIES OF MERCHANTABILITY AND FITNESS FOR A PARTICULAR
PURPOSE. ALL IMPLIED WARRANTIES ARE LIMITED TO THE DURATION OF
THIS LIMITED WARRANTY. SOME STATES OR PROVINCES MAY NOT ALLOW
LIMITATIONS ON HOW LONG AN IMPLIED WARRANTY LASTS, SO THE ABOVE
MAY NOT APPLY TO YOU.
Form No. 20026035-F AC
©2020 Water Pik, Inc.
Design and tested in the US. Made in China.
Water Pik, Inc., a subsidiary
of Church & Dwight Co., Inc.
1730 East Prospect Road
Fort Collins, CO 80553-0001 USA
844-821-4873
www.waterpik.com
www.waterpik.co.uk
SOFIBEL SAS
92686 Levallois-Perret Cedex-France
Church & Dwight UK LTD.,
Folkestone, CT19 6PG
UK: 0800 121 6080

Other manuals for WF-10 Series

4

This manual suits for next models

1

Other Waterpik Accessories manuals

Waterpik WP-250 User manual

Waterpik

Waterpik WP-250 User manual

Waterpik WP-600 Series User manual

Waterpik

Waterpik WP-600 Series User manual

Waterpik Waterflosser WP-150 Series User manual

Waterpik

Waterpik Waterflosser WP-150 Series User manual

Waterpik WP-360 User manual

Waterpik

Waterpik WP-360 User manual

Waterpik 200 Series User manual

Waterpik

Waterpik 200 Series User manual

Waterpik WF-16 User manual

Waterpik

Waterpik WF-16 User manual

Waterpik WP-120 User manual

Waterpik

Waterpik WP-120 User manual

Waterpik Sonic-Fusion 2.0 SF-03 User manual

Waterpik

Waterpik Sonic-Fusion 2.0 SF-03 User manual

Waterpik Water Flosser WP-560 User manual

Waterpik

Waterpik Water Flosser WP-560 User manual

Waterpik WP-200 Series User manual

Waterpik

Waterpik WP-200 Series User manual

Waterpik Waterflosser WP-810 User manual

Waterpik

Waterpik Waterflosser WP-810 User manual

Waterpik WF-13CD User manual

Waterpik

Waterpik WF-13CD User manual

Waterpik Water Flosser WF-06 User manual

Waterpik

Waterpik Water Flosser WF-06 User manual

Waterpik WP-100 Series User manual

Waterpik

Waterpik WP-100 Series User manual

Waterpik WF-10 Series User manual

Waterpik

Waterpik WF-10 Series User manual

Waterpik WF-10 Series User manual

Waterpik

Waterpik WF-10 Series User manual

Waterpik 600 Series User manual

Waterpik

Waterpik 600 Series User manual

Waterpik Water Flosser WF-03 User manual
Waterpik

Waterpik Water Flosser WF-03 User manual

Waterpik WP-120 User manual

Waterpik

Waterpik WP-120 User manual

Waterpik WF-09 User manual

Waterpik

Waterpik WF-09 User manual

Waterpik Water Flosser WP-560 User manual

Waterpik

Waterpik Water Flosser WP-560 User manual
Waterpik WP-400 Series User manual

Waterpik

Waterpik WP-400 Series User manual

Waterpik WP-562 User manual

Waterpik

Waterpik WP-562 User manual
Waterpik Sidekick WF-04 User manual

Waterpik

Waterpik Sidekick WF-04 User manual

Popular Accessories manuals by other brands

Leuze electronic LRS Technical description

Leuze electronic

Leuze electronic LRS Technical description

Muller METS-WTEx operating manual

Muller

Muller METS-WTEx operating manual

Duevi Photon System Installation guides

Duevi

Duevi Photon System Installation guides

miCoach SMART BALL user manual

miCoach

miCoach SMART BALL user manual

Owon FDS315 quick start guide

Owon

Owon FDS315 quick start guide

Pepperl+Fuchs U-P R4 Series manual

Pepperl+Fuchs

Pepperl+Fuchs U-P R4 Series manual

Daktronics FB-2025 DISPLAY MANUAL

Daktronics

Daktronics FB-2025 DISPLAY MANUAL

BASETech 12 54 17 operating instructions

BASETech

BASETech 12 54 17 operating instructions

Siemens Wireless Room Sensor Solution user guide

Siemens

Siemens Wireless Room Sensor Solution user guide

Intenso S10000-C user manual

Intenso

Intenso S10000-C user manual

DS 1260 Operation manual

DS

DS 1260 Operation manual

Philips DLA67044D brochure

Philips

Philips DLA67044D brochure

Siemens QAA2391.EWTC installation instructions

Siemens

Siemens QAA2391.EWTC installation instructions

Dedrone RF-360 installation manual

Dedrone

Dedrone RF-360 installation manual

Niko 350-30010 manual

Niko

Niko 350-30010 manual

Cedes IMS 100 Pro Series Installation and operation manual

Cedes

Cedes IMS 100 Pro Series Installation and operation manual

Huawei RRU Hardware maintenance guide

Huawei

Huawei RRU Hardware maintenance guide

VuPoint PB-BK05-VP user manual

VuPoint

VuPoint PB-BK05-VP user manual

manuals.online logo
manuals.online logoBrands
  • About & Mission
  • Contact us
  • Privacy Policy
  • Terms and Conditions

Copyright 2025 Manuals.Online. All Rights Reserved.