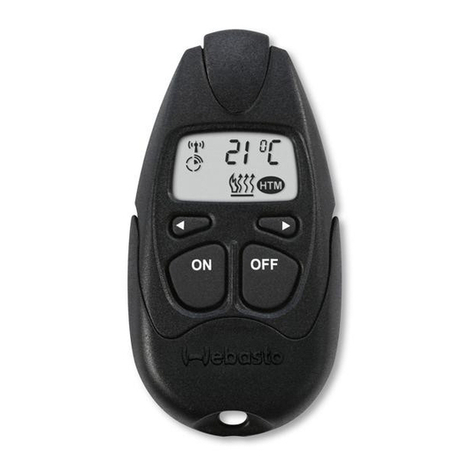
Webasto ThermoConnect TCon2 User manual

EN
9040092D_OI-II_ThermoConnect TCon2
Contents
1About this document..................................................... 3
2Warranty and liability..................................................... 3
3General safety information ........................................... 3
4Intended use................................................................. 4
5Control.......................................................................... 4
6Pushbutton.................................................................... 4
7Mobile phone app......................................................... 5
8My Webasto Connect web service................................. 5
9Subscription................................................................... 5
10 Installation and electrical connection............................. 5
11 Connector to connect to heater..................................... 8
12 QR-code labels.............................................................. 8
13 Initial start-up................................................................ 8
14 Fault messages..............................................................10
15 Statutory regulations governing installation...................10
16 Declaration of Conformity............................................. 10
17 Technical data............................................................... 11
18 Dimensions....................................................................11

EN
1 About this document
1.1 Purpose of the document
These Operating and Installation Instruc-
tions are part of the product and provide
the user with information on the safe oper-
ation of the ThermoConnect TCon2. These
Operating and Installation Instructions ex-
plain all the functions of the control ele-
ment.
Carefully read through and follow the
heater Operating and Installation In-
structions and the safety information
contained therein.
NOTE
The actual availability of these func-
tions depends on each installed heater.
1.2 Using this document
– Before operating the ThermoConnect
TCon2, carefully read and follow these
Operating and Installation Instructions
as well as the operating instructions for
the heater.
– Hand over these Operating and Installa-
tion Instructions to the next owner or
user of the device.
1.3 Use of symbols and
highlighting
Texts with the symbol refer to separate
documents which are enclosed or are avail-
able from Webasto at
https://dealers.webasto.com.
– Texts with the symbol refer to tech-
nical features.
– Texts with the symbol or refer to
possible material damage, risk of acci-
dent or injury.
– Texts with the symbol describe a re-
quirement for the following necessary
action.
– Texts with the symbol describe an ac-
tion.
2 Warranty and liability
Webasto shall not assume liability for de-
fects or damage that are the result of the
installation and operating instructions, and
the instructions in this document, being
disregarded. This liability exclusion particu-
larly applies for:
– Mechanical damage to the equipment.
– Maintenance by untrained personnel
– failure to comply with inspection and
service instructions
– Repairs not carried out by a Webasto
service workshop.
– Conversion of the unit without permis-
sion from Webasto.
– Improper use.
3 General safety
information
DANGER
Danger of explosion
In environments with combustible va-
pours, flammable dust and hazardous
goods (e.g., petrol stations, tank facilit-
ies, fuel store, coal bunkers, timber
yard or grain warehouses).
uDo not switch on or operate the
heater.
DANGER
Danger of poisoning and suffoca-
tion
Do not operate the heater in closed
rooms that do not have an exhaust ex-
traction unit.
uDo not switch on or operate the
heater, also not with programmed
heating start.
DANGER
Danger of fire
Flammable materials or liquids in the
hot air flow.
uKeep the hot air flow free.
9040092D 3

EN 4 Intended use
The control element ThermoConnect
TCon2 is currently approved for the follow-
ing applications:
Switching Webasto air and water heaters
on and off.
The ThermoConnect TCon2 has an integ-
rated GPS antenna and an eSIM (embed-
ded SIM).
5 Control
You can operate the air - or water heater in
3 ways:
– With the provided button.
– With the ThermoConnect app on a mo-
bile phone.
– With the "My Webasto Connect" web
page.
NOTE
Switching on the heating may be
delayed depending on the mobile net-
work reception.
NOTE
Depending on the vehicle model, there
may be an increased quiescent current
consumption message in the vehicle
information system after operation in
parking heating mode. This can occur,
for example, when the vehicle is
parked in an area without mobile net-
work reception (e.g. in an under-
ground car park).
6 Pushbutton
WHE000015A
Fig.1
NOTE
The pushbutton must be located
within the driver's field of view and
operation. Install the pushbutton at a
visible and accessible location.
The pushbutton switches the air- or water
heater on or off with a default duration.
uPress the pushbutton to start the air- or
water heater.
If necessary, the default duration can be
changed. See chapter 8 "My Webasto Con-
nect web service" on page 5.
The illumination of the pushbutton is also a
status indicator:
– LED does not light up - The heater is
switched off.
– LED flashes green – The heater is not
connected, searching for the cellular
network or restart in progress.
– LED lights up green - Heater is on.
Use of the pushbutton to restart and reset
the ThermoConnect TCon2 receiver.
– Restart see chapter 6.1 "Restart" on
page 4.
– Reset see chapter 6.2 "Settings reset"
on page 5.
6.1 Restart
uPress and hold the pushbutton for 10s.
uRelease the pushbutton.
– The ThermoConnect TCon2 restarts.
– The pushbutton illumination flashes
while the ThermoConnect TCon2 is re-
starting.
49040092D

EN
6.2 Settings reset
NOTE
Settings reset performs the following
functions:
Connection settings revert back to de-
fault. Removes paired mobile users and
user phone numbers. Removes all
timers and location-based events.
Procedure for resetting to factory settings:
uPress and hold the pushbutton for 10s.
uRelease the pushbutton.
uPress the pushbutton 3 times while the
pushbutton LED is flashing.
7 Mobile phone app
The ThermoConnect TCon2 is controlled by
the ThermoConnect mobile app. It is oper-
ated using any compatible mobile phone
that is connected to the internet.
NOTE
To install the app: See chapter 13.1
"Install the app on mobile phone" on
page 8.
NOTE
Not all settings can be controlled by
using the app. More settings are avail-
able in the web service. See chapter 8
"My Webasto Connect web service" on
page 5.
8 My Webasto Connect web
service
NOTE
All app settings are also available in My
Webasto Connect and will be syn-
chronised automatically. Context-spe-
cific help for each setting is available in
My Webasto Connect service.
The ThermoConnect TCon2 settings can be
controlled using the My Webasto Connect
web service.
9 Subscription
An active subscription is required to be
able to use the ThermoConnect TCon2. A
subscription fee is payable. You can find
the General Terms and Conditions at
https://my.webastoconnect.com.
When subscription period nears expiration
a reminder will be sent to the ThermoCon-
nect mobile app and / or to user E-mail (if
given in My Webasto Connect service).
Check and renew the current subscription
in My Webasto Connect web service.
NOTE
If the subscription is not renewed be-
fore expiration then the service will be
suspended. A reactivation fee may be
payable to reactivate the service.
10 Installation and electrical
connection
10.1 Scope of Delivery
WHE000016A
1
2
3
4
Fig.2
ThermoConnect TCon2
Wiring harness
Pushbutton (with illumination and
temperature sensor)
QR-code labels (2x)
Not illustrated:
– Velcro stickers (2x)
– Operating- and Installation instructions
9040092D 5

EN 10.2 Connections
1
12
67
WHE000018A
Fig.3
Black - Switch output 1, (0.5A, level
same as supply voltage when con-
trolled)
Brown - ground
not in use
Blue - pushbutton with integrated
temperature sensor
Grey - Switch input1 (+0V…+32V,
min. impedance 10kΩ, high level
>5V, low level <0.5V)
not in use
Red - Supply voltage (+9V…+32V)
Brown - Pushbutton, ground
Green - Pushbutton, LED illumina-
tion
Grey - Pushbutton, switch contact
Yellow - W-bus
not in use
10.3 Installation position
NOTE
Do not install the device in the grey
area as shown in Fig. 4.
NOTE
The vehicles with special glazing, such
as windscreen heating or sun protec-
tion glazing, can influence the recep-
tion of the ThermoConnect TCon2. For
vehicles with this type of equipment, it
is recommended to avoid installation
close to the windscreen.
WHE000222A
Fig.4
10.4 Installing the unit
uSelect an installation place for the Ther-
moConnect TCon2:
– Install the ThermoConnect TCon2 only
on flat surfaces to avoid bending of the
casing.
– The ThermoConnect TCon2 must be in-
stalled inside the car, in a dry and pro-
tected place.
– Installation below dashboard, as high as
possible, on driver side is recommen-
ded.
To get the best GPS and cellular antenna
performance, the ThermoConnect TCon2
must not contact metal (e.g. chassis or fix-
ing plates) in the marked areas, see Fig. 5.
WHE000223A
>3 cm
>3 cm
>3 cm
>3 cm
>3 cm
>3 cm
Fig.5
uMark the location of the ThermoCon-
nect TCon2 in the drawing in Fig. 6.
69040092D

EN
>3 cm
WHE000224A
Fig.6
WARNING
Risk of failure
Installation close to metal surfaces im-
pairs the antenna reception. It can also
cause damage to the device.
uDo not install the ThermoConnect
TCon2 on metal surfaces.
For optimal reception of the mobile net-
work and the GPS signal becomes one in-
stallation in the upper area of the dash-
board recommended. Fig. 7 shows the re-
commended area.
WHE000225A
Fig.7
Recommended area
Moderate range
Not recommended area
10.5 Installation of the
pushbutton
WHE000045A
12
Fig.8
Pushbutton Wiring harness
NOTE
Do not disconnect the connector from
the cable.
NOTE
The pushbutton must be installed.
NOTE
The pushbutton includes a temperat-
ure sensor. Make sure that the air can
flow around the pushbutton at the in-
stallation location, but the pushbutton
must be shielded from direct air flow
from ventilation ducts.
NOTE
The pushbutton must be located
within the driver's field of view and
operation.
The pushbutton has four functions:
1. Switch the heater on/off.
2. Acknowledge new users.
3. Measure the temperature.
4. Reset or restart, see chapter 6.1 "Re-
start" on page 4/chapter 6.2 "Settings
reset" on page 5.
uPlug on the ThermoConnect TCon2 wir-
ing harness.
uInstall the pushbutton at an accessible
location, a protected area.
– Make sure the illumination is visible dur-
ing operation.
9040092D 7

EN 10.6 Wiring harness installation
2
1
4
3
1
2
3
4
WHE000030A
Fig.9
ThermoConnect TCon2
Main connector
Heater connector
Pushbutton connection
NOTE
Only install the ThermoConnect TCon2
with the ThermoConnect TCon2 wiring
harness.
11 Connector to connect to
heater
WHE000019A
1
4
2
3
Fig.10
Yellow - W-bus
Black - Analogue
Red - Pin30, power supply
Brown - Pin31, ground
See also heater wiring harness.
12 QR-code labels
2
1
4
3
WHE000020A
Fig.11
The QR-code label is needed to couple the
ThermoConnect mobile app with the Ther-
moConnect TCon2 device.
2
1
4
3
WHE000021A
Fig.12
uAttach one label to a place where it can
be scanned using the phone camera.
For example to the vehicle A- or B-pil-
lar, the side of the dashboard or on the
fuse compartment lid.
uAttach the other label on the back of
the document.
13 Initial start-up
13.1 Install the app on mobile
phone
Apple App Store and Google Play have the
app available.
uCheck that the mobile phone is connec-
ted to the internet.
uGo to the relevant app store and search
for “ThermoConnect”. This step can
also be performed by using the QR
code.
89040092D

EN
– Apple App Store see Fig. 13
– Google Play see Fig. 14
2
WHE000023A
Fig.13
2
WHE000024A
Fig.14
uInstall the ThermoConnect mobile app
on the phone.
uConnect the phone with the Thermo-
Connect TCon2 following the instruc-
tions on the mobile phone app. See
chapter 13.2 "Connect the mobile
phone" on page 9.
13.2 Connect the mobile phone
Make sure that you have the Thermo-
Connect mobile app installed.
Step 1 of 4
WHE000025A
Fig.15
uLaunch the mobile app by clicking the
Webasto icon.
Step 2 of 4
2
1
4
3
WHE000026A
Fig.16
uScan the QR code using the phone
camera. The QR code should be affixed
to the vehicle and to the backpage of
this manual. The QR code can also be
find on the receiver. (See chapter 12
"QR-code labels" on page 8).
Step 3 of 4
2
1
4
3
WHE000027A
Fig.17
uNow any name can be entered for the
ThermoConnect TCon2 and be con-
firmed by clicking " ".
Step 4 of 4
ThermoConnect TCon2 is now connected
and ready for use. For more information,
see "https://www.webasto-comfort. com".
13.3 User management
More than one user may use ThermoCon-
nect TCon2. When adding new users (see
chapter 13.2 "Connect the mobile phone"
on page 9), an identification message is
required from the new user. Existing users
receive this message as a notification in
their ThermoConnect mobile app and must
confirm or deny a new user. If the user
gets a new phone and tries to pair the mo-
bile phone without access to the previously
paired phone, the confirmation can be
9040092D 9

EN done with the pushbutton: Press and hold
the pushbutton for 10seconds to approve
a new user.
14 Fault messages
The following heater faults are displayed as
fault messages in the ThermoConnect app.
You will find further information in the
operating instructions for the heater.
WARNING
Inspections and repairs on heaters
must only be carried out by trained
personnel.
Fault mes-
sages
Fault
code
Description
Heater
overheating
0x06 Overheating lock-out
has tripped (heater
overheated).
Heater lock-
out
0x07 Heater lock-out was
activated.
Permanent
heater lock-
out
0x87 Permanent heater
lock-out was activ-
ated.
Operating
voltage too
low
0x84 Supply voltage is too
low. Charge the bat-
tery and check car
electrical installation.
Fault mes-
sages
Fault
code
Description
Supply
voltage too
high
0x04 The operating voltage
was higher than the
maximum permissible
value for too long.
15 Statutory regulations
governing installation
Regulation Typ approval number
ECE R10 E17 10 R - 050151
The provisions of these regulations are
binding within the scope of EU Regulation
2018/858 and should also be observed in
countries where there are no special regu-
lations! Failure to follow the installation in-
structions and the notes contained therein
will lead to all liability being refused by
Webasto.
WEEE directive This product
must not be disposed of with
normal household waste.
Dispose of this product according to the
applicable rules and regulations. Informa-
tion about proper disposal is provided by
the municipal authorities, the responsible
household waste recycling centre and/or
your local distribution partner.
The provisions of these regulations are
binding within the scope of EU Regulation
2018/858 and should also be observed in
countries where there are no special regu-
lations! Failure to follow the installation in-
structions and the notes contained therein
will lead to all liability being refused by
Webasto.
16 Declaration of Conformity
CE-Declaration of Conformity and UKCA-
Declaration of Conformity
The ThermoConnect TCon2 was de-
veloped, manufactured, tested and sup-
plied in accordance with the relevant dir-
ectives, regulations and standards for
safety, EMC and environmental compatibil-
ity. Webasto declares that the product
ThermoConnect TCon2 is manufactured
and delivered in accordance with the dir-
ectives and regulations.
The complete CE Declaration of Conformity
and UKCA Declaration of Conformity can
be found in the download area at
https://dealers.webasto.com.
10 9040092D

EN
17 Technical data
ThermoConnect TCon2 Values
Operating voltage [V] 9 to 32
Average current con-
sumption [mA]
15
Operating/storage tem-
perature for receiver [ºC]
-40 to +80
18 Dimensions
112
WHE000028A
70
18
Fig.18
All dimensions specified in mm.
9040092D 11

This is a translation from the original German installation in-
structions. The German language is binding. To request this
Installation Documentation in another language, please loc-
ate and contact your local Webasto dealer. You can find your
nearest dealer at:


Europe, Asia Pacific
Webasto Thermo & Comfort SE
Postfach 1410
82199 Gilching
Germany
Company address:
Friedrichshafener Str. 9
82205 Gilching
Germany
UK only
Webasto Thermo & Comfort UK Ltd
Webasto House
White Rose Way
Doncaster Carr
South Yorkshire
DN4 5JH
United Kingdom
Ident. Nr. 9040092D • 11.2023 • Errors and omissions excepted© Webasto Thermo & Comfort SE
www.webasto.com
Other manuals for ThermoConnect TCon2
2
Table of contents
Other Webasto Remote Control manuals

Webasto
Webasto Telestart T80 User guide

Webasto
Webasto Telestart T91 Owner's manual

Webasto
Webasto Telestart T91 User manual

Webasto
Webasto Telestart T91 User manual

Webasto
Webasto ThermoCall TC4 User manual

Webasto
Webasto Telestart T100 HTM User manual

Webasto
Webasto Telestart T91 Holiday User manual

Webasto
Webasto BlueHeat T91 User manual

Webasto
Webasto Telestart T100 HTM User manual

Webasto
Webasto Telestart T70 User manual