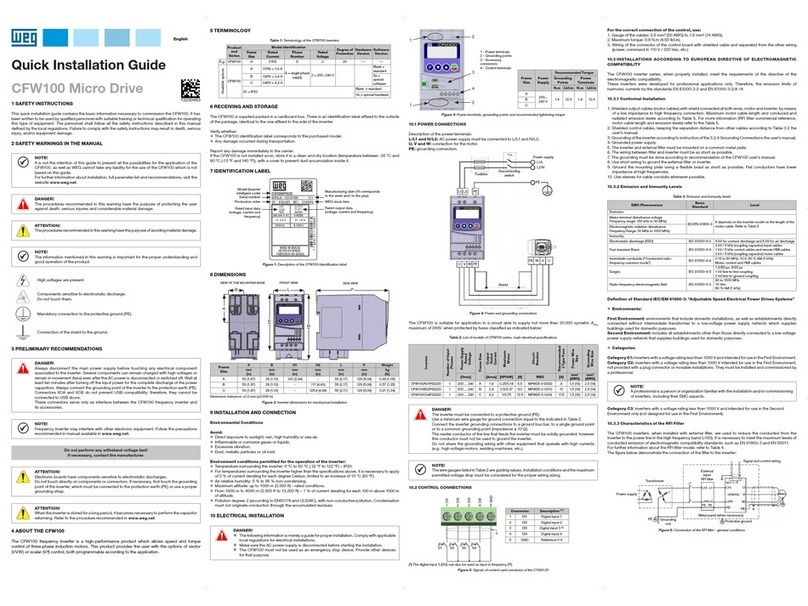
For the correct connection of the control, use:
1. Gauge of the cables: 0.5 mm² (20 AWG) to 1.5 mm² (14 AWG).
2. Ma ximum torque: 0.5 N.m (4.50 lbf.in).
3. Wiring of the plug-in module connector with shielded cables separated from the other wiring (power,
command in 110 V / 220 Vac, etc.).
10.3.1 RFI Filter
Built-in RFI filter option is available to reduce the conducted disturbance from the inverter to the main
power supply in the high frequency band (>150 kHz). It is necessary to meet the maximum levels of
conducted and radiated emissions of electromagnetic compatibility standards, such as EN 61800-3 and
EN 55011. For fur ther details, refer to item 10.2 INSTALL ATIONS ACCORDING TO EUROPEAN DIRECTIVE
OF ELECTROMAGNETIC COMPATIBILITY.
ATTENTION!
When inver ters with internal RFI filter is used in IT networks (neutral conductor not grounded
or grounded through a high ohmic value resistor), remove grounding screw XE1, since those
kinds of network cause damage to the filter capacitors of the inver ter.
Tab l e 5: Conducted and radiate d emission levels, and addi tional information
Inverter Model
Without E xternal RFI Filte r for
Decentralized Installation With Ext ernal RFI Filter
Conducted Emission
- Maximum Motor
Cable Length
Radiated
Emission External RFI
Filter Part
Number
(manufacturer:
XXX)
Conducted Emission -
Maximum
Motor Cabl e Length
Radiated
Emission
- Category
Category
C3
Category
C2 Category Category
C2
Category
C1
Without
Metallic
Cabinet
1MW5 00A04P3S 2...C2... 10 m 5 m 30 m C2 - - - -
2MW5 00A06 P0 S2...C2... 10 m 5 m 3 0 m C2 - - - -
3MW5 00A02P6T4...C2... 10 m 5 m 30 m C3 - - - -
4MW5 00A04P3T4...C2... 10 m 5 m 30 m C 3 - - - -
5MW5 00 B0 6P5T4...C2... 6 m - 6 m C3 - - - -
6MW5 00 B10P 0T4...C2... 6 m - 6 m C3 - - - -
10.4 ACCESSORIES
The accessories are hardware resources that can be added in the application with the MW500.
The accessories are incorporated to the inverters in an easy and quick way by using the "Plug and Play"
concept. When an accessor y is connected to the inverter, the control circuitr y identifies the model and
informs the code of the accessory connected in parameter P0027. The accessory must be installed or
modified with the inverter de-energized. They may be ordered separately and are sent in their own
package containing the components and manuals with detailed instructions for their installation, operation
and setting.
11 USE OF THE HMIR TO OPERATE THE INVERTER
Press th is key to acc elera te the motor u p to the spe ed set in P 0122 within the t ime dete rmine d by the
accel eration ramp. The motor sp eed is ke pt while the key is pressed. When th e key is released, t he
motor decelerates within the time determined by the deceleration ramp, until it stops.
This fu nctio n is active when all the con ditio ns below are met:
1. Turn/S top = Stop.
2. Enable G eneral = Active.
3. P0225 = 1 in LOC and/or P0228 = 1 i n REM.
Press th is key to com mute bet ween LOCAL
and REMOTE mode.
Active when:
P0220 = 2 or 3
Press th is key to def ine the motor rotati on
direction.
Active when:
P0223 = 2 or 3 in LOC and/or
P0226 = 2 or 3 in R EM
- When in the moni toring m ode: pre ss this
key to incre ase the s peed.
- When in t he setting mod e, level 1: press th is
key to go to the previous group.
- When in the setting mod e, level 2: p re ss
this key to go to the next p arame ter.
- When in the setting mod e, level 3: pres s
this key to increase the conte nt of the
parameter.
- When in the setting mod e, level 1: pr es s
this key to ret urn to the monitor ing mod e.
- When in t he sett ing mod e, level 2:
press this key to retu rn to level 1 o f t he
setting mode.
- When in the setting mod e, level 3: pres s
this key to ca ncel th e new value (new val ue
is not save d) and return to level 2 o f t he
setting mode.
When in the moni toring m ode: pre ss this key to enter
the setting mode.
- When in the setting mod e, level 1: press th is key
to selec t the des ired pa ramete r group - i t shows th e
parameter group selected.
- When in the setting mod e, level 2: press this key
to show the parameter - it shows the con tent of the
parameter in ord er to cha nge the c ontent.
- When in the setting mod e, level 3: pres s this key to
save the new conten t of the par ameter - i t returns to
level 2 of th e setti ng mode.
When in t he moni toring m ode: pre ss this ke y to
decrease the speed.
- When in the setting mod e, level 1: press th is key to
go to the nex t group.
- When in the setting mod e, level 2: press this key to
go to the previous parameter.
- When in the setting mod e, level 3: pres s this key to
decre ase the c ontent of t he para meter
Press th is key to acc elera te the motor w ithin the time
determined by the acceleration ramp.
Active when:
P0224 = 0 in LOC or P0227 = 0 in REM
Press th is key to dec elerate the motor within t he time
determined by the deceleration ramp.
Active when:
P0224 = 0 in LOC or P0227 = 0 in REM
11.1 INDICATIONS OF DISPLAY
Main display
Menu (to select the
parameter gro ups) -
only one parameter
group is shown at
a time
Measurement unit
(it refe rs to the va lue
of the main indication)
Secondary indication
Bar graph
Inverter status
11. 2 OPERATING MODES OF THE HMI
Monitoring Mode
It is the in itial status of th e HMIR af ter the p owerin g up and of the initi aliza tion
screen, with default values
The field Men u is not act ive in thi s mode
The mai n displ ay, second ary display a nd bar graph indicate th e value s of three
parameters predefi ned by P0205, P0206 a nd P0207
From the mo nitoring mo de, when you pre ss the key ENTER/MENU, you commute
to the setting mod e
Monitoring
Setting
level 2
Setting
level 3
Setting
level 1
Enter
Menu
Enter
Menu
Enter
Menu
Back
Esc
Back
Esc
Back
Esc
Setting Mode
Level 1:
This is the firs t level of the setting mode. It is possible to choose the parameter
group us ing the keys and
The main display, secondary display, bar graph and measurement units are not
shown in t his leve l
Press t he key ENTER/MENUto g o to level 2 of the set ting mode - pa rameter sel ection
Press th e key BACK /ESC to return to the monito ring mo de.
Level 2:
O número do parâmetro é exi bido no d isplay princ ipal e o se u conteú do no
display secundário
Use the keys and to find th e desir ed para meter
Press th e key ENTER/MENU to go to level 3 of the setting mod e - modif icati on
of the parameter c ontent
Press th e key BACK /ESC to return to level 1 of the setting mode.
Level 3:
The con tent of the p arame ter is sho wn on the main dis play and the numb er of the
parameter is shown on the secondary display
Use the ke ys and to configure the new value for the selected parameter
Press th e key ENTER/MENU to confi rm the mo dification (s ave the new value) or
BACK/ ESC to cancel th e modif ication (not save t he new value). In both c ases, th e
HMIR returns to level 2 of the se tting m ode
12 START-UP PREPARATION
DANGER!
Always disconnect the main power supply before making any connection.
1. Check if the power, grounding and control connections are correct and firm.
2. Remove all materials left from the inside of the inverter.
3. Check if the motor connections and motor current and voltage match the inverter.
4. Mechanically uncouple the motor from the load. If the motor cannot be uncoupled, be sure that its
turning in any direction (clockwise or counterclockwise) will not cause damages to the machine or risk
of accidents.
5. Close the covers of the inverter.
6. Measure the power supply and verify if it is within the allowed range.
7. Apply power to the input: close the input disconnecting switch.
8. Check the result of the first time power-up:
The HMI display indicates:
12 .1 BASIC APPLICATION
Seq Display Indication/Action Seq Display Indication/Action
12
Monitoring mode
Press th e key ENTER/MENU to enter th e 1st level of
the programming mode
The PARAM group i s selected, press the keys or
until selecting the BASIC group
3 4
When th e BASIC grou p is selected press the key
ENTER/MENU
Basi c Application routi ne is sta rted. If nece ssar y, modif y
the content of "P0100 - Ac cele ration Time"
Press the key for the next parameter
5 6
If nece ssary, modif y the content of "P0101 -
Deceleration Time"
Press th e key for the next parameter
If nec essa ry, modi fy the content of "P0133 - Minimum
Speed"
Press the key for the next parameter
7 8
If nece ssar y, modify the content of "P0134 - Ma ximum
Speed"
Press th e key for the next parameter
If nece ssar y, modify the content of "P0135 - Ma ximum
Output Current"
Press th e key for the next parameter
9
To end the Start-up routine, press the key BACK /ESC
To return to the mo nitoring mod e, press the key
BACK/ ESC again
12. 2 V/F CONTROL TYPE (P0202 = 0)
Seq Display Indication/Action Seq Display Indication/Action
12
Monitoring mode
Press the key ENTER/MENU to enter 1st level of
programming mode
The PARAM group i s selected, press the keys or
until selecting the STARTUP group
3 4
When th e STARTUP group is se lecte d press the key
ENTER/MENU
If nece ssary, press ENTER/MENU to modify the
content of "P0202 - C ontrol Type" for P0202 = 0 ( V/f)
5 6
When the desired valu e is reac hed, press ENTER/
MENU to save the modification
Press th e key for the next parameter
If nec essa ry, modify the c ontent of "P0401 - Motor
Rated Current”
Press the key for the next parameter
7 8
If nece ssar y, modif y the content of "P0402 - Motor
Rated Speed"
Press th e key for the next parameter
If nece ssar y, modif y the content of "P0403 - M otor
Rated Frequency
Press th e key for the next parameter
9
To end the Start-up routine, press the Key BACK /ESC
To return to the mo nitoring mod e, press the key
BACK/ESC again
13 TECHNICAL SPECIFICATIONS
POWER DATA
Power Supply:
Tolerance: -15 % to +10 %.
Frequency: 50/60 Hz (48 Hz to 62 Hz).
Phase imbalance: ≤ 3 % of the rated phase-to-phase input voltage.
Over voltage according to Category III (EM 61010/UL 508C).
Transient voltage according to Category III.
Maximum of 10 connections per hour (1 every 6 minutes).
Typical efficiency: ≥ 97 %.
14 ELECTRONICS/GENERAL DATA
Table 6: Electronics/general data
Control Method Types of control:
- V/f (Scala r))
- VVW: voltage vector control.
PWM SVM (Space Vector Modulation)
Output frequency 0 to 50 0 Hz, resolution of 0.015 Hz
Performance V/f control Speed regulation: 1 % of th e rated speed (with slip compensation)
Speed variation range: 1:20
Vector control (VV W) Speed regulation: 1 % of the rated speedl
Speed variation range: 1:30
Inputs (*) Analog Knob additional in put for s peed reference variation
1 insulated input. Levels: (0 to 10) V or (0 to 20) mA o r (4 to 20) mA
Linearity error ≤ 0.25 %
Imped ance: 100 k Ω for voltage input, 500 Ω for current input
Programmable functions
Maximum vol tage permitted in th e input: 30 Vdc
Digital 4 insulated inputs
Programmable functions:
- active high (PNP): maximum low l evel of 15 Vdc / minimum high level of 20 Vdc
- active low (NPN): maxim um low level of 5 Vdc / min imum high leve l of 9 Vdc
Maximum input voltage of 30 Vdc
Input current: 4.5 mA
Maximum input current: 5.5 mA
Outputs (*) Relay 1 relay with NC/NO contact
Maximum voltage: 240 Vac
Maximum current: 0.5 A
Programmable functions
Transistor 1 insulated digital output open sink (uses as reference the 24 Vdc power supply)
Maximum current 150 mA (**) (maximum capacity of the 24 Vdc) power supply
Programmable functions
Power supply 24 Vdc power supply. Maximum capacity: 150 mA
10 Vdc power supply. Maximum capacity: 2 mA
Communication Interface RS-485 Insulated RS-485
Modbus-RTU protocol with maximum communication of 38.4 kbps
Safety Protection Overcurrent/phase-phase short circuit in the output
Overcurrent/phase-ground short circuit in the output
Under/overvoltage
Overtemperature in the heatsink
Overload in the motor
Overload in the power module (IGBTs)
External alarm/fault
Setting error
Human-machine
interface (keypad)
Remote keypad
(HMIR)
9 keys: Star t/S top, up arrow, down arrow, Direction of Rotation, Jo g, Local/
Remote,
BACK/ ESC and ENTER/MENU
LCD display
View/edition of all parameters
Indication accuracy:
- current: 5 % of the rated current
- speed resolution: 0.1 Hz
Enclosure Degree of protection IP66
UL type 4X
(*) The num ber and /or type of a nalog /digital i nputs /outputs ma y vary, dep ending o n the Plug -in modu le (acce ssor y) used. Fo r the tabl e above, it wa s
considered the standard plug-in module. For further information, refer to the programming manual and the guide supplied with the optional item.
(**) The ma ximum c apaci ty of 150 mA mus t be consi dered by a dding th e load of the 24 V pow er supp ly and tra nsistor o utput, th at is, the su m of the
consum ption of bo th must not ex ceed 150 mA.
15 CONSIDERED STANDARDS
Tab l e 7: Considered standards
Safety
standards
EN 61800-5-1 - safety electrical, therma l and en ergy requirements
EN 50178 - electron ic equipment for use in power installations
EN 60204-1 - safety of machine ry. Electrical equipment of machines. Part 1: generalrequirements
Note: For the machine to comply with this standard, the manufacturer of the machine is responsible
for installing an emergency stop device a nd equipment to disconnect the input power supply
EN 60146 (IEC 146) - semiconductor converters
EN 61800-2 - adjustable speed electrical power dri ve systems - par t 2: general requirements - rating
specifications for low voltage adjustable frequency AC power drive systems
Electromagnetic
compatibility (EMC)
standards
EN 61800-3 - adjustable speed electrical power dr ive systems - part 3: EMC product standard
including specific test methods
EN 55011 - limits and methods of measurem ent of radio disturbance characteristics of industrial,
scientific and medical (ISM) radio-frequency equipment
CISPR 11 - industrial, scientific and medical (ISM) radio-frequency equipment - electromagnetic
disturbanc e characteristic s - limits and methods of measu rement
EN 61000-4-2 - electromagnetic compatibility (EMC) - part 4: testing and measurement techniques
- section 2: electrostatic discharge immunity test
EN 61000-4-3 - electromagnetic compatibility (EMC) - part 4: testing and measurement techniques
- section 3: radiated, radio-frequency, electromagnetic field immunity test
EN 61000-4-4 - electromagnetic compatibility (EMC) - part 4: testing and measurement techniques
- section 4: electrical fast transient/burst immunity test
EN 61000-4-5 - electromagnetic compatibility (EMC) - part 4: testing and measurement techniques
- section 5: surge immunity test
EN 61000-4-6 - electromagnetic compatibility (EMC) - part 4: testing and measurement techniques
- section 6: immu nity to condu cted disturbance s, indu ced by radio-frequency fields
Mechanical
construction
standards
EN 60529 - degree s of protection provided by enclosures (IP code)
UL 50 - enclosures for electrical equipment
16 MAIN PAREMETERS
NOTE!
ro = read only parameter.
V/f = parameter available in V/f mode.
cfg = configuration parameter, value can only be changed with the motor stopped.
Param. Description Adjustable Range Factor y
Setting Propr. Groups
P0000 Access to Parameters 0 to 9999 0
P0001 Speed Reference 0 to 6553 5 ro READ
P0002 Motor Speed 0 to 65535 ro READ
P0003 Motor Current 0.0 to 200.0 A ro READ
P0004 DC Link Volt age (Ud ) 0 to 2000 V ro READ
P0005 Motor Frequency 0.0 to 500.0 Hz ro READ
P0006 Inverter Status 0 = Ready
1 = Run
2 = Undervoltage
3 = Fault
4 = Self-Tuning
5 = Configuration
6 = DC-Br aking
7 = Sleep M ode
ro READ
P0007 Motor Voltage 0 to 20 00 V ro READ
P0 0 11 Power Factor -1.00 to 1.00 A ro READ
P0012 DI8 to DI1 Status Bit 0 = DI1
Bit 1 = DI2
Bit 2 = DI3
Bit 3 = DI4
Bit 4 = DI5
Bit 5 = DI6
Bit 6 = DI7
Bit 7 = DI8
ro REA D, I/O
P0022 FI Hz Value 1 to 20000 Hz ro READ, I/O
P0023 Main SW Version 0.00 to 655.35 ro READ
P0030 Heatsink Temperature -20 to 150 ºC ro READ
P0037 Moto r Overl oad Ix t 0 to 100 % ro READ
P00 47 CONFIG Status 0 to 999 ro READ
P0048 Present Alar m 0 to 999 ro READ
P0049 Present Fault 0 to 999 ro READ
P0050 Last Fault 0 to 999 ro READ
P0100 Acceleration Time 0.1 to 999.0 s 10,0 s BASIC
P0101 Deceleration Time 0.1 to 999.0 s 10,0 s BASIC
P012 0 Spee d Ref. Back up 0 = Inacti ve
1 = Active
3 = Backu p by P0121 1
P0121 Speed R eference via H MI 0.0 to 50 0.0 Hz 3.0 Hz
P0124 Multis peed R ef. 1 - 500.0 to 50 0.0 Hz 3.0 Hz
P012 5 Multispeed Ref. 2 -500.0 to 500.0 Hz 10.0 (5.0) Hz
P012 6 Multi speed Ref. 3 -500.0 to 500.0 Hz 20.0 (10.0) Hz
P0127 Multis peed R ef. 4 - 500.0 to 500.0 Hz 30.0 (20.0) Hz
P012 8 Multi speed Ref. 5 -500.0 to 500.0 Hz 40.0 (3 0.0) Hz
P012 9 Multi speed Ref. 6 -500.0 to 500.0 Hz 50.0 (40.0) Hz
P013 0 Multispeed R ef. 7 - 500.0 to 50 0.0 Hz 60.0 (50.0) Hz
P0131 Mu ltisp eed Ref. 8 -500.0 to 5 00.0 Hz 66.0 (55.0) H z
P013 3 Minimum Speed 0.0 to 500.0 Hz 3.0 Hz BASIC
P013 4 Maximum Speed 0.0 to 500.0 Hz 66.0 (55.0) Hz BASIC
P013 5 Max. Output Current 0.0 to 200.0 A 1.5 x Inom BASIC,
MOTOR
P013 6 Manual Torque Boost 0.0 to 30.0 % According to
inverter model
V/f BASIC,
MOTOR
P0137 Autom. Torque Boost 0.0 to 30.0 % 0.0 % V/f MOTOR
P013 8 Slip Compensation -10.0 to 10.0 % 0.0 % V/f MOTOR
P0139 Output Current Filter 0 to 9999 ms 50 ms
P014 2 Max. Output Voltage 0.0 to 100.0 % 100.0 % cfg, V/f
P014 3 Interm. Output Voltage 0.0 to 100.0 % 66 .7 % cf g, V/f
Param. Description Adjustable Range Factor y
Setting Propr. Groups
P014 5 Field Weakening Frequency 0.0 to 500.0 Hz 60.0 (50.0) Hz cfg, V/ f
P014 6 Inter media te Freque ncy 0.0 to 500.0 Hz 40.0 (33.3) H z cf g, V/f
P015 6 Overl. C urr. 100 % Spee d 0.0 to 200.00 A 1.1 x Inom M OTOR
P0202 Control Type 0 = V/f
1 a 4 = Not Used
5 = V V W 0 cfg STAR T UP
P0204 Load/Save Parameters 0 and 1 = Not Us ed
2 = Reset P0045
3 and 4 = Not Us ed
5 = Load WEG 60 Hz
6 = Load WEG 50 H z
7 = Load Use r 1
8 = Load Use r 2
9 = Save User 1
10 = Save User 2
0cfg
P0220 LOC/REM Selection Source 0 = Always LOC.
1 = Always R EM.
2 = HMI Key (LOC)
3 = HMI Key (RE M)
4 = DIx
5 = Seria l/USB (LOC)
6 = Seria l/USB (REM)
7 and 8 = Not Us ed
9 = CO/DN/ DP (LOC)
10 = CO/DN/DP (REM)
11 = SoftPLC
4cfg I/O
P0221 LOC Reference Sel. 0 = Keypad
1 = AI1
2 = AI2
3 = AI3
4 = FI
5 = AI1 + AI2 > 0
6 = AI1 + AI2
7 = E.P.
8 = Multis peed
9 = Serial/USB
10 = Not Used
11 = CO/DN/DP
12 = SoftPLC
13 = Not Used
14 = AI1 > 0
15 = AI2 > 0
16 = AI3 > 0
17 = FI > 0
18 = Knob
18 cfg I/O
P0222 REM Refe rence Sel. See options in P0221 9 cfg I/O
P0223 LOC FWD/REV Selection 0 = Always FWD
1 = Always R EV
2 = HMI Key (F WD)
3 = HMI Key (RE V)
4 = DIx
5 = Seria l/USB (FWD)
6 = Seria l/USB (REV )
7 and 8 = Not Us ed
9 = CO/DN/ DP (H)
10 = CO/DN/DP (AH)
11 = Not Used
12 = SoftPLC
4cfg I/O
P0263 DI1 Function 0 = Not Use d
1 = Run/Stop
2 = General Enable
3 = Quick S top
4 = FWD Ru n
5 = REV Run
6 = Star t
7 = Stop
8 = Clock wise R otation Dir
9 = LOC/REM
10 = JOG
11 = Increase E.P.
12 = Decreas e E.P.
13 = Multispeed
14 = 2nd Ramp
15 to 17 = Not Used
18 = Sem Alar me Ex t.
19 = Sem Falha E xt.
20 = Reset
21 = SoftPLC
22 = Manual/Auto PID
23 = Not Used
24 = Disabl e Flyin g Star t
25 = Not Used
26 = Progra m. Off
27 = Load User 1
28 = Load Use r 2
29 = PTC
30 and 31 = Not Us ed
32 = 2nd Ramp Multispeed
33 = 2nd Ramp E.P. Ac.
34 = 2nd Ramp E.P. De.
35 = 2nd Ramp F WD Run
36 = 2nd Ramp R EV Run
37 = Start / Inc. E.P.
38 = Dec. E.P. / Stop
39 = Function 1 Application
40 = Function 2 Application
41 = Function 3 Application
42 = Function 4 Application
43 = Function 5 Application
44 = Function 6 Application
45 = Function 7 Application
46 = Function 8 Application
1cfg I/O
P0264 DI2 Function See options in P 0263 8 cfg I/O
P0265 DI3 Function See opt ions in P 0263 20 cfg I/O
P0266 DI4 Function See options in P 0263 9 cfg I/O
P0267 DI5 Function See opti ons in P0263 0 cfg I/O
P0268 DI6 Function See options in P 0263 0 cfg I/O
P0269 DI7 Function See options in P 0263 0 cfg I/O
P0270 DI8 Function See optio ns in P026 3 0 cfg I/O
P0295 VFD Rate d Curr. 0.0 to 20 0.0 A According to
inverter model
ro READ
P0296 Power Supply Rated Voltage 0 = 200 / 240 V
1 = 380 / 480 V
2 = 500 / 60 0 V
According to
inverter model
ro, cfg READ
P0297 Switching Frequency 1500 to 15000 kHz 4000 kHz
P0401 Motor Rated Current 0.0 to 200.0 A 1.0 x Inom cfg MOTOR,
STA RT U P
P0402 Motor Rated Spee d 0 to 30000 rpm 1710 (1425) rpm cfg MOTOR,
STA RT U P
P0403 Motor Rated Freque ncy 0 to 50 0 Hz 60 (50) Hz cfg MOTOR,
STA RT U P
17 FAULTS AND ALARMS
Falha / Alarme Descrição Causas Prováveis
A0046
Motor Overload
Motor overload alarm Overl oad on the motor shaft
A0050
Power Module
Overtemperature
Overtemperature alarm from the
power module temperature sensor
(NTC)
High a mbient tempe rature aroun d the inverte r (>50 °C (> 122 °F))
and high output current
Blocked or defective f an
Heatsink is too dirt y, preventing the air flow
A0090
External Alarm
Exte rnal alarm via DIx (option "No
Exte rnal A larm" in P026x)
Wirin g on DI1 to DI8 in puts are open or have poo r contact
A0700
Communication Fault
with Remote HMI
No communication with remote HMI,
but there is no speed command or
reference for this source
Check if the communication interface with the HMI is properly
configured in parameter P0312
HMI cable disconnected
F0021
Undervoltage on the
DC Link
Undervoltage fault on the
intermediate circuit
Wrong voltage supply; check if the data on the inverter label
complies with the power supply and parameter P0296
Suppl y voltage too low, producing voltage on the DC link be low
the minimum value (in P0004):
Ud < 200 Vdc in 20 0 / 240 Vac (P029 6 = 0)
Ud < 360 Vdc in 3 80 / 480 Vac (P0296 = 1)
Ud < 500 Vdc in 500 / 600 Vac (P0296 = 2)
Phase fault in the input
Fault in the pre- charge circu it
F0022
Overvoltage on the DC
Link
Overvoltage fault on the intermediate
circuit
Wrong voltage supply; check if the data on the inverter label
complies with the power supply and parameter P0296
Suppl y voltage is too hi gh, prod ucing voltag e on the DC link
above the maximum value (in P0004):
Ud > 410 Vdc in 200 / 240 Vac (P0296 = 0)
Ud > 810 Vdc in 380 / 480 Vac (P0296 = 1)
Ud > 1000 Vdc in 500 / 600 Vac (P0296 = 2)
Load ine rtia is too high or deceleration ra mp is too fast
P0151 or P0153 setting is too high
F0031
Communication Fault
with Plug-in Module
Main co ntrol cannot set a
communication link with the plug-in
module
Plug-in module is damaged
Plug-in module is not properly connected
Proble m in the identi fication of t he plug-in mo dule; refer to P0 027
for further information
F00 51
IGBTs Overtemperature
Overtemperature fault measured
on the temperature sensor of the
power pack
High ambient tempe rature a round the inverter (>50 °C (>122 °F))
and high output current
Blocked or defective f an
Heatsink is too dirt y, preventing the air flow
F0070
Overcurrent/Short
Circuit
Overcurrent or short circuit on the
output, DC link or braking resistor
Short circuit between two motor phases
Short circuit of the rheostatic braking resistor connecting cables
IGBTs module in short circuit or damaged
Star t with too shor t acceleration ram p
Start with motor spinning without the Flying Start function
F0072
Motor Overload
Motor Ove rload Fault (60 s in
1.5xInom)
P0156, P0157 and P0158 settin g is too low in relati on to the
motor operating current
Overl oad on the motor shaft
F0080
CPU Fault (Watchdog)
Fault related to the supervision
algorithm
Electric noise
Inverter firmware fault
F0084
Auto-diagnosis Fault
Fault related to the automatic
identificati on algorith m of the inverter
hardware and plug-in module
Poor contact in the connection between the main control and
the power pack
Hardware not compatible with the firmware version
Defect on the internal circui ts of the inverte r
F0091
External Fault
Exte rnal fault vi a DIx (“N o External
Fault” in P026x)
Wirin g on DI1 to DI8 in puts are open or have poo r contact
NOTE!
For further information, refer www.weg.net.
Document: 10003693218 / 00
