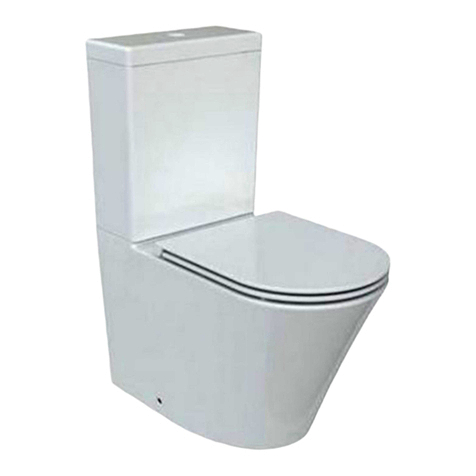
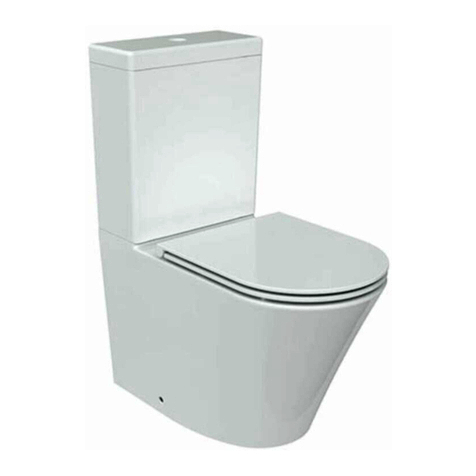
Wellis Ditte monoblock User manual

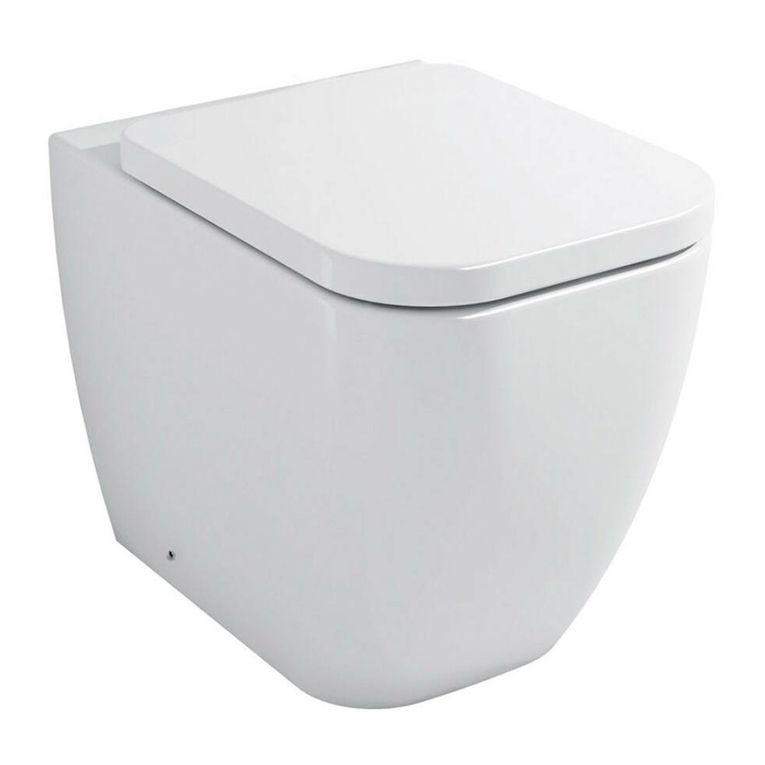
Ditte monoblock toilet
INSTALLATION MANUAL
Ditte monoblock Toiletten
MONTAGEANLEITUNG
Wc monobloc Ditte
MANUEL D’INSTALLATION
Ditte monoblokkos WC
SZERELÉSI ÚTMUTATÓ
EN
DE
FR
HU WF00032:
WF00026 + WF00030
DITTE MONOBLOCK

EN 1. Installation Notice:
1. Water must be turned off at main supply before you begin installation
2. Never use cement or plaster to fix or seal the water closet on the floor because rigid
materials used can expand while hardening and may cause ceramic to break.
3. Do not over tighten closet nuts as you may crack the base of the toilet and bolt caps
may pop off.
4. Do not over tighten the toilet fill valve water supply nut, this way may cause leakage.
2. Tools (not included)
3. Installation Instruction
3-1 Install the Seat cover onto the Toilet Pan following the seat cover installation manual
which included in the seat covers you have received.
Flat Screwdriver Drilling machine Silica gel
Spanner Spirit level Tape measure Pencil
4-2 Install the fittings into the Cistern.
4-2-1 Water Filling valve installation
1) Unscrew the lock nut from the thread of
water inlet valve.
2) Insert the water inlet valve with rubber
seal washer into the toilet side inlet hole
vertically and assure the rubber seal wash-
er is attached to the tank surface; then nest
the plastic seal washer and hexagon lock
nut into the water inlet valve connector
from outer tank.
3) Tighten the hexagon lock nut subject
to no interference among the tank and
fittings. Turn on water to clean the water
supply pipe and connect the water supply
pipe with the valve.

4-2-2 Water flushing valve installation
Rubber
washer
Connection
bolt&nut
Solid
washer
1) Unscrew the connection lock nut from
the conection bolt and unscrew round lock
nut from water outlet valve respectively.
2) Insert the water outlet valve with seal
washer into the outlet part of Tank. After
adjusting the valve to its right place, screw
the round lock nut and tighten it.
3) Nest the rubber washer into the round
lock nut and bolt water in the connection
bolt respectively. Fix the tank with valve
installed to the closet with connection bolt
and connection lock nut tightly.
4-2-3 Top push button installation
4-3 Install the Toilet set.
1) Unscrew the lock nut from push button.
2) Insert the push buttom into the hole of tank cover, and screw the lock nut into the
thread of push button from the inner side of tank cover. (But keep it loose)
3) Measuer the lehgth of A1,A2 as picture, cut off the poles according to A3(A3=A1-
A2+1CM), screw poles into button holes and adjust it by screw in or out.
4) Look at above picture. The one with circle marker is 6L botton, and the other with semi-
circle marker is 3L botton.
Tank
Cover
Poles
Lock Nut
6L 3L 6L 3L
4-3-1 Place the cistern on the top of the
pan.
Small Rubber gasket
Rubber Water seal
Plastic screw
Plastic washer
Nut
4-3-2 Put the rubber water seal onto the
Cistern flushing outlet. Screw the bolt to
link the cistern onto the WC pan. Install
the plastic washer and the then tighten the
nut, entill the cistern steadly installed onto
the pan.

EN
4-3-3 Establish position for the pan. Mark
hole position on the floor, ensure the align-
ment by the spirit level.
4-3-5 Attach the extensible pipe (not
included) to the drain hole and apply the
waterproof PVC sealant around the hole.
4-3-7 Fix the pan by tightening the screw
by screwdriver and insert the plastic wash-
er and cap as above picture, do not over
tighten.
4-3-6 Locate the pan and connect the other
end of pipe to the pan.
4-3-8 Use the silica gel to seal the joint of
the WC pan and the floor surface.
4-3-4 Drill holes with 10mm diameter;
ensure the holes at 55mm away from the
marked position. Fix the L-shape braket
onto floor and tighten the screw. Do not
over tighten.
Connect the water source to the inlet valve by assembly the hose(not supplied).
Turn on the water valve and flush several times and check for leaks.
Installation screw
Fixing set
Plastic plug
55 mm
Plastic plug
Installation screw
Deco Cap
not included

5. Guarantee
This product with 2 year guarantee after its initial purchase, if any defective caused by
material or workmanship.
6. Care Instruction
Do not use abrasive, cleanses to cleaning up the pan and toilet seat as they may scratch
and dull the pan and seat surface. Do not use cleaners containing chlorine as it can seri-
ously damage of fitting.
Use warm spongy water or liquid detergent to clean the surface and dry with soft cloth.
7. Problem and solution
A: The fill valve not turn off.
• Open the cap of the fill valve and clear the valve seal, or replace the seal if it is
defective or cracked.
• The position of the floater may too high, adjust the valve floater by adjust the thread
nod.
• Replace the flapper if it is worn.
• Check the tightening of the mechanism.
B: Water leaks out under the cistern:
• Fitting screws must be tightened.
• The gasket between the pan and the cistern is badly positioned or it is worn, replace
the gasket.
C. Poor flush performance
• Adjust the water level inside the cistern.
• Check if the water supply valve is fully open.
• Clear obstructions from the trap way and pan rim holes.
D. No flush
• Check if water supply valve is closed.
• Check if the water supply hose is blocked.
E. Long time require to fill the cistern.
• Check if the water supply valve is fully open.
• Check the hose of inlet valve if any leaks.

DE 1.Montage Anmerkungen:
1. Vor Durchführung der Montagearbeit schließen Sie das Wasserventil an der Haupt-
versorgungseinheit!
2. Benutzen Sie niemals Zement oder Pflaster für Festigung oder Dichtung der Toilet-
tenbecken, weil sie könnten sich während der Phase der Erhärtung ausdehnen und
den Bruch des Toilettenbeckens verursachen!
3. Überziehen Sie nicht die Toilettebecken-Schrauben, weil der Toilettenbecken einen
Riss bekommen, und Schraubenkappen abspringen könnten!
4. Überziehen Sie nicht die Toilette Spülventilschraube, weil das könnte Undichtigkeit
verursachen!
2. Werkzeuge (nicht geliefert)
3. Montageanleitung
3-1 Montieren Sie den Toilettedeckel auf den Toilettebecken nach der gelieferten Anlei-
tung des Toilettendeckels!
Flachköpfige
Schraubenzieher
Bohrmaschine Silikagel
Schraubenschlüssel Wasserwaage Messband Bleistift
4-2 Montieren Sie Montageteile in den Behälter!
4-2-1 Montage des Füllventils
1) Schrauben Sie die Schließmutter von
der Schraube des Eingangsventils herab!
2) Positionieren Sie das Eingangsventil
und die Gummiunterlage ins Loch an der
Seite des WC-Behälters und stellen Sie
sicher, dass die Gummiunterlage an die
Behälteroberfläche anhaftet, dann setzen
Sie auf den Anschlussteil des Eingangs-
ventils die Plastikunterlage und hexagona-
le Schließmutter auf!
3) Ziehen Sie die Schließmutter so, dass
keine Interferenz zwischen den Behälter
und Montagteile wird! Öffnen Sie den Was-
serhahn, um die Wasserleitung zu reinigen
und schließen Sie den Wasserschlauch
ans Ventil an!

4-2-2 Montage des Wasserspülventils
Gummi-
unterlage
Verbindungsschraube
& Mutter
Plastikun-
terlage
1) Schrauben Sie die Verbindungsschließ-
mutter von der Verbindungsschraube her-
ab, und schrauben Sie die runde Schließ-
mutter vom Ausgangsventil herab!
2) Positionieren Sie das Ausgangsven-
til und die Dichtungsunterlage auf den
Ausgangsteil des Behälters! Nachdem das
Ventil entsprechend positioniert ist, schrau-
ben Sie die runde Schließmutter darauf
und ziehen Sie fest!
3) Setzen Sie die Gummiunterlage
zwischen den runde Schließmutter und
Schraube auf den Verbindungsschraube!
Befestigen Sie den Behälter mit mon-
tiertem Ventil am Toilettenbecken durch
Verbindungsschraube und Schließmutter!
4-2-3 Montage des oberen Druckknopfes
4-3 Montage der Toilettenteile
Be-
hälter-
deckel Haltestangen
Schließmutter
6L 3L
6L 3L
4-3-1 Setzen Sie den Behälter auf den
Toilettenbecken!
4-3-2 Setzen Sie die Gummidichtung auf
den Spülausgang des Behälters! Schrau-
ben Sie die Schraube ein um den Behälter
mit Toilettebecken verbinden! Montieren
Sie die Plastikunterlage, und ziehen Sie
die Schraube, bis der Behälter fest auf
dem Toilettenbecken steht!
1) Schrauben Sie die Schließmutter von der Druckknopf!
2) Positionieren Sie den Druckknopf ins Loch des Behälterdeckels, und schrauben Sie
die Schließmutter auf die Schraube des Druckknopfes von der Innenseite des Behälterde-
ckels! (Halten Sie es locker!)
3) Messen Sie den Abstand zwischen A1 und A2, schneiden Sie die Haltestangen nach
Länge von A3 (A3=A1-A2+1CM), schrauben Sie die Stangen in die Löcher des Druck-
knopfes und justieren Sie sie durch ein und ausschrauben!
4) Schauen Sie die Abbildung oben an! Der durch einen Kreis angezeigte Knopf ist der 6L
und durch einen Halbkreis angezeigter Knopf ist 3L.
Kleine Gummidichtung
Gummidichtung
Plastikschraube
Plastikunterlage
Schraube
DE
4-3-3 Stellen Sie die Position des Toiletten-
becken fest! Markieren Sie die Positionen
der Löcher auf dem Fußboden! Prüfen Sie
die Position mit Wasserwaage!
4-3-5 Positionieren das Abflussrohr (kein ge-
lieferter Teil) ins Abflussloch und benutzen Sie
das Loch herum wasserdichte PVC Dichtung!
4-3-7 Befestigen den Toilettenbecken
durch Schrauben und positionieren Sie die
Plastikunterlage und Kappe nach Abbil-
dung oben! Überziehen Sie sie nicht!
4-3-6 Stellen Sie die Position der Toiletten-
becken fest und schließen Sie die andere
Ende des Rohres an den Toilettenbecken!
4-3-8 Benutzen Sie Silikagel um den
Anschlusspunkt zwischen den Toilettenbe-
cken und Fußboden isolieren!
4-3-4 Bohren Sie ein Loch mit Durchmesser
von 10 mm! Prüfen Sie, ob die Löcher mit
einem Abstand von 55 mm von markierter
Position liegen! Befestigen die L-förmige Hal-
teteil auf dem Fußboden und ziehen Sie die
Schraube fest! Überziehen Sie sie nicht!
Schließen Sie die Wasserquelle an die Eingansventile durch einen Gummischlauch
(nicht geliefert)! Öffnen Sie die Wasserventile, spülen Sie die Ventile mehrmals und
prüfen Sie die Dichtung!
Verbindungss-
chraube
Festigungsteil
Plastikdüppel
55 mm
Plastikdüppel
Verbindungschraube
Dekorations-Schraubekappe
Nicht geliefert

5. Garantie
Zwei Jahre Garantie ist von der Zeit des Kaufes berechnet gewährleistet, wenn ein Mate-
rialfehler oder Herstellungsfehler vorkommen sollte.
6. Behandlungsanleitung
Benutzen Sie keine Schleifstoffe für die Reinigung des Toilettebeckens und Sitzes, weil
Sie die Oberfläche des Toilettebeckens und Sitzes kratzen könnten! Benutzen Sie kein
Reinigungsmittel mit Chlorinhalt, weil die Chemikalien die Verbindungsteile schwer
beschädigt könnten! Verwenden Sie warmes Wasser oder flüssige Waschmittel für die
Reinigung der Oberfläche und trocknen Sie sie mit einem weichen Tuch!
7. Problem und Lösung
A: Das Füllventil schließt nicht.
• Öffnen Sie die Kappe der Füllungsventile und reinigen Sie Ventildichtung oder wech-
seln Sie die Dichtung, wenn sie beschädigt oder gerissen ist!
• Die Position der Schwimmer ist zu hoch. Stellen Sie die Ventilschwimmer durch
Einstellung der Gewindekonstrukt!
• Wechseln Sie den Filternetz, wenn es veraltet ist!
• Prüfen Sie die Dichtigkeit der Konstruktion!
B: Der Behälter ist unter undicht:
• Ziehen Sie die Verbindungsschrauben!
• Die Dichtung zwischen den Toilettebecken und Behälter ist nicht gut platziert oder
veraltet. Wechseln Sie die Dichtung!
C. Geringe Spülleistung
• Stellen Sie wieder das Wasserniveau im Behälter ein!
• Prüfen Sie, ob das Wasserleitungsventil vollständig geöffnet ist!
• Reinigen Sie den Eingang des Abflussrohres und der Löcher am Rand des Toiletten-
beckens von Verstopfungsmaterien!
D. Keine Spülung
• Prüfen Sie, ob das Wasserleitungsventil geschlossen ist!
• Prüfen Sie, ob die Wasserleitung nicht verstopft ist!
E. Die Auffüllung des Behälters braucht viel Zeit.
• Prüfen Sie, ob das Wasserbehälterventil vollständig geöffnet ist!
• Prüfen Sie, ob das Eingangsventilrohr dicht ist!

FR 1.Notice d’installation:
1. L’alimentation générale en eau doit être coupée avant de procéder à l’installation.
2. Ne jamais utiliser de ciment ou d’enduit pour fixer ou sceller les toilettes sur le sol, de
tels matériaux rigides peuvent gonfler pendant le séchage et causer des dégâts à la
céramique.
3. Ne serrez pas trop les écrous, ceci pourrait causer des fissures sur la base des
toilettes et les têtes de boulons pourraient ressortir.
4. Ne serrez pas trop l’écrou de la valve d’alimentation des toilettes, ceci pourrait cau-
ser des fuites.
2. Outils (non inclus)
3. Instructions d’installation
3-1 Installez l’abattant sur la cuvette en suivant les instructions d’installation de l’abattant
inclus dans l’abattant que vous avez reçu.
Tournevis plat Perceuse Gel de silice
Clef a molette Niveau Mètre Crayon
4-2 Installez les raccords dans le réservoir.
4-2-1 Installation de la valve de remplissage
1) Dévissez le contre-écrou sur le filetage
de la valve de remplissage.
2) Insérez la valve de remplissage avec
son joint d’étanchéité en caoutchouc
verticalement dans le trou de remplissage
et assurez-vous que le joint est bien fixé
à la surface du réservoir; ensuite, depuis
l’extérieur du réservoir, emboitez le joint
d’étanchéité en plastique et l’écrou hexa-
gonal dans le connecteur de la valve de
remplissage.
3) Serrez l’écrou hexagonal. Ouvrez l’ar-
rivée d’eau pour nettoyer le flexible d’ali-
mentation, puis refermez-la et connectez le
flexible a la valve d’alimentation.

4-2-2 Installation de la valve de chasse.
Joint
caoutchouc
Connexion
Ecrou/boulon
Joint
solide
1) Dévissez l’écrou de connexion et le
contre-écrou rond de leur filetages respec-
tifs.
2) Insérez la valve de chasse avec son
joint d’étanchéité dans le trou du réservoir.
Apres ajustement, vissez le contre-écrou
rond et serrez-le.
3) Emboitez le joint en caoutchouc dans
le contre-écrou rond et vissez l’évacuation
d’eau au connecteur. Installez le réser-
voir dans son logement (avec la valve
de chasse montée) avec les boulons de
connexion et serrez les écrous fermement.
4-2-3 Installation du bouton de chasse.
4-3 Installez les toilettes.
Couvercle
de
réservoir Tiges
Contre-écrou
6L 3L
6L 3L
4-3-1 Placez le réservoir sur la cuvette
4-3-2 Placez le joint d’évacuation sur le
raccord d’évacuation du réservoir. Vissez
la vis plastique pour relier le réservoir à
la cuvette. Placez le joint plastique puis
serrez l’écrou jusqu’a ce que le réservoir
soit fermement fixé a la cuvette.
1) Dévissez le contre-écrou du bouton.
2) Insérez le bouton dans le trou du couvercle du réservoir, et revissez le contre-écrou sur
le filetage du bouton mais ne le vissez pas jusqu’au bout.
3) Mesurez A1 et A2 (voir ci-dessus), coupez les tiges à la longueur A3 (A3=A1-A2+1cm),
vissez les tiges dans les trous du bouton et ajustez la longueur en vissant plus ou moins.
4) Comme vous le voyez dans la photo ci-dessus, le un demi-cercle est le bouton 6L alors
que le second est le bouton 3L.
Petite rondelle caoutchouc
Joint d’évacuation
Vis plastique
Joint plastique
Ecrou

FR
4-3-3 Définissez la position de la cuvette.
Marquez la position du trou sur le sol,
vérifiez l’alignement avec le niveau.
4-3-5 Fixez le flexible (non-inclus) a l’évacua-
tion et appliquez le mastic hydrofuge pour
PVC autour du trou.
4-3-7 Fixez la cuvette en serrant les vis
avec un tournevis sans oublier de placer
les chevilles et les protections comme
ci-dessus. Ne serrez pas trop.
4-3-6 Connectez l’autre extrémité au trou
de la cuvette.
4-3-8 Utilisez le gel de silice pour sceller le
joint entre la cuvette et le sol.
4-3-4 Percez des trous de 10mm, assu-
rez-vous que les trous se situent a 55mm de
la position marquée. Positionnez les équerres
au sol et les chevilles et serrez les vis. Ne les
serrez pas trop.
Connectez l’alimentation en eau à la valve de remplissage avec un flexible
(non-fourni), mettez en eau et utilisez la chasse plusieurs fois pour vous assurez
qu’il n’y ait pas de fuites.
Vis
Equerre
Cheville plastique
55 mm
Cheville
plastique
Vis
Protection
Non inclus

5. Garantie
Ce produit est garanti deux ans après l’achat initial en cas de problème dû à un défaut du
matériel ou de fabrication.
6. Conseil d’entretient.
Ne pas utiliser d’abrasif pour nettoyer la cuvette ou le siège, ceci provoquerait des rayures
et ternirait la surface de la cuvette ou du siège.
Ne pas utiliser de nettoyant contenant de la javel, ceci provoquerait une usure prématurée
des raccords.
Utilisez une éponge et de l’eau chaude ou un détergeant liquide pour nettoyer les sur-
faces, puis essuyez avec un chiffon.
7. Problèmes et solutions
A: Le remplissage du réservoir ne s’arrête pas
• Ouvrez le couvercle de la valve de remplissage et nettoyez le joint de cette valve, ou
remplacez-le s’il est endommagé.
• La position du flotteur est peut-être trop élevée, ajustez le flotteur en vissant ou
dévissant son réglage.
• Remplacez le clapet s’il est usé.
• Vérifiez que tous les vis et boulons sont bien serrés.
B: De l’eau fuit sous le réservoir :
• Les vis d’assemblage avec la cuvette doivent être resserrées.
• Le joint entre le réservoir et la cuvette est mal placé ou usé, remplacez le joint.
C. La chasse d’eau ne fonctionne pas bien
• Ajustez le niveau d’eau dans le réservoir.
• Vérifiez que l’alimentation d’eau est complètement ouverte.
• Retirez les obstructions dans le siphon et/ou les ouvertures de la cuvette.
D. La chasse d’eau ne fonctionne pas du tout
• Vérifiez que l’alimentation d’eau n’est pas fermée.
• Vérifiez que le flexible d’alimentation d’eau n’est pas bouché.
E. Le réservoir se rempli très lentement :
• Vérifiez que l’alimentation en eau est bien totalement ouverte.
• Vérifiez qu’il n’y ait pas de fuites sur le flexible d’alimentation en eau

HU 1.Szerelési megjegyzés:
1. Kérem zárja el a vízutánpótlást a fővezetéken, mielőtt hozzálátna a szereléshez!
2. Soha ne használjon cementet vagy habarcsot a WC csésze rögzítéséhez vagy tömí-
téséhez, mert ezek a szilárd anyagok a megkeményedés közben kitágulhatnak és a
kerámiacsésze törését okozhatják!
3. Ne szorítsa túl a WC csésze csavarokat, mert megrepesztheti a WC csészét és a
csavarsapkák leugorhatnak!
4. Ne szorítsa túl a WC töltőszelep csavart, mert szivárgást okozhat!
2. Szerszámok (nem tartozék)
3. Szerelési útmutató
3-1 Szerelje a WC ülőke fedelét a WC csészére a mellékelt WC ülőkefedél szerelési
útmutatójának megfelelően!
Laposfejű
csavarhúzó
Fúrógép Szilika gél
Csavarkulcs Vízmérték Mérőszalag Ceruza
4-2 Helyezze be az összeszerelő-elemeket a tartályba!
4-2-1 Töltőszelep szerelése
1) Csavarozza le a záróanyát a bemeneti
szelep csavarjáról!
2) Illessze be függőlegesen a bemeneti
szelepet a gumitömítő alátéttel együtt a
WC tartály oldalsó lyukába és győződjön
meg arról, hogy a gumi tömítőalátét a
tartály felületéhez tapad; majd tegye rá a
tartály külső oldalán a bemeneti szelep
csatlakozójára a műanyag tömítőalátétet
és a hatszögletű záróanyát!
3) Szorítsa meg úgy a záróanyát, hogy a
tartály és a szerelvény között ne legyen
játék! Nyissa meg a vizet, hogy megtisztít-
sa a vízvezetékcsövet és csatlakoztassa a
vízvezetékcsövet a szeleppel!

4-2-2 Vízöblítőszelep szerelése
Gumi
alátét
Összekötő
csavar & csavaranya
Műanyag
alátét
1) Csavarozza le az összekötő záróanyát
az összekötő csavarról és csavarozza le a
kerek záróanyát a kimeneti szelepről!
2) Illessze a kimeneti szelepet a tömítőa-
látéttel a tartály kimeneti részére! Miután
a szelepet a megfelelő helyre igazította,
csavarozza rá a kerek záróanyát és szorít-
sa meg!
3) Helyezze a gumi alátétet a kerek
záróanya és csavar közé az összekötő
csavaron! Az összekötő csavarral és
záróanyával rögzítse szorosan a tartályt a
felszerelt szeleppel együtt a WC-hez!
4-2-3 Felső nyomógomb felszerelése
4-3 A WC elemek összeszerelése
Tartály
fedél
Rudak
Záróanya
6L 3L
6L 3L
4-3-1 Helyezze a tartályt a WC csésze
tetejére!
4-3-2 Helyezze a gumitömítést a tartály
öblítő kimenetre! Csavarozza be a csavart,
hogy összekösse a tartályt a WC csé-
szével! Szerelje fel a műanyag alátétet,
majd szorítsa meg a csavart addig, amíg a
tartály szilárdan nem áll a csészén!
1) Csavarozza le a záróanyát a nyomógombról!
2) Illessze be a nyomógombot a tartály fedelének lyukába, és csavarozza a záróanyát a
nyomógomb csavarára a tartályfedél belső oldaláról! (De tartsa lazán!)
3) Mérje meg az ábrán látható A1 és A2 távolságokat, vágja méretre a tartórudakat A3-
nak (A3=A1-A2+1CM) megfelelően, csavarozza a rudakat a nyomógomb lyukaiba és ki-
és becsavarozással igazítsa meg!
4) Figyelje meg a fenti ábrát! A kör jellel ellátott a 6L gomb, míg a félkör jellel ellátott a 3L
gomb.
Kis gumitömítés
Gumitömítés
Műanyag
csavar
Műanyag alátét
Csavar

HU
4-3-3 Állapítsa meg a WC csésze pozí-
cióját! Jelölje ki a lyukak helyét a padlón,
ellenőrizze a pozíciót vízmértékkel!
4-3-5 Illessze a lefolyócsövet (nem tartozék)
a lefolyó lyukba és használjon vízálló PVC
tömítést a lyuk körül!
4-3-7 Rögzítse a csészét a csavar meg-
szorításával és illessze a műanyag alátétet
és sapkát a fenti ábrának megfelelően! Ne
szorítsa meg túl erősen!
4-3-6 Állapítsa meg a WC csésze helyét
és csatlakoztassa a cső másik végét a WC
csészéhez!
4-3-8 Használjon szilikagélt a WC csésze
és a padlófelület közötti csatlakozás szige-
teléséhez!
4-3-4 Fúrjon 10 mm átmérőjű lyukakat;
ellenőrizze, hogy a lyukak 55 mm távolság-
ra vannak a megjelölt helytől! Rögzítse az
L-alakú tartókonzolt a padlón és szorítsa meg
a csavart! Ne szorítsa meg túl erősen!
Csatlakoztassa a vízforrást a bemeneti szelephez gumicső (nem tartozék) összekö-
tésével! Nyissa meg a vízszelepet és öblítse át többször és ellenőrizze a szivárgá-
sokat!
Összeszerelő
csavar
Rögzítőkonzol
Műanyagtipli
55 mm
Műanyagtipli
Összeszerelőcsavar
Esztétikai
csavarsapka
Nem tartozék

5. Garancia
A vásárlást követően 2 év garancia áll rendelkezésre, ha bármilyen anyaghiba vagy gyár-
tásból származó károsodás jelentkezne.
6. Kezelési útmutató
Ne használjon csiszoló, súroló tisztítószereket a WC csésze és ülőke tisztításához, mert
megkarcolhatja és koptathatja a WC csészét és ülőkét! Ne használjon klórt tartalmazó
tisztítószert, mert súlyosan károsíthatja az összeszerelő elemeket! Használjon melegvizet
vagy folyékony mosószert a felület megtisztításához és törölje szárazra puha ronggyal!
7. Probléma és megoldás
A: A töltőszelep nem záródik.
• Nyissa meg a töltőszelep sapkát és tisztítsa meg szeleptömítést, vagy cserélje ki a
tömítést, ha hibás vagy repedt!
• Az úszó helyzete túl magas. Igazítsa a szelep úszót a menetes szerkezet állításával!
• Cserélje ki a szűrőhálót, ha el van használódva!
• Ellenőrizze a szerkezet szorosságát!
B: Víz szivárog a tartály alatt:
• Összeszerelő csavarokat meg kell szorítani.
• A WC csésze és a tartály közötti tömítés rosszul van elhelyezve, vagy el van kopva.
Cserélje ki a tömítést!
•
C. Rossz öblítő teljesítmény
• Igazítsa a vízszintet a tartály belsejében!
• Ellenőrizze, hogy a vízvezeték szelep teljesen nyitva van-e!
• Tisztítsa meg a lefolyócső és a WC csésze peremén lévő lyukak bemenetét a dugu-
lást okozó anyagoktól!
D. Nincs öblítés
• Ellenőrizze, hogy a vízvezeték szelep el van-e zárva!
• Ellenőrizze, hogy a vízvezetékcső nincs-e eldugulva!
E. Sok idő szükséges a tartály feltöltéséhez.
• Ellenőrizze, hogy a víztartály szelep teljesen ki van-e nyitva!
• Ellenőrizze, hogy a bemeneti szelepcső nem ereszt-e!

DITTE
MONOBLOCK TOILET
WF00032: WF00026 + WF00030
55
755
1/2” 1/2”
1/2”

DITTE
MONOBLOCK TOILET
WF00032: WF00026 + WF00030
55
755
1/2” 1/2”
1/2”

Table of contents
Languages:
Other Wellis Toilet manuals

Wellis
Wellis CLEMENT MONOBLOCK WF00031 User manual

Wellis
Wellis Ditte Rimless WF00023 User manual

Wellis
Wellis Corsica CJ805W+J518 Manual

Wellis
Wellis WF00035 User manual

Wellis
Wellis Ditte WF00025 User manual

Wellis
Wellis WF00110 Manual

Wellis
Wellis Ditte WF00022 User manual

Wellis
Wellis Evolo WF00052 User manual