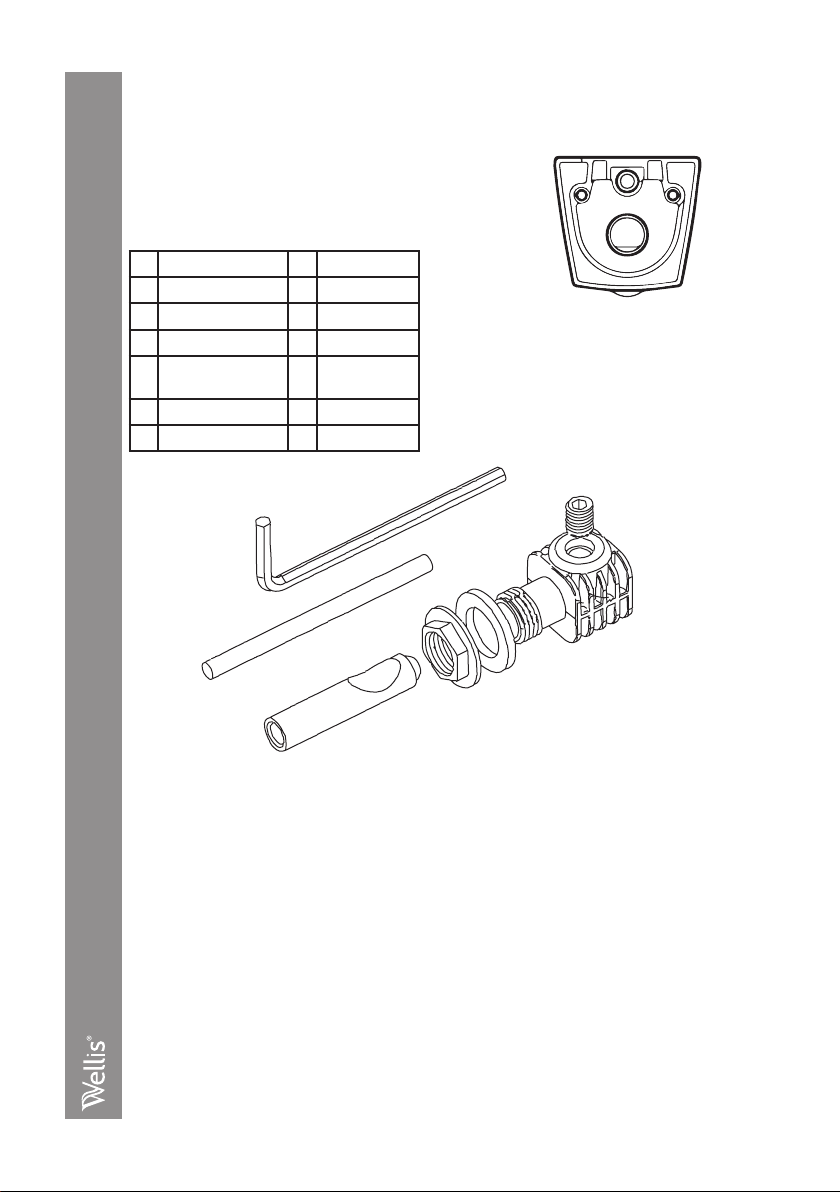
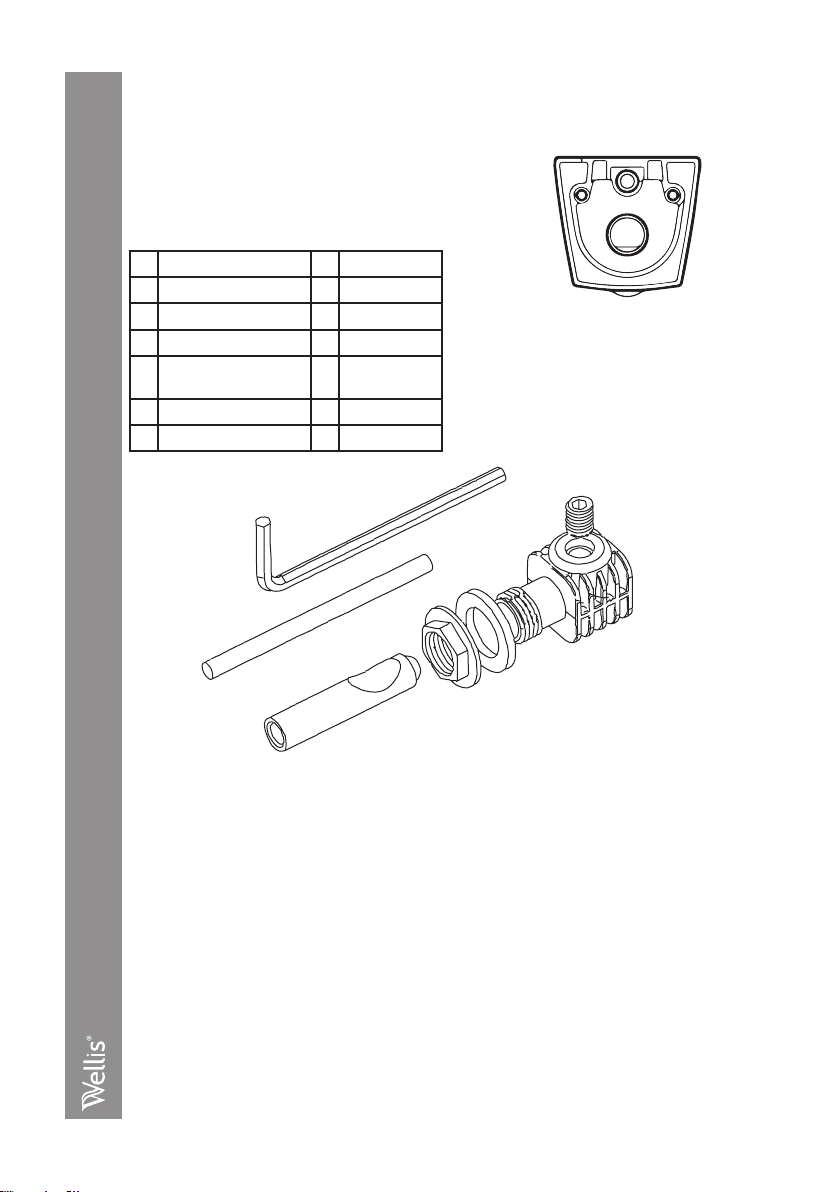
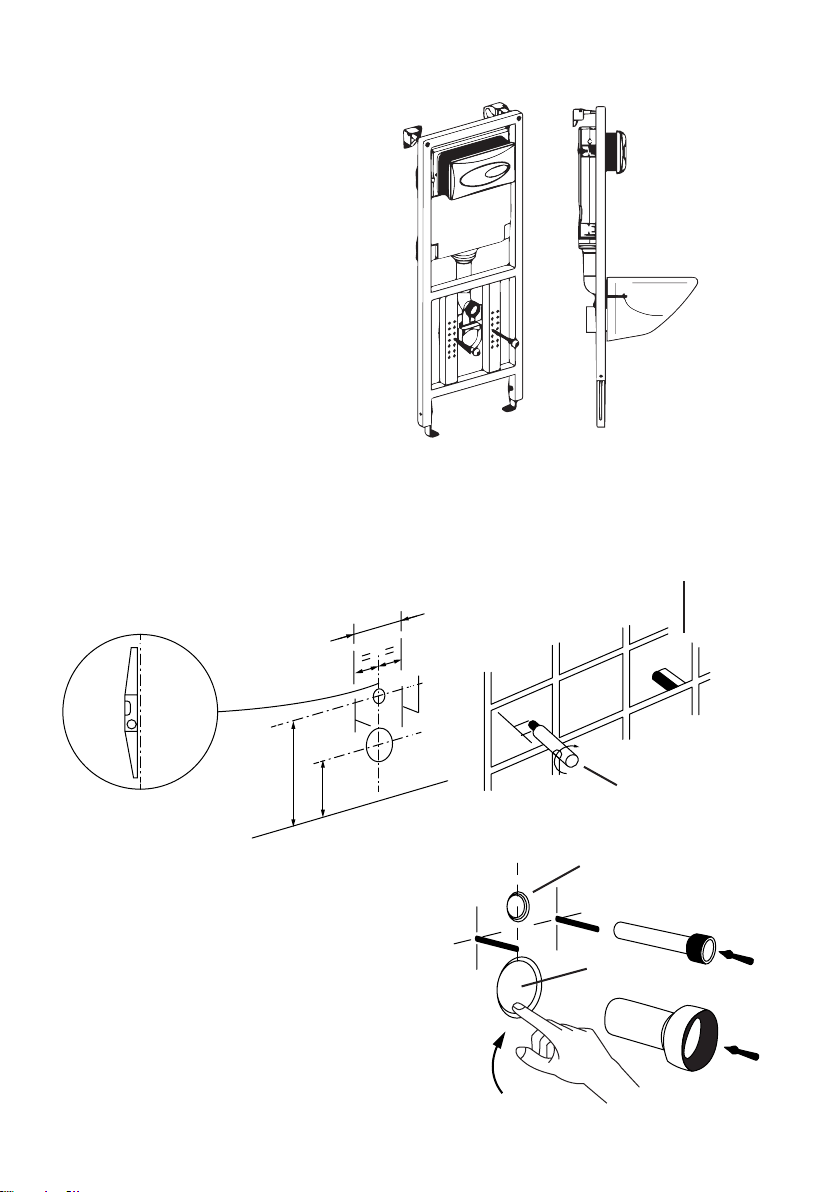
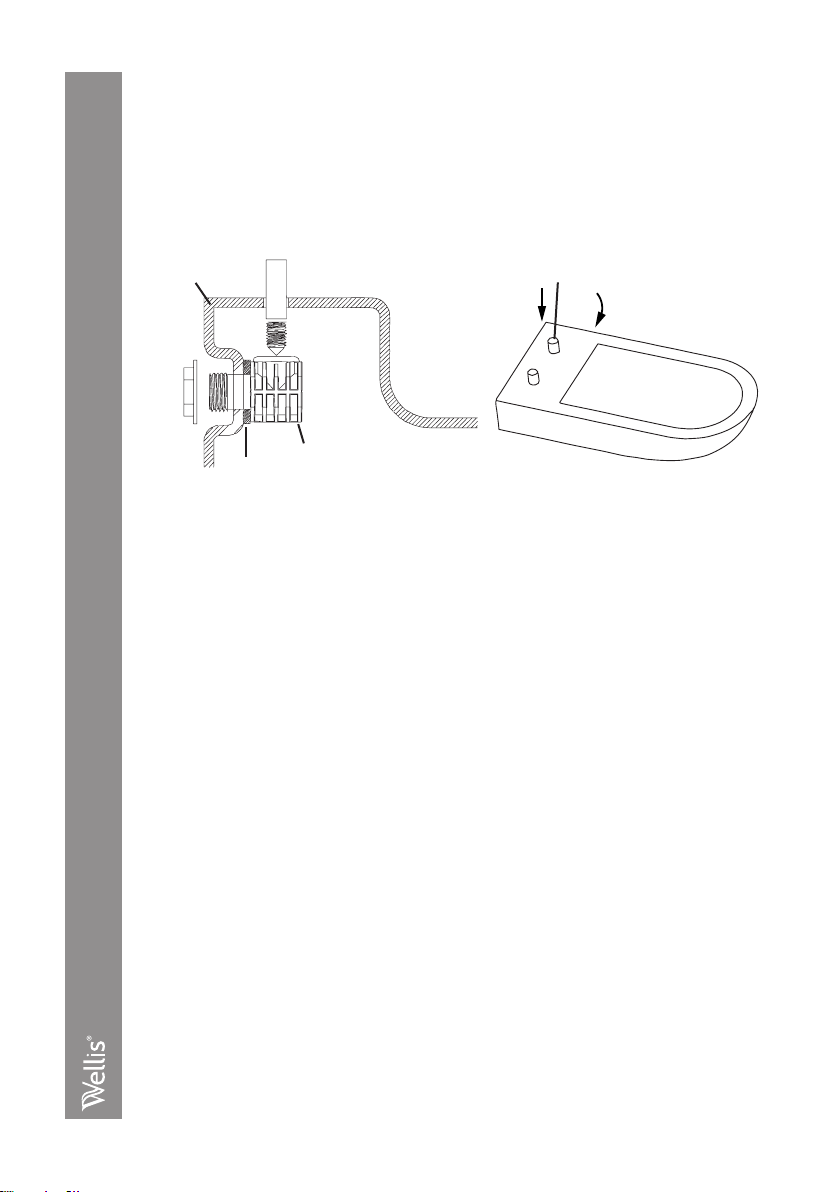
Wellis Ditte Rimless WF00023 User manual

Ditte wall-mounted Rimless WC
INSTALLATION MANUAL
Ditte wall-mounted Rimless WC
INSTALLATIONSANLEITUNG
Ditte wall-mounted Rimless WC
INSTALLATION MANUELLE
Ditte Rimless falra rögzített WC
ÖSSZESZERELÉSI ÚTMUTATÓ
EN
DE
FR
HU WF00023
DITTE

Installation instruction
Hung toilet fixing sets
For fixing of .hung toilet
Matched with in-wall tank
Contents
1 Nut 2 M16X70
2 Plastic nut 2 POM
3 Washer 2 Nylon
4 Bracket 2 Nylon
5 Hexagon socket
set screw
2 Din914
6 Plastic pipe 2
7 Hex wrench 1 6 mm
Please read these instructions carefully to familiarize yourself with the required tools,
materials,and installation sequences
Follow the sections that pertain to your particular installation
This will help you avoid costly mistakes
In addition to proper installation, read all operating and safety instruction
Observe all local plumbing and building codes
Shut off the water supply
TOOLS AND MATERIALS REQUIRED (Not supplied)
• adjustable wrench
• tape measure
• level
• putty knife
• connection packing
• metal file (file cut)
• tubing cutter
• hacksaw
• screwdriver
• connection packing
1 Nut 2 Plastic nut
3 Washer
4 Bracket
5 Din914
6 Plastic pipe
7 Hex wrench

180
INSTALLATION
1. INSTALL THE TANK
1. Turn the water supply off before
installing the new toilet.
2. Install the concealed tank system in
wall before decorating the wall.
3. Install the tank system per tank’s
installation instructions.
2. SET THE SPACING OF THE BOWL
After you install the tank, be careful to set the spacing of set aside the length for carrier
studs and tighten nut. The bowl on wall according to the dimensions as shown.
3. ATTACH CONNECTION
PIPE
1. Attach inlet pipe which set aside the
length to the concealed tank.
2. Attach outlet pipe to the toilet.
3. You may apply some lubricant to help
connect smoothly.
25
50
Carrier Stud
Nut
Inlet
Outlet

4. INSTALL THE NEW TOILET
1. Install the accessory kit into the installing hole.
2. Place the new toilet on the wall through the carrier.
3. Use wrench to tighten accessories and level in the toilet. Then finish fixation
4. Apply sealant to make sure the bowl’s edge seals to the wall.
Bowl Plastic pipe
Plastic
nut
Washer
Wrench
Bowl
backet
Din912


DE Installationsanweisungen
Hänge-WC-Befestigungssets
Zur Befestigung der Hänge-Toilette
Abgestimmt mit In-Wand-Tank
Inhalt
1 Mutter 2 M16X70
2 Plastikmutter 2 POM
3 Unterlegscheibe 2 Nylon
4 Halterung 2 Nylon
5 Gewindestift mit
Innensechskant
2 Din914
6 Kunststoffrohr 2
7 Sechskantschlüssel 1 6 mm
Bitte lesen Sie diese Anweisungen sorgfältig durch, um sich mit den erforderlichen
Werkzeugen, Materialien und Installationssequenzen vertraut zu machen
Befolgen Sie die Abschnitte, die sich auf Ihre bestimmte Installation beziehen
So vermeiden Sie kostspielige Fehler
Lesen Sie neben der ordnungsgemäßen Installation alle Betriebs- und
Sicherheitshinweise
Beachten Sie alle örtlichen Sanitär- und Bauvorschriften
Wasserzufuhr abstellen
ERFORDERLICHE WERKZEUGE UND MATERIALIEN
(nicht im Lieferumfang enthalten)
• Rollgabelschlüssel
• Maßband
• Wasserwaage
• Spachtel
• Verbindungsverpackung
• Metallfeile (Feilenschnitt)
• Schlauchschneider
• Säge
• Schraubenzieher
• Verbindungsverpackung
1 Mutter 2 Kunststoffmutter
3 Unterlegscheibe
4 Halterung
5 Din914
6 Kunststoffrohr
7 Sechskantschlüssel

180
INSTALLATION
1. DEN TANK INSTALLIE-
REN
1. Schalten Sie die Wasserversorgung
ab, bevor Sie die neue Toilette
installieren.
2. Installieren Sie das verdeckte
Tanksystem in der Wand, bevor Sie
die Wand dekorieren.
3. Installieren Sie das Tanksystem
gemäß den Installationsanweisungen
des Tanks.
2. ABSTAND DER SCHÜSSEL EINSTELLEN
Achten Sie nach dem Einbau des Tanks darauf, den Abstand des Satzes neben der
Länge für die Tragbolzen einzustellen und die Mutter festzuziehen. Die Schüssel an der
Wand entsprechend den angegebenen Abmessungen.
3. VERBINDUNGSROHR
BEFESTIGEN
1. Befestigen Sie das Einlassrohr, das
die Länge gegenüber dem verdeckten
Tank festlegt.
2. Befestigen Sie das Auslassrohr an der
Toilette.
3. Sie können etwas Schmiermittel
auftragen, um eine reibungslose
Verbindung zu gewährleisten.
25
50
Trägerstift
Mutter
Einlass
Auslass

DE 4. INSTALLATION DER NEUEN TOILETTE
1. Installieren Sie das Zubehör-Set in der Installationsöffnung.
2. Legen Sie die neue Toilette durch den Träger an die Wand.
3. Ziehen Sie das Zubehör mit einem Schraubenschlüssel fest und nivellieren
Sie die Toilette. Beenden Sie dann die Fixierung
4. Tragen Sie Dichtungsmittel auf, um sicherzustellen, dass der Rand der
Schüssel an der Wand abdichtet.
Schüssel Kunststoffrohr
Plastikmutter
Unterlegscheibe
Schlüssel
Schüssel
Halterung
Din912


FR Instructions d'installation
Set de fixation des toilettes suspendues
Pour la fixation de toilettes suspendues
Assorties d'un réservoir intra-mural
Contenu
1 Écrou 2 M16X70
2 Écrou plastique 2 POM
3 Rondelle 2 Nylon
4 Crochet 2 Nylon
5 Vis sans tête à six
pans creux
2 Din914
6 Tuyau plastique 2
7 Clé hexagonale 1 6mm
Merci de lire ces instructions avec attention pour vous familiariser avec les outils
nécessaires et les étapes d'installation
Suivez la section correspondant à votre installation en particulier
Cela vous aidera de faire des erreurs coûteuses
En plus des consignes d'instructions en elles-mêmes, lisez toutes les instructions de
sécurité et de fonctionnement
Respectez toutes les réglementations locales en matière de plomberie et de bâtiment.
Fermez l'alimentation en eau
OUTILS NÉCESSAIRES (non fournis)
• Clé à molette ajustable
• Mètre ruban
• Niveau
• Couteau à mastic
• Emballage de connexion
• Lime en métal
• Coupe-tube
• Scie à métaux
• Tournevis
• Emballage de connexion
1 écrou 2 Écrou en plastique
3 Rondelle
4 Crochet
5 Din914
6 Tuyau en plastique
7 Clé hexagonale

180
Installation
1. INSTALLEZ LE RÉSER-
VOIR
1. Coupez l'arrivée d'eau avant
d'installer les nouvelles toilettes.
2. Installez le système de réservoir
dissimulé dans le mur avant de le
décorer.
3. Installez le système de réservoir en
suivant les instructions d'installation
du réservoir.
2. DEFINISSEZ L'ESPACEMEMENT DE LA CUVETTE
Après avoir installé le réservoir, veillez à définir l'espacement en prenant en compte la
taille des goujons porteurs et l'écrou serré. La cuvette sur le mur conformément aux
dimensions comme montré.
3. FIXEZ LE TUYAU DE
RACCORDEMENT
1. Fixez le tuyau d'entrée qui détermine
la distance vers le réservoir dissimulé.
2. Fixez le tuyau de sortie aux toilettes.
3. Vous pouvez appliquer un peu de
lubrifiant pour facilier le raccordement.
25
50
Goujon porteur
Écrou
Entrée
Sortie

FR 4. INSTALLER LES NOUVELLES TOILETTES
1. Installez le kit d'accessoires dans le trou d'installation.
2. Placez les nouvelle toilettes sur le mur à travers le transporteur.
3. Utilisez une clé pour serrer les accessoires et niveler les toilettes. Puis finissez
la fixation
4. Appliquez du mastic pour vous assurer que le bord de la cuvette se scelle au
mur.
Cuvette Tuyau plastique
Écrou
plastique
Rondelle
Clé
Cuvette
Crochet
Din912


HU Összeszerelési útmutató
Függesztett WC rögzítőkészletei
Függesztett WC rögzítéséhez
Beépített tartályhoz illeszkedik
A doboz tartalma
1 Anyacsavar 2 M16X70
2Műanyag
anyacsavar
2 POM
3 Alátét 2 Nejlon
4Rögzítőkonzol 2 Nejlon
5Imbuszfejű
csavarkészlet
2 Din914
6Műanyag cső 2
7 Imbuszkulcs 1 6 mm
Kérjük, olvassa el az alábbi utasításokat, hogy megismerkedjen a szükséges
szerszámokkal, alapanyagokkal és szerelési lépésekkel
Azokat a részeket kövesse, melyek az adott szerelési fázisra vonatkoznak
Így elkerülheti a költséggel járó későbbi hibákat
A helyes összeszerelésről való tájékozódáson túl olvassa el a használatra és a
biztonságra vonatkozó utasításokat
Nézzen utána a helyi vízvezeték-hálózati és építési szabályzatoknak
Zárja el a vízvezetéket
SZÜKSÉGES SZERSZÁMOK ÉS ALAPANYAGOK (A do-
boz nem tartalmazza ezeket)
• állítható csavarkulcs
• mérőszalag
• vízszintező
• gittkés
• csatlakozókészlet
• fémreszelő
• csővágó
• fémfűrész
• csavarhúzó
• csatlakozókészlet
1 Anyacsavar
2 Műanyag anyacsavar
3 Alátét
4 Rögzítőkonzol
5 Din914
6 Műanyag cső
7 Imbuszkulcs

180
ÖSSZESZERELÉS
1. A TARTÁLY BESZERE-
LÉSE
1. Az új WC felszerelése előtt zárja el a
vízvezetéket.
2. Festés előtt szerelje be a rejtett
tartályrendszert a falba.
3. A tartályrendszert az utasításoknak
megfelelően szerelje be.
2. A CSÉSZE ELHELYEZÉSÉNEK BEÁLLÍTÁSA
A tartály beszerelése után gondosan mérje le a tartópeckek távolságát és húzza meg az
anyát. A falra szerelt csésze méretei az ábra szerint.
3. CSATLAKOZTASSA AZ
ÖSSZEKÖTŐ CSÖVET
1. Csatlakoztassa a bevezetőcsövet,
amely elér egészen a rejtett tartályig.
2. Csatlakoztassa a lefolyócsövet a
WC-hez.
3. A könnyebb illesztés érdekében
célszerű kenőanyagot használni.
25
50
Tartópecek
Anyacsavar
Bevezetőcső
Lefolyócső

HU 4. AZ ÚJ WC SZERELÉSE
1. Szerelje a tartozékkészletet a szerelőlyukba.
2. Helyezze az új WC-t a falra a tartó segítségével.
3. A csavarkulccsal húzza meg az alkatrészeket, és győződjön meg arról, hogy a
WC vízszintesen áll. Majd fejezze be a rögzítést.
4. Tömítőanyaggal töltse ki a csésze széle és a fal közötti hézagot.
Csésze Műanyag cső
Műanyag
anyacsavar
Alátét
Csavarkulcs
Csésze
Tartó
Din912


DITTE
WALL RIMLESS TOILET
WF00023
345
500
420
160
60
10 0
400
55
210
10 0
180
310
345

DITTE
WALL RIMLESS TOILET
WF00023
345
500
420
160
60
10 0
400
55
210
10 0
180
310
345

Table of contents
Languages:
Other Wellis Toilet manuals

Wellis
Wellis Ditte WF00025 User manual

Wellis
Wellis WF00035 User manual

Wellis
Wellis Ditte monoblock User manual

Wellis
Wellis Evolo WF00052 User manual

Wellis
Wellis Ditte WF00022 User manual

Wellis
Wellis Corsica CJ805W+J518 Manual

Wellis
Wellis CLEMENT MONOBLOCK WF00031 User manual

Wellis
Wellis WF00110 Manual
Popular Toilet manuals by other brands

Gessi
Gessi 37513 Pre-installation information

noken
noken ACRO COMPACT 100251816 N390000064 manual

Villeroy & Boch
Villeroy & Boch VICLEAN U+ installation guide

clivus multrum
clivus multrum HIGH PROFILE Installation & operation manual

Dometic
Dometic VacuFlush 5000 Series Operation manual

BEMIS
BEMIS BioBidet BB-600R owner's manual