For more information
www.wePresentWiFi.com
© wePresent 2017
WICS-2100-USER-GUIDE-01
Contents
1 Overview 1
2Physical Details 3
3 Quick Installation 4
4 Start/Standby Screen of the Projector/Display 5
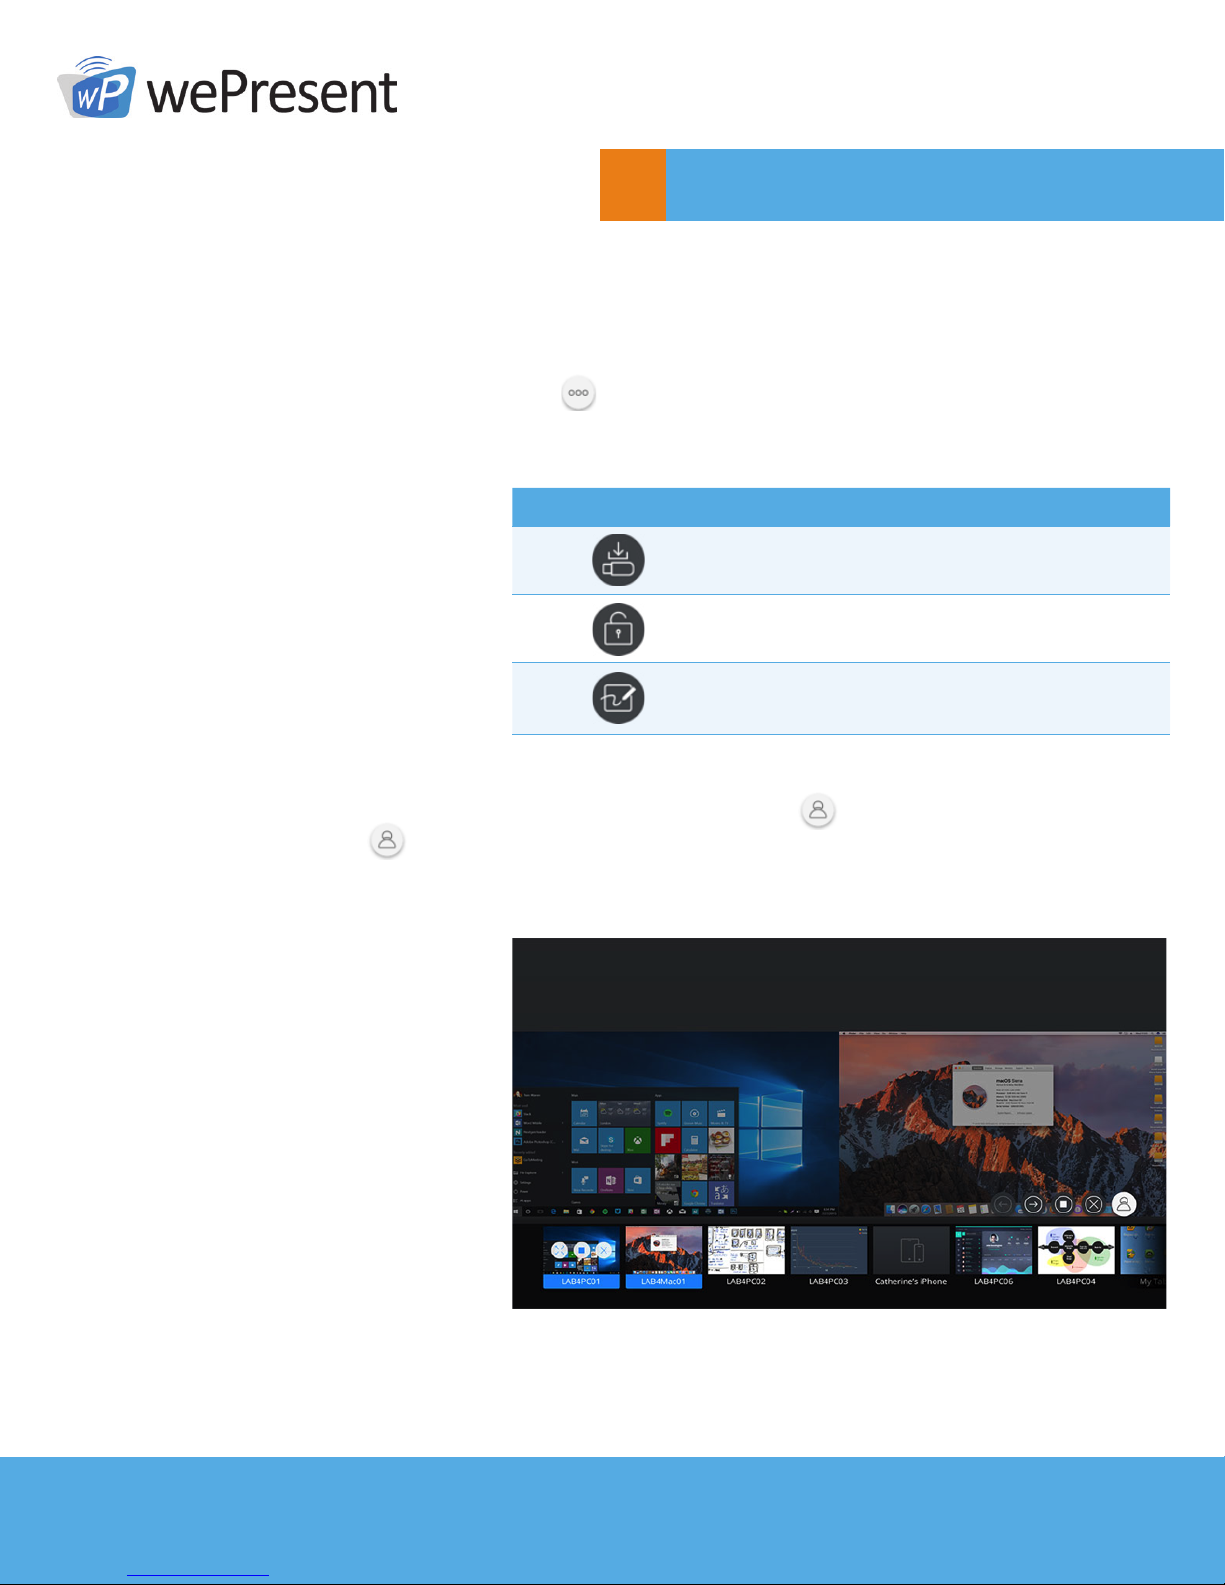
5 Main Button and Toolbar 6
5.1 Main Button, User-List Button and Toolbar in
the Standby Mode 6
5.2 Toolbar in the Whiteboard Mode 7
5.3 Toolbar in the Projection Mode 8
5.4 Dynamic Screen Layout 8
5.5 Remote Desktop Control/
Remote Touch Control (UMT) 9
6Web Management 9
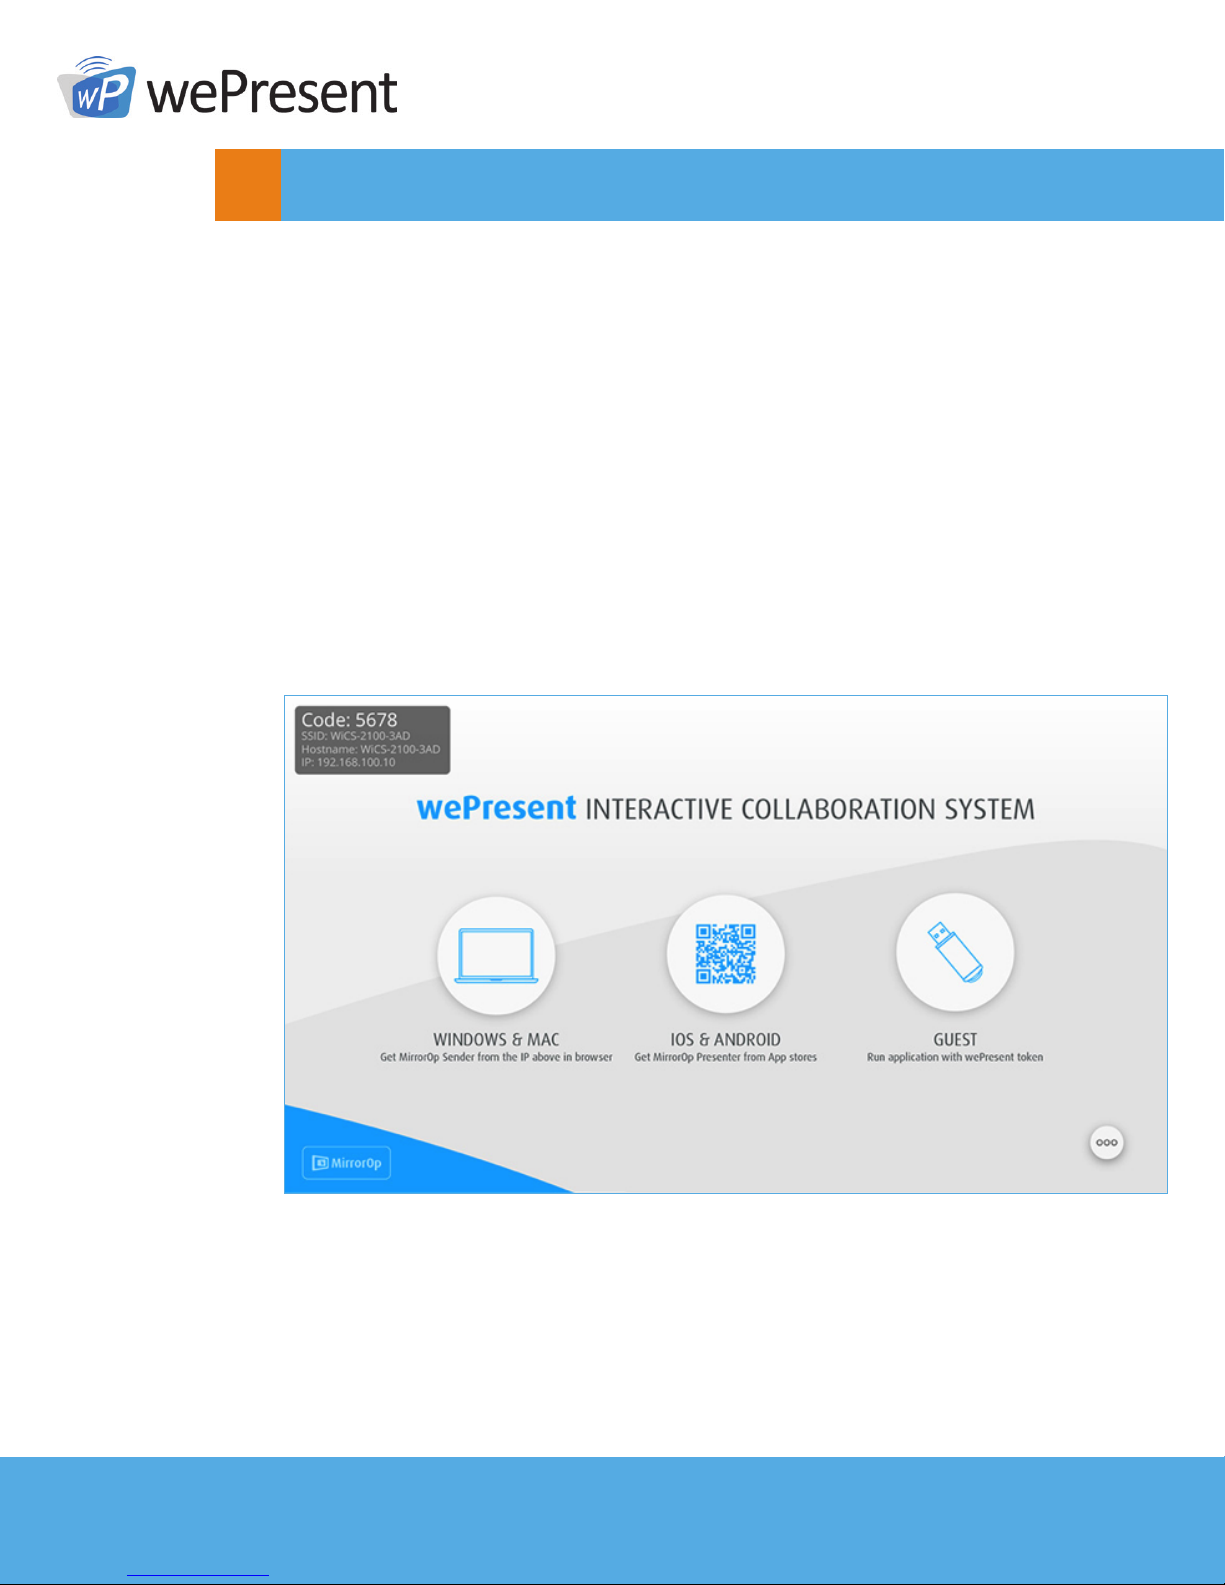
6.1 Home Page 9
6.1.1 Get MirrorOp (Sender) 11
6.1.2 Moderator 12
6.1.3 WebSlides 13
6.2 AdminPage(wePresentCongurator) 14
6.2.1 Personalization & Display 15
6.2.1.1 Wallpaper 15
6.2.1.2 Display & Login 16
6.2.1.3 Energy Savers 17
6.2.2 Wi-Fi & Network 17
6.2.2.1 Hostname & Domain Name 17
6.2.2.2 Wi-Fi Settings 18
2.2.3 Network Settings 19
6.2.3 System & Service 20
6.2.3.1 System Information 20
6.2.3.2 Date & Time 21
6.2.3.3 WebSlides Setup 21
6.2.3.4 Change Passwords 22
6.2.3.5 Service Management 22
6.2.4 Support & Updates 23
6.2.4.1 Firmware Update 23
6.2.4.2 Reboot & Reset to Default 24
6.2.5 Log out of Admin Page 24
7Using MirrorOp (Sender) to Start Projection 25
7.1 Start the MirrorOp application 25
7.2 Main User Interface of MirrorOp (Sender) 26
7.3 A Complete User’s Guide on MirrorOp (Sender) 27
8Use the SidePad Function with MirrorOp Receiver 27
9Launch WebSlides 34
10 Wall-Mount Kit 36