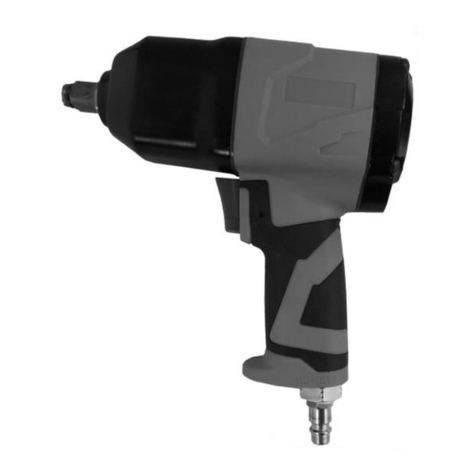
Westfalia 54 63 09 User manual

Westfalia Bedienungsanleitung
Nr. 108229

Bedienungsanleitung
Instruction Manual
1/2“ Druckluft-Schlagschrauber Set
A
rtikel Nr. 54 63 09
1/2” Air Impact Wrench Kit
A
rticle No. 54 63 09

II
Instruction manuals provide valuable hints for using your new device. They
enable you using all functions, and they help you avoiding misunderstandings
and preventing damage.
Please take the time to read this manual carefully and keep it for future
reference.
Bedienungsanleitungen enthalten wichtige Hinweise für den Umgang mit
Ihrem neuen Gerät. Sie ermöglichen Ihnen, alle Funktionen zu nutzen, und sie
helfen Ihnen, Missverständnisse zu vermeiden und Schäden vorzubeugen.
Bitte nehmen Sie sich die Zeit, diese Bedienungsanleitung in Ruhe
durchzulesen und bewahren Sie sie für späteres Nachlesen gut auf.
Sehr
g
eehrte Damen und Herren
Dear Customers

III
Übersicht
|
Overvie
w
1
2
5
4
3
10
7
8
6
9
11
3

IV
1 ½“ Vierkantantrieb ½” Square Drive
2 Abzugshebel Trigger
3 Umschaltknopf Rechts- und
Linkslauf Rotational Direction Switch
4 Luftregler bzw.
Drehmomentregler Flow Regulator
5 Druckluftanschluss Compressed Air Connection
6 ½“ Kraft-Stecknüsse ½” Impact Sockets
7 Schnellkupplungsadapter Quick Coupling Adaptor
8 Mini Nebelöler Mini Oil-fog Lubricator
9 Inbusschlüssel Allen Wrench
10 Ölkännchen (ohne Inhalt) Small Oil Can (empty)
11 ½“ Kraft-Verlängerung ½” Impact Extension
Übersicht
|
Overvie
w

1
Safety Notes......................................................................................Page 9
Intended Use .....................................................................................Page 11
Before first Use..................................................................................Page 11
Installing / Exchanging Tools.............................................................Page 11
Start-up..............................................................................................Page 11
Maintenance and Care......................................................................Page 13
Lubrication.........................................................................................Page 13
Oiler Setting.......................................................................................Page 13
Suggested Components for safe Operation......................................Page 14
Air Pressure and Air Volume.............................................................Page 14
Storing ...............................................................................................Page 14
Technical Data ..................................................................................Page 15
Sicherheitshinweise...........................................................................Seite 2
Bestimmungsgemäße Verwendung ..................................................Seite 4
Vor der ersten Benutzung .................................................................Seite 4
Einsetzen / Wechsel von Werkzeugen..............................................Seite 4
Inbetriebnahme .................................................................................Seite 5
Wartung und Pflege...........................................................................Seite 6
Schmierung .......................................................................................Seite 7
Ölereinstellung ..................................................................................Seite 7
Empfohlene Druckluftkomponenten ..................................................Seite 7
Luftdruck und Luftmenge...................................................................Seite 8
Lagerung ...........................................................................................Seite 8
Technische Daten .............................................................................Seite 15
Table of Contents
Inhaltsverzeichnis

2
Sicherheitshinweise
Das Druckluft-Schlagschrauber Set ist nur für den privaten Gebrauch
bestimmt. Das Set ist nicht für den gewerblichen Dauereinsatz bestimmt.
Verwenden Sie das Werkzeug gemäß dieser Bedienungsanleitung und nur für
den bestimmungsgemäßen Einsatzbereich.
Seien Sie besonders aufmerksam, wenn ein Druckluft-Werkzeug in der Nähe
von Kindern verwendet wird. Das Werkzeug und das Zubehör gehören nicht in
Kinderhände. Betreiben Sie das Werkzeug außerhalb der Reichweite von
Kindern und von zu beaufsichtigenden Personen.
Richten Sie den Druckluft-Schlagschrauber niemals gegen Personen, Tiere
oder Pflanzen.
Personen mit eingeschränkten physischen, sensorischen oder geistigen
Fähigkeiten dürfen den Druckluft-Schlagschrauber nicht benutzen, es sei
denn, sie werden durch eine Betreuerin/einen Betreuer beaufsichtigt und
unterwiesen.
Seien Sie aufmerksam. Achten Sie darauf, was Sie tun. Gehen Sie mit
Umsicht an die Arbeit.
Zu Ihrer eigenen Sicherheit benutzen Sie das Druckluft-Werkzeug immer mit
der Schnellkupplung.
Der Druckluft-Schlagschrauber erzeugt einen hohen Schall-
leistungspegel, tragen Sie entsprechenden Hörschutz. Alle Personen
in der Nähe des Arbeitsbereiches müssen entsprechenden
Augenschutz und Gehörschutz tragen.
Tragen Sie persönliche Schutzkleidung wie Schutzbrille, Arbeits-
handschuhe und wenn erforderlich auch eine Schutzmaske.
Tragen Sie geeignete Arbeitskleidung. Tragen Sie enganliegende
Kleidung, rutschfestes Schuhwerk und bei langen Haaren ein Haarnetz.
Schmuck und weite Kleidung können von beweglichen Teilen des Druckluft-
Werkzeugs erfasst werden.
Verwenden Sie den Druckluft-Schlagschrauber nicht in der Nähe von
brennbaren Flüssigkeiten, Gasen oder Staub. Durch Funken können sich
Staub oder Gase entzünden.
Beachten Sie bitte zur Vermeidung von Fehlfunktionen, Schäden
und gesundheitlichen Beeinträchtigungen die beigefügten
Allgemeinen Sicherheitshinweise sowie folgende Hinweise:

3
Sicherheitshinweise
Tragen Sie den Druckluft-Schlagschrauber nie am Schlauch, sondern halten
Sie ihn am Gehäuse. Halten Sie den Handgriff trocken und frei von Öl oder
Fett.
Stellen Sie den Arbeitsdruck stets über einen Druckminderer ein.
Lassen Sie das Gerät nicht bei voller Drehzahl unbelastet laufen.
Verwenden Sie keinen Sauerstoff oder brennbare Gase als Energiequelle. Für
den Betrieb des Druckluft-Schlagschraubers verwenden Sie nur saubere,
trockenen Druckluft mit einem Druck von 6,3 bar und max. 7 bar. Das
Überschreiten des Drucks verkürzt die Lebensdauer des Druckluft-Werkzeugs
erheblich.
Trennen Sie den Druckluft-Schlagschrauber stets von der Druckluftquelle,
bevor Sie Wartungsarbeiten vornehmen oder bevor die Werkzeugeinsätze
(Stecknuß, etc.) ausgetauscht werden.
Kontrollieren Sie sämtliche Anschlüsse und Schläuche auf guten Sitz und
Funktionstüchtigkeit. Lose Schläuche können eine ernsthafte Verletzungs-
gefahr bilden. Benutzen Sie nur Sicherheitskupplungen.
Überprüfen Sie den Druckluft-Schlagschrauber vor dem Einsatz auf
Beschädigungen und benutzen Sie diesen nicht mehr, wenn Beschädigungen
vorliegen.
Verwenden Sie nur spezielle Steckschlüsseleinsätze, die für Druckluft-
Schlagschrauber ausgelegt sind.
Vermeiden Sie bei der Arbeit abnormale Körperhaltung. Sorgen Sie für
sicheren Stand und halten Sie jederzeit das Gleichgewicht.
Seien Sie aufmerksam. Achten Sie darauf, was Sie tun. Gehen Sie mit
Umsicht an die Arbeit.
Verwenden Sie den Druckluft-Schlagschrauber nicht, wenn Sie müde sind
oder unter Einfluss von Drogen, Alkohol oder Medikamenten stehen. Ein
Moment der Unachtsamkeit beim Gebrauch kann zu ernsthaften Verletzungen
führen.
Halten Sie Ihren Arbeitsbereich in Ordnung. Unordnung kann Unfälle zur Folge
haben.
Sorgen Sie bei der Arbeit für gute Beleuchtung.
Öffnen Sie den Druckluft-Schlagschrauber nicht und unternehmen Sie keine
eigenen Reparaturversuche. Wenden Sie sich an einen Fachmann oder
unsere Kundenbetreuung. Benutzen Sie nur Originalersatzteile.

4
Bedienun
g
Bestimmungsgemäße Verwendung
Der Druckluft-Schlagschrauber ist mit entsprechendem Werkzeug
ausschließlich zum Lösen und Festziehen von Schrauben, Bolzen, Muttern,
usw. in Werkstätten, an landwirtschaftlichen Fahrzeugen, Geräten und
Maschinen konzipiert worden.
Zur bestimmungsgemäßen Verwendung gehört auch das Einhalten der
Anleitung.
Jede darüber hinausgehende Verwendung (andere Medien,
Gewaltanwendung) oder eigenmächtige Veränderung (Umbau, kein Original-
Zubehör) können Gefahren auslösen und gelten als nicht bestimmungsgemäß.
Für Schäden, die aus nicht bestimmungsgemäßer Verwendung resultieren,
haftet der Betreiber.
Vor der ersten Benutzung
Nehmen Sie den Druckluft-Schlagschrauber und alle Zubehörteile aus der
Verpackung und überprüfen alle Teile auf Transportschäden. Halten Sie die
Verpackungsmaterialien von Kleinkindern fern. Es besteht Erstickungsgefahr!
Einsetzen / Wechsel von Werkzeugen
Der Druckluft-Schlagschrauber ist mit einem ½“ Vierkantantrieb (1)
ausgestattet, d.h. es können nur Werkzeuge eingesetzt werden, welche über
eine entsprechende ½“ Vierkantaufnahme verfügen.
Achtung! Trennen Sie den Schlagschrauber vor dem Wechsel des Werkzeugs
vom Druckluftanschluss, um ungewolltes Einschalten zu vermeiden.
Verwenden Sie nur spezielle Steckschlüsseleinsätze, die für Druckluft
Schlagschrauber ausgelegt sind.
Stecken Sie das gewünschte Werkzeug fest auf den Vierkantantrieb, so dass
es sich bei der Arbeit nicht lösen kann.

5
Bedienun
g
Inbetriebnahme
1. Der Druckluft-Schlagschrauber ist mit einem ¼“ Druckluftanschluss (5)
ausgestattet. Zu Ihrer eigenen Sicherheit sollten Sie den Schlagschrauber
nicht fest mit dem Druckluftschlauch verbinden, sondern den beigefügten
Schnellkupplungsadapter (7) benutzen.
2. Dichten Sie das Ende der Schnellkupplung mit Teflonband ab, bevor Sie
diese am Druckluftanschluss des Schlagschraubers aufschrauben.
3. Das Gerät muss während des Betriebes mit Schmieröl versorgt werden.
Geben Sie vor jedem Gebrauch des Gerätes etwas Öl in die Öffnung des
Druckluftanschlusses (5). Alternativ können Sie auch den Mini Nebelöler (8)
benutzen. Beachten Sie auch das Kapitel „Schmierung“.
4. Verbinden Sie die Schnellkupplung des Druckluft Schlagschraubers mit der
Druckluftquelle. Schaltern Sie den Kompressor ein und stellen Sie den
Druckluftminderer Ihrer Druckluftquelle auf 6,3 bar ein.
5. Drücken Sie den Abzugshebel (2). Durch die Betätigung des Abzugshebels
werden die Drehzahl und das Drehmoment geregelt. Je weiter der Hebel
durchgedrückt wird, desto schneller läuft das Gerät. Halten Sie das Gerät
beim Arbeiten fest.
6. Die Maschine ist für den Rechts- wie auch
Linkslauf ausgelegt. Verwenden Sie den
Rechts-/Linkslauf-Schiebeschalter (3) an
der Vorderseite bzw. an der Rückseite der
Maschine, zur Einstellung der Laufrichtung.
7. Drücken Sie den Schiebeschalter nach
vorn heraus. Der Schlagschrauber dreht bei
Betätigung des Abzughebels (2) im
Rechtslauf.
8. Drücken Sie den Schiebeschalter nach
hinten heraus, so dreht der Schlag-
schrauber entsprechend im Linkslauf wenn der Abzugshebel betätigt wird.
9. An der Unterseite des Werkzeuggriffes befindet sich der Luftregler bzw. der
Drehmomentregler (4) zur Voreinstellung einer maximalen Umdrehungs-
geschwindigkeit bzw. eines maximalen Drehmomentes. Drücken Sie diesen
Regler hinein und drehen Sie ihn gleichzeitig auf die gewünschte Stufe. In der
kleinsten Stufe wird ein maximales Drehmoment von 140 Nm erreicht, in der
höchsten Stufe werden die maximal möglichen 312 Nm erreicht.
10. Trennen Sie beim Wechsel des Steckschlüsseleinsatzes, bei Nichtgebrauch
und nach Beendigung der Arbeit sowie bei der Wartung immer zuerst das

6
Bedienun
g
Werkzeug vom Druckluftanschluss und drücken Sie den Abzugshebel, um im
Gerät verbliebene Luft entweichen zu lassen.
Hinweise zur Benutzung
Verwenden Sie den Schlagschrauber zum Ein- und Ausdrehen von Schrauben
und Muttern. Durch pulsartige („geschlagene“) Drehbewegungen erzeugt der
Schlagschrauber ein hohes Drehmoment von max. 312 Nm.
Beim Einschrauben von Schrauben und Muttern sollten diese zunächst mit der
Hand für einige Umdrehungen auf dem Gewinde angezogen werden, damit
ein versehentliches Verkanten verhindert wird.
Beginnen Sie bei Schraubarbeiten zunächst immer mit einer niedrigen
Drehzahl. Achten Sie darauf, die Schrauben und Muttern nicht zu überdrehen!
Wartung und Pflege
Um eine einwandfreie Funktion und lange Lebensdauer zu gewährleisten,
sind gewissenhafte Schmierung und Wartung unerlässlich.
Zum Betrieb von Druckluftwerkzeugen wird saubere Luft benötigt.
Korrosionsrückstände, Staub und Schmutz aus der Versorgungsleitung
beeinträchtigen die Leistung und schaffen technische Probleme. Eine dem
Werkzeug vorgeschaltete Wartungseinheit mit Filter, Reduzierventil und Öler
entzieht der Luft Feuchtigkeit und Schmutz, regelt den Betriebsdruck und
versorgt das Werkzeug optimal mit Wartungsöl.
Reinigen Sie den Druckluft-Schlagschrauber und das Zubehör
gegebenenfalls mit einem feuchten Tuch.
Benutzen Sie keine chemischen Reinigungsmittel, die aggressive Substanzen
enthalten, wie Benzin, Verdünnung u. a., da sie den Kunststoff angreifen
können.
Lassen Sie keine Flüssigkeiten in das Werkzeug gelangen und tauchen Sie
es nicht in Flüssigkeiten. Wasser in der Druckluftzufuhr kann Schäden am
Gerät verursachen. Entwässern Sie Ihren Kompressor oder Ihr
Leitungssystem regelmäßig! Reinigen Sie den Luftfilter ihrer Anlage ebenfalls
regelmäßig.

7
Bedienun
g
Schmierung
Druckluftwerkzeuge müssen immer ausreichend geschmiert werden. Dies
geschieht kontinuierlich und am sichersten mit Nebelölern. Ist der Öler jedoch
zentral am Kompressor oder fix am Ende der Druckluftverrohrung montiert, so
darf der flexible Schlauch nur bis maximal 10 m lang sein. Bei längeren
Schläuchen verschwindet die Vernebelung der Luft, das Öl "schwimmt" im
Schlauch und erreicht nicht das Druckluftwerkzeug.
Möchten Sie den mitgelieferten Mini Nebelöler (8) verwenden, so schrauben Sie
diesen direkt auf den Druckluftanschluss (5). Der Schnellkupplungsadapter (7)
wird dann mit dem Mini Nebelöler verbunden. Öffnen Sie die kleine Schraube am
Mini Nebelöler und füllen Sie etwas Öl hinein.
Ölereinstellung
Schlauch bis 5 m alle 2 Min. 1 Tropfen
Schlauch bis 10 m jeweils pro Min. 1 Tropfen
Sollten Sie keinen Nebelöler einsetzen, geben Sie vor jedem Maschineneinsatz
ein paar Tropfen Öl in den Luftanschluss. Ölen Sie das Druckluft-Werkzeug
nochmals nach Beendigung des Einsatzes, insbesondere, wenn Sie das Gerät
längere Zeit nicht mehr einsetzen werden. Weitergehende Wartungsarbeiten sind
nicht erforderlich.
Empfohlene Druckluftkomponenten für sicheren Gebrauch
1.
2. 3. 4.
6.
7.
8.
9.
10.
1. Druckluft-Werkzeug
2. Schnellkupplungsadapter
3. Druckluftschlauch mit Schnellkupplungen an beiden Seiten
4. Schnellkupplungsadapter
5. Schnellkupplung
6. Ventil
7. Nebelöler
8. Druckluftminderer
9. Filtereinheit
10. Druckluftquelle (Kompressor)
5.

8
Bedienun
g
Luftdruck und Luftmenge
Der Druckluft-Schlagschrauber sollten mit einem Druck von 6,3 bar und mit
einem Kompressor mit einem Luftvolumen von min. 200 l/min betrieben
werden. Ein größerer Druck als der max. zulässige Druck von 7 bar würde
aufgrund höherer Belastung die Lebensdauer der Geräte verkürzen. Ideal ist
die Verwendung eines Kompressors mit einem Luftvolumen von 300 bis
400 l/min.
Verwenden Sie nur Anschlussschläuche mit einem Innendurchmesser von
mindestens 9 mm. Bedenken Sie bitte beim Einstellen des Luftdrucks, dass
der Druck bei einer Schlauchlänge von 10 m und einem Innendurchmesser
von 9 mm um ca. 0,6 bar absinkt.
Lagerung
Legen Sie den Druckluft-Schlagschrauber und das Zubehör nach dem
Gebrauch wieder in den Transportkoffer in die jeweils dafür vorgesehenen
Aussparungen.
Lagern Sie alle Teile des Sets an einem vor Staub und Schmutz geschützten,
trockenen Ort zwischen 10ºC und 30ºC.

9
Safet
y
Notes
.
Please note the included General Safety Notes and the
following safety notes to avoid malfunctions, damage or
physical injury:
Use the air impact wrench only for domestic purposes. The tool is not
designed for continuous, professional use.
Only use this tool according to this instruction manual and for the intended
use.
Supervise closely when an air tool is used near children. Do not allow children
to use the tool or the accessory. Operate the air tool out of reach of children
or persons in need of supervision.
Never direct the air impact wrench towards people, animals or plants.
Persons with limited physical, sensorial or mental abilities are not allowed to
use the air impact wrench, unless they are supervised and briefed for their
safety by a qualified person.
Stay alert! Watch what you are doing. Use common sense.
For your own safety always use the quick coupling adaptor to connect the air
tool to the air supply.
The air impact wrench creates a high noise emission level.
Therefore it is recommended to use appropriate hearing protection
when using it. All persons in the immediate working area have to
wear eye and ear protection.
Wear personal protective clothing such as goggles, protective
gloves and protective mask if necessary.
Please wear convenient work clothes. Wear tight clothes, non-slip footwear
and a hair net if you wear long hair or tie it up. Jewellery and loose clothing
may be caught by the moving parts of the air tool.
Do not use the air impact wrench near flammable liquids, gases or dust.
Sparks may ignite the dust or fumes.
Never carry the air impact wrench with the hose. Carry it with the housing.
Keep the handle dry and free from oil or grease.
Always regulate the working pressure by using a pressure regulator.
Do not operate the air impact wrench unloaded with full speed.

10
Safet
y
Notes
Do not use oxygen or flammable gases as source of energy. The air impact
wrench should only be operated with clean, dry air with 6.3 bar and max. 7
bar. When using higher pressure for operating the air tool, self life of the air
tool will be reduced drastically.
Disconnect the air impact wrench from the compressed air source before
doing any maintenance work or before exchanging the tool (socket, etc.).
Check if all connections and hoses are mechanically secured and if they are
functioning properly. Loose hoses may cause severe injuries. Only use safety
couplings.
Check the air impact wrench and accessory before use for damage and do
not continue using the tool in case of damage.
Only use impact-quality sockets and accessories with the air impact wrench.
Avoid abnormal posture. Make sure you have a firm foothold and you always
hold the balance.
Be attentive! Pay attention to what you are doing. Approach your work with
circumspection.
Do not use the air impact wrench when your reactivity is affected by alcohol
consumption, medication, drugs, illness or tiredness. One moment of
abstraction operating the device can cause grave injuries.
Keep your work area clean. Disorder can cause accidents.
Take care of adequate lighting.
Do not open the air impact wrench and do not try to repair it yourself. Contact
a professional or our customer service. Only use original replacement parts.

11
O
p
eration
Intended Use
The air impact wrench with an appropriate tool has been exclusively designed
for loosening and tightening of screws, bolts and nuts, etc. in the workshop, in
agricultural vehicles, equipment and machinery.
The intended use also includes an operation following the operating
instructions.
Any use beyond these parameters (different media, applying force) or any
changes (reconstruction, no original accessory) can lead to serious risks and
is regarded as use that is contrary to the intended purpose. The operator is
liable for any damage caused by improper use.
Before first Use
Unpack the air impact wrench and the accessory and check all parts for any
damage in transit. Dispose of packaging materials or store them out of reach of
children. Plastic bags etc. may become a deadly toy for children.
Installing / Exchanging Tools
The air impact wrench features a ½” square drive (1). That means you can
operate it with tools that have a ½” shaft.
Please note! Before changing the socket / the tool, unplug the air impact
wrench from the compressed air connection to avoid unintentional start-up.
Only use impact-quality sockets and accessories with the air impact wrench.
Firmly push the desired socket / tool onto the square drive, so that it can not
loosen when working.
Start-up
1. The air impact wrench is equipped with an R ¼“ air inlet (5). For your own
safety it is not recommended to use a permanent connection between the air
impact wrench and the air hose, but use the supplied quick coupling
adaptor (7) instead.
2. Seal the end of the quick coupling adaptor with Teflon tape before you screw
it onto the air connection.
3. The air impact wrench has to be provided with lubricating oil during operation.
Before each use add oil through the opening of the compressed air
connection (5). Alternatively you can use the supplied mini oil-fog
lubricator (8). Also pay attention to the chapter “Lubrication”.
4. Connect the quick coupler of the air impact wrench to the compressor. Switch
on the compressor and setup a pressure of 6.3 bar.

12
O
p
eration
5. Press the trigger (2) to operate the tool. The trigger is also used to control the
rotation speed and the torque. The deeper the trigger is pressed, the faster
the unit runs. While working hold the unit firmly with your hands.
6. The unit is designed for clockwise and
counter-clockwise rotation. Use the
rotational direction switch (3) at the front
resp. at the back side of the unit to choose
between left and right direction of
movement.
7. Push this switch out forwards. When you
press the trigger (2), the unit revolves
clockwise.
8. Push the switch out backwards. Then the
impact wrench will rotate counter-clockwise
when you press the trigger.
9. The adjustable flow regulator (4) is located at the bottom side of the tool. This
control is used to setup the maximum rotational speed resp. the maximum
torque. Press this switch and turn it at the same time to the desired stage. At
the lowest stage the tool will work with a maximum torque of 140 Nm. At the
highest stage the tool will work with a maximum torque of 312 Nm.
10. First disconnect the air impact wrench from the air supply when exchanging
the socket / the tool, when not using the unit, after finished working and when
applying maintenance work. Press the trigger in order to remove any
remaining air from the air impact wrench.
Tips for Using
Use the air impact wrench for screwing on and unscrewing of bolts and nuts.
The impact wrench creates a high maximum torque of up to 312 Nm by
means of pulse ("beaten") rotational movements.
When screwing on bolts and screws, first turn them on the thread by hand for
a few turns, so that inadvertent tilting is prevented.
Always start working with low revolutions. Make sure not to over tighten the
bolts and nuts!

13
O
p
eration
Maintenance and Care
To ensure proper functionality and a long lifetime, diligent lubrication and
maintenance is essential.
For operating pneumatic tools clean air is required. Corrosion residues, dust
and dirt from the pneumatic pipes reduce the efficiency of the tool and will
cause technical problems. An upstream maintenance unit consisting of filter,
pressure regulator valve and lubricating equipment removes moisture and dirt
from the air, controls the working pressure and supplies the tool perfectly with
lubricating oil.
If necessary clean the air impact wrench and the accessory with a moist cloth.
Do not use abrasive or aggressive chemicals as benzene or thinner, which
may dissolve plastic parts.
Do not allow liquids to enter the tool and never immerse it into liquids. Water
in the compressed air inlet can damage the machine. Therefore it is
recommended to drain the air lines and the compressor regularly! Also clean
the air filters on a regular basis.
Lubrication
Pneumatic tools always have to be lubricated sufficiently. This is done
continuously and safest by using an oil-fog lubricator. If the oiler is mounted
centrally at the compressor or mounted firmly at the end of the compressed-air
pipe installation, only use a hose with a length of max. 10 m. If the hose is longer,
the nebulisation disappears in the air. The oil floats inside the hose and does not
arrive at the air tool.
If you intend to use the supplied mini oil-fog lubricator, install it directly on the
compressed air connection (5) of the air impact wrench. Connect the quick
coupling adaptor to the other end of the mini oil-fog lubricator. Remove the small
screw of the mini oil-fog lubricator and add oil through the opening.
Oiler Setting
Hose up to 5 m every 2 min. 1 drop
Hose up to 10 m once a min. 1 drop
If you do not intend to use an oiler, please put a few drops of oil into the
compressed air connection before every machine usage. Lubricate the air tool
once more after use, especially if you do not operate the unit for a long time.
Further maintenance work is not necessary.

14
O
p
eration
Suggested Components for safe Operation
Air Pressure and Air Volume
Operate the air impact wrench with a pressure of 6.3 bar (90 psi) using a
compressor with an air suction capacity of at least 200 l/min. When using
higher pressure for operating the air tool than the max. allowable pressure of
7 bar, its self life will be reduced drastically. The ideal capacity is provided by
compressors with a suction capacity of 300 – 400 l/min.
Only use air hoses with an inner diameter of at least 9 mm. When setting up
the air pressure, always keep in mind that the pressure will decrease approx.
0.6 bar when using a 10 m long hose with an inner diameter of 9 mm.
Storing
After use put the air impact wrench and the accessory into the transport box
into the intended slots.
Store all parts of the set in a dust and dirt-free location, between 10°C and
30°C.
1.
2. 3. 4.
6.
7.
8.
9.
10.
1. Air Tool
2. Quick Coupling Adaptor
3. Pneumatic Pipe with Quick Couplers at both sides
4. Quick Coupling Adaptor
5. Quick Coupling
6. Valve
7. Oil-fog Lubricator
8. Pressure Regulator
9. Filter Unit
10. Air Source (Compressor)
5.

15
Technische Daten
|
Technical Data
Arbeitsdruck 6,3 bar Operating Pressure
Max. Betriebsdruck 7,0 bar Max. Operating Pressure
Luftverbrauch Max. 142 l/min Air Consumption
Drehzahl 7000 min-1 Revolutions
Max. Drehmoment 312 Nm Max. Torques
1. Gang 140 Nm 1st Gear
2. Gang 200 Nm 2nd Gear
3. Gang 250 Nm 3rd Gear
Hand-/Arm-Vibration 9,2 m/s² Hand Arm Vibration
Schalldruckpegel
Schallleistungspegel
LWA,d = 106 dB (A)
LpA,d = 93 dB (A)
Sound Pressure Level
Sound Power Level
Gewicht ca. 2150 g Weight
Druckluftanschluss R ¼” Compressed-Air
Connection
Other manuals for 54 63 09
1
Table of contents
Languages:
Other Westfalia Impact Driver manuals

Westfalia
Westfalia 85 92 78 User manual

Westfalia
Westfalia 86 39 88 Instruction sheet

Westfalia
Westfalia ASS 18 BL User manual

Westfalia
Westfalia 81 13 65 User manual

Westfalia
Westfalia ZK-508E User manual

Westfalia
Westfalia HY-360 User manual

Westfalia
Westfalia 86 81 47 User manual

Westfalia
Westfalia 17 73 45 User manual

Westfalia
Westfalia ASS18 User manual

Westfalia
Westfalia 89 27 00 User manual